Shop Accounts
WATCH THE VIDEO
In a B2C scenario, customers always register online in the webstore by entering their personal data, like name and address. Webstore visitors must also enter their e-mail and password during registration. The e-mail and password are used by the customers to log in to the webstore. When a B2C customer registers in the Sana webstore, the shop account is automatically created, activated, and approved in Sana Admin. For more information, see B2C Customer Registration.
In the B2B scenario, Sana Commerce Cloud provides two ways to register B2B customers:
-
New B2B customers can register in the Sana webstore online on their own.
-
A webstore administrator can create shop accounts in Sana Admin for those B2B customers that already exist in the ERP system.
Sana retrieves all customers, contacts, and sales agents from your ERP system when you run the Customer import task and then you can create shop accounts for the necessary B2B customers, contacts, and sales agents in Sana.
When a B2B customer registers in the Sana webstore, the shop account is automatically created in Sana Admin. All shop accounts must be activated and approved. For more information, see B2B Customer Registration.
Create a Shop Account
Shop accounts must be created only for those B2B customers that already exist in the ERP system. When B2C and B2B customers register online in the Sana webstore, shop accounts are automatically created for them in Sana Admin.
Step 1: In Sana Admin click: Customers > Shop accounts.
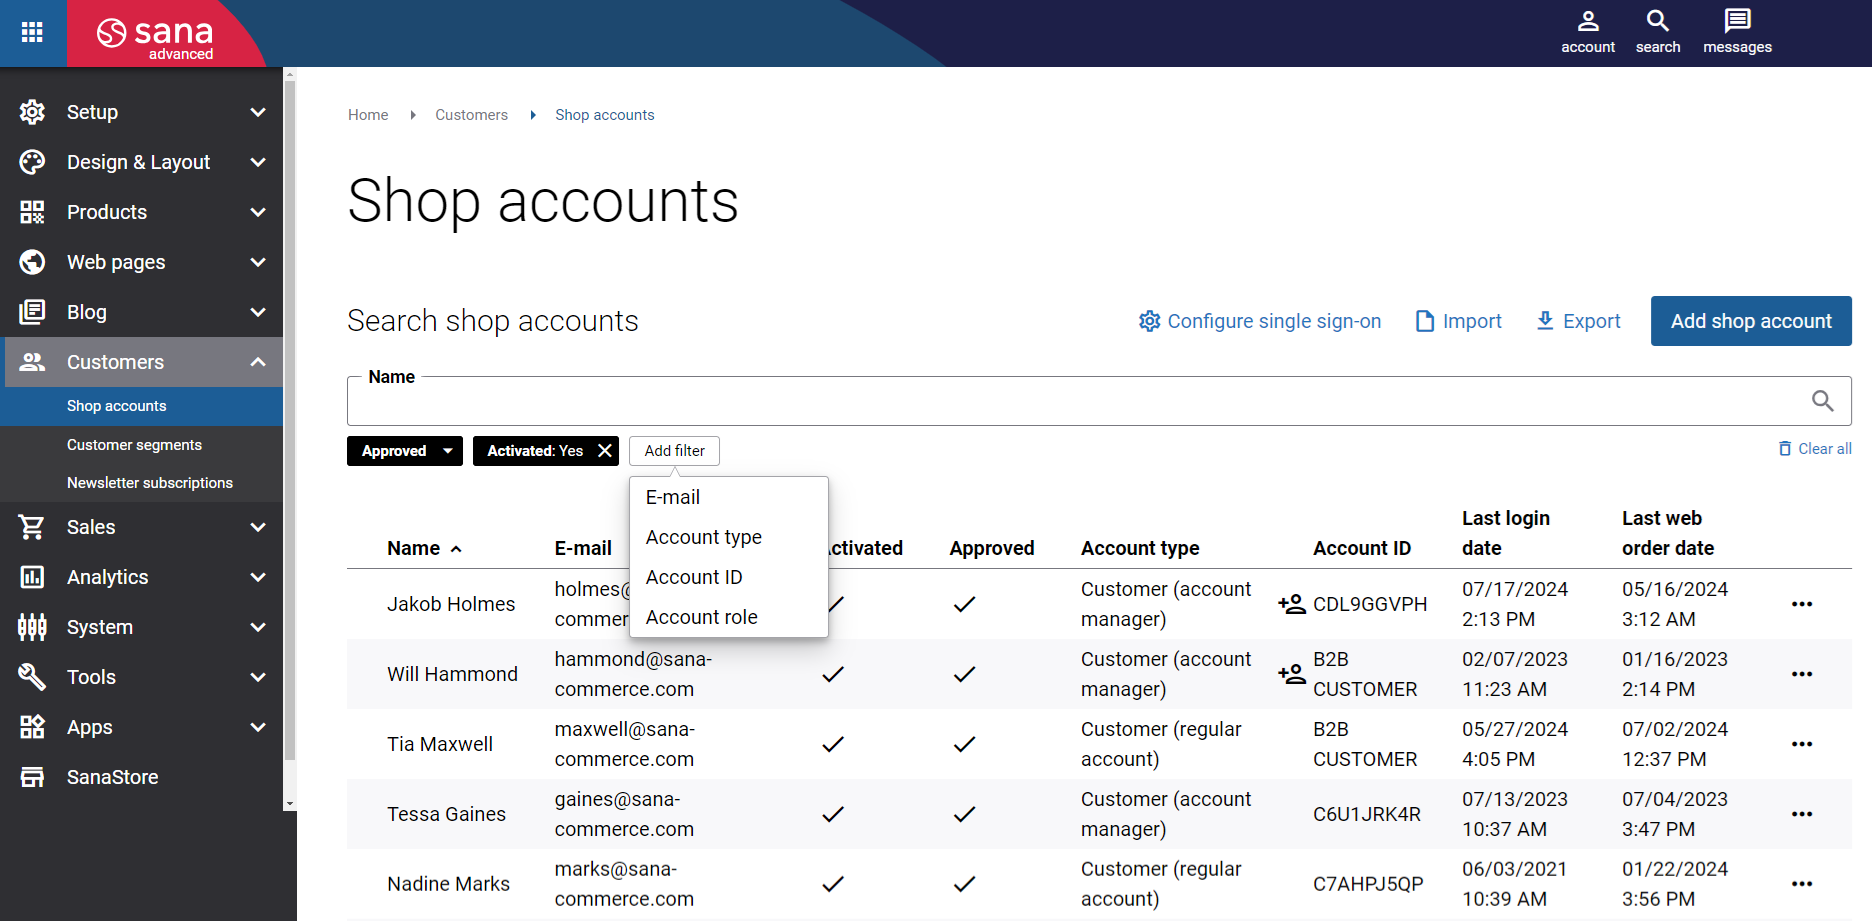
On the Shop accounts page, you can see an overview of all shop accounts. You can create a shop account, edit and delete already existing shop accounts and import shop accounts from a CSV file. You can also open customers’ sales statistics from their shop accounts by clicking the Sales statistics button  .
.
You can click the Add filter button and select the necessary filter options to find what you need. You can search for a shop account by name, e-mail address, and account ID and filter the shop accounts by the Activated and Approved statuses, account type, and account role. You can also sort the shop accounts by name, e-mail, account type, or ID, by the Activated and Approved statuses, last login date and last web order date.
The Shop accounts indexing scheduled task allows webstore administrators to efficiently search, filter, and sort shop accounts in Sana Admin. New shop accounts registered online in the Sana webstore or created directly in Sana Admin are automatically indexed in real-time, ensuring they are immediately available for shop accounts management and search operations.
Step 2: To create a shop account, click Add shop account.
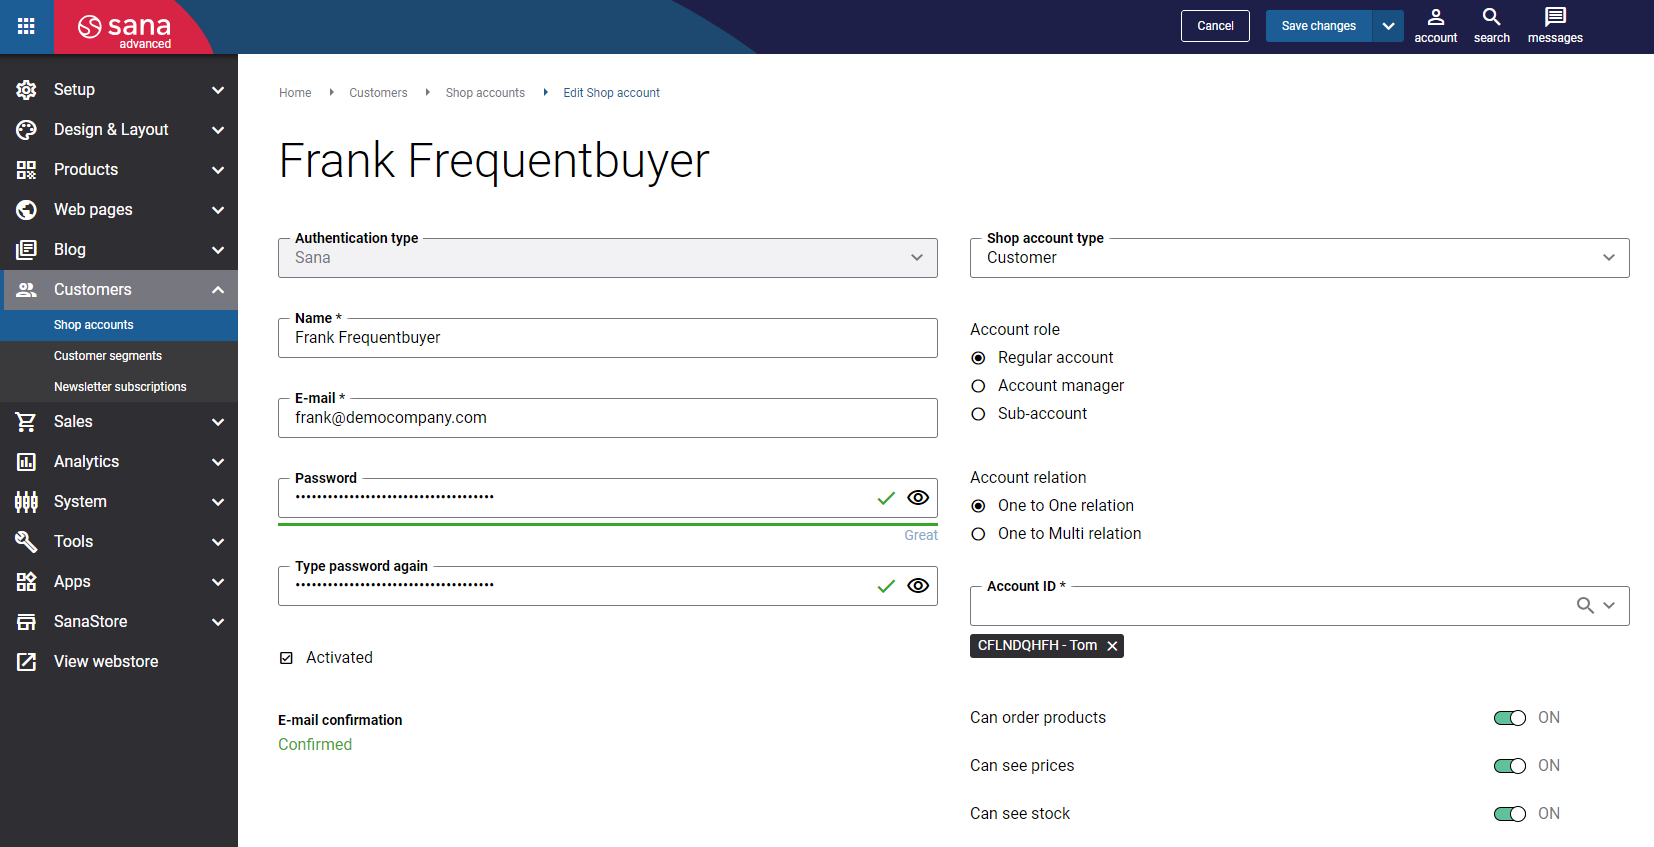
Step 3: Enter the shop account information. The table below describes the shop account fields.
| Shop account details | Description |
|---|---|
| Authentication type | Choose the authentication type of the webstore customer.
Sana Commerce Cloud supports two different types of authentication for webstore customers – Sana’s internal shop accounts and single sign-on with accounts that exist in your identity provider. When you save the shop account, you cannot change the authentication type. For more information, see Customer Authentication. |
| Name | Enter the name of the customer.
This name is shown in the account menu in the header of the webstore and on the My account page. If you use the Single sign-on authentication type, the customer's name shown in the Sana webstore after logging in is taken from the identity provider, not from the shop account details in Sana Admin. |
| Enter the e-mail address of the customer which is used to log in to the webstore.
If you use the Single sign-on authentication type, the customer's e-mail address must be the same in the identity provider and Sana Admin. You can only use:
Sana Commerce Cloud does not support international e-mail addresses, for example with German umlauts. |
|
| Password | Enter the password of a shop account which is used to log in the webstore.
Password should be at least 7 characters and not more than 30. If you use the Single sign-on authentication type, the customer must use the credentials from the identity provider to log in to the Sana webstore. |
| Type password again | |
| Activated | Activate the shop account.
|
| E-mail confirmation | If the setting Confirm e-mail upon registration is enabled, you can check the e-mail confirmation status of a shop account. The available options are:
When customers register online in the Sana webstore, they enter their e-mail addresses. Sana Commerce Cloud sends a confirmation e-mail to the provided e-mail addresses. To complete the registration, customers must click on the link in the e-mail to confirm their e-mail address. |
| Shop account type | Select the shop account type. The available account types are:
If you select the sales agent account type, then you can select its representation behavior.
|
| Account role | The shop account roles are:
When using the Single sign-on authentication type, only shop accounts with the Regular account role are supported. For more information about different roles, see Shop Account Roles. |
| Account relation | Select the necessary account relation. The available options are:
You can add multiple customer accounts only to the shop account with the Customer shop account type and the Regular account or Account manager role. |
| Account ID | This field is available when the One to One relation account relation option is selected.
Select the account ID of the customer (contact or sales agent) depending on the selected account type. You can search for the account by ID or name of the customer (contact or sales agent). The list of all available accounts is retrieved from your ERP system. Use the Customer import task to retrieve or update the list of all customers (contacts or sales agents) from your ERP system. |
| Account IDs | This field is available when the One to Multi relation account relation option is selected.
Using this field, you can add multiple customer accounts to the shop account. The minimum number of accounts you can add is 2. You can search for the account by ID or name of the customer. The list of all available accounts is retrieved from your ERP system. Use the Customer import task to retrieve or update the list of all customers from your ERP system. |
Step 4: Set up permissions for a customer. You can define whether a customer should be able to order products, see prices and stock.
Shop account permissions depend on whether orderability, price and stock visibility are enabled or disabled globally in Sana Admin under: Setup > Products. If it is disabled globally, you cannot override it per customer. In this case, you will see a message that the setting has no effect when it is disabled on the webstore level.
If the Can see prices option is disabled for a customer, then this customer will not be able to download sales reports from the webstore. The same applies in case you disable prices globally per customer type using the Price visibility option, then sales reports will not be available for these customers as well.
Step 5: After you have entered all shop account details and configured it, you must save it. You can simply save the shop account or save it and send the confirmation e-mail to the customer. You can also send the confirmation e-mail when you change the details of the existing shop account.
Click Save changes to save the shop account or click the split button and then click Save changes & send confirmation email to save the shop account and to send the confirmation e-mail to the customer. The New Shop Account By Shop Admin e-mail template is used to send a confirmation e-mail to a customer.
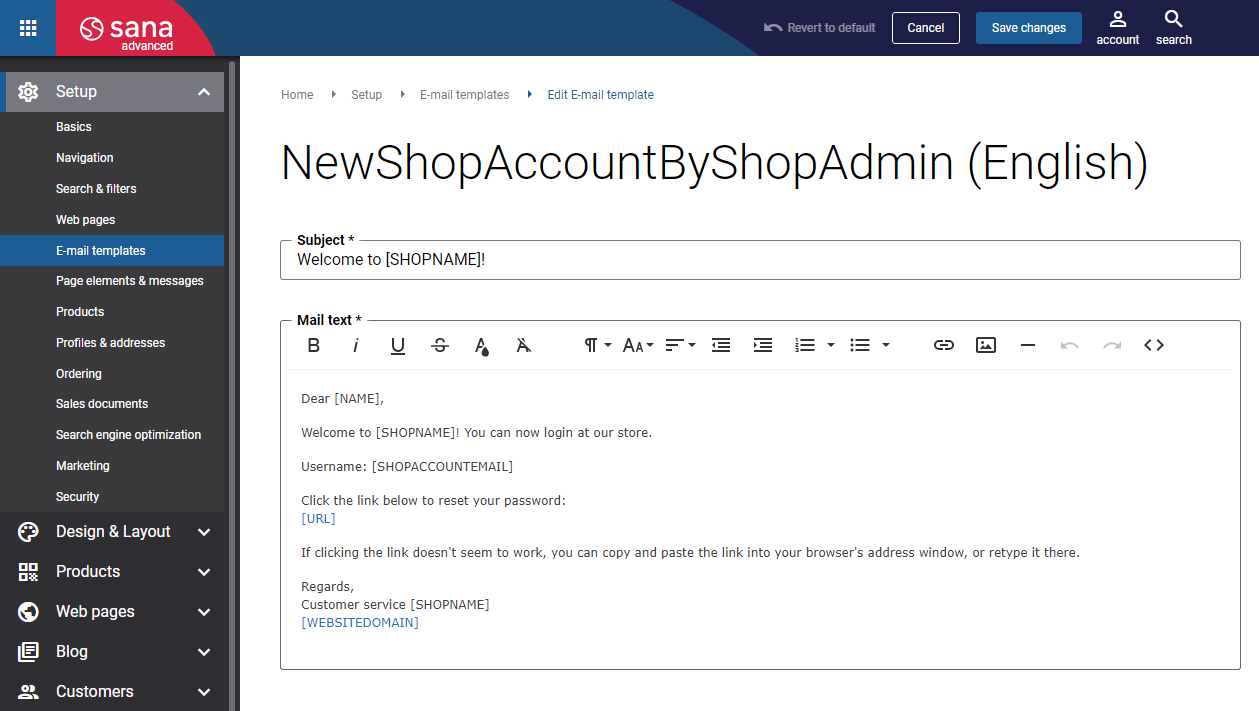
The confirmation e-mail will be sent to the e-mail address entered in the shop account details. Using the link in the confirmation e-mail, a customer can reset the default password generated by the webstore administrator and log in to the webstore.
Related Articles
Export and Import Shop Accounts
Customer and Prospect Profiles
Shop Account Roles