Shop Account Relation
WATCH THE VIDEO
Sana Commerce Cloud allows you to create one shop account for multiple customers. You can think of it as a shared account used by different customers, but sales orders are created for each customer individually.
Companies doing business in the B2B format can benefit from it if they want to create one business account with multiple customers linked to it. There is no need to create separate accounts for each customer.
By logging into the webstore under this account, customers can select themselves from the list and place an order on their own behalf.
All sales orders are created in ERP for the selected customer account. When a customer logs in to the webstore and selects an account, all ERP logic and data of that customer are used, such as prices, discounts, taxes, currencies, addresses, etc.
In Sana Admin there are two types of account relations:
- One to One relation: You can assign only one customer account to a shop account.
- One to Multi relation: You can assign multiple customer accounts to a single shop account.
Create a Shop Account with Multiple Relations in Sana Admin
To assign multiple customer accounts to a single shop account:
Step 1: In Sana Admin click: Customers > Shop accounts.
Step 2: On the Shop accounts page, click Add shop account. Fill in all the necessary fields to create a shop account. To assign multiple customer accounts to a single shop account, select the One to Multi relation account relation option.
The One to Multi relation option is available only for the Customer shop account type with the Regular account or Account manager account role.
Step 3: Add the necessary customer accounts to a shop account using the Account IDs field.
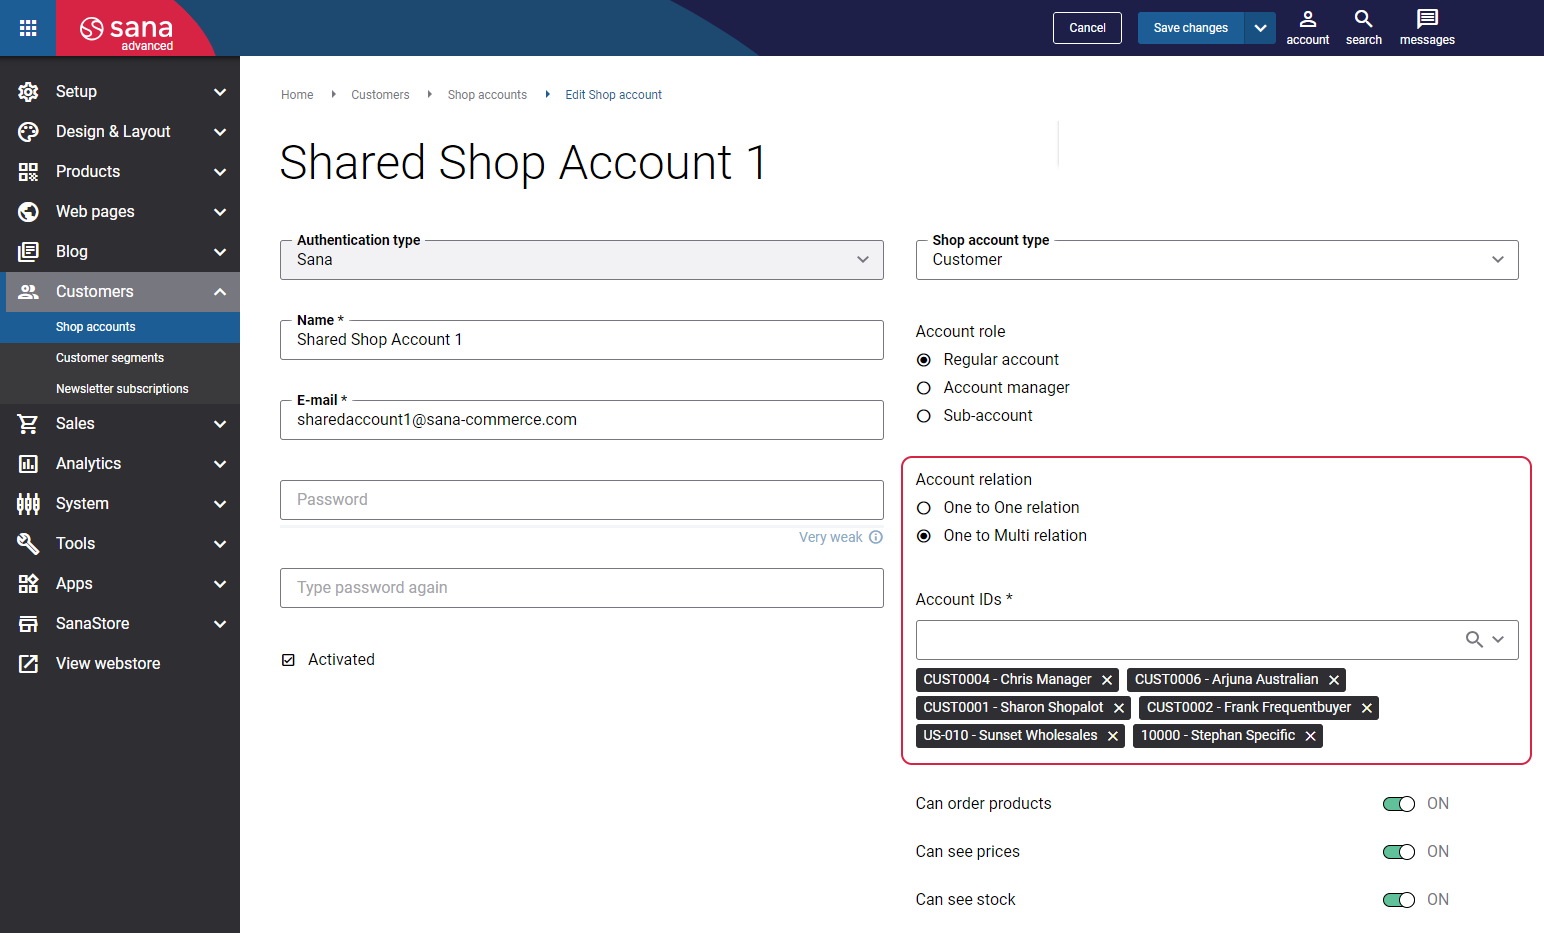
The minimum number of accounts you can add is 2. You can search for the account by ID or name of the customer. The list of all available accounts is retrieved from your ERP system. Use the Customer import task to retrieve or update the list of all customers from your ERP system.
The customer accounts which are blocked in the ERP system can be also added to a shop account. If shop accounts with one to multi relation represent a blocked customer account in the webshop, they will not be able to see price and stock information, place orders and quotes, pay invoices, convert quotes to orders and create return orders.
The first customer account you add to a shop account is the main account. It will be selected by default on the Represent an account page when a customer logs in to the webstore using this shop account. This customer account will be also used for a shop account in case you switch from one to multi relation to one to one relation.
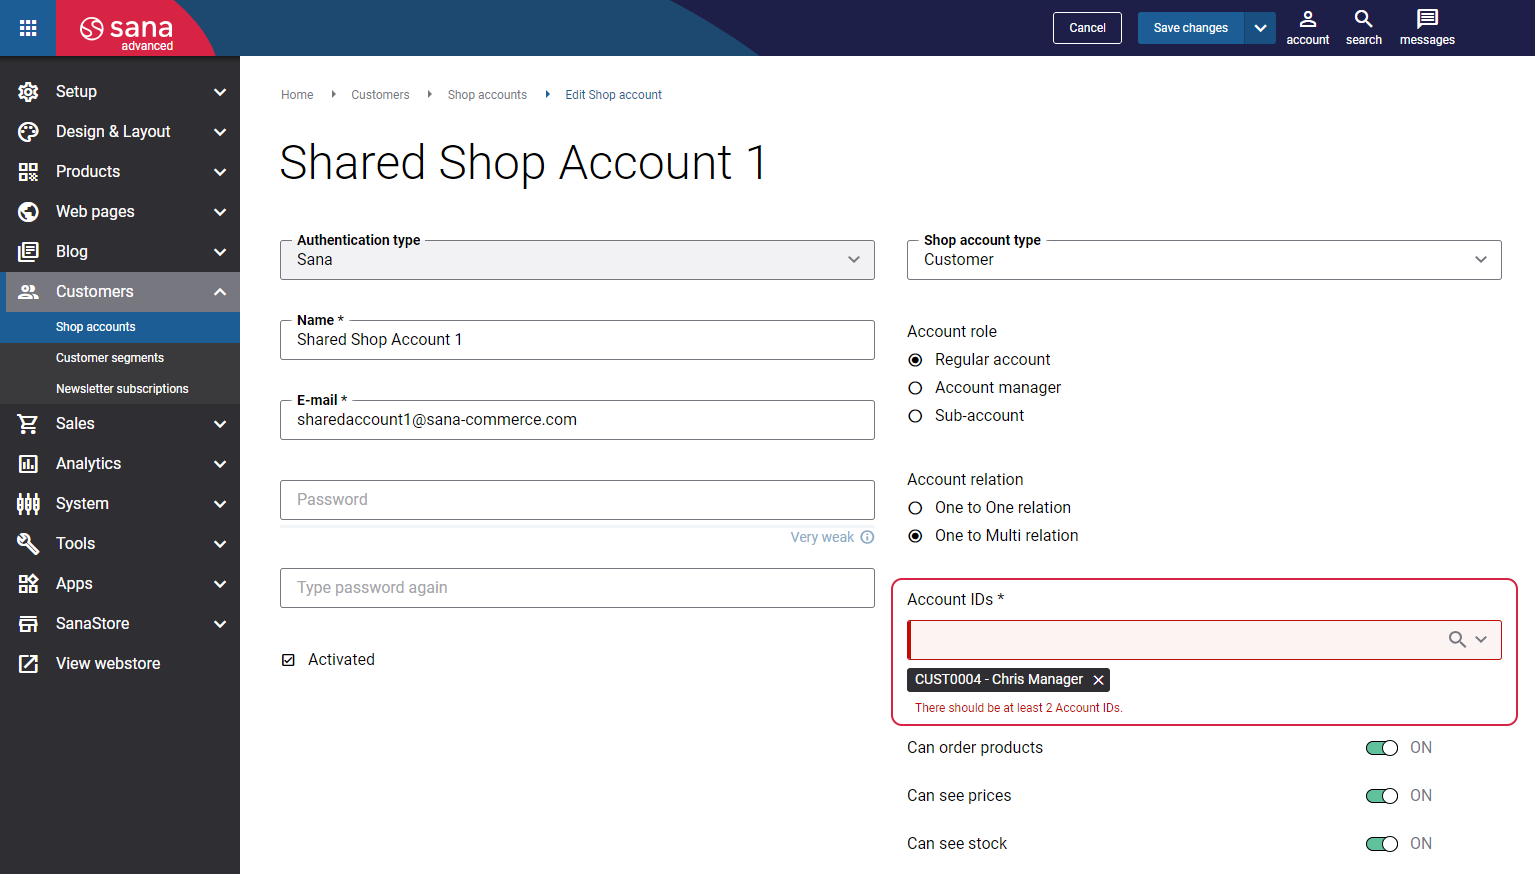
You can also add several customer accounts to the already existing shop account. To do this, you need to open the necessary shop account and select the One to Multi relation account relation option. The customer account which was previously used for your shop account in one to one relation will be automatically added to the shop account once you switch to one to multi relation. Then, start adding account IDs. If only one account is selected for one to multi relation shop account and you save it, you will see a message informing you that it is necessary to add more accounts.
Once a shop account with one to multi relation is saved, it will be shown on the Shop accounts page. You can easily distinguish the one to multi relation shop accounts from one to one relation shop accounts. The one to multi relation shop accounts are shown on the Shop accounts page with the One to Multi relation icon  near the account ID.
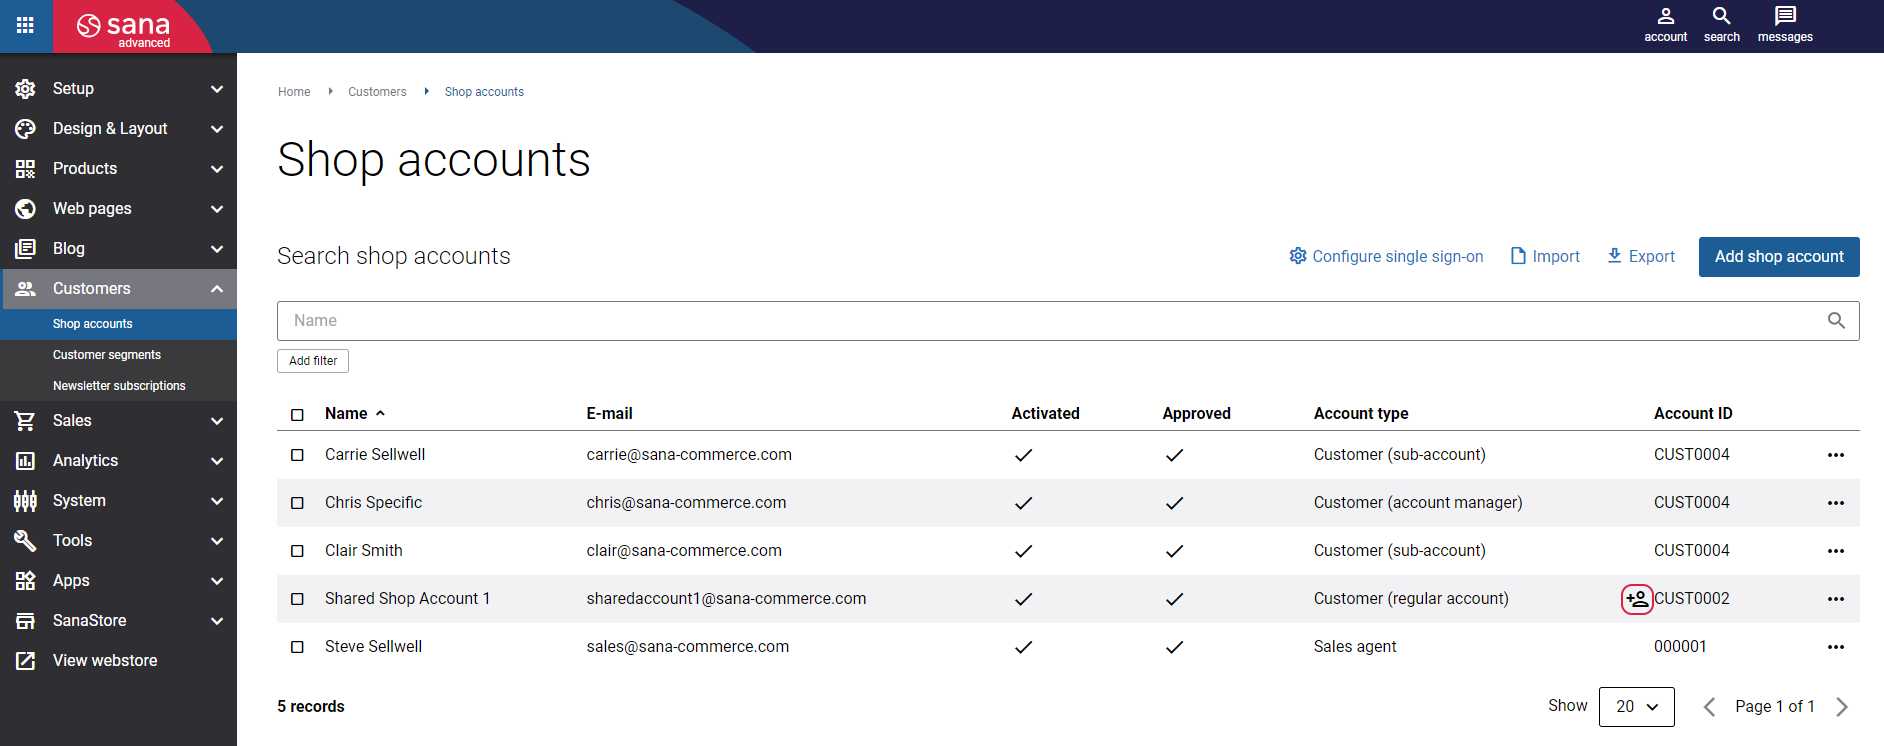
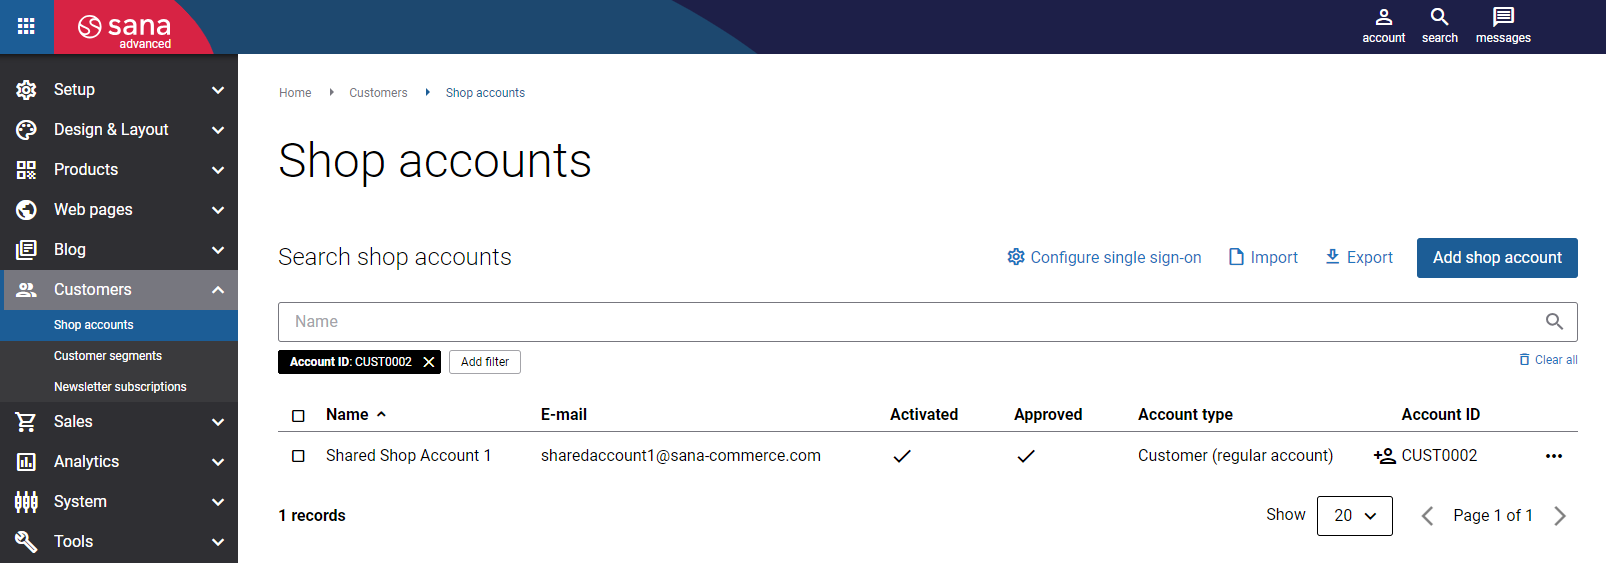
You can also search for a one to multi relation shop account on the Shop accounts page by one of the account IDs assigned to it.
Shop Account with Multiple Relations in the Webstore
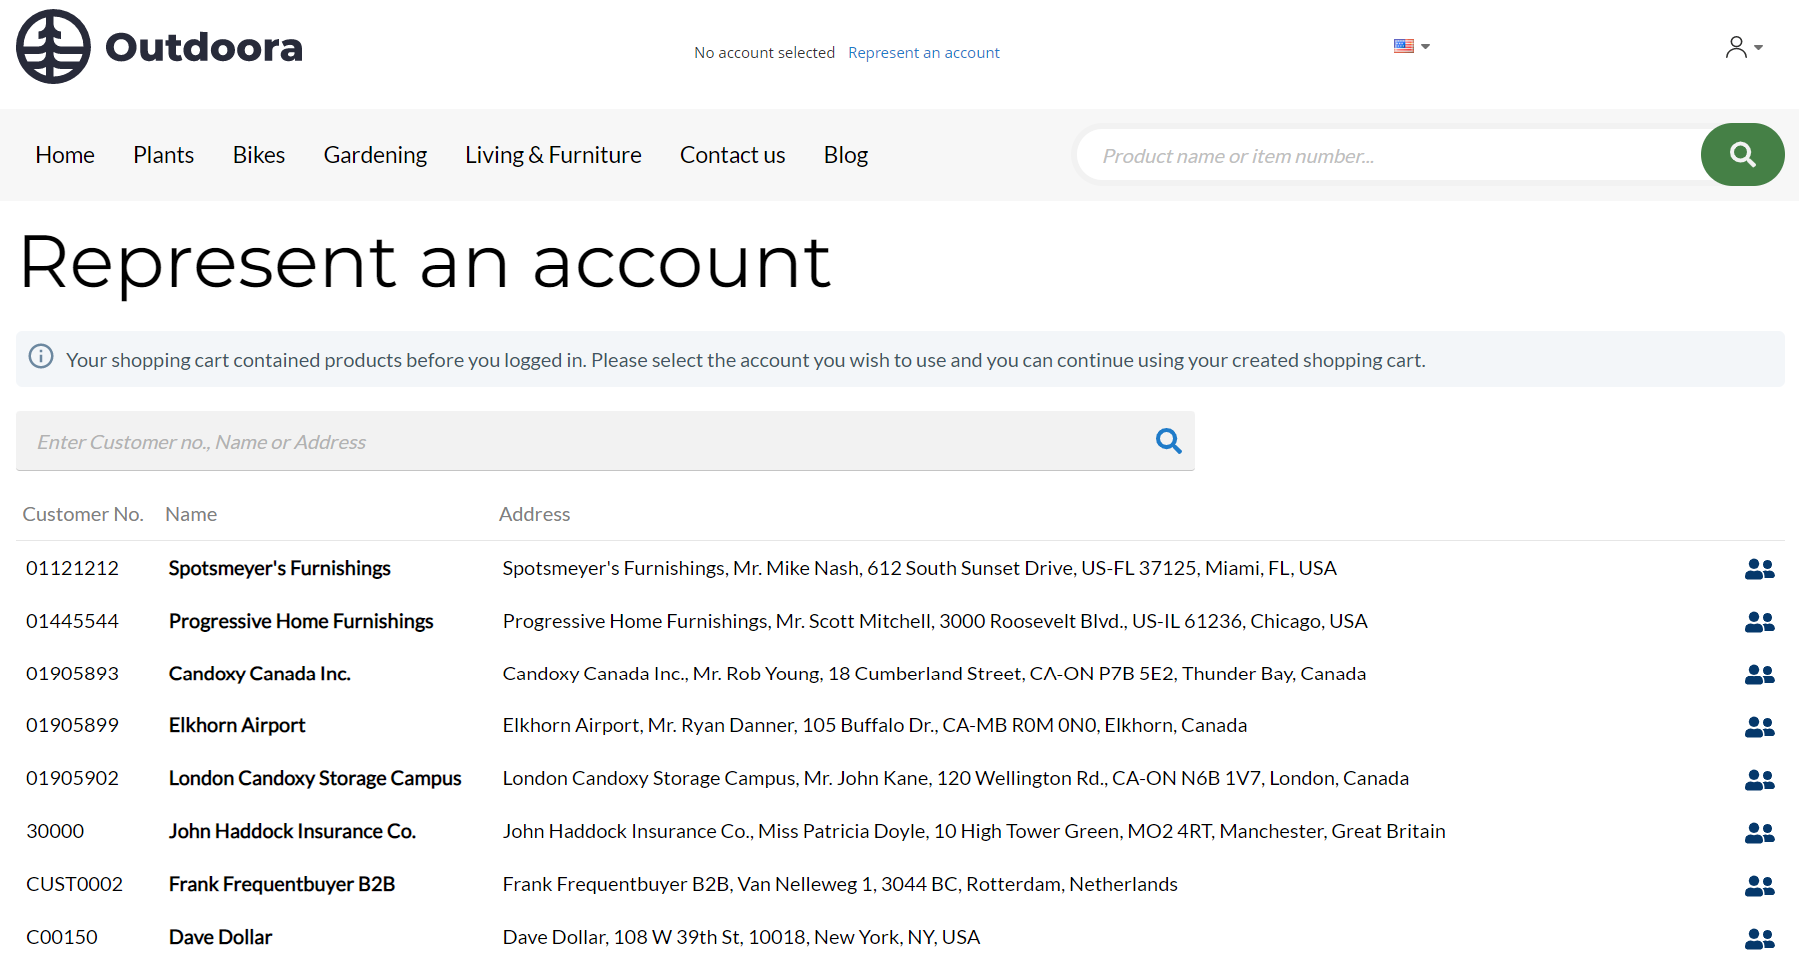
When customers log in to the webstore with a one to multi relation shop account, they will be redirected to the Represent an account page.
The Represent an account page is a system page with the predefined content that exists in Sana Commerce Cloud. This page is editable. You can change the content and styles of the Represent an account page, modify it the way you need. For more information, see Represent an Account.
On the Represent an account page, customers will see all customer accounts they can represent. A customer can search for the necessary customer account by number, name or address. If there are a lot of customer accounts on the page, a customer can load more accounts using the button.
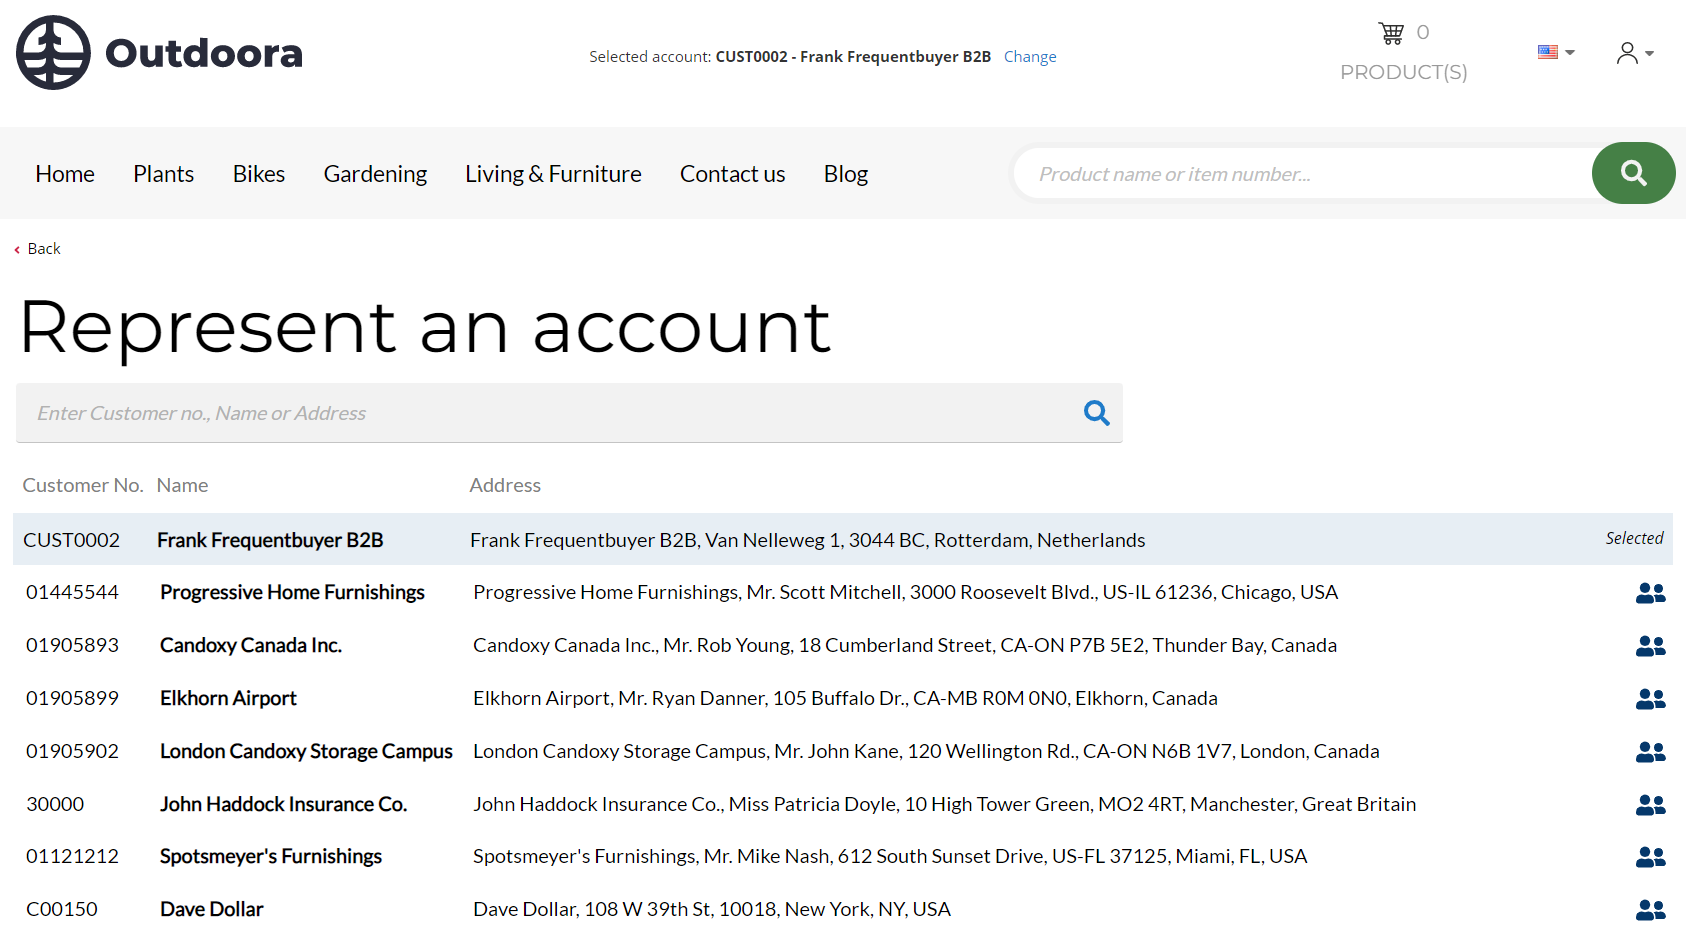
The customer account which was added first to this shop account in Sana Admin and is considered to be the main account will be selected by default on the Represent an account page. A customer will see the text Selected on a customer account which is currently represented. The represented customer account is shown at the top of the list. To select another customer account, a customer needs to click on the icon  near the necessary customer account. When a customer account is selected, customers can place orders on their behalf. All sales orders are created in ERP for the selected customer account.
When a customer logs in to the webstore and selects an account, all ERP logic and data of that customer are used, such as prices, discounts, taxes, currencies, addresses, etc.
A customer can change a customer account, if necessary. A customer can open the Represent an account page from the account menu and change a customer account there.
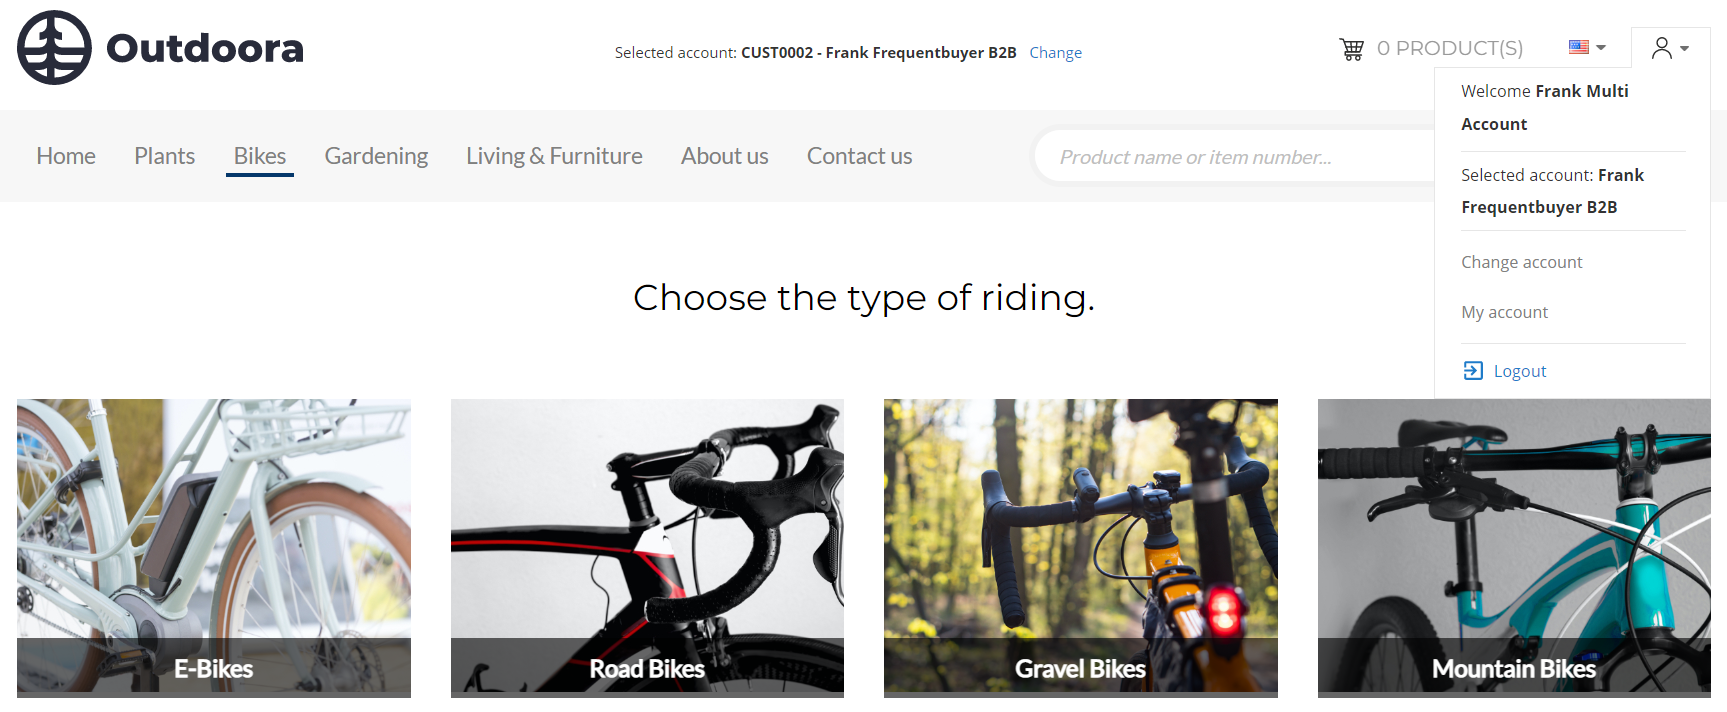
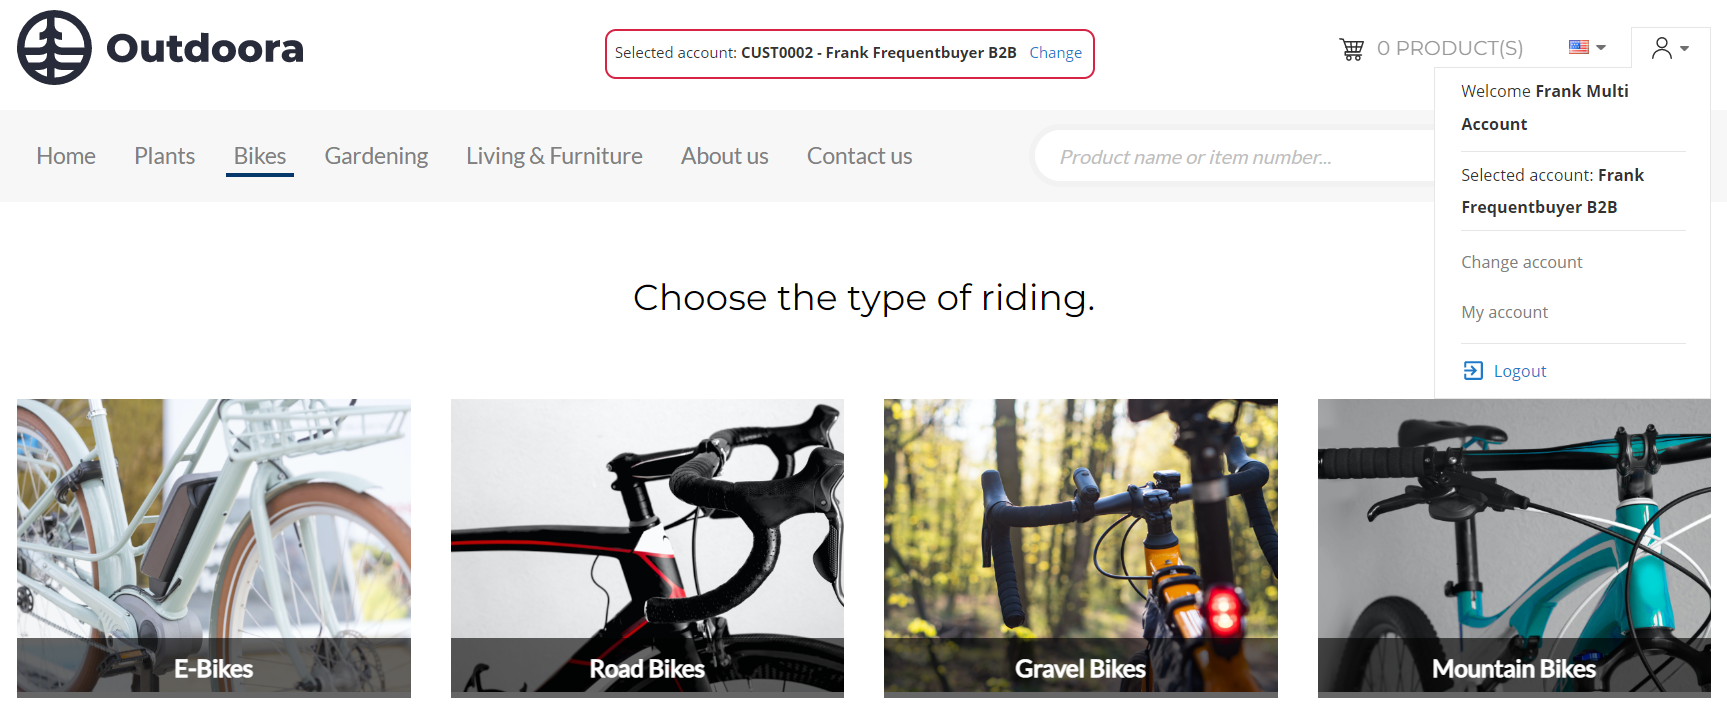
Besides, you can add the Represented account content element to the header of your webstore. If this content element is added, then customers will see a customer account they currently represent, and customers will be able to change a customer account using the link in the webstore header.
There is also one scenario when a customer account is not selected by default on the Represent an account page. A webstore visitor can add some products to the shopping cart without logging in to the webstore. So, in case there are already some products in the shopping cart and a customer logs in to the webstore with a one to multi relation shop account, a customer account will not be selected on the Represent an account page. In this way, customers can choose the necessary account using which they want to proceed to checkout and complete the order.