Synchronize Purchase Activity
Each time your customer completes the checkout process, the order information is automatically sent to Mailchimp. Each order includes the following information:
- Products your customer purchased
- Shipping and billing addresses
- Shipping cost, tax amount, and order total
- The discount codes applied to an order
- Financial status: It is a payment status of an order. The change in the status of the payment system is always reflected in the order information in Mailchimp. Having the payment status up to date is useful when you want to send order or invoice confirmation e-mails to your customers.
- Fulfillment status: It is a shipping status of an order, order tracking information, for example, a tracking number and link to it. The fulfillment status depends on the shipment document associated with an order in the ERP system. Sana Commerce Cloud also uses shipment documents to get shipping tracking information such as a tracking number and a link, and transfers them to Mailchimp. To keep the order fulfillment status up to date with your ERP system, you need to configure the Order data export scheduled task to run daily.
To synchronize the purchase activity between Sana Commerce Cloud and Mailchimp:
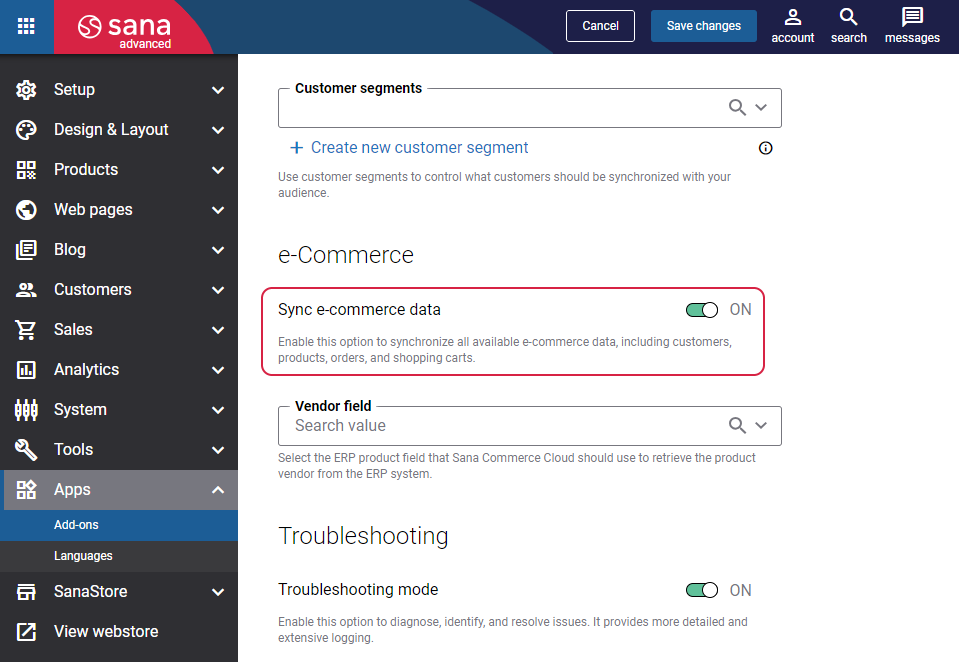
Step 1: Enable the Sync e-commerce data setting on the Mailchimp configuration page in Sana Admin.
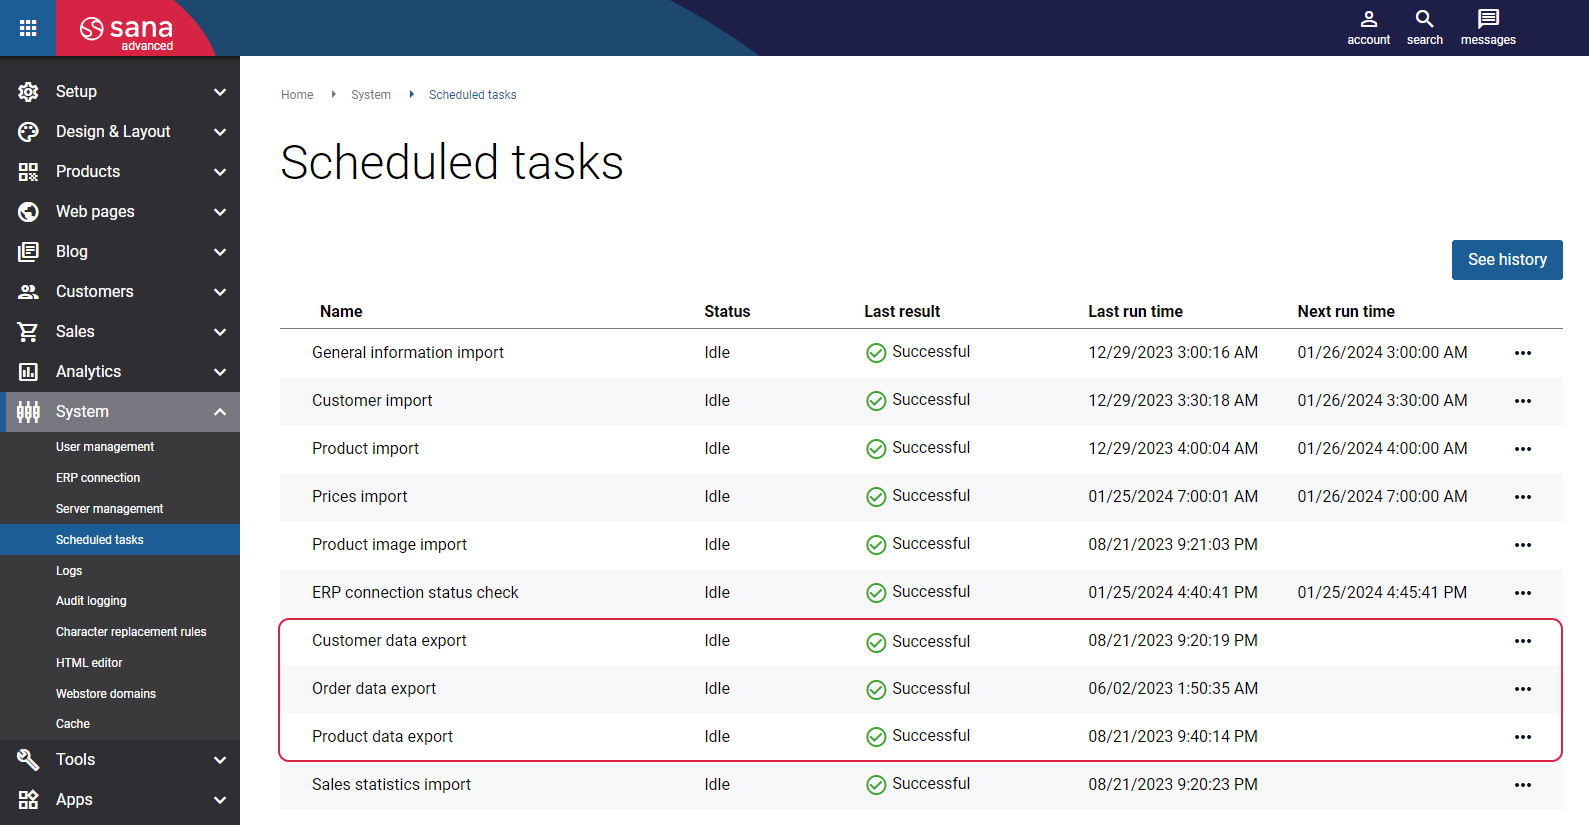
Step 2: Configure the Product data export scheduled task to run daily and keep your Mailchimp catalog up to date.
Step 3: Run the Product data export scheduled task to make the initial export of the product data from Sana Commerce Cloud and ERP to Mailchimp.
Step 4: Configure the Customer data export scheduled task to run daily and send your customers’ abandoned carts periodically to Mailchimp.
Step 5: Run the Customer data export scheduled task to upload abandoned carts to Mailchimp.
Step 6: Configure the Order data export scheduled task to run daily and upload sales orders created directly in ERP to Mailchimp.
Step 7: Run the Order data export scheduled task to make the initial export of order data. Using the Order data export scheduled task, you can also update the shipping status of the sales order based on the shipping status of the document in ERP.
When you synchronize the purchase activity between Sana Commerce Cloud and Mailchimp, you get a nice possibility to:
- View purchase data, a visual timeline of your contact’s engagement on the activity feed page.
- Send order notification e-mails.
- View revenue you earned from e-mail campaigns.
- Add recommended products to your e-mails to increase revenue and encourage repeat purchases.
- Encourage customers’ online reviews for purchased products.
- Segment an audience by purchase activity.
For more information on how to keep shoppers coming back and increase customers’ lifetime value, see the official Mailchimp documentation How To Get Repeat Customers and Build Loyalty.
Information About Purchase Activity in Mailchimp
Step 1: Log in to Mailchimp with your account. In the Audience section, click All contacts.
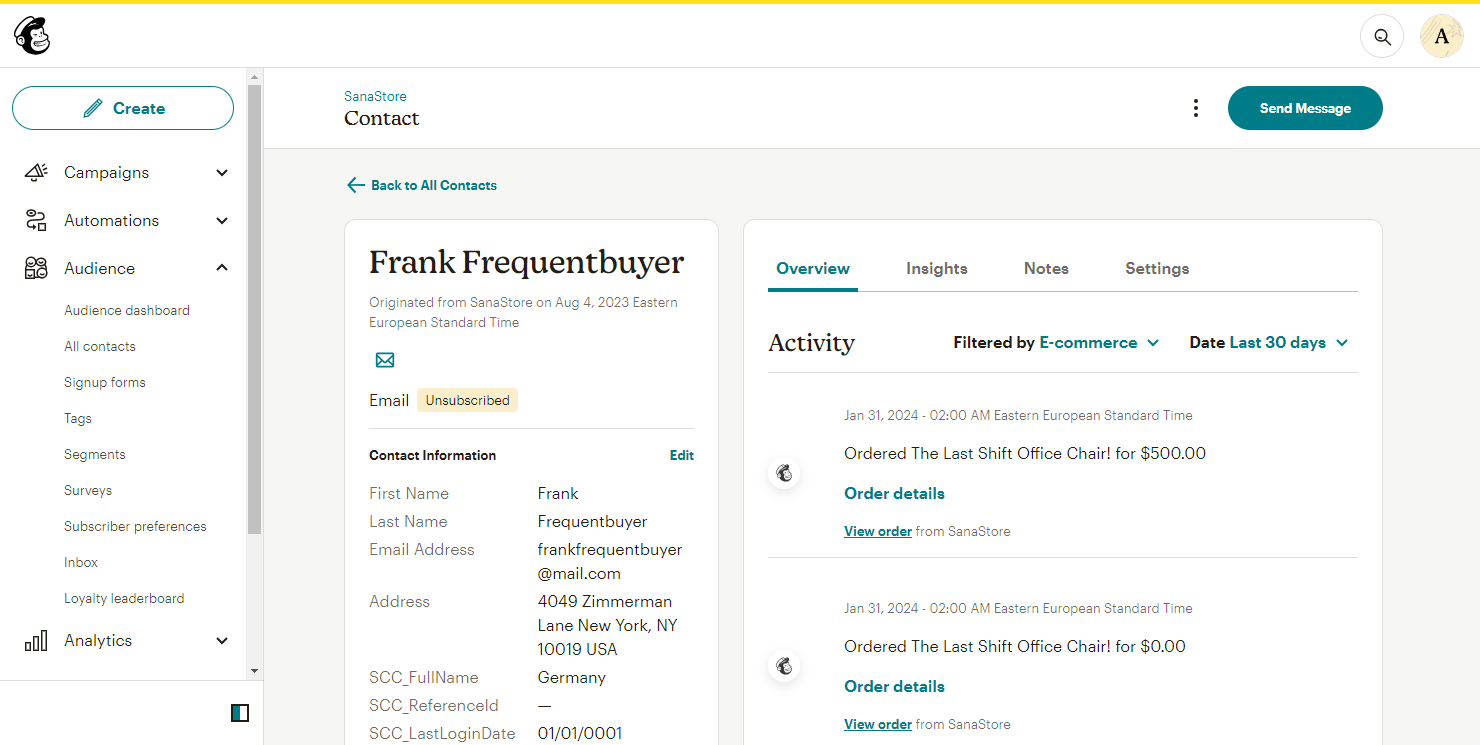
Step 2: Open the necessary contact. On the Overview tab, you can view the contact’s purchase activity.
Step 3: In the Activity types filter drop-down, select E-commerce to view the exported historical order data.
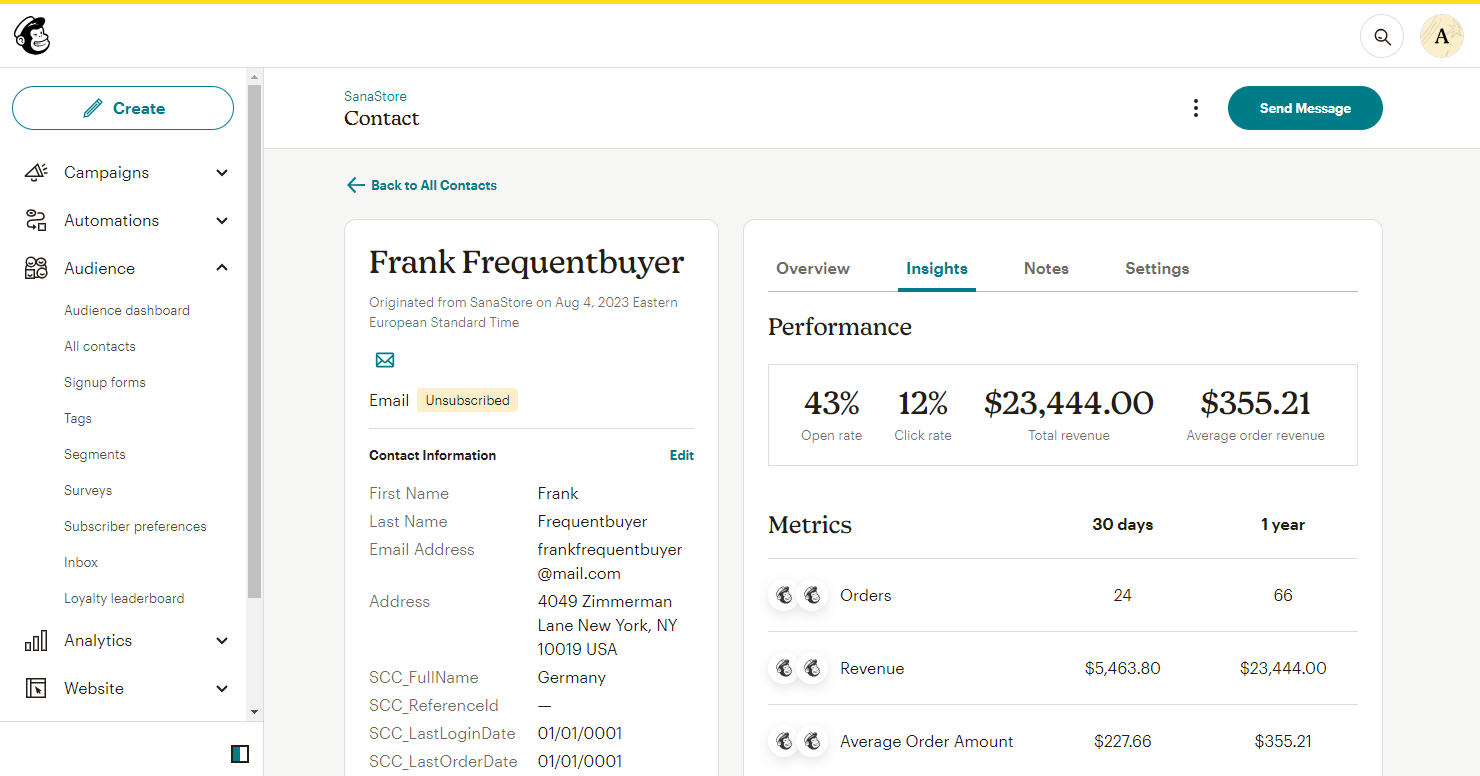
Step 4: On the Insights tab, you can view the order metrics such as number of orders, revenue, and average order amount.
Order Notification E-mails
You can send notification e-mails to your customers about their orders.
- Order confirmation e-mail is sent to a customer when a payment status is In progress.
- Order invoice e-mail is sent to a customer when a payment status is Paid.
- Shipping confirmation e-mail is sent to a customer when a shipment document is created for a corresponding order in the ERP system.
Currently, order notifications such as Refund confirmation and Cancellation confirmation are not supported.
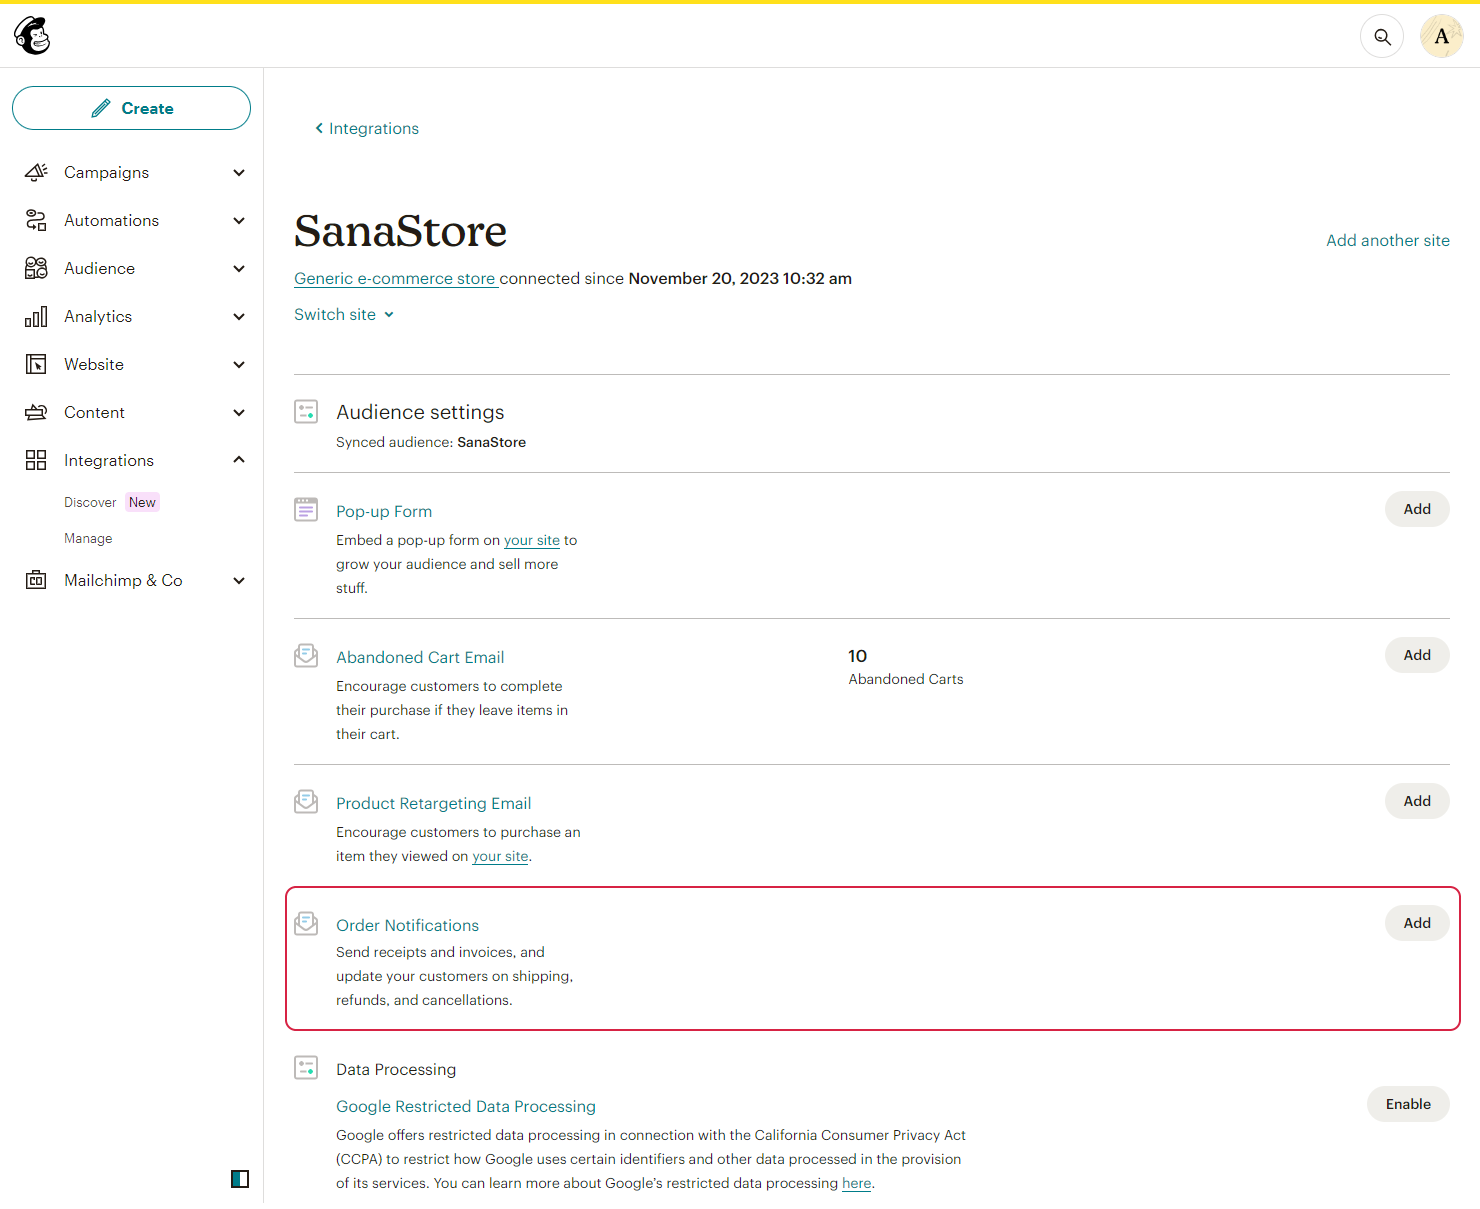
In Mailchimp you can configure order notification e-mails, customize them to reflect your brand, and add product recommendations to encourage repeat business.
-
If you use the Classic Automations builder, click on your profile name and then: Account & billing > Extras > Custom Website > Manage Your Sites > Add Order Notifications.

-
If you use the Customer Journey builder, in the Automations section, click Pre-build journeys. In the Transactional emails section, click Send order confirmation.

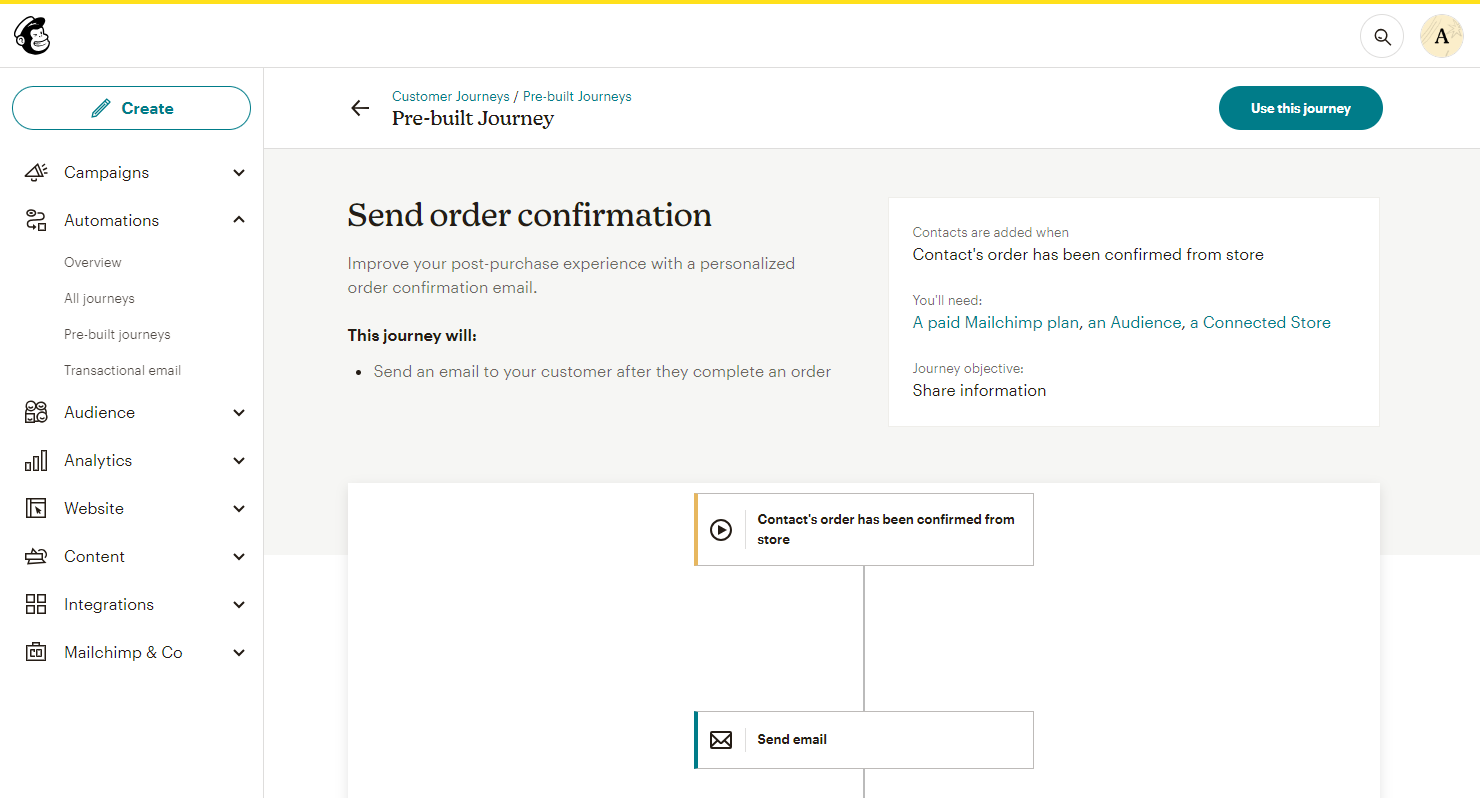
When you make the initial export of order data that is already in the ERP system to Mailchimp, you should pause the customer journeys responsible for order notification e-mails. Otherwise, the order confirmation e-mails will be sent to your customers. This step is specific only if you use the Customer Journey builder and should do it only once during the initial order data export.
For more information, see the official Mailchimp documentation Create Order Notifications for Your Connected Store.
View Revenue from E-Mail Campaigns
You can track marketing campaign revenue based on the order information in Mailchimp. It means, that when a customer follows the link included in your e-mail campaign, Sana Commerce Cloud will take a campaign ID from the URL and send it with an order to Mailchimp. As a result, the purchase will be tracked and associated with a marketing campaign in Mailchimp.
Only the first customer’s purchase which was made after clicking on the link in the e-mail is counted in the campaign revenue. Sana Commerce Cloud does not count next purchases since they do not relate to the campaign.
To view e-commerce data for a specific campaign:
Step 1: In Mailchimp click: Analytics > Reports.
Step 2: Select the necessary marketing campaign and click View Report.
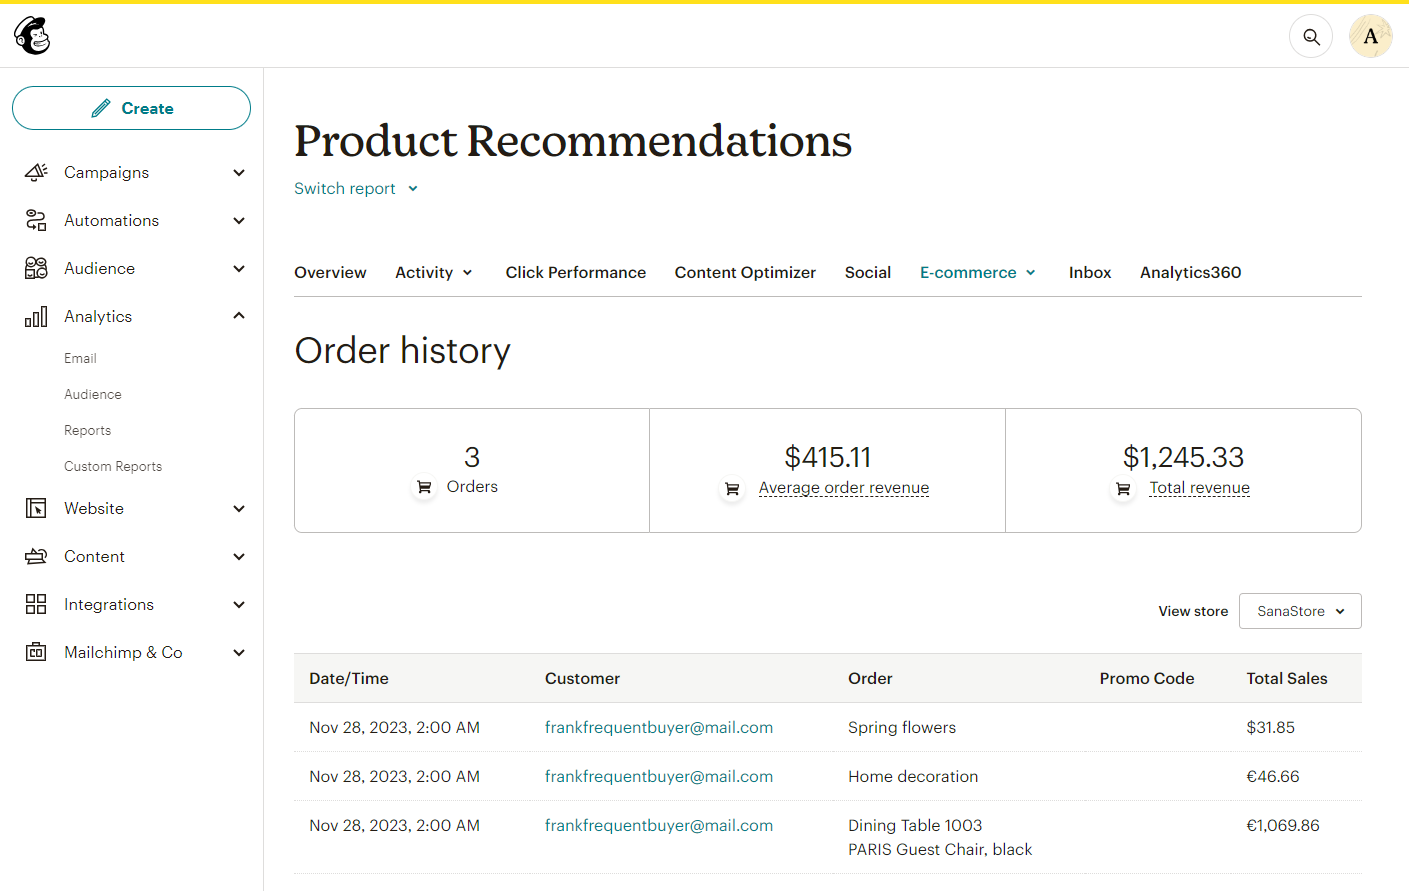
Step 3: On the E-commerce tab, you can select the Order history option to see a record of subscriber purchases.
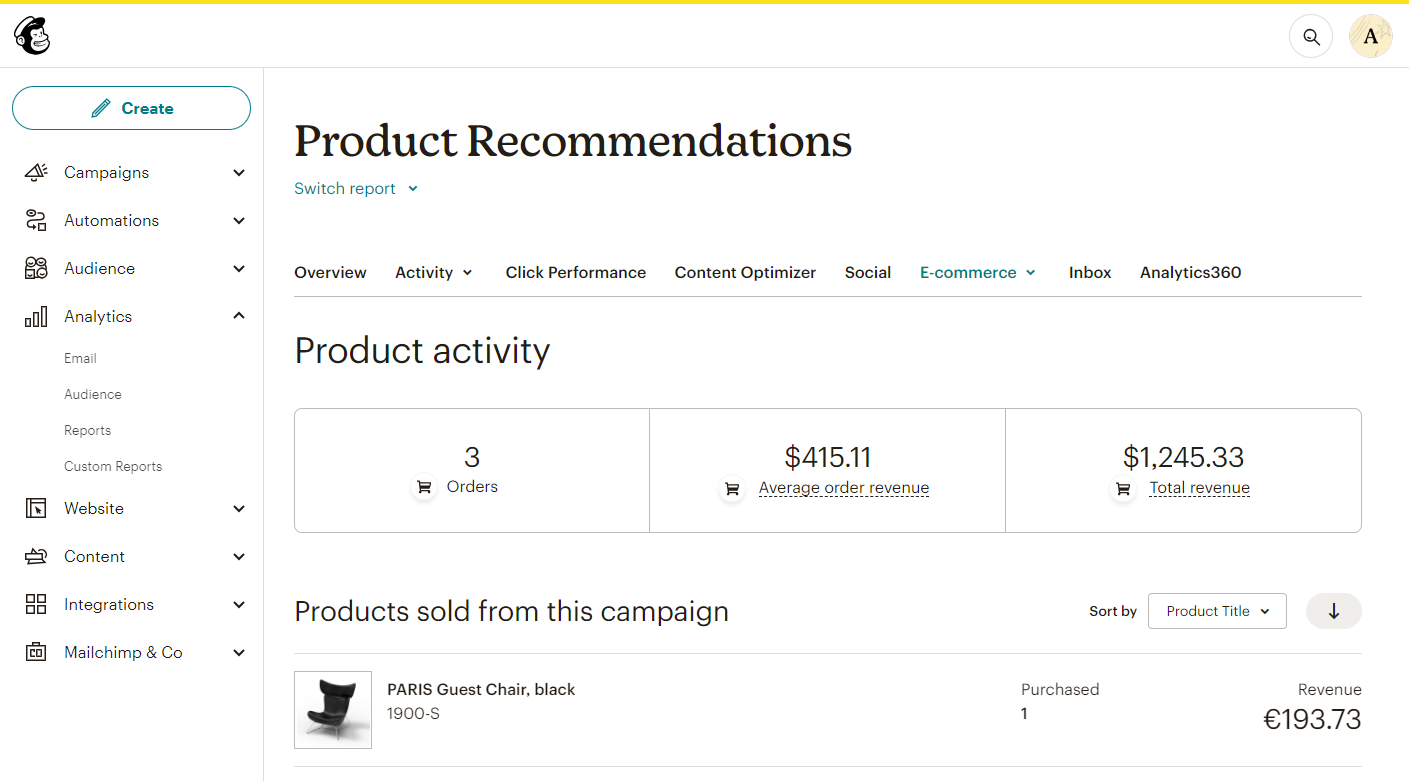
You can also select the Product activity option to view a list of products sold through the campaign, purchases generated by product recommendations, and revenue totals.
For more information, see the official Mailchimp documentation View Revenue from Email Campaigns and About Email Reports.
To track the marketing campaign revenue, you can add the Mailchimp tracking content element either to the webstore header or webstore footer in Sana Admin.

Using the Mailchimp tracking content element, you can add Mailchimp signup forms, track campaign revenue, and enable browsing of abandoned pages.
When you have the purchase information in Mailchimp, it allows you to create a segment for your contacts in the audience based on purchase activity. Mailchimp for Sana Commerce Cloud provides all the necessary purchase information including the following filters:
- Total number of orders
- Purchased products
- Purchase activity
- Purchase date
- Average amount spent per order
- Amount spent on a single order
- Amount spent in total
- Store an order created from
- Vendor purchased
For more information, see the official Mailchimp documentation Segment an Audience by Purchase Activity.
To use the Vendor purchased filter, use the Vendor field on the Mailchimp configuration page in Sana Admin. For more information, see Product Vendor.
