Add Shopping Cart Upload Content Element
The Shopping cart upload content element is available as an app. It can be installed from the Sana App Center. In Sana Admin click: App Center > Apps > Apps Explorer.
The Shopping cart upload content element can be added to the web pages (content pages, product and product list pages) and system pages of the Sana webstore. For example, you can create a separate content page with the Shopping cart upload content element and add it to your webstore navigation.
For more information about adding, searching, and filtering content elements on pages, see Content Elements.
Content Tab
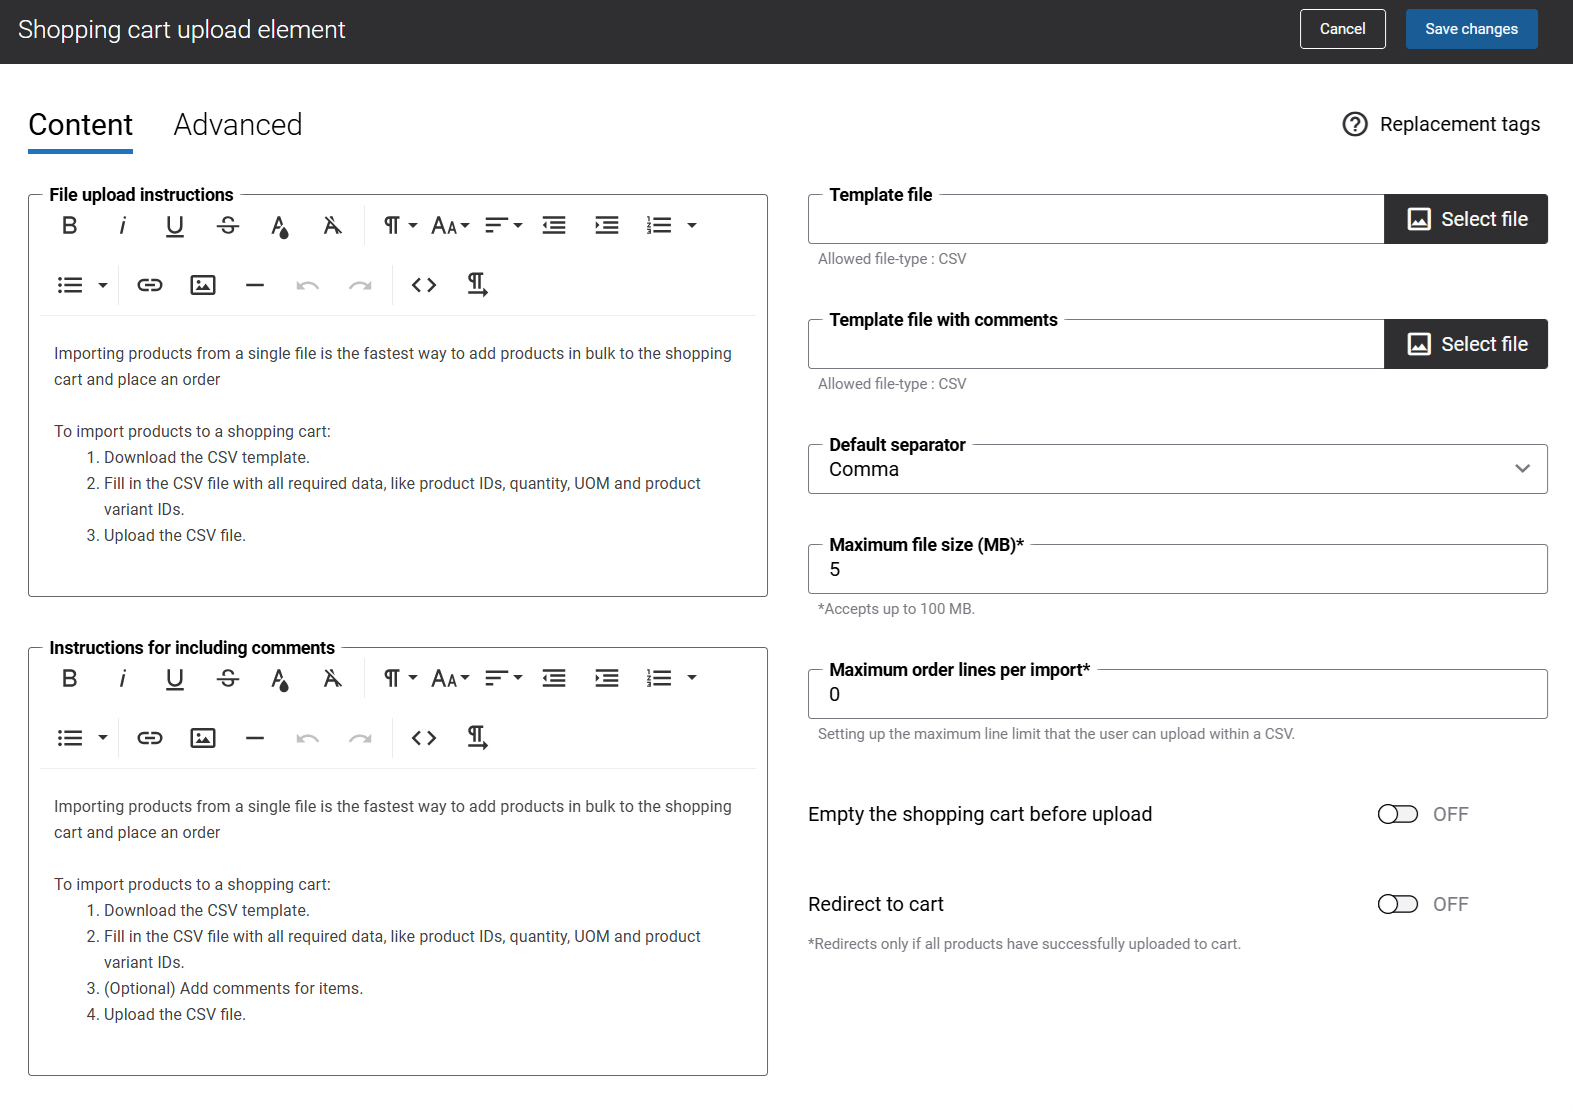
The table below provides description of the Shopping cart upload content element settings.
| Field | Description |
|---|---|
| File upload instructions | Enter instructions. For example, this can be a short instruction on how to import products using a CSV file. If you support different units of measure and your customers are allowed to select a unit of measure for products, then you can also add a short explanation of how to use units of measure when importing products to the shopping cart using CSV.
You can provide two distinct instructions for the product import. Enter the instruction for product import without comments in the File upload instructions box. Use the Instructions for including comments box to enter the instruction for product import with comments. The instructions entered in the Instructions for including comments box will be shown in the webstore only if the Comment per shopping cart line option is enabled in Sana Admin. Make sure to enable this option for the necessary customer types.
|
| Instructions for including comments | |
| Template file | Use the Template file field to upload the CSV template for products without comments, and the Template file with comments field to upload the CSV template for products that include comments.
Select a CSV template. It should be created beforehand. It can also contain a few demo records, for example, product and product variant IDs, quantity and UOM, comments. Customers will be able to download the CSV template from a page, fill it in with the necessary data, and then import it to the shopping cart. The CSV template will help customers to fill it in with data correctly and to avoid issues with products import because of the wrong data. You can use the CSV template which is already available in the add-on package or you can create your own CSV template and select it. When the add-on is installed, you can find the CSV template in the Sana Commerce frontend directory: \content\files\content\CartUpload. The CSV template uploaded to the Template file with comments field will be accessible in the webstore only if the Comment per shopping cart line option is enabled in Sana Admin. Make sure to enable this option for the necessary customer types. Please ensure that the CSV template uploaded to the Template file with comments field includes the Comment column. Users can either fill in this column or leave it empty, but the Comment column must be present for the CSV upload to proceed smoothly. |
| Template file with comments | |
| Default separator | Select the separator which will be shown as default in the Separator dropdown in the Shopping cart upload content element in the webstore. The available options are:
|
| Maximum file size (MB) | Enter the maximum size of the CSV file in MB.
You cannot import the CSV file which exceeds the size specified in this field. |
| Maximum order lines per import | Enter the maximum number of sales order lines that a customer can upload with a CSV file.
|
| Empty the shopping cart before upload | This option defines whether all products, if there are any, should be removed from the shopping cart before importing products from the CSV file. If this option is disabled and there are products in the shopping cart, those from the CSV file will be imported in addition to those which are already present in the basket. |
| Redirect to cart | This option defines whether a customer should stay on the same page when products are imported to the shopping cart or should be redirected to the basket automatically. |
Advanced Tab
On the Advanced tab of the Shopping cart upload content element, you can configure height, width, and spacing settings.
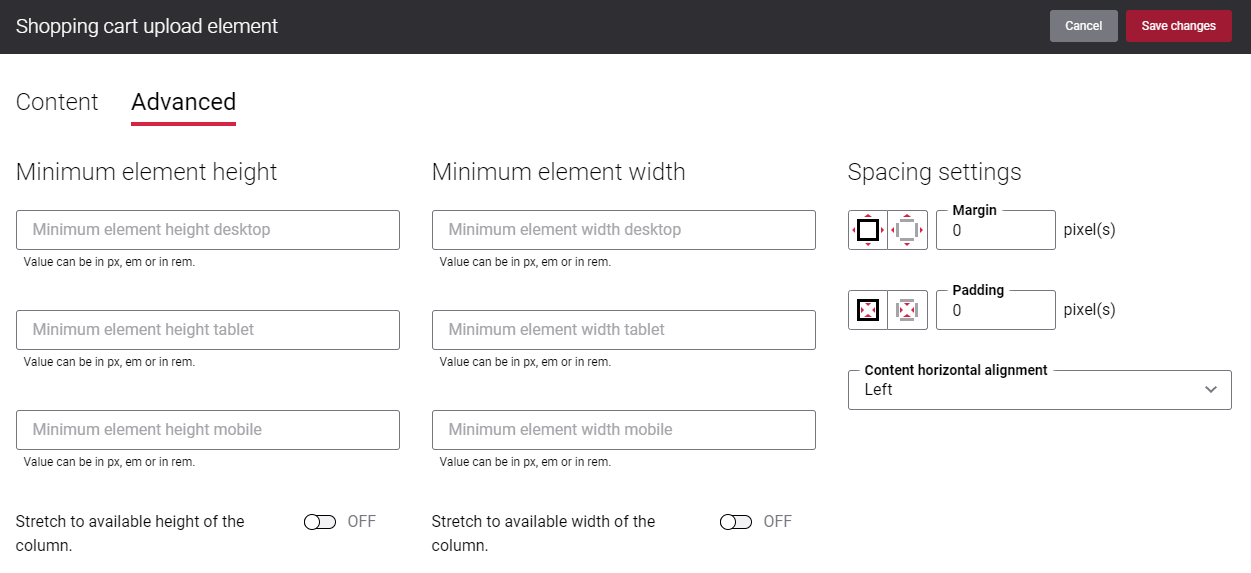
For more information about advanced settings, see Content Elements.