Add Product Subcategory Content Element
This content element was available in previous versions of Sana under the name Child Menu Items. The Product subcategory content element is its successor and has replaced the Child Menu Items content element in Sana Commerce Cloud.
The Product subcategory content element is available as an app. It can be installed from the Sana App Center. In Sana Admin click: App Center > Apps > Apps Explorer.
The Product subcategory content element can be added to the web pages (content, product, and product list pages) and system pages of the Sana webstore.
For more information about adding, searching, and filtering content elements on pages, see Content Elements.
When you add it to a page, it is already predefined with the default values, so you can preview the page to see how the content element looks like. Then you can configure it the way you need.
Content Tab
Good to Know
Displaying menu items in the Product subcategory content element is dependent on the structure of the main menu of your webstore. Making changes to the main menu of your webstore can affect the behavior of the Product subcategory content element. For example, if you make some menu item invisible in the main menu it will not be shown in the Product subcategory content element as well. Even though the invisible menu item will be shown in the Product subcategory content element configuration page, you will not be able to make it visible using content element settings. Customer segments assigned to the menu items also affect menu items visibility in the Product subcategory content element.
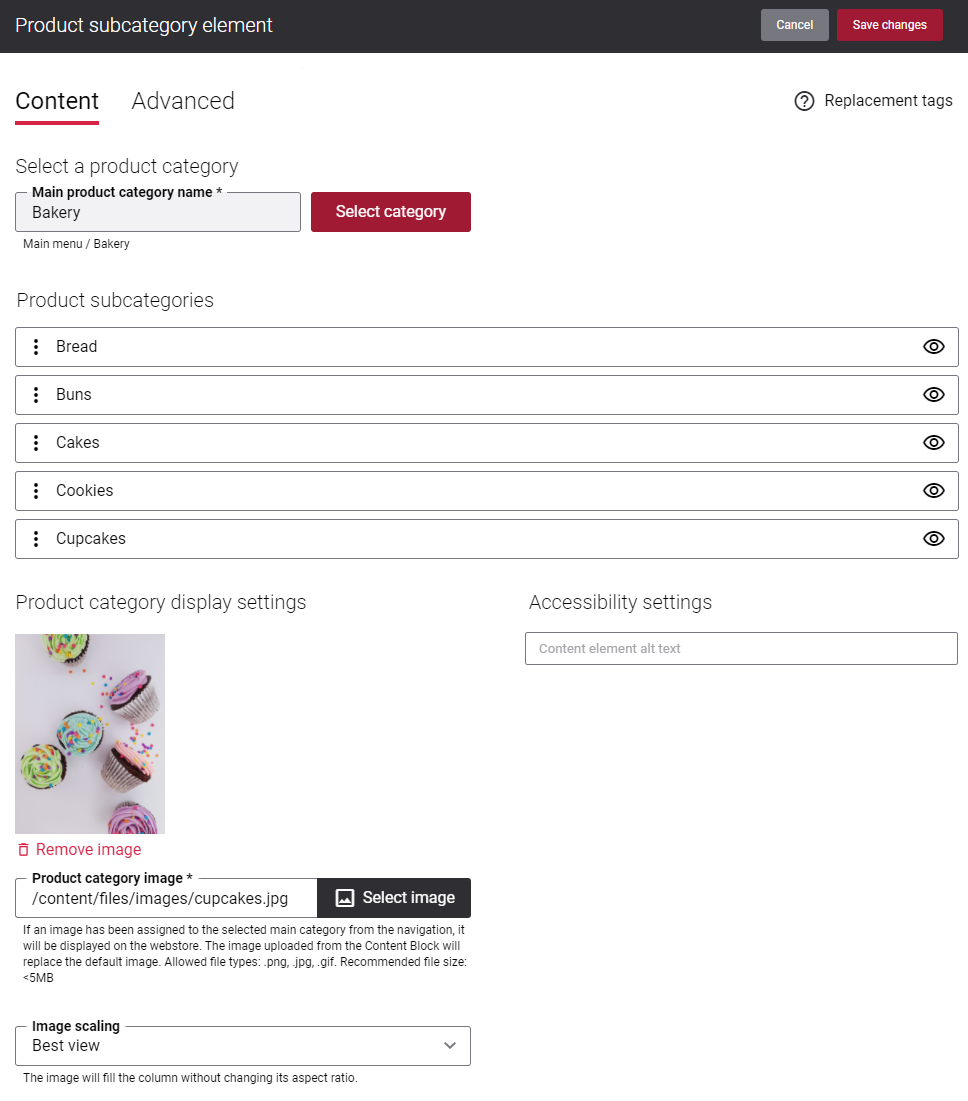
The table below provides the description of the Product subcategory content element settings.
| Field | Description |
|---|---|
| Main product category name | Select the necessary category. You can create categories using menu items on the Navigation page in Sana Admin.
This field is mandatory. |
| Product subcategories | If the selected category has any subcategories, all of them are shown here.
You can create subcategories using menu items on the Navigation page in Sana Admin. You can change the order of subcategories by dragging and dropping them. If you open Main menu in Sana Admin and change the order of subcategories of the category which is already added to the Product subcategory content element, the order of the subcategories in the Product subcategory content element will not change. You can also make any subcategory visible or invisible. |
| Product category image | Select the image. This image is used as the background for the product category and its subcategories and it is shown on the page in the Sana webstore.
This field is mandatory. |
| Image scaling | Use this field to change the size of an image. The following image scaling options are available:
When you select one of the scaling options, make sure that the image fits the column and looks good on the page. You can preview the page to check it. |
| Content element alt text | Enter the Product subcategory content element alt text.
Alt (alternative) text is used to describe the function and content of the Product subcategory content element on a page. Visually impaired users using screen readers can read an alt text to better understand the content in the Product subcategory content element. |
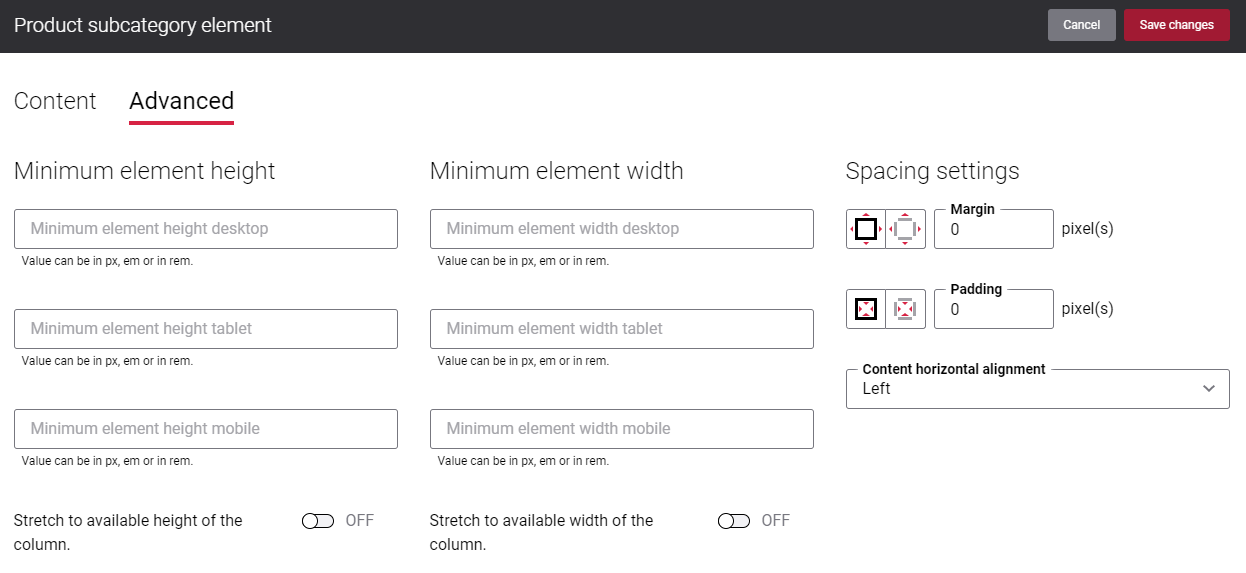
Advanced Tab
On the Advanced tab of the Product subcategory content element, you can configure height, width, and spacing settings.
If the selected category has a lot of subcategories, some of the subcategories might not be shown in the content element. You can adjust the height of the Product subcategory content element to fit all the subcategories using the Minimum element height settings on the Advanced tab.
For more information about advanced settings, see Content Elements.