Product Images
WATCH THE VIDEO
Microsoft Dynamics 365 for Finance and Operations gives a possibility to add product images and show them in the webshop. Sana also allows to add videos to the products. You can add videos only in Sana Admin but not in ERP. Product videos are shown along with product images in the media carousel on the product pages.
The product images and product videos are shown on the product details page using the Media gallery content element.
You can equally use the procedure which Sana provides out-of-the-box and Microsoft Dynamics 365 for Finance and Operations to add product images.
Add an Image to a Product in Dynamics 365 for Finance and Operations
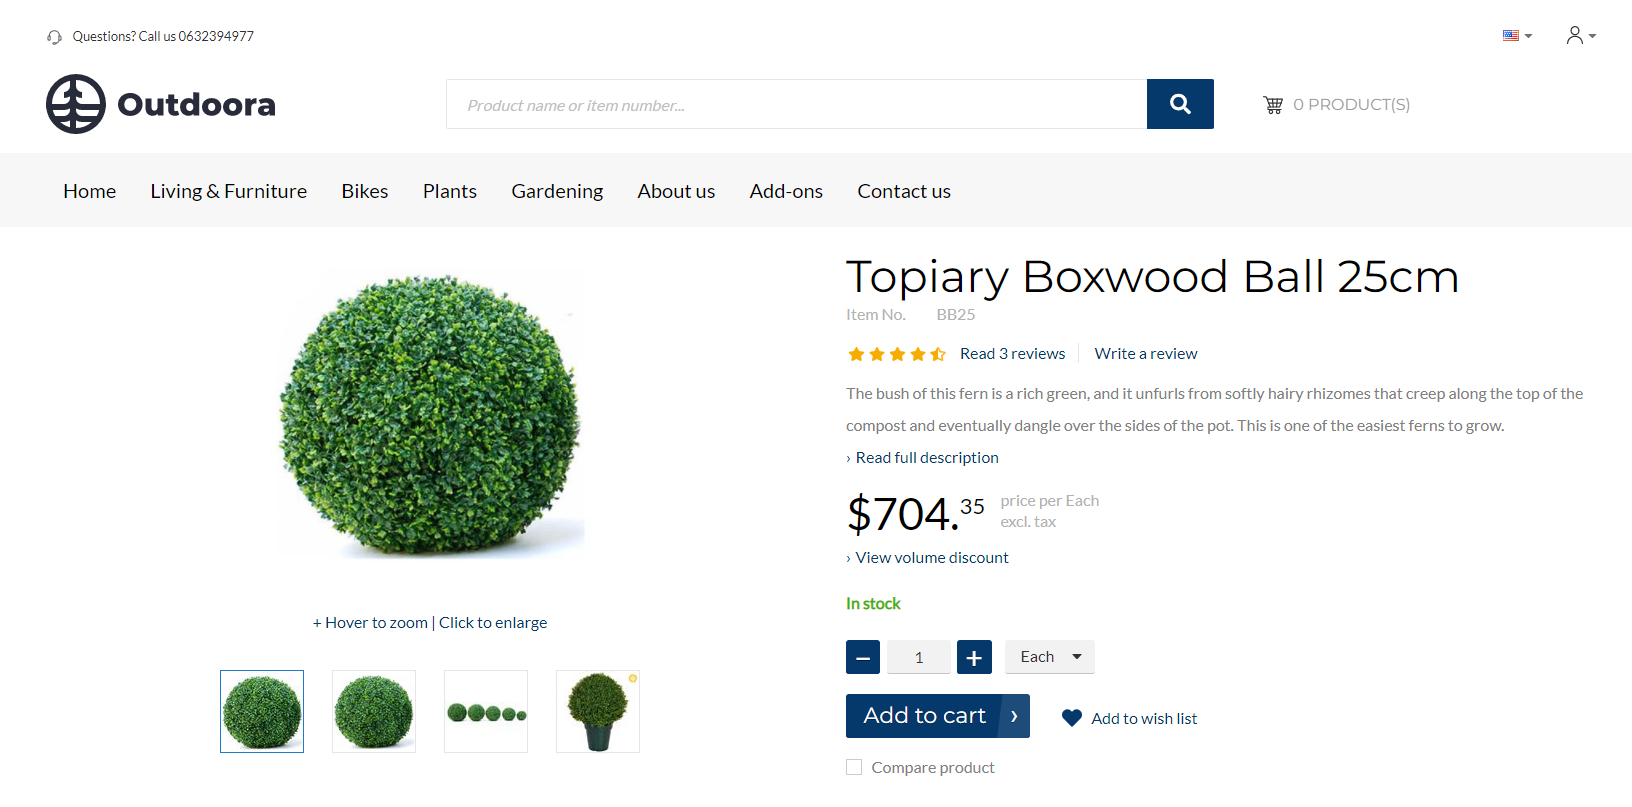
Step 1: Click: Organization administration > Document management > Document types.
You must create a document type for product images if you don't already have one. In the Group field, select Image. It is important to select Image, otherwise it will not be shown as a product image in the webshop.
In the Document types window, you can create a document type for images and specify the location where the images should be stored.
The following locations are available:
-
Azure storage - Images are stored in Azure storage.
-
Database - Images are stored in the Dynamics 365 for Finance and Operations database.
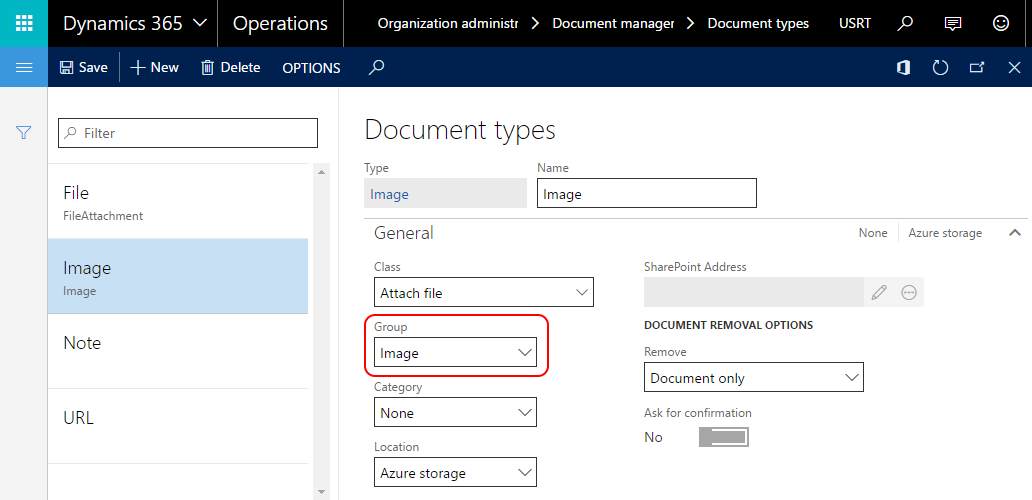
Step 2: Set up general document management parameters. Click: Organization administration > Document management > Document management parameters.
For example, here you can set up maximum file size.
Step 3: In Microsoft Dynamics 365 for Finance and Operations click: Product information management > Products > Released products. Select the necessary product and open the FactBox Pane on the right.
Step 4: On the FactBox Pane, on the Product image FastTab, click Change image. Add the default product image. Make sure that the Default image checkbox is selected. The default image is the main product image that is shown on the product details page in the Sana webshop.
Starting from Sana Commerce Cloud 10.0.75 in Microsoft Dynamics 365 for Finance and Operations, if product images are not available for the released product, Sana will use images from the main product (not released) if they are available.
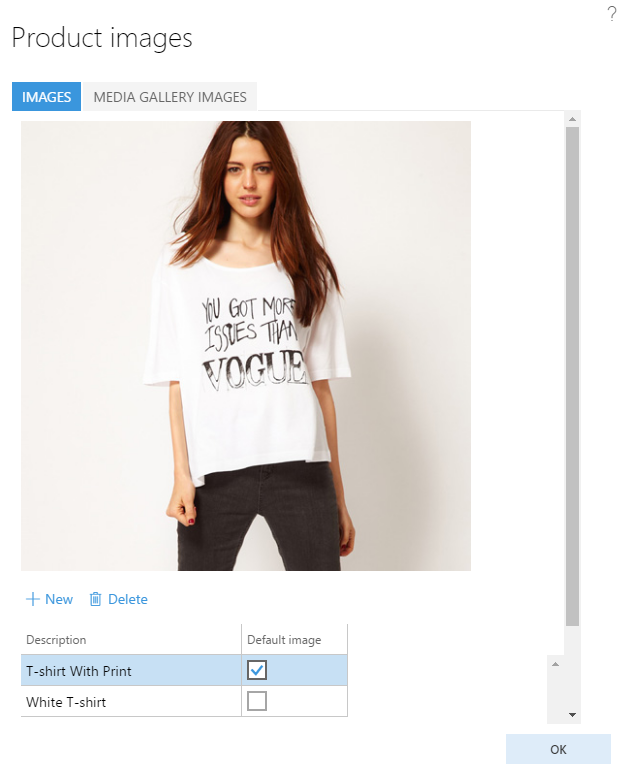
Besides the default product image, you can add other product images from the FactBox Pane.
All product images added from the FactBox Pane are automatically available in the Attachments window. You can also add product images using the attachments.
Step 5: To open product attachments, click the Attach button on the action pane. In the Attachments window, you can add as many product images as you need.
To add a product image, click New and select the document type that you created for product images in Step 1. It must be the document type with the Image group.
Step 6: In the Attachments window, you can manage product image visibility. To make a product image visible in the webshop select the Visible in webshop option.
The product images added from the FactBox Pane are also shown in the list in the Attachments window. Select the Visible in webshop option for those product images which you are going to use in the webshop.
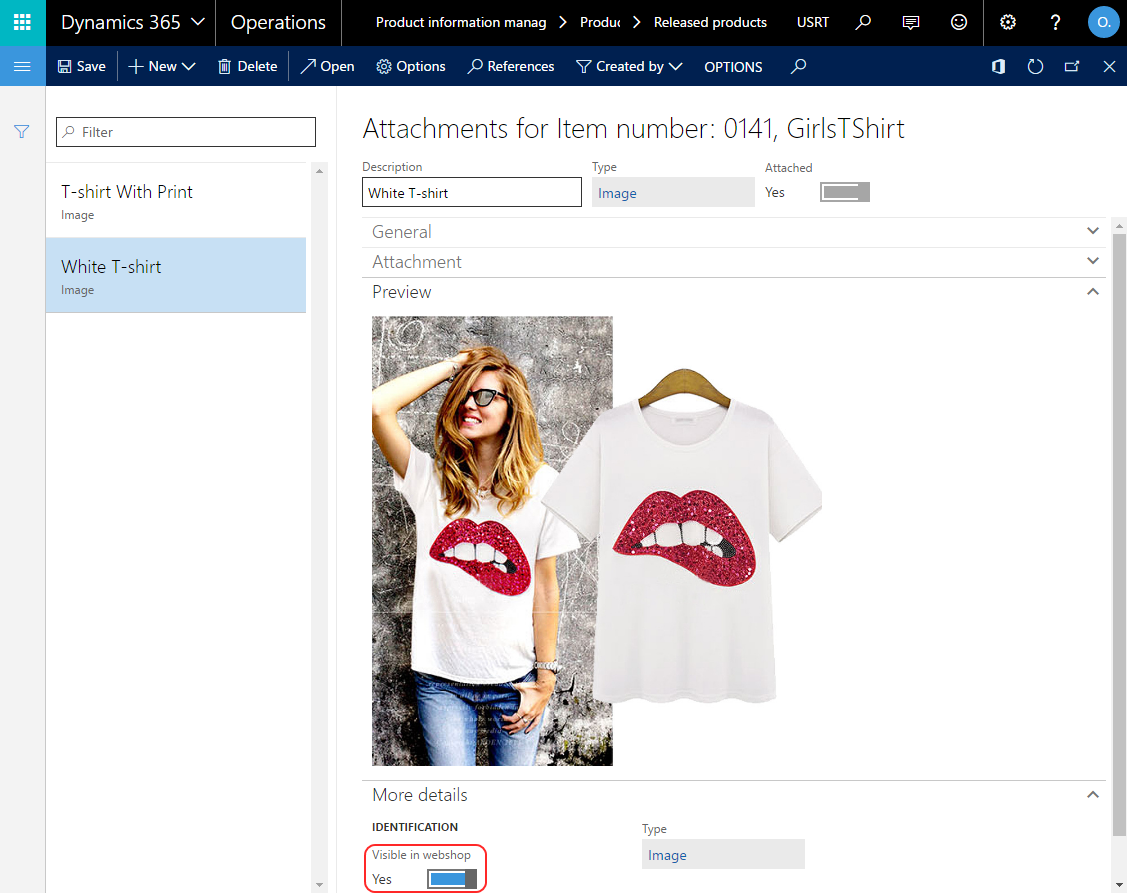
All visible product images added from the FactBox Pane and all visible product images with the Image document type added in the Attachments window will be available in the webshop.
In the previous versions only the default product image added from the FactBox Pane was retrieved and all other product images were taken from the product attachments. Starting from Sana Commerce Cloud 10.0.38 in Microsoft Dynamics 365 for Finance and Operations all visible product images added from the FactBox Pane and all visible product images with the Image document type from the product attachments will be retrieved and shown in the webshop.
Just in the same way you can add images to the product variants. When a customer selects a product variant from the dropdown list on the product details page the corresponding product image is shown.
How Product Images in Microsoft Dynamics 365 for Finance and Operations Are Linked to Products in Sana?
Step 1: When images are added to the products in Microsoft Dynamics 365 for Finance and Operations, run the Product import task in Sana Admin. Open Sana Admin and click: System > Scheduled tasks.
The Product import task retrieves product information from the database to build or update the webshop index.
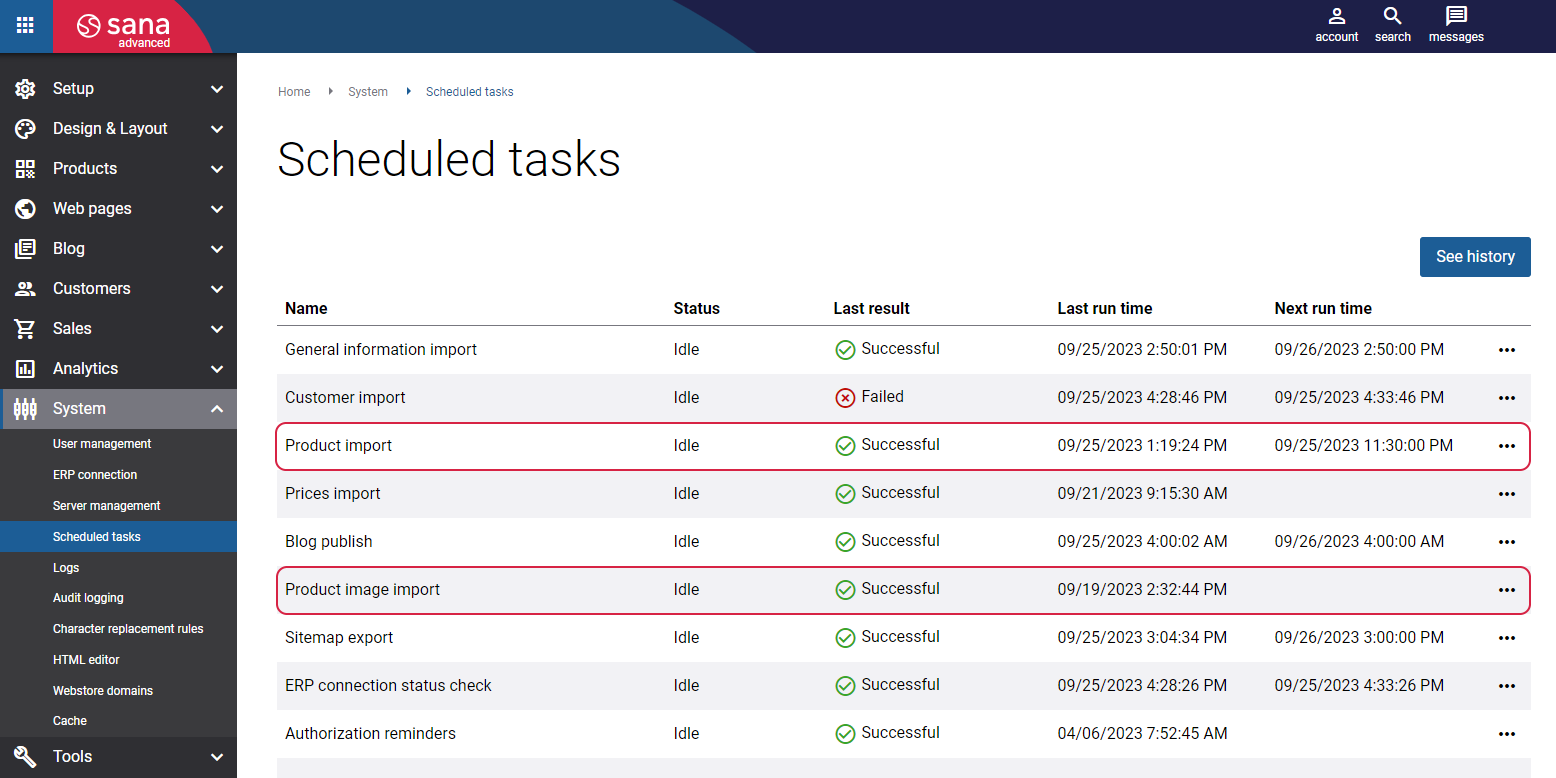
Step 2: When the Product import task is completed, start the Product image import task.
Before running the task make sure that it is configured. Click Edit on the Product image import task and enable the option Import product images from ERP. In the Separator field, enter the symbol that will be used to separate product image information in the product image filename, like item number, product variant code and order number.
For more information, see Product Image Import.
The Product image import task will retrieve all product images from Dynamics 365 for Finance and Operations, rename them according to the image file name format supported by the Sana webshop, and save all images to the ProductImages directory of the Sana Commerce solution on the Web server.
Then, the Product image import task will automatically resize all product images from the ProductImages folder and put them according to the size to the Small, Medium and Large folders. This is done because product images of three different sizes are used in the Sana webshop.
For more information about product image import task and image sizes, see Product Images.
When the Product image import task is completed, product images from Dynamics 365 for Finance and Operations will be shown in the Sana webshop.
Microsoft Dynamics 365 for Finance and Operations sends the product image modification date to Sana Commerce Cloud. This means that Sana Commerce Cloud tracks the date and time when the product image was changed and retrieves only those images that have been added or changed.