Create Blog Articles
A blog is a journal or a publication that includes a collection of short posts or articles about certain topics. Blogs are typically written in an informal or conversational style, they are organized by the date they were published, they are regularly updated, and normally users can leave comments on the posts.
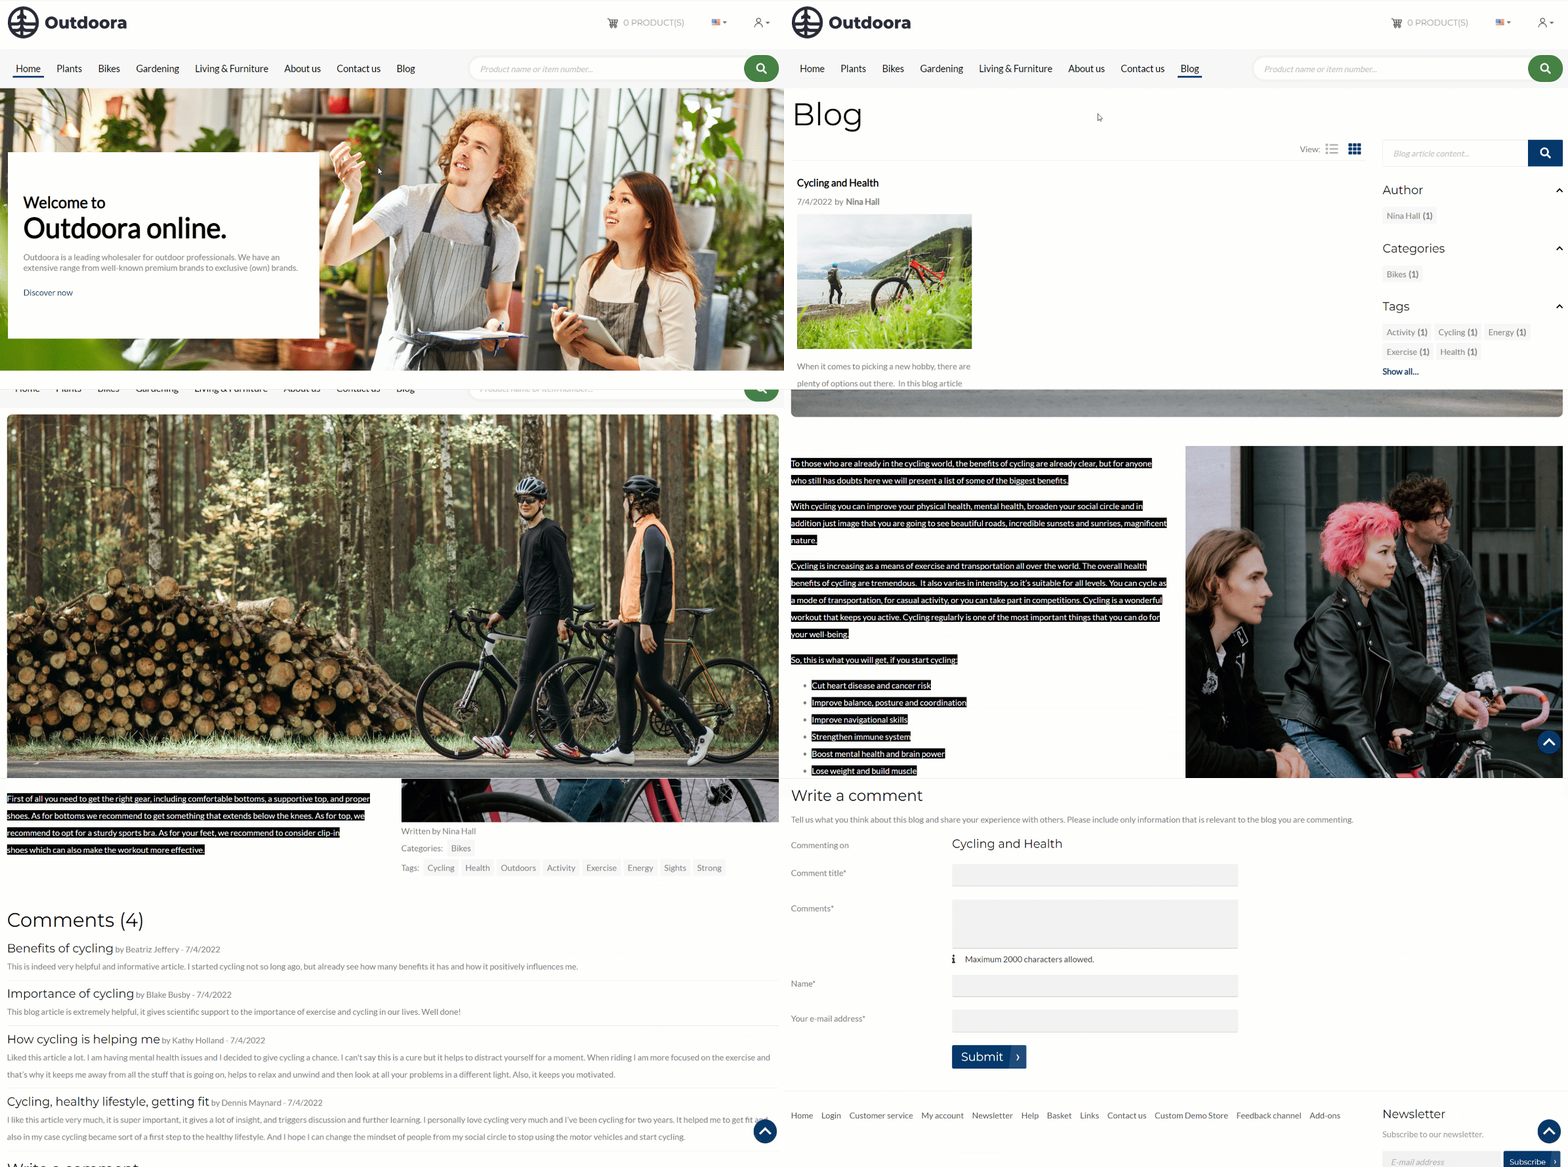
Blogging is a great way to inform your customers about your brand and promote your products and services. You can show your customers what your product is about, how to use it, and why they should buy it.
A well-managed blog can help you to generate more traffic and drive sales. Blogging is also an effective way to keep your current customers engaged, attract more potential customers and build trust with them.
The importance of having a blog in your online store is often overlooked. Here are some convincing benefits of using a blog:
-
Gives an opportunity to build reputation for your brand and also gain credibility and authority for your webstore.
-
It is a great way to increase brand awareness.
-
Can help you to improve the connection between your business and your customers.
-
Can boost your search engine optimization (SEO).
-
Helps you to stand out from your competitors.
Sana Commerce Cloud provides a feature called Blog. Using this feature, you can create an excellent, visually appealing blog and in this way demonstrate that your business is an industry leader.
There are two pages in Sana Admin which take part in the blog creation: one is the Blog article page using which you can create a blog article itself and there is also the Blog system page. You can add an overview of all blog articles you created to the Blog system page and show it in the webstore.
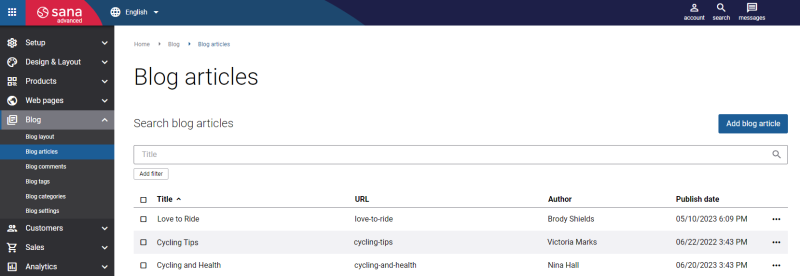
To create and manage blog articles, in Sana Admin click: Blog > Blog articles.
Here you can create a new blog article and see the list of already created blog articles.
In Sana Admin you can search and filter blog articles by title, author, URL and visibility on the Blog articles page. You can click the Add filter button and select the necessary filter options to find what you need. You can also sort the blog articles by title, URL, author, and publish date.
You can edit, delete and view a blog article in the Sana webstore. You can also duplicate a blog article and reuse it to create other blog articles.
To create a blog article, click the button Add blog article. You can create blog articles for the desktop and mobile layouts.
Set Up Basic Settings
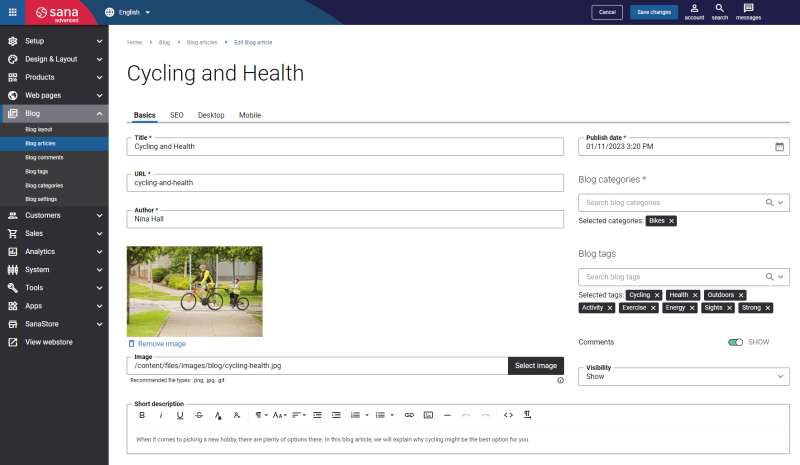
On the Basics tab, set up basic settings necessary to create a blog article.
Some of the blog article information you fill in on the Basics tab is used not only for a blog article itself but it is also used in the blog articles overview in the webstore. You can add an overview of all blog articles you created to the webstore using the Blog system page.
The table below provides the description of the settings on the Basics tab.
| Field | Description |
|---|---|
| Title | Enter the blog article title. |
| URL | Enter the blog article URL. You should specify the part of the blog URL which will be used after your webstore address.
Examples:
URL is a required field only for the blog in the default language (English). For the blog in other languages the URL field is optional. If you do not specify it, the URL of the default language (English) will be used. |
| Author | Enter the name of an author who created a blog article. |
| Image | Add an image to a blog article. This image is used for a blog article when a blog article is shown in an overview in the webstore. You can show an overview of all blog articles in the webstore using the Blog system page. |
| Publish date | Specify the date when a blog article should be published. |
| Blog categories | Add the necessary blog categories and tags to a blog article. You can create a new category or a tag or search for an existing one.
Categories and tags help to organize the blog articles and help your users find what they need. A category is a topic you address on your blog, while a tag is more specific and addresses the items you discuss in a particular blog article. |
| Blog tags | |
| Comments | Using this option, you can allow or forbid your readers to leave comments on this blog article.
You can also enable or disable comments globally on all existing blog articles using the Comments on blog article pages option on the Blog settings page. The possibility to leave comments on the blog articles will be available to users, only if the comments are enabled and the Blog article comments (list and form) content element is added to a blog article. For more information, see Process Blog Comments. |
| Visibility | Select a necessary option whether you want to show a blog article or hide it in the webstore. The available options are:
If you change page visibility, you must run the Content indexing and Sitemap export scheduled tasks to change page visibility and update sitemap. After you change blog article visibility and save it, you will see the messages prompting you to run the tasks. |
| Short description | Provide a short description of a blog article.
This description is used for a blog article when a blog article is shown in an overview in the webstore. You can show an overview of all blog articles in the webstore using the Blog system page. |
SEO
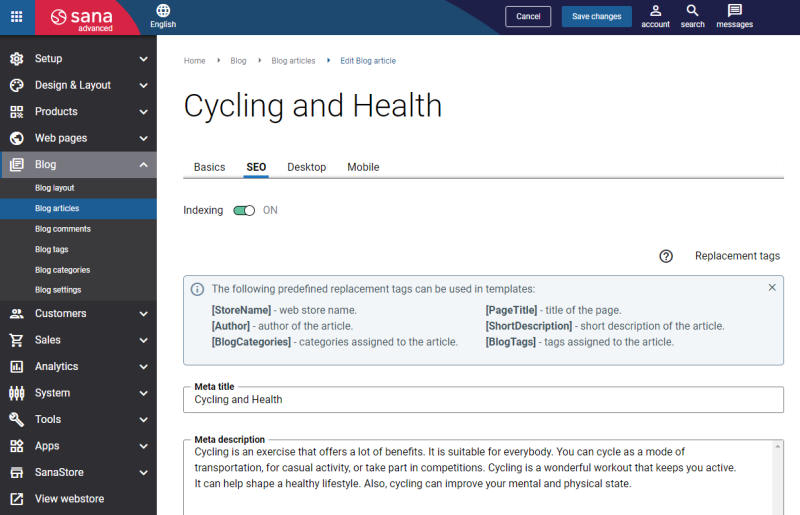
The table below provides the description of the settings on the SEO tab.
| Field | Description |
|---|---|
| Indexing | Use this option to allow or deny a blog article page to be indexed and crawled by search engine robots. |
| Meta title | Add meta title and meta description to a blog article. Here you can specify meta title and meta description for a specific blog article page, but there is also a possibility to set meta title and meta description globally for all blog article pages on the Meta data tab on the Search engine optimization page. Meta title and meta description added to a specific blog article page have higher priority. It means that if there is meta data set for a specific blog article page and there is meta data set globally for all blog article pages, the latter will be ignored.
Meta title is shown in the Web browser on a tab of the opened page. If meta title is not specified neither for a specific blog article, nor for all blog articles globally, the title of the opened page and the name of the webstore set in the Sana Admin settings will be shown on the tab of the Web browser. If you enter a meta title, you can also use the [StoreName] replacement tag. This tag will be automatically replaced with the webstore name set in the Sana Admin settings. Meta description describes your page to search engines. It should provide concise explanation of the web page contents. Meta description is used on search engine result pages to display short description for a given page. The value of the replacement tag or the meta data and description manually entered on the Meta data tab on the Search engine optimization page will be shown as the placeholder text in the Meta data and Meta description fields for each blog article page. In this way, you can clearly see which meta data is used for each page and change it if necessary. Meta title and meta description are important factors for a successful search engine optimization of your webstore. |
| Meta description |
You can use replacement tags to create meta data for a blog article page.
Add Content to a Blog Article
No doubt that blogging can benefit your online business greatly, but not just any blog can leave an impact on your customers. Blog should be well-written and well-organized in the first place and what is also important it must be styled. With the possibilities Sana Commerce Cloud provides, you can create an absolutely impressive blog and grab the attention of your customers. The variety of tools and features Sana possesses gives you flexibility in creating a good, elaborate blog.
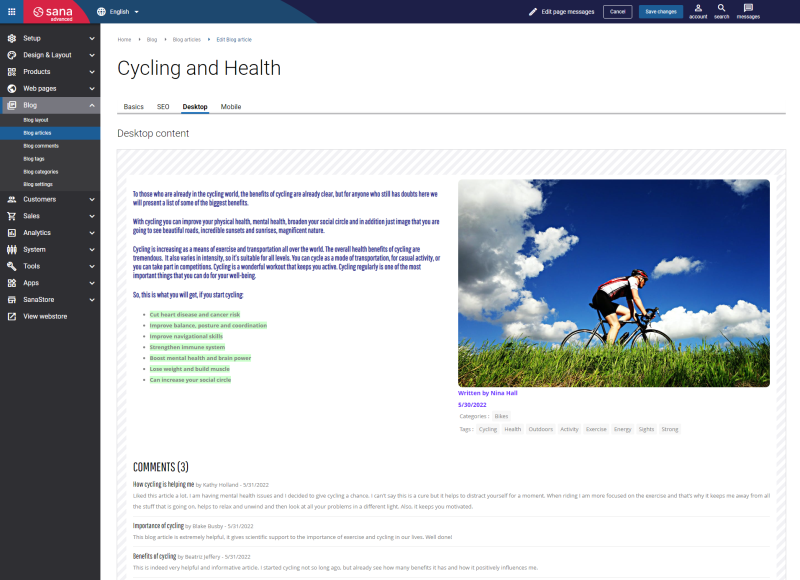
You can create content and styles of a blog article for the desktop layout on the Desktop tab and the mobile layout on the Mobile tab. When you create content of a blog article for the desktop layout, the content and styles are also used for the mobile layout.
By default, the content added for the desktop layout is also used for mobile. But you can override content for the mobile layout, for example, change the position of content elements, add or remove some content elements. If you change something on the Mobile tab, changes made after that on the Desktop tab will not affect the mobile content. From now on, editing the mobile content will be separate from editing the desktop content. Changes made to the mobile content can also be reverted to the desktop version using the Revert to desktop button on the Mobile tab.
You can add and remove various content elements on a blog article page as well as use the content management system of Sana with the page layouts, row and column settings to create high quality and impressive design for your blog article page.
There are a couple of content elements which are used specifically on a blog article page and cannot be used on other pages. You can mix the content elements which are used specifically on a blog article page with other content elements available in Sana to create an engaging blog article. You can add different content elements and place them anywhere you need on a blog article page. To learn more about blog article specific content elements, read the next section.
Content Elements Specific to the Blog Article Only
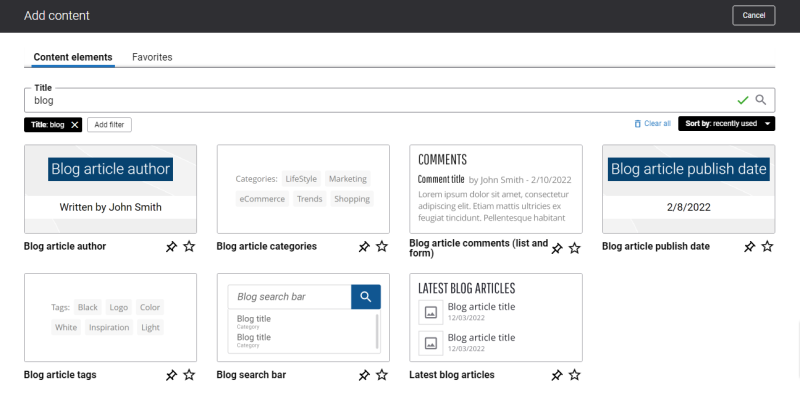
To add content elements to a blog article page, use the content element explorer. You can easily find the necessary content element using filters. In the content element explorer, click the Add filter button and select the necessary filter options to find what you need. Also, you can search for the necessary content element.
Here is the list of the blog article specific content elements:
- Blog article author
- Blog article categories
- Blog article tags
- Blog article comments (list and form)
- Blog article publish date
These content elements can be used on the blog article page only. They cannot be added to any other pages in Sana.
Besides the above-mentioned content elements, you can also use any other content elements available in Sana to enrich your blog article. For example, you can add text, images, banners, sliders, videos, tiles, etc.
Edit Blog Article Author
The Blog article author content element is used to show the name of the author who created a blog article on a blog article page. The blog article author is specified in the Blog article settings on the Basics tab.
Edit Blog Article Categories
The Blog article categories content element is used to show categories on a blog article page. You can add categories to a blog article in the Blog article settings on the Basics tab.
Edit Blog Article Tags
The Blog article tags content element is used to show tags on a blog article page. You can add tags to a blog article in the Blog article settings on the Basics tab.
Edit Blog Article Comments (List and Form)
The Blog article comments (list and form) content element is used to add a form to a blog article page. Using this form a customer can write a new comment on a blog article and see previous comments.
Your customers will be able to leave comments on a blog article only if the comments are enabled and the Blog article comments (list and form) content element is added to the blog article page. You can enable and disable comments separately for each blog article or globally for all blog articles.
For more information, see Process Blog Comments.
Edit Blog Article Publish Date
The Blog article publish date is used to show the date when a blog article was published on a blog article page. You can specify the blog article publish date in the Blog article settings on the Basics tab.
Content Element Advanced Settings
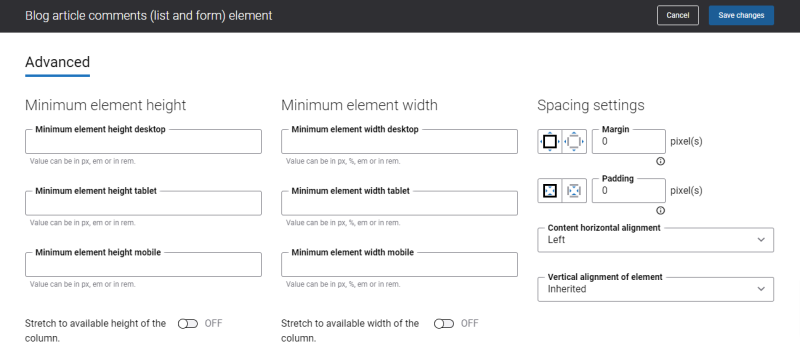
On the Advanced tab of each blog article content element, you can configure height, width, and spacing settings. These settings are the same for all content elements.
For more information about advanced settings, see Content Elements.
Change the Default Texts of the Blog Article Page
You can easily change the standard texts of a blog article page in the English language or any other installed webstore language.
Standard texts which are a part of the content elements on a blog article page can be changed either in the Page elements & messages or In-site editor.
