Okta Workforce Identity Cloud
With Okta Workforce Identity Cloud, your customers, employees, contractors, or business partners can securely log in to the Sana webstore and other applications with their Okta accounts using single sign-on (SSO). It provides a simple, secure, and seamless login to the Sana webstore using Okta accounts and enforcing all Okta security policies.
To allow your webstore customers to log in to the Sana webstore with their Okta accounts, you will need to:
- Create a Sana Commerce Cloud application in the Okta Admin Console.
- Add users (customers) to the Okta Admin Console.
- Assign users or groups to the application.
You will also need to connect Sana Commerce Cloud to Okta, create shop accounts and modify the Login page of your webstore. For more information, see Single Sign-On.
Create an App Integration in Okta
The app is needed to connect Sana Commerce Cloud to Okta.
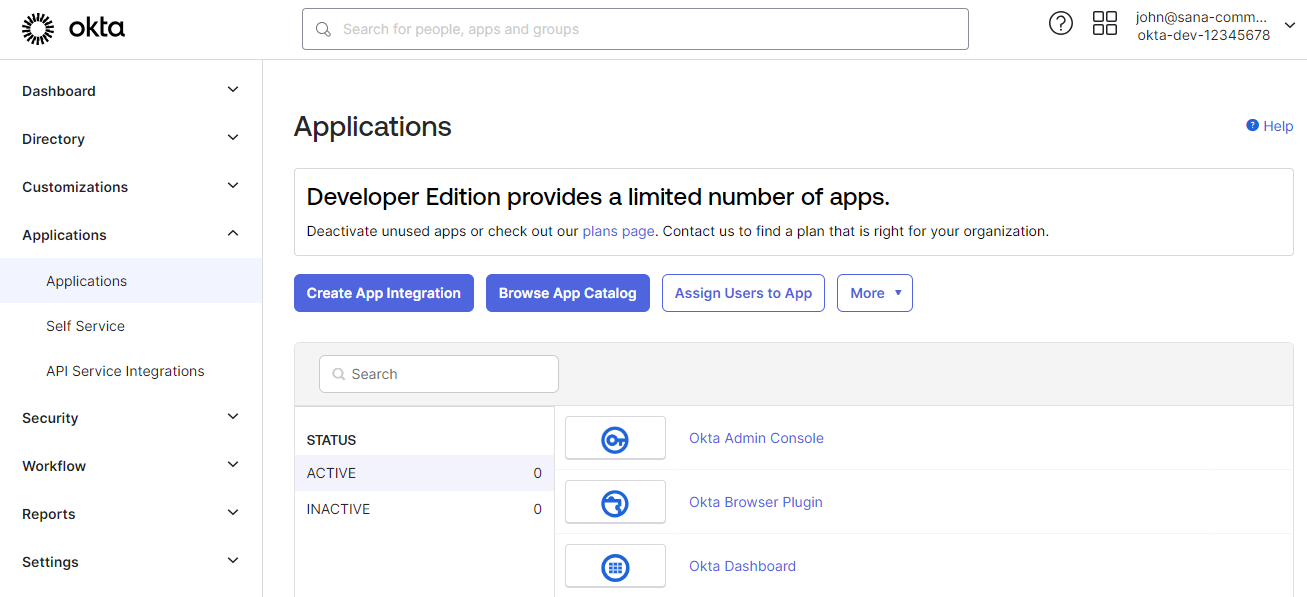
Step 1: Sign in to the Okta Admin Console.
Step 2: Go to: Applications > Applications.
Step 3: Click Create App Integration.
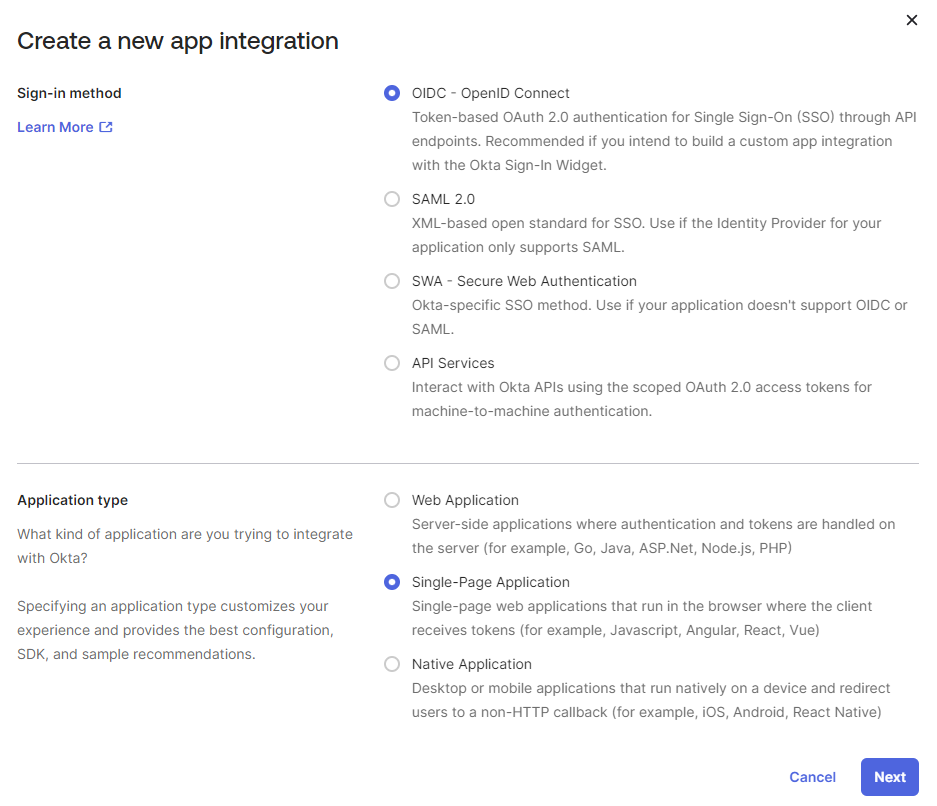
Step 4: On the Create a new app integration page, select OIDC - OpenID Connect sign-in method.
Step 5: Choose Single-Page Application as the application type and click Next.
Step 6: In General Settings, enter a name for your app integration, for example, Sana Commerce Cloud, Sana, your webstore, or company name.
Step 7: Enable the Authorization Code and Refresh Token grant types.
Step 8: Add your Sign-in redirect URIs and Sign-out redirect URIs.
The sign-in redirect URI is where Okta sends the authentication response and ID token for the sign-in request. After Sana Commerce Cloud contacts Okta to close the user session, Okta redirects the user to the sign-out redirect URI.
If you have multiple Sana Commerce Cloud webstores and want to use single sign-on for all your webstores, you must add all your webstore URLs.
- Sign-in redirect URI format: https://your-webstore-domain.com/profile/login/callback
- Sign-out redirect URI format: https://your-webstore-domain.com/profile/logout/callback
If you have a multi-lingual webstore, you need to add all webstore URLs for all languages, for example:
https://your-webstore-domain.com/de-de/profile/login/callback
https://your-webstore-domain.com/de-de/profile/logout/callback
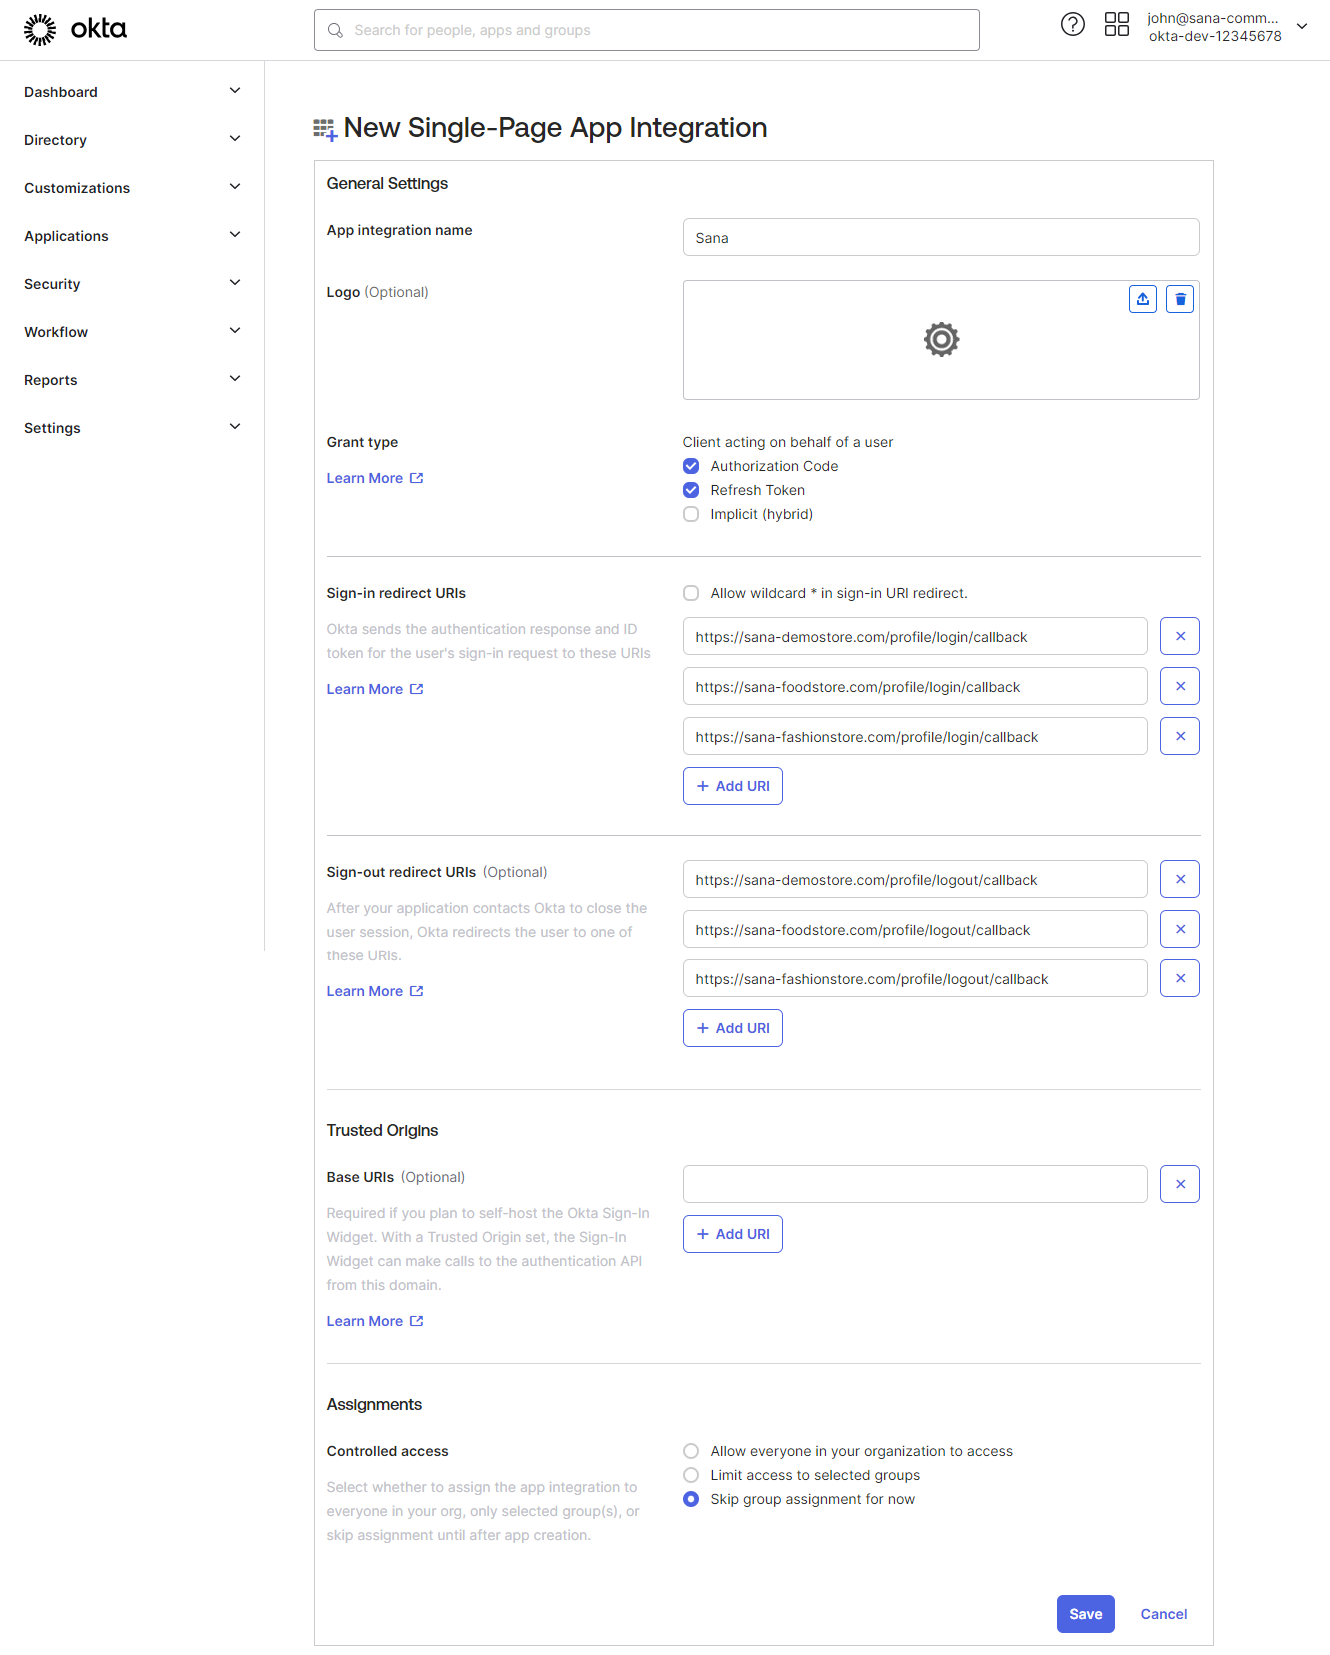
Step 9: In Assignments, assign the app integration to a specific user group, grant access to everyone, or skip it and do it later.
Step 10: Click Save.
When the app is created, you can configure any other settings. For more information about app settings in Okta, see Create OIDC app integrations on the Okta website.
In the app details in Okta, see the Client ID and URL in the user profile menu. You will need the client ID and URL to connect your Sana Commerce Cloud application to Okta. Thus, copy these values.
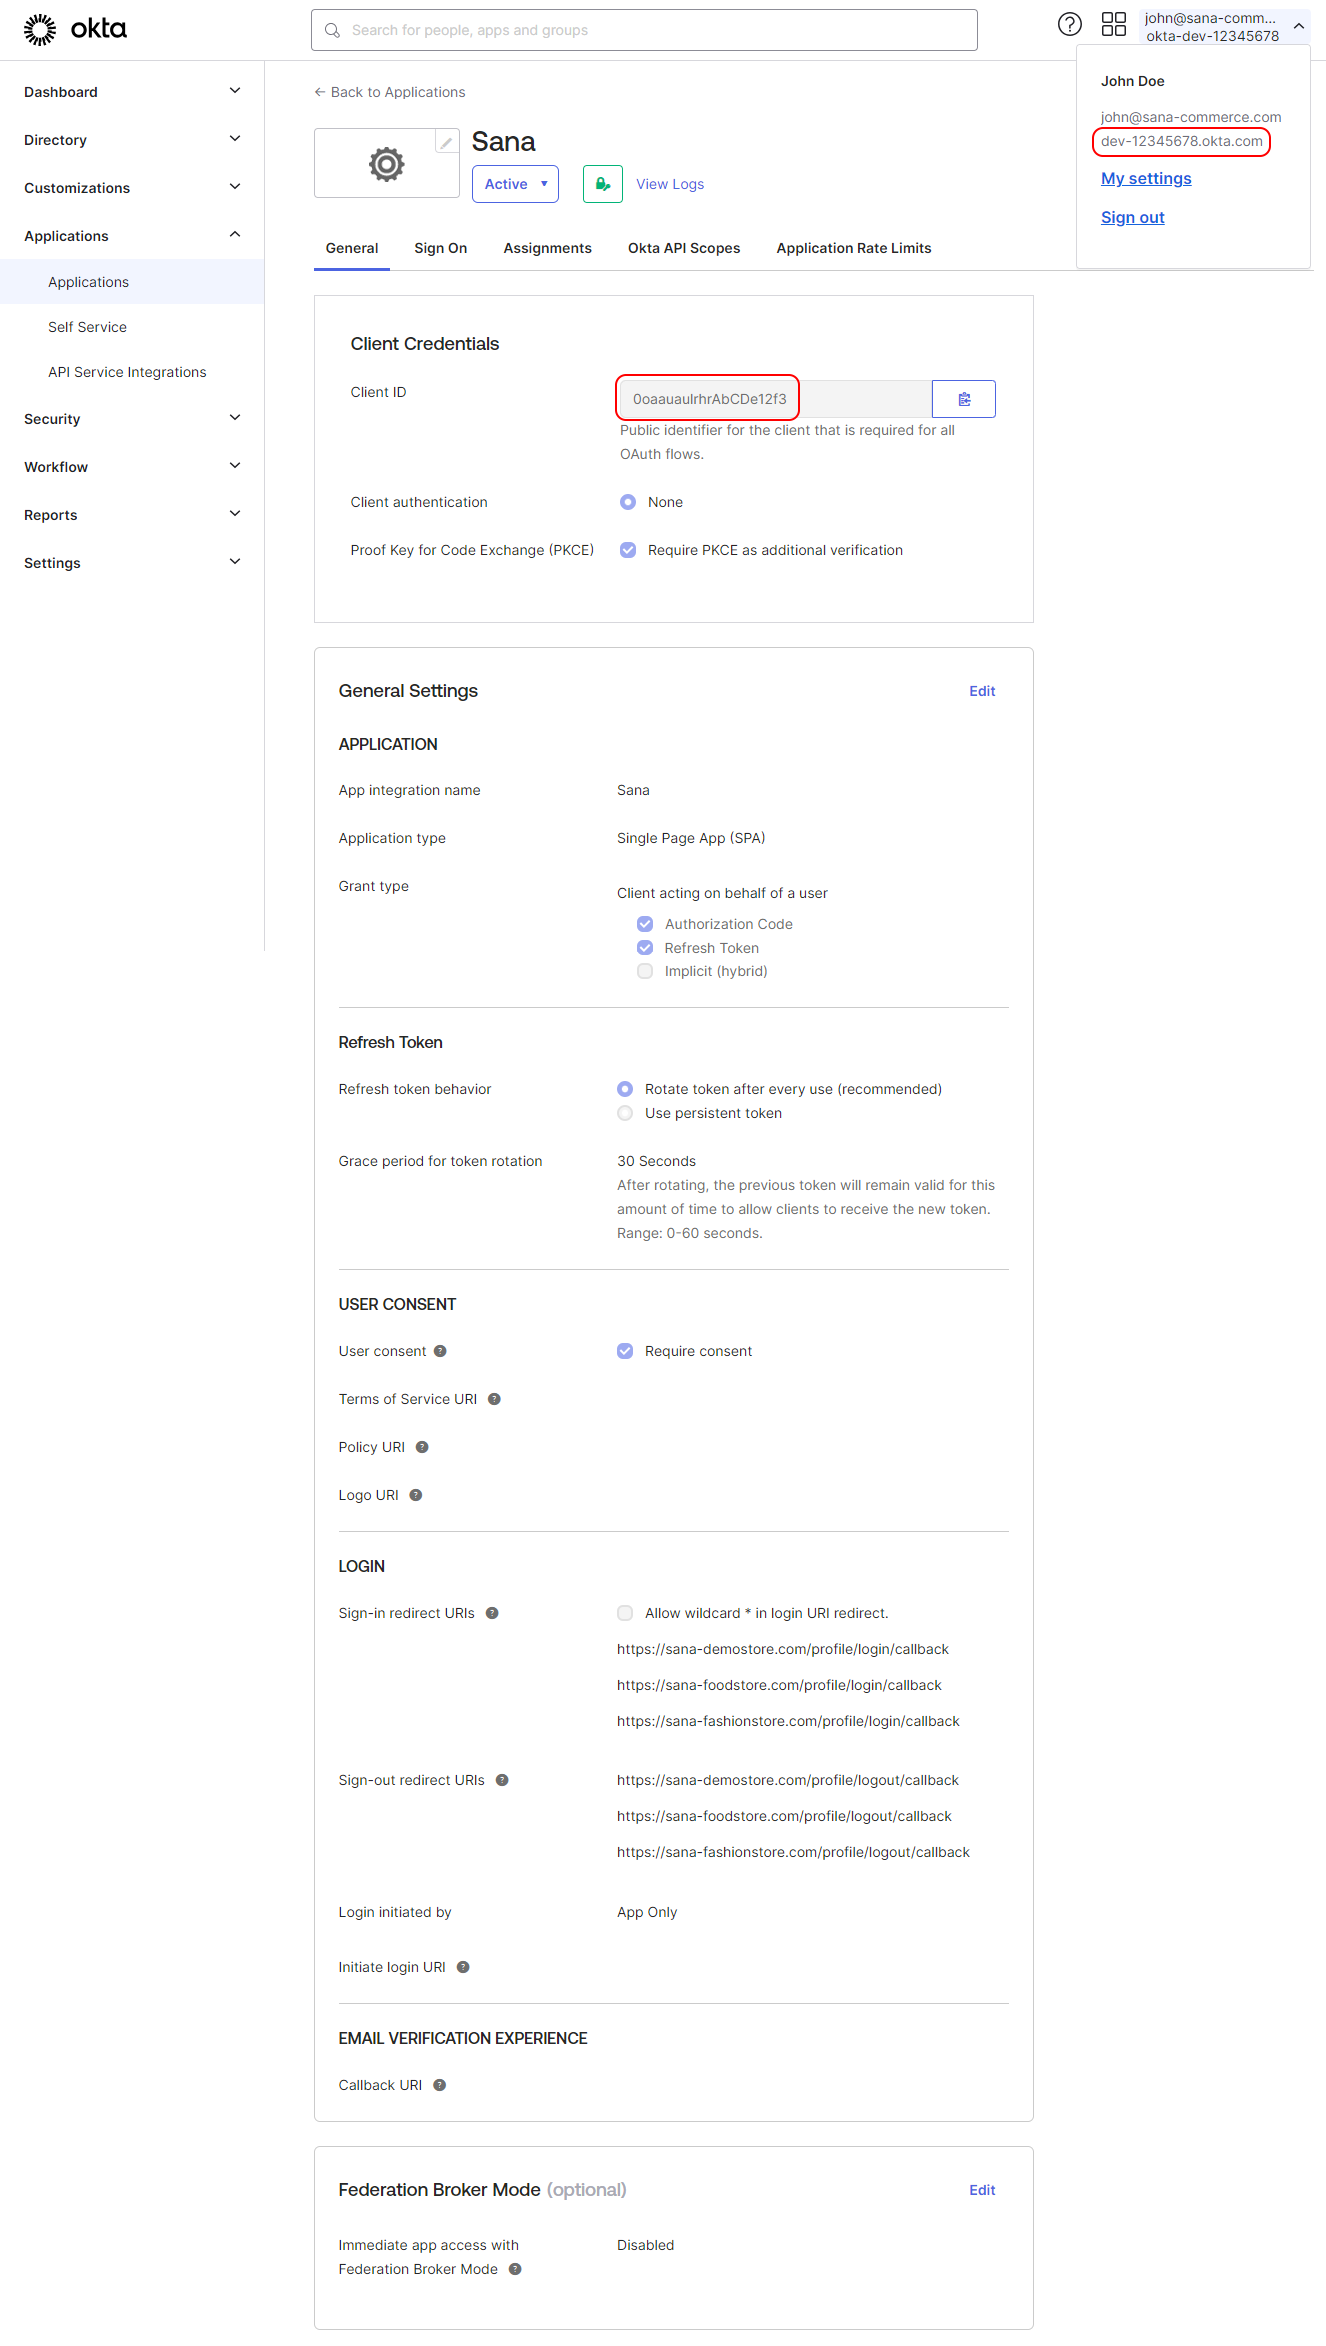
To connect Sana Commerce Cloud to Okta, you will need to enter your application’s client ID and URL in Sana Admin.
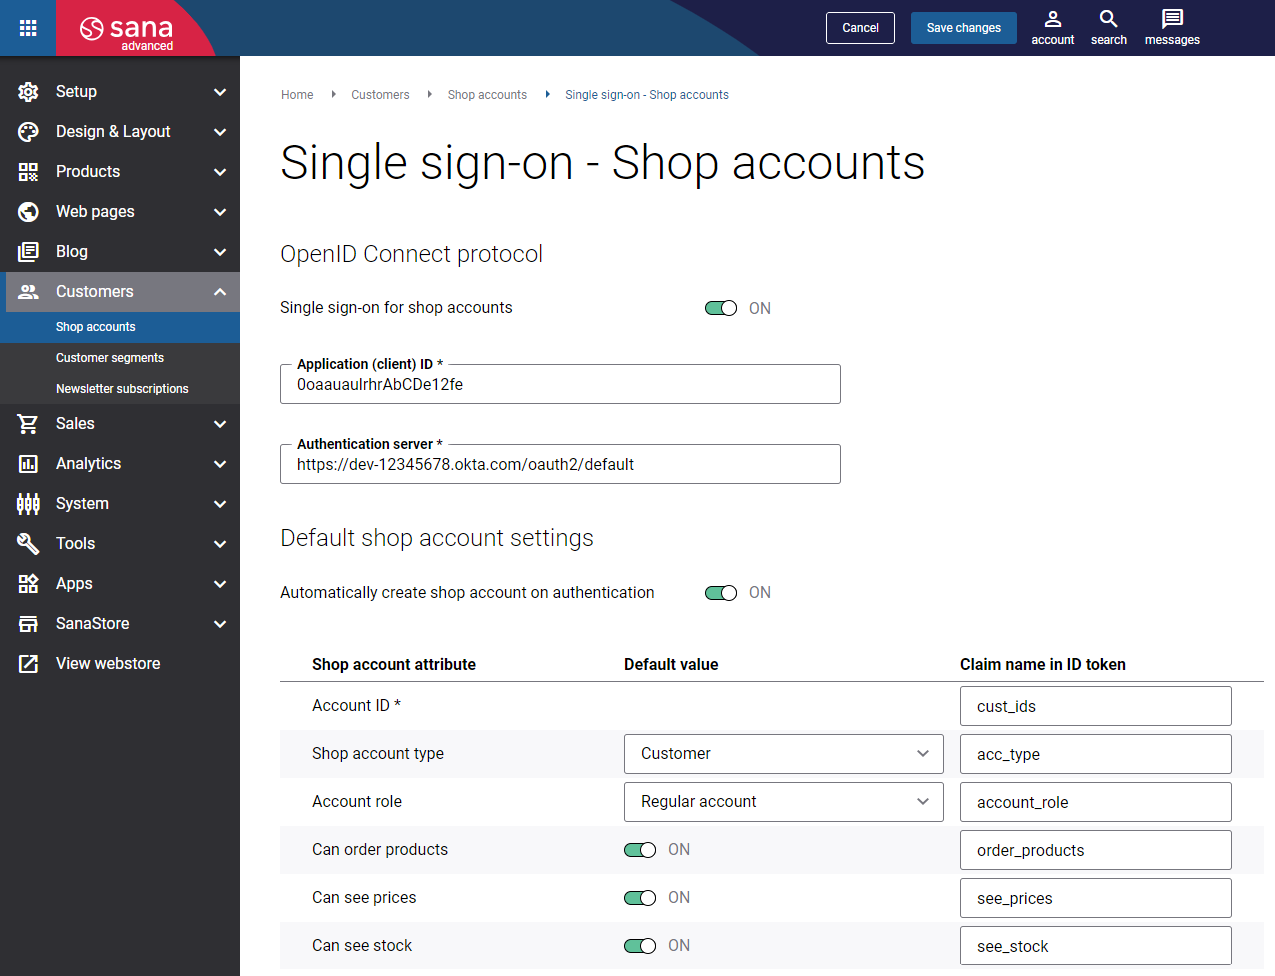
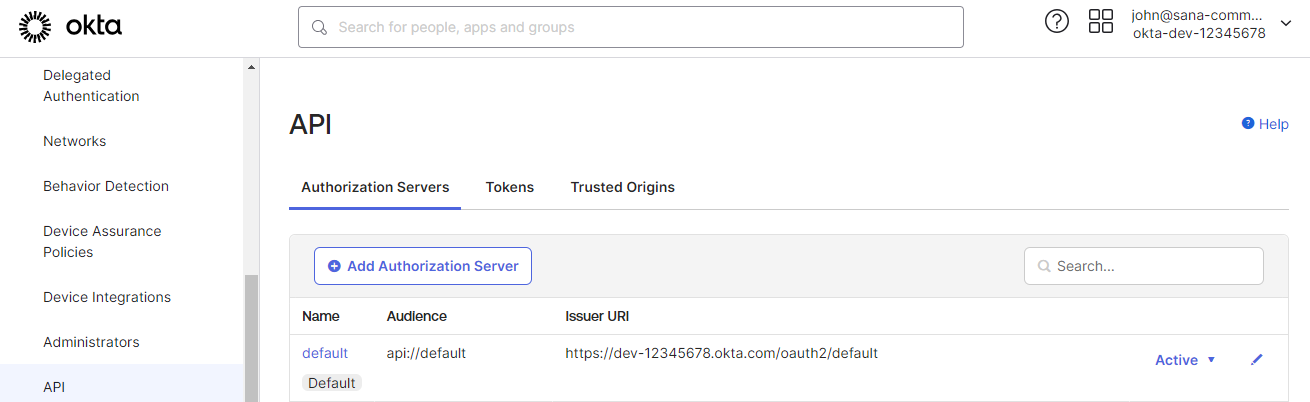
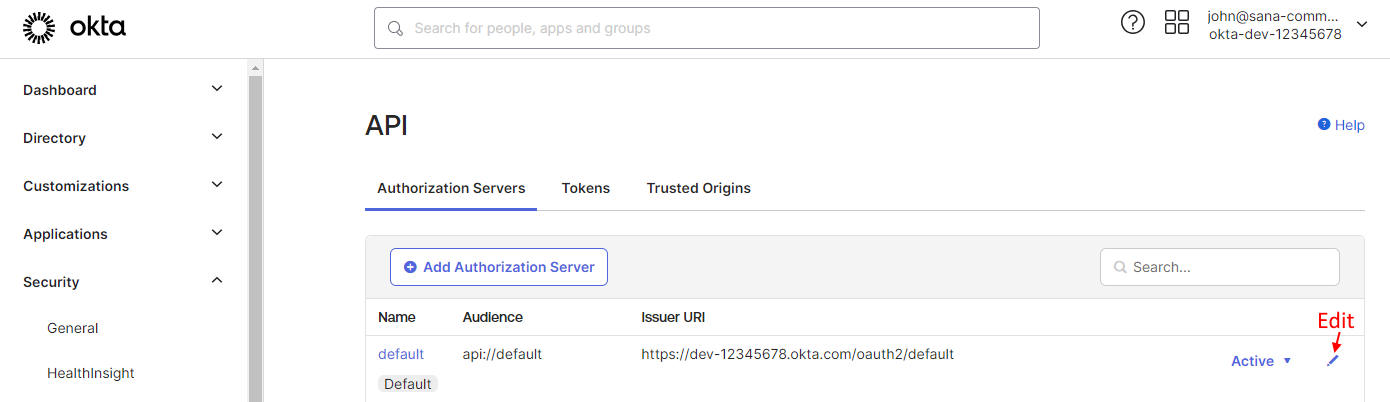
If you enable the option Automatically create shop account on authentication, you must copy the authentication server URL from the following location in the Okta Admin Console: Security > API > Authorization Servers.
Example: https://dev-12345678.okta.com/oauth2/default
For more information, see Connect Sana Commerce Cloud to Your Identity Provider and Create Shop Accounts in Sana Admin.
User Accounts
You can create new users (people) to Okta or use existing users to allow your webstore customers to log in to the Sana webstore with their Okta accounts.
Go to the Directory menu item to create and manage users (people) and groups in the Okta Admin Console.
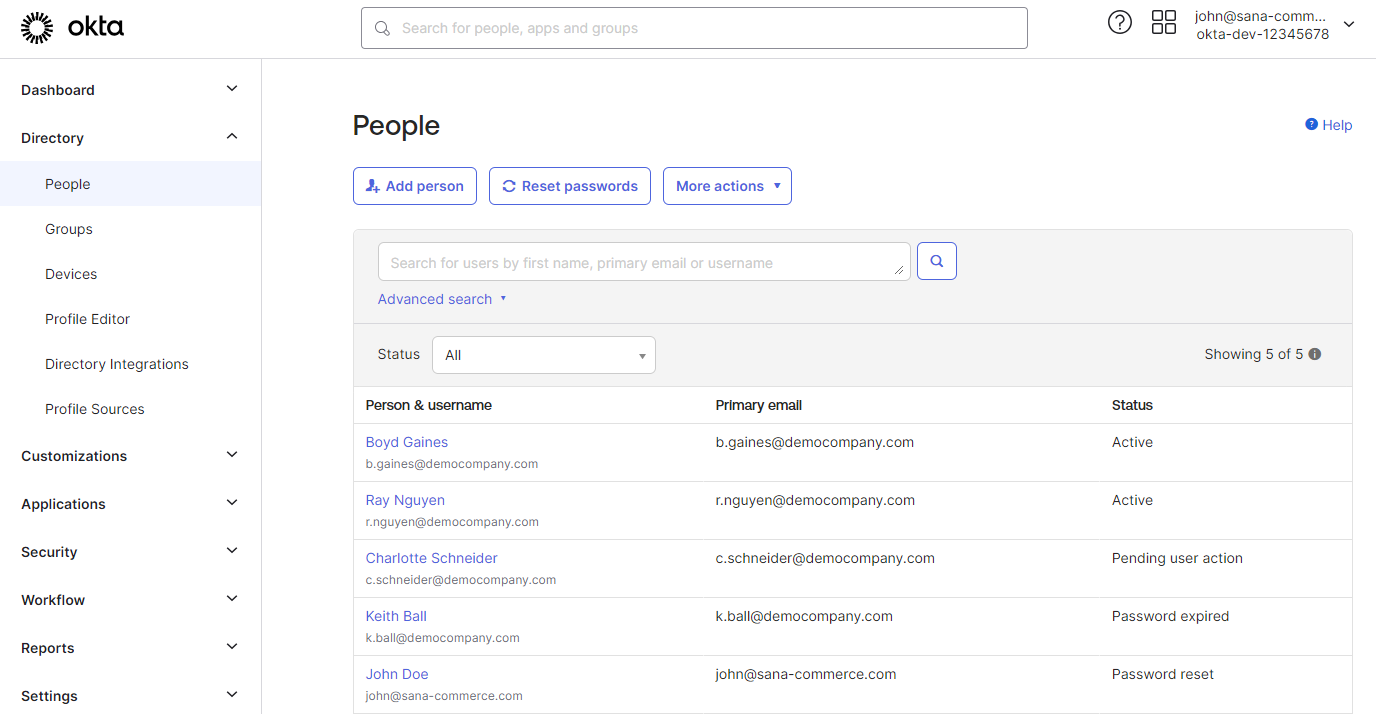
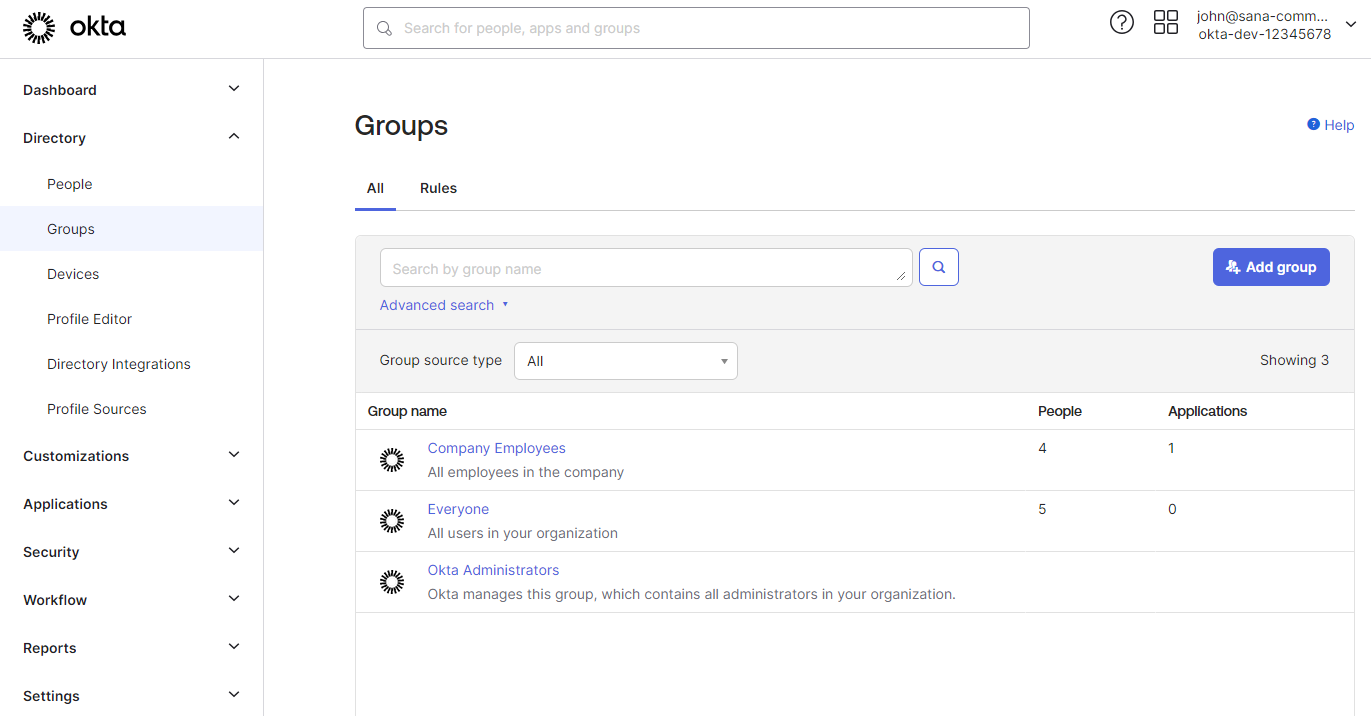
For more information about how to create and manage users and groups in the Okta Admin Console, see User management on the Okta website.
You must assign your application in Okta to individual users (people) or entire groups so that they can access it.
There are several ways to assign users (people) and groups to applications in the Okta Admin Console. You can do it from the user or group details. You can also do it from the list of applications or application details.
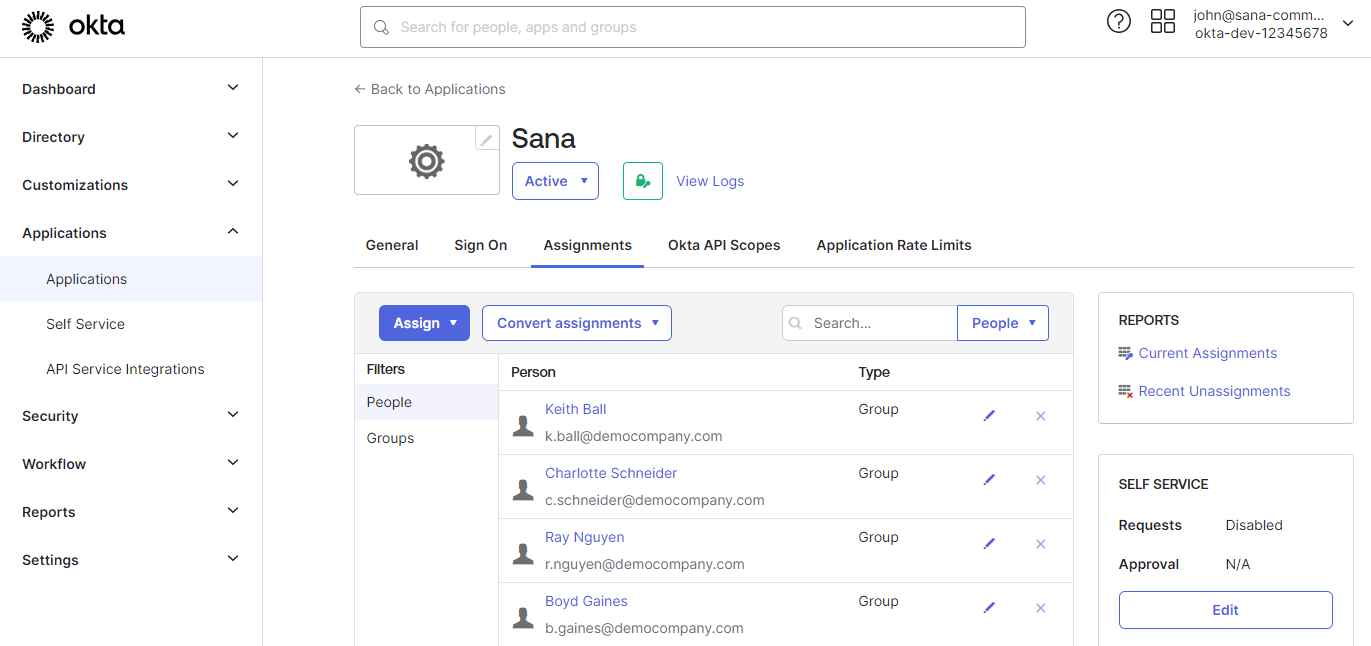
For more information about how to assign applications to users and groups, see Assign app integrations, Assign applications to users, and Assign a single app to groups on the Okta website.
Claims for Shop Accounts Creation
Claims are pieces of information about a user that the identity provider sends to the application. They are necessary to automatically create shop accounts in Sana Admin for customers who log in to the Sana webstore with their identity provider accounts.
For more information, see Single Sign-On: Create Shop Accounts in Sana Admin.
How to Configure Claims
Step 1: Sign in to the Okta Admin Console.
Step 2: Go to: Security > API.
Step 3: Edit the authorization server.
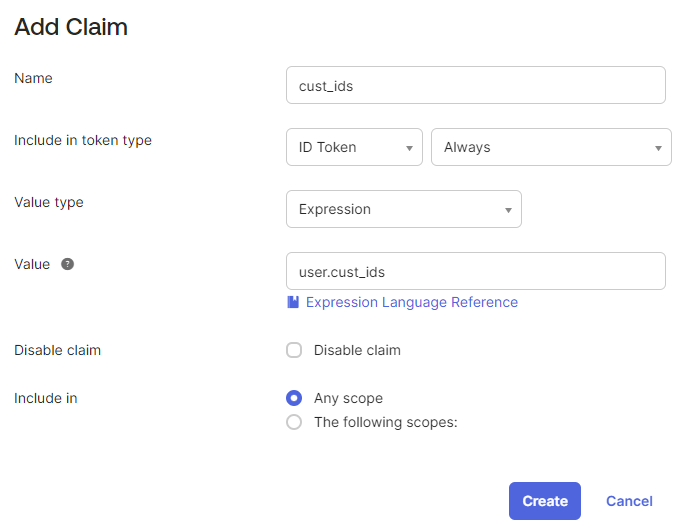
Step 4: On the Claims tab of the authorization server, click Add Claim.
You must create the claims that you need to automatically create shop accounts in Sana Admin when customers log in to the Sana webstore for the first time with their Okta accounts.
You can enter any claim name. In the table below you can see examples of claim names that you can also use. The claim names you specify must also be used to set up claims in Sana Admin.
You can create claims for the following shop account settings:
- Account (customer) ID
- Shop account type
- Account role
- Can order products
- Can see prices
- Can see stock
| Shop account settings | Claim name | Value | Include in token type |
|---|---|---|---|
| Customer ID | cust_ids | user.cust_ids | ID Token - Always |
| Shop account type | acc_type | user.acc_type | ID Token - Always |
| Account role | account_role | user.acc_account_role | ID Token - Always |
| Can order products | order_products | user.order_products | ID Token - Always |
| Can see prices | see_prices | user.see_prices | ID Token - Always |
| Can see stock | see_stock | user.see_stock | ID Token - Always |

Step 5: Go to: Directory > Profile Editor.
Step 6: Click on the User (default) profile.
Step 7: On the Profile editor page, click Add Attribute.
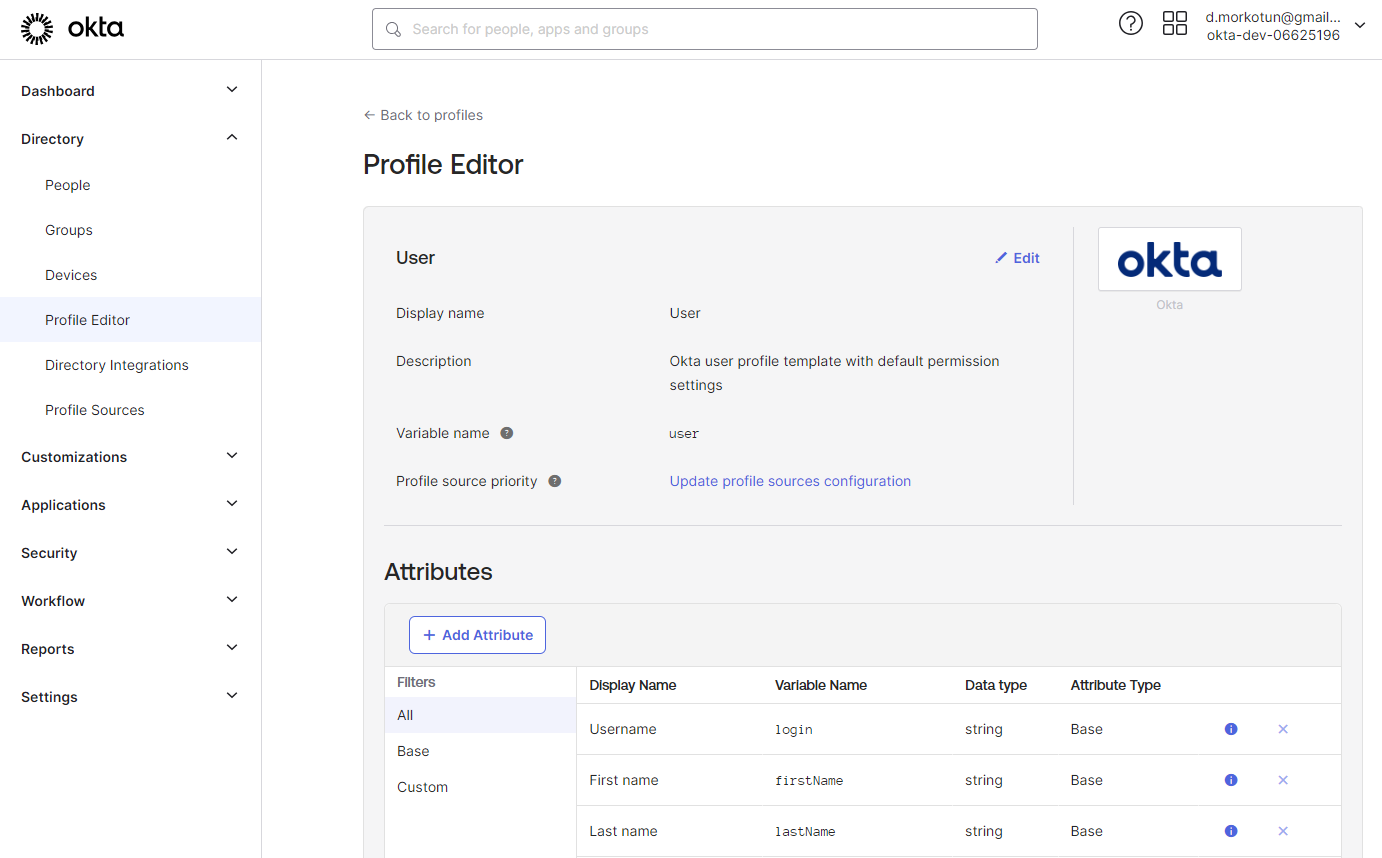
You must add attributes to the default user profile for the created claims. The variable name of the attribute must be the same as the claim name.
| Display name | Variable name | Data type |
|---|---|---|
| Customer ID | cust_ids | string array |
| Shop account type | acc_type | string |
| Account role | account_role | string |
| Can order products | order_products | boolean |
| Can see prices | see_prices | boolean |
| Can see stock | see_stock | boolean |

These attributes are shown in the user profiles. After adding them, you can specify the necessary values for each attribute in the user profiles that will be used to create shop accounts in Sana Admin.
Go to: Directory > People. Edit the profiles of the necessary users and enter the required user details.
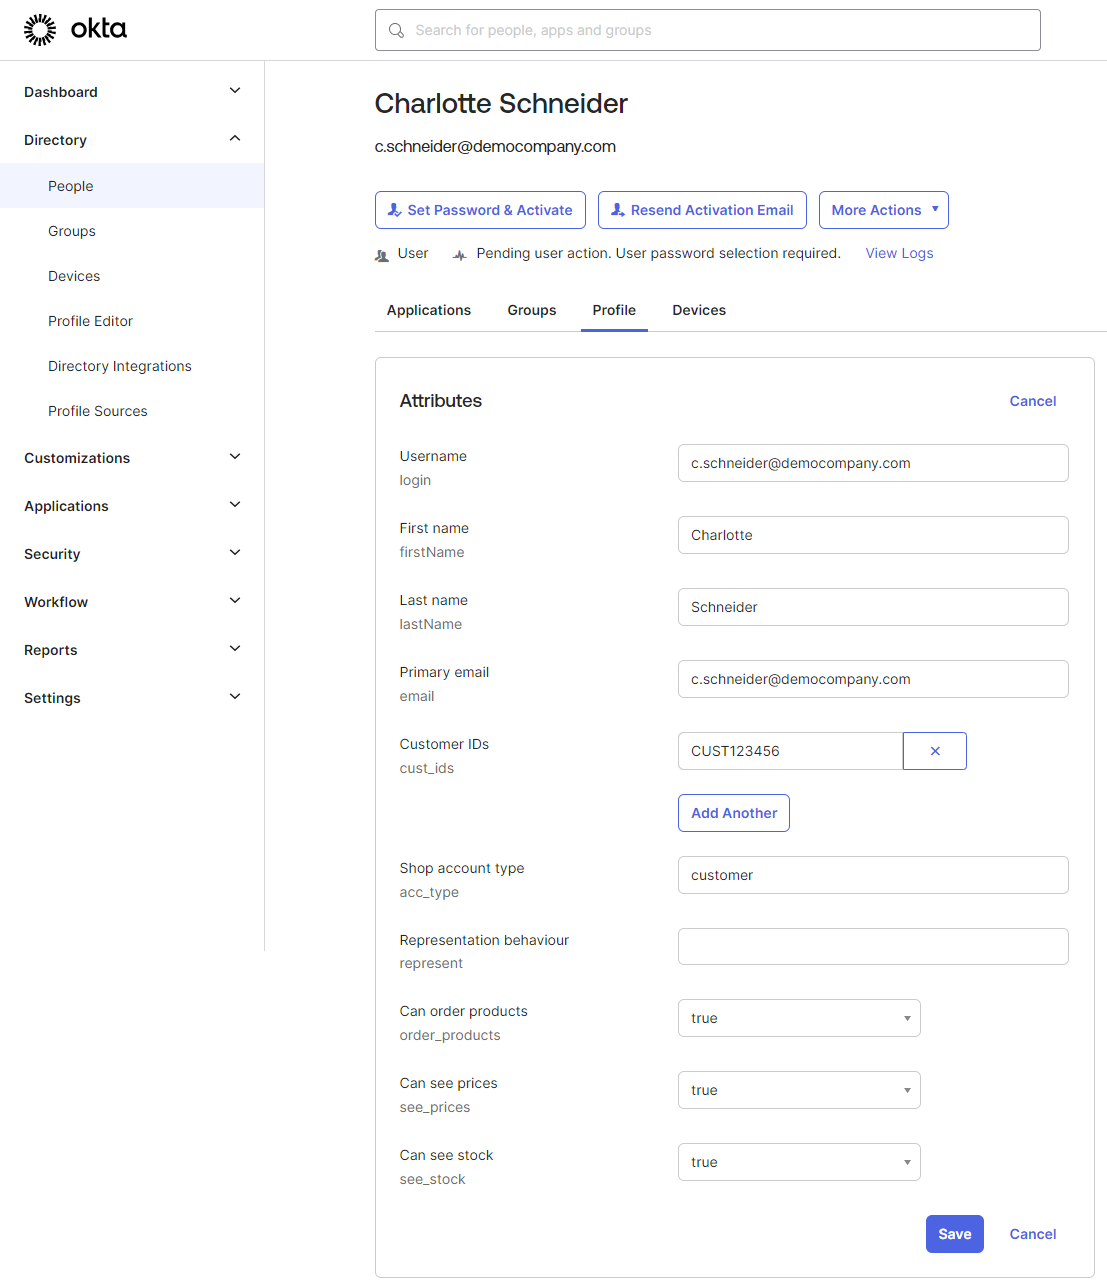
| User profile attributes | Values |
|---|---|
| Customer ID | Customer ID in ERP
One to Multi relation is supported. You can add as many customer IDs to the user profile as you need. |
| Shop account type |
|
| Account role |
|
| Can order products |
|
| Can see prices |
|
| Can see stock |
|
Create an Access Policy
Step 1: Sign in to the Okta Admin Console.
Step 2: Go to: Security > API.
Step 3: Edit the authorization server.
Step 4: On the Access Policies tab of the authorization server, click Add Policy.
Step 5: Enter a policy Name and Description.
Step 6: Click Create Policy.
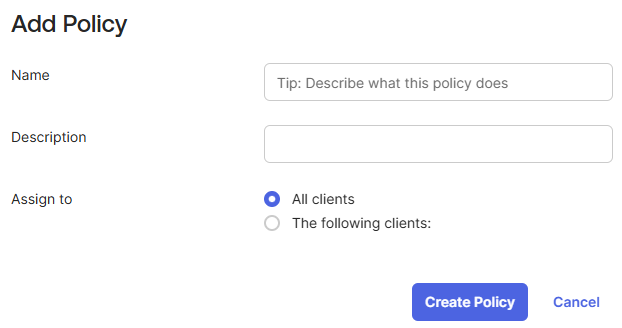
Step 7: After the policy is created, click Add rule.
Step 8: Create a rule.
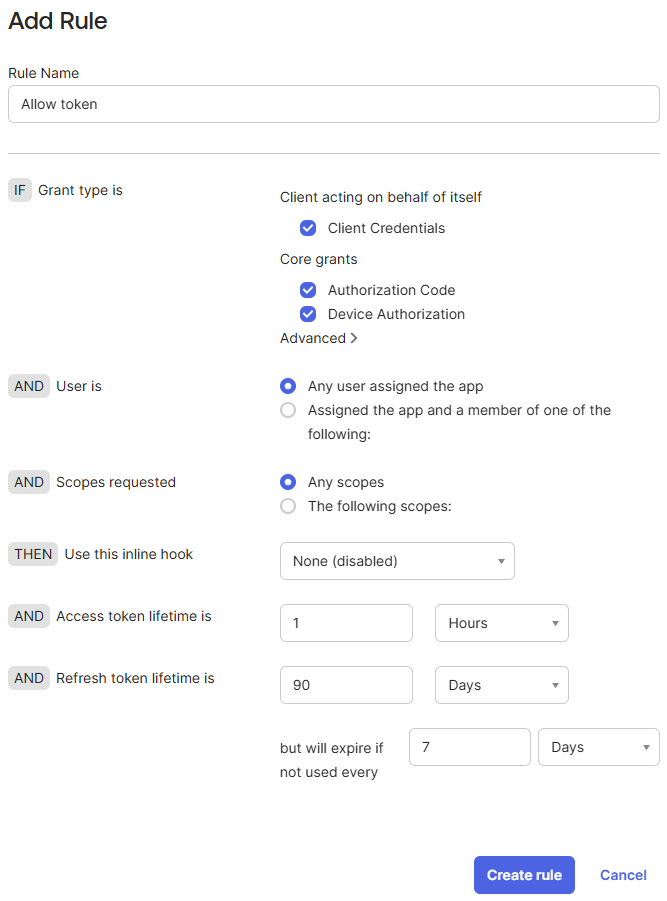
For more information, see Create access policies on the Okta website.
Shop Account Roles
Sana Commerce Cloud supports shop account roles when using single sign-on to log in to the Sana webstore with the Okta accounts. You can use claims in the Okta Admin Console to automatically create shop accounts with the necessary role (regular account, account manager, sub-account) in Sana Admin when customers log in to the Sana webstore for the first time with their Okta account.
When a customer logs in to the Sana webstore for the first time with the Okta account and the shop account is created, it can be changed in Sana Admin. The claims in the Okta Admin Console are only used to create shop accounts.
Limitations
- The account manager cannot change the name and e-mail of sub-accounts logged in to the Sana webstore with their Okta accounts. This information is stored in the user details in the Okta Admin Console.
- The account manager cannot remove sub-accounts logged in to the Sana webstore with their Okta accounts.
Good to Know
If you use a single sign-on for your webstore customers with Okta:
- You can set up any security policies and restrictions in Okta, such as multi-factor authentication (MFA) and others.
- You can activate and deactivate the account. The deactivated users cannot log in to the applications.
- Okta controls user password policies, such as password reset and password expiration. If customers use their Okta credentials to log in to the Sana webstore, they cannot use the forgot password functionality of Sana. Instead, they can use Okta’s functionality, which is managed in the Okta Admin Console.