Google Sheets
To use Google Sheets actions, you must connect them to a Google account that has edit access to the target spreadsheet. Service account credentials must be created in the Google Cloud Console and stored as a secret. For more information, see Access Google Sheet Data Using a Service Account.
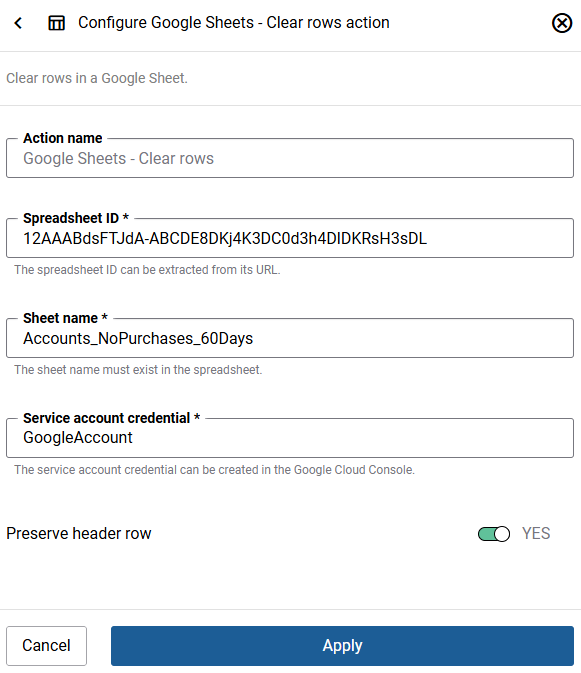
Google Sheets - Clear Rows
Clears the contents of rows in a specified Google Sheet. Use this action to reset a sheet before appending fresh data, ensuring the sheet always contains only the most current information.
| Field | Description |
|---|---|
| Step name | A descriptive name for this action. You can use the default name or enter your own. |
| Spreadsheet ID | The unique identifier of your Google Sheet. You can find this in the sheet’s URL - the long string of characters between /d/ and /edit.
|
| Sheet name | The name of the sheet tab to clear. The sheet must exist in the spreadsheet. |
| Service account credentials | The credentials for your Google service account, stored as a secret. Storing credentials in plain text violates security policies. |
| Preserve header row |
|

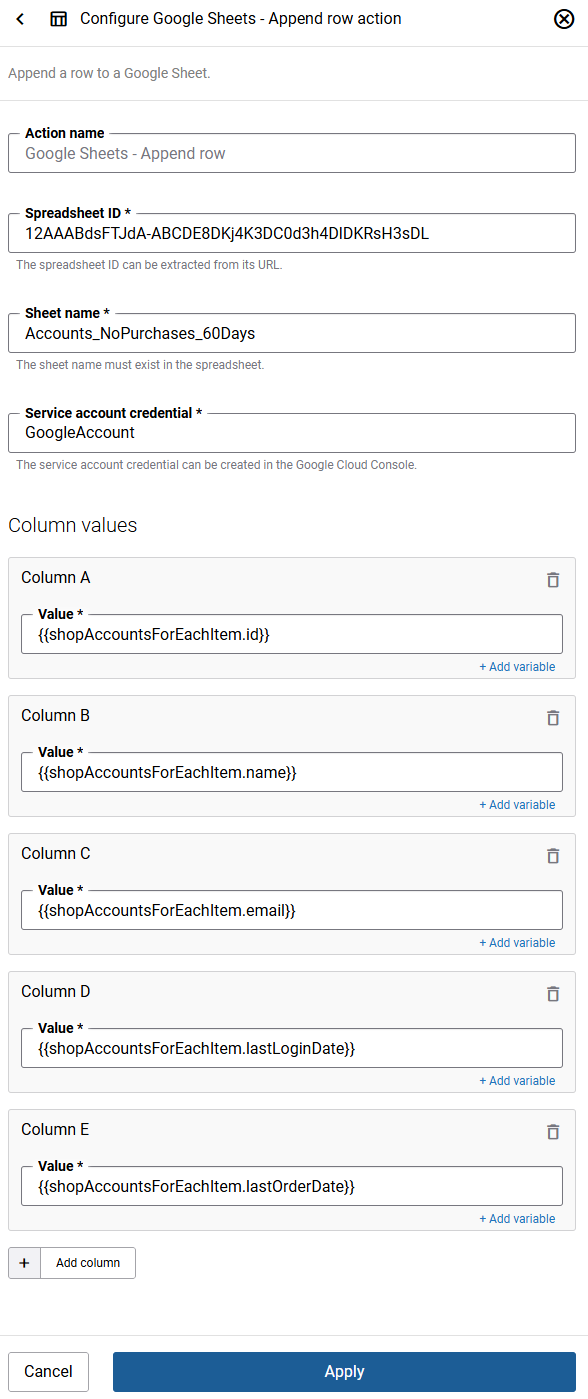
Google Sheets - Append Row
Appends a new row of data to a specified Google Sheet. Use this action to export webstore data, such as order information or customer details, into a spreadsheet.
| Field | Description |
|---|---|
| Step name | A descriptive name for this action. You can use the default name or enter your own. |
| Spreadsheet ID | The unique identifier of your Google Sheet. You can find this in the sheet’s URL - the long string of characters between /d/ and /edit.
|
| Sheet name | The name of the specific sheet tab to append a row to. The sheet must exist in the spreadsheet. |
| Service account credentials | The credentials for your Google service account, stored as a secret. Storing credentials in plain text violates security policies. |
| Column values | The values to write into each column of the new row. You can add up to 26 columns (A-Z). Each value can be static text or a Liquid variable taken from workflow data. |
Access Google Sheet Data Using a Service Account
To use Google Sheets actions, you must connect them to a Google account that has edit access to the target spreadsheet. Service account credentials must be created in the Google Cloud Console and stored as a secret.
Enable Google Sheets API
To enable the Google Sheets API for your project:
Step 1: Go to the Google Cloud Console.
Step 2: From the projects list, select a project or create a new one.
Step 3: Open the console left side menu and select APIs & Services, and then select Library.
Step 4: Click the API you want to enable or use the search field to find it.
Step 5: Click Enable.
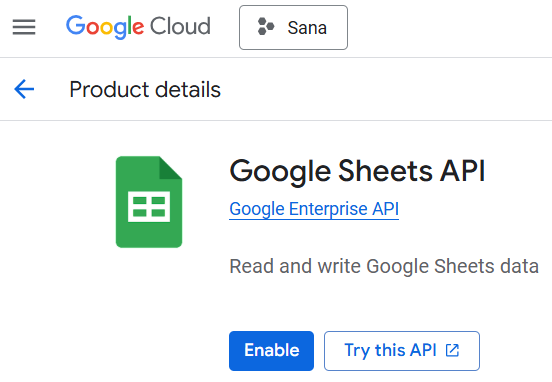
With the Google Sheets API enabled, Sana’s Google Sheets actions can now interact with Google Sheets data.
Create a Service Account and Generate a Key File
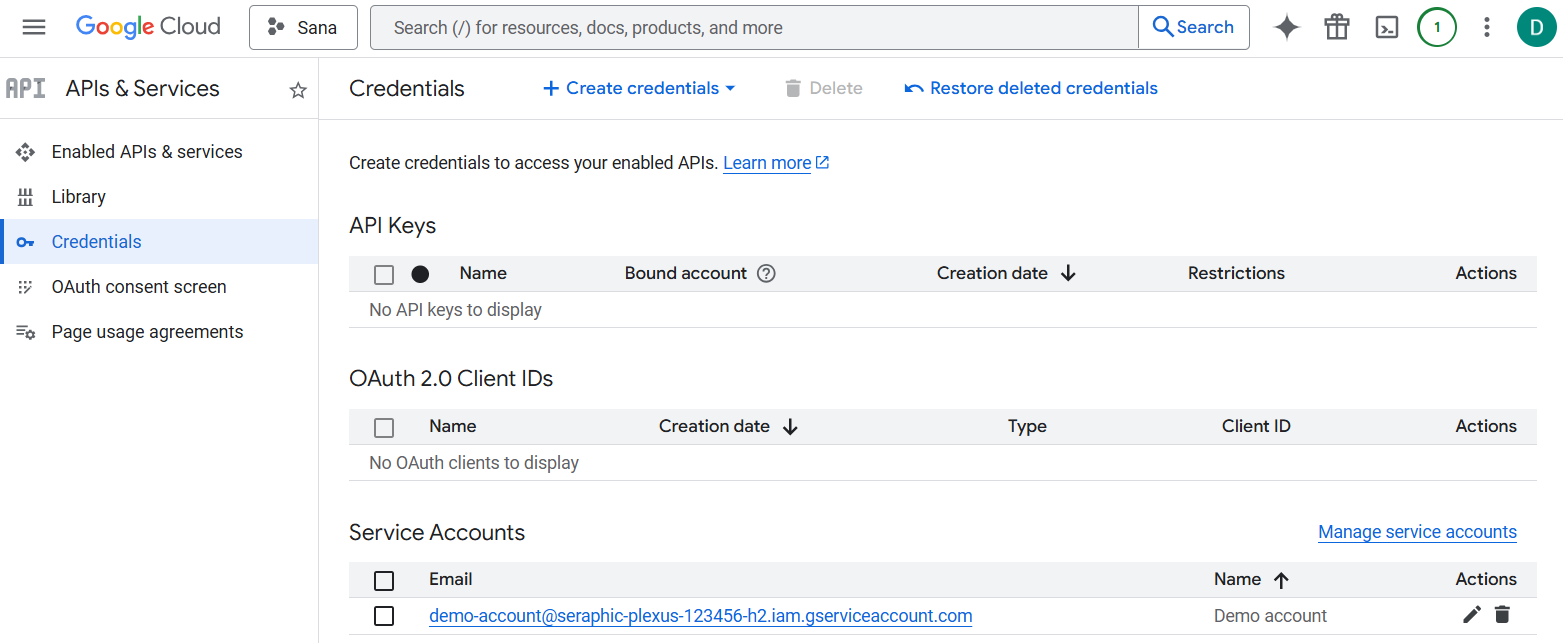
Step 1: In the Google Cloud Console go to: API & Services > Credentials.
Step 2: Click on Create credentials and select Service account.
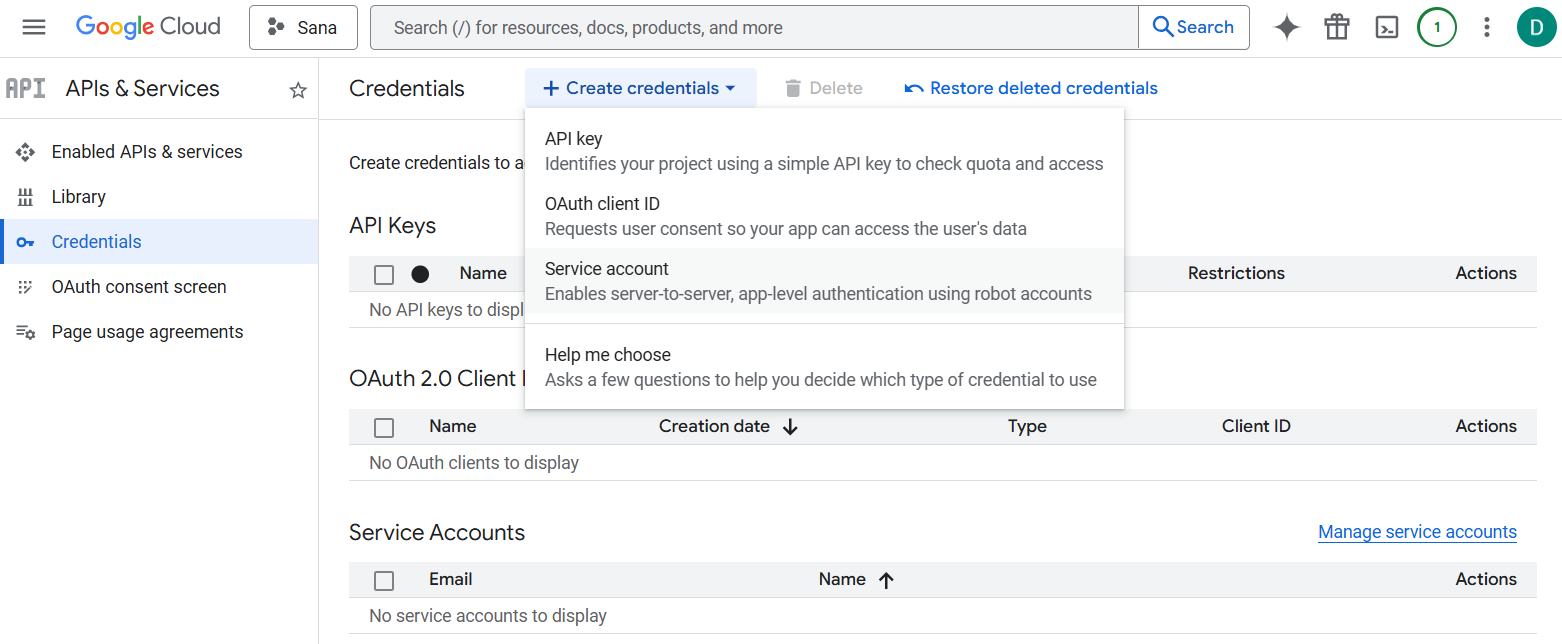
Step 3: Fill in the required fields and settings and create the service account.
For more information, see Create a service account.
You should now see your service account listed.
Step 4: Click on the service account you have just created.
Step 5: Click Add key and select Create new key. Select the JSON key type and click Create.
The JSON key file will be downloaded to your computer. You must store it securely. It contains sensitive credentials that provide access to your Google Cloud resources.
Step 6: Open the downloaded JSON key file in any text editor, for example, Notepad.
Step 7: Copy the entire contents of the JSON key file.
In Sana Admin, create a secret. Paste the copied JSON content as the secret value. Set the Secret category to Google Sheets.
This secret can then be referenced in your Google Sheets workflow actions, in the Service account credentials field.
Share the Spreadsheet with the Service Account E-Mail
The service account acts as a virtual user. To allow it to access your spreadsheet, you must share the file with its e-mail address.
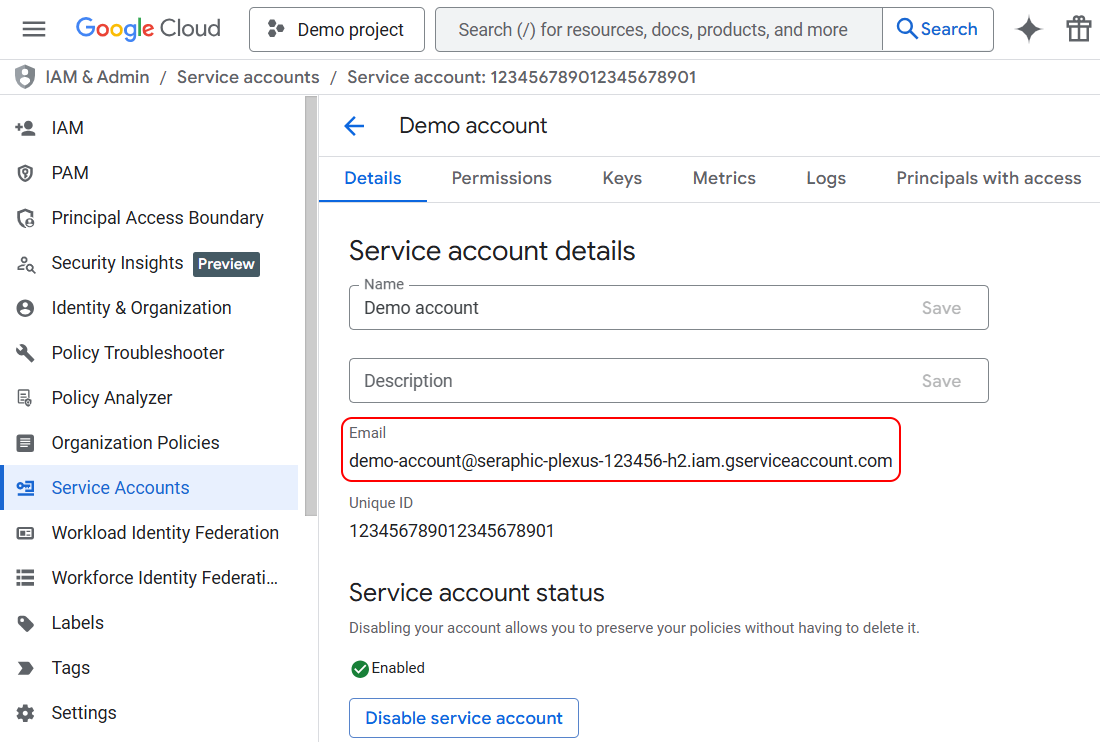
Step 1: Open your service account in the Google Cloud Console.
Step 2: Navigate to the Details tab and see the Email field.
Step 3: Open your Google Spreadsheet in a browser via Google Sheets.
Step 4: Click the Share button. Share your spreadsheet with your service account e-mail address. Set the permission to Editor to allow write access. Click Send to apply the changes.