Workflow Editor
The workflow editor is a visual, drag-and-drop canvas where you build and configure your workflows. It presents your workflow as a horizontal, left-to-right diagram, with each step connected by arrows that show the flow of execution.

Canvas and Navigation
- Zoom: Use the zoom controls to zoom in, zoom out, zoom to 100%, or zoom to fit.
- Zoom to fit: Centers the entire workflow on the visible canvas at the zoom level that shows all elements. Use this whenever you need to see the full picture of your workflow at once.
- Pan around the canvas by clicking and dragging on an empty area.
Naming a Workflow
Every workflow must have a name. Enter a descriptive name at the top of the workflow editor, in the Workflow name field, so you can easily identify it on the Workflows page.
Adding Elements
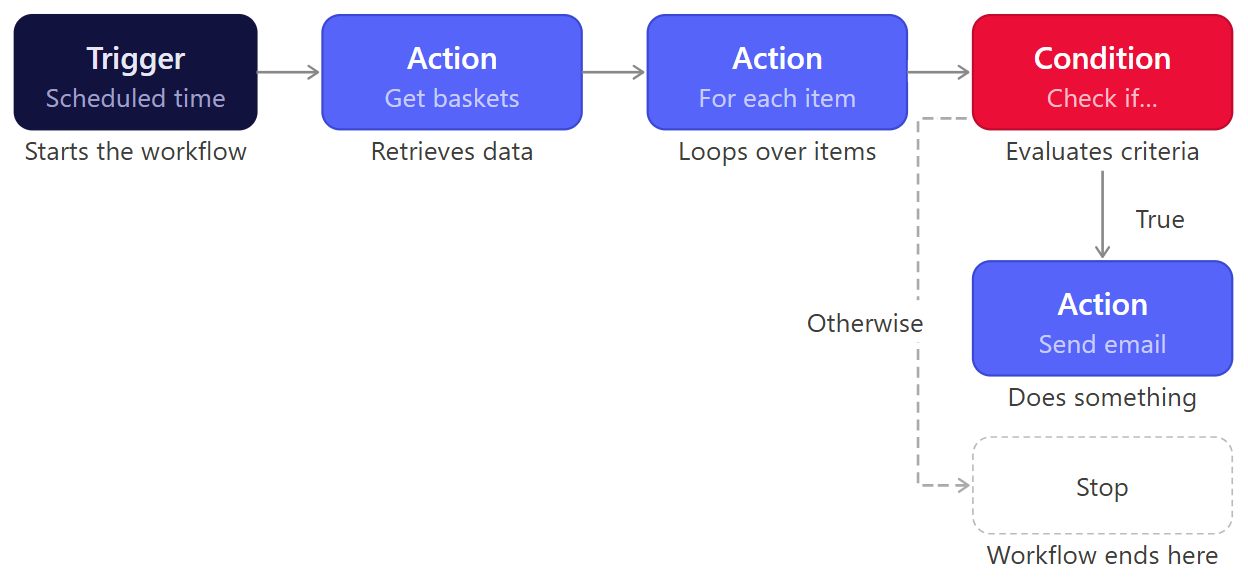
A workflow always starts with a trigger. After adding the trigger, you can build out the rest of the workflow by adding actions and conditions:
-
Configure the workflow trigger. This is the first and only trigger a workflow can have.
-
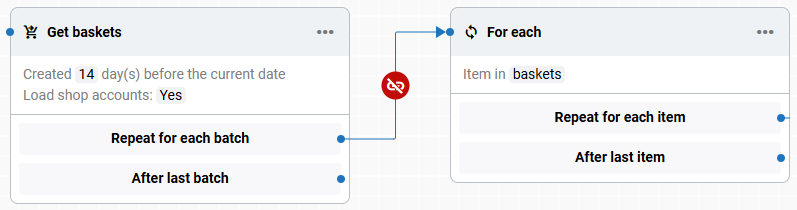
Click + Add next step on the workflow trigger. Various workflow elements (steps) have different output handlers, such as Next step, True and False, For each item and After all items, etc.
-
Click on the output handler to add the next element, action or condition.
-
When you add an element from another workflow element, it is automatically connected.
-
Continue adding actions and conditions as needed. Multiple elements can follow a single step and will execute sequentially.
Configuring Elements
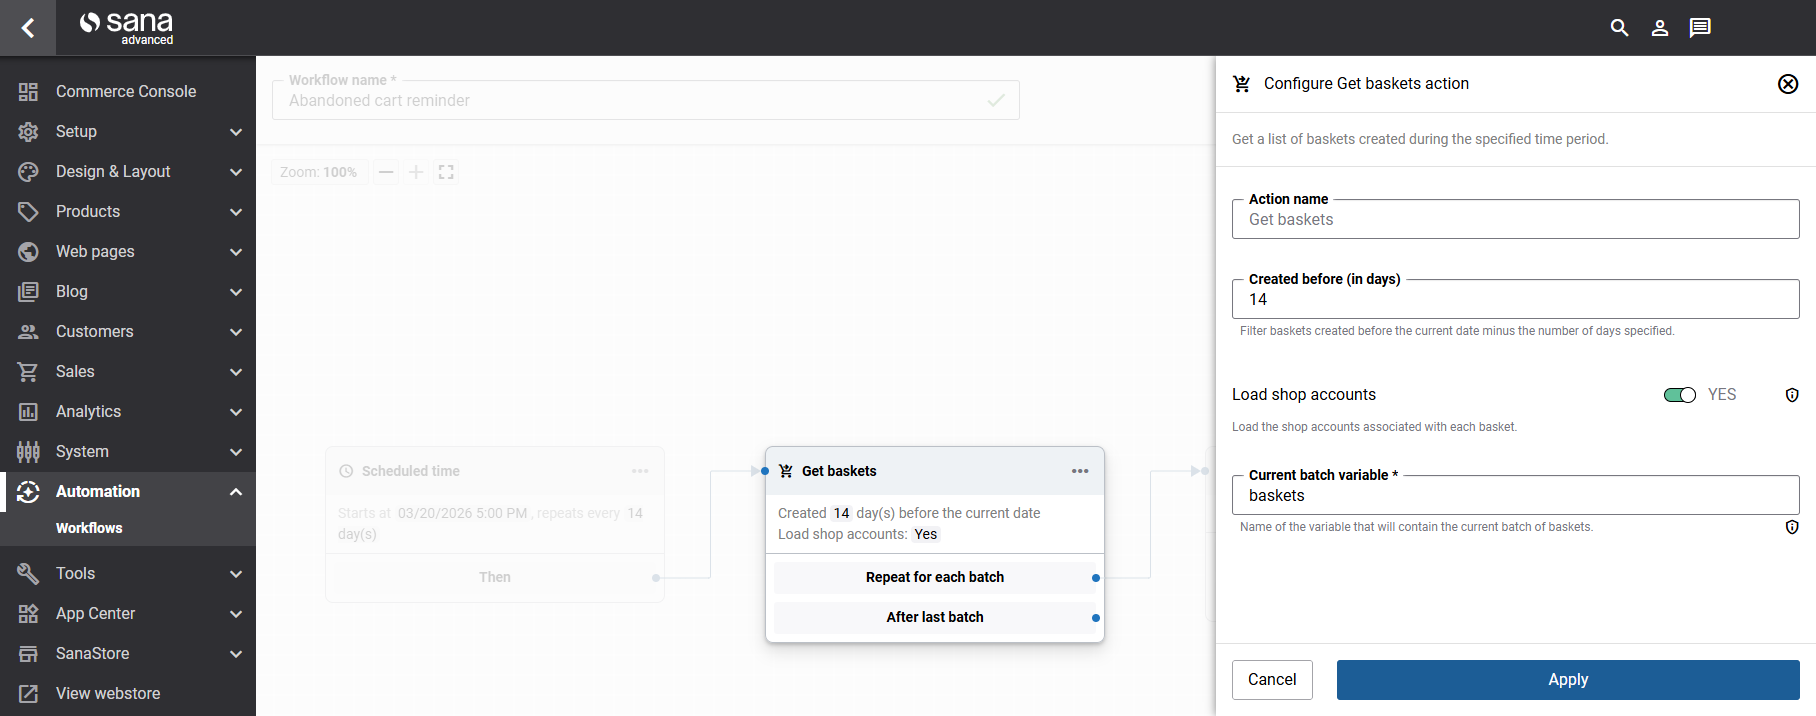
Each workflow element, trigger, condition, or action, can be configured using the configuration panel on the right side of the workflow editor. To open it:
- Click on the workflow element to open the configuration panel directly.
- Or click the More options (three-dot) menu on the workflow element and select Configure.
As you configure a workflow element, the configured details appear directly on the element tile in the canvas. This lets you quickly understand what each step does. For example, a Get baskets step might display Created more than [14] days ago. Load shop accounts: [Yes].
Managing Connections
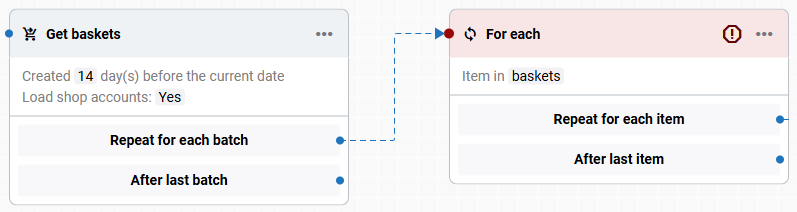
Arrows on the canvas show which steps lead to which. You can manage these connections:
-
Remove a connection: Hover over the arrow you want to remove and click the Unlink icon.
-
Restore a connection: Draw a new arrow from one element to another to reconnect them.
Replacing or Deleting Elements
Click the More options (three-dot) menu on any workflow element to access the following options:
- Configure: Opens the configuration panel of the workflow element.
- Replace: Replaces the current workflow element with another one.
- Delete: Removes the element from the workflow.

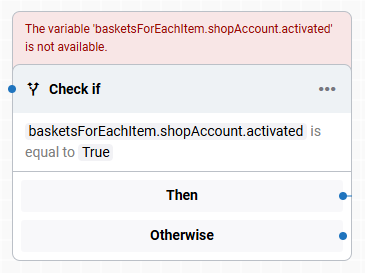
Validation and Error Highlighting
The workflow editor validates your workflow as you build it. If something is wrong, for example, a step is not connected to another, or a variable is wrong, the affected element is highlighted in red, and a user-friendly error message explains the issue. Invalid workflows cannot be saved or run.
For more information, see Troubleshooting and Error Handling.