Visual Components
Tweakwise's visual components are content blocks such as images, banners, lifestyle photos, or promotional graphics that you can place directly inside your product listings, alongside the products themselves. Configured through the Builder , they let you slot branded or promotional content into any position within a listing, whether it's displayed as a grid or a list, so your product list and search pages aren't just showing products, but telling a story around them.
In practical terms, a visual component works like any other item in your listing: you drag it into position in the builder and choose what content it should display, whether that's a seasonal campaign banner, a lifestyle shot showing a product in use, or an image suggesting related items customers might also want to buy.
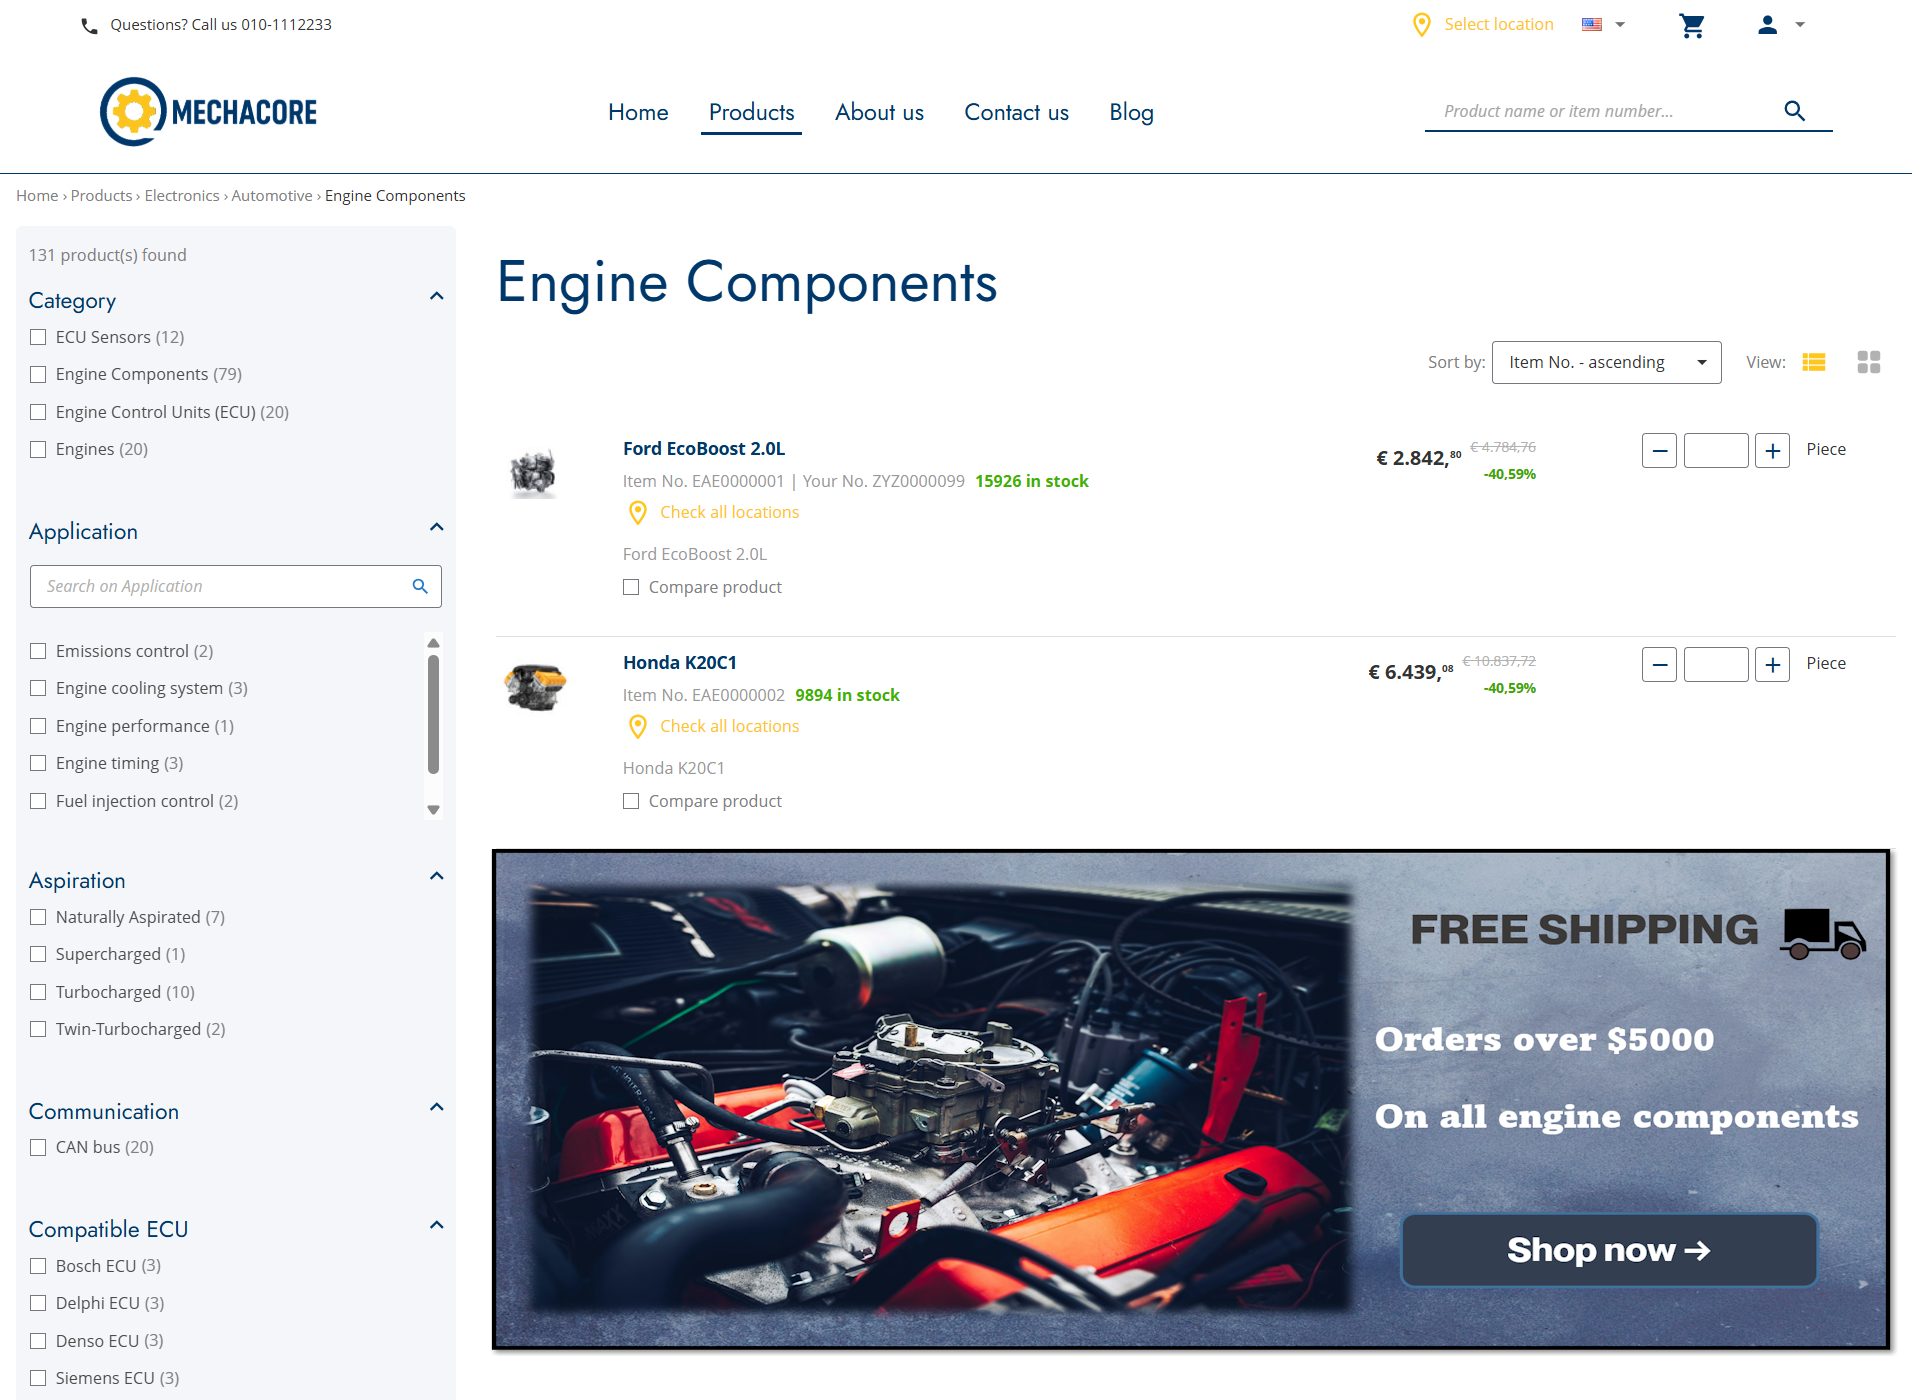
Visual component displayed on the product list page in list view
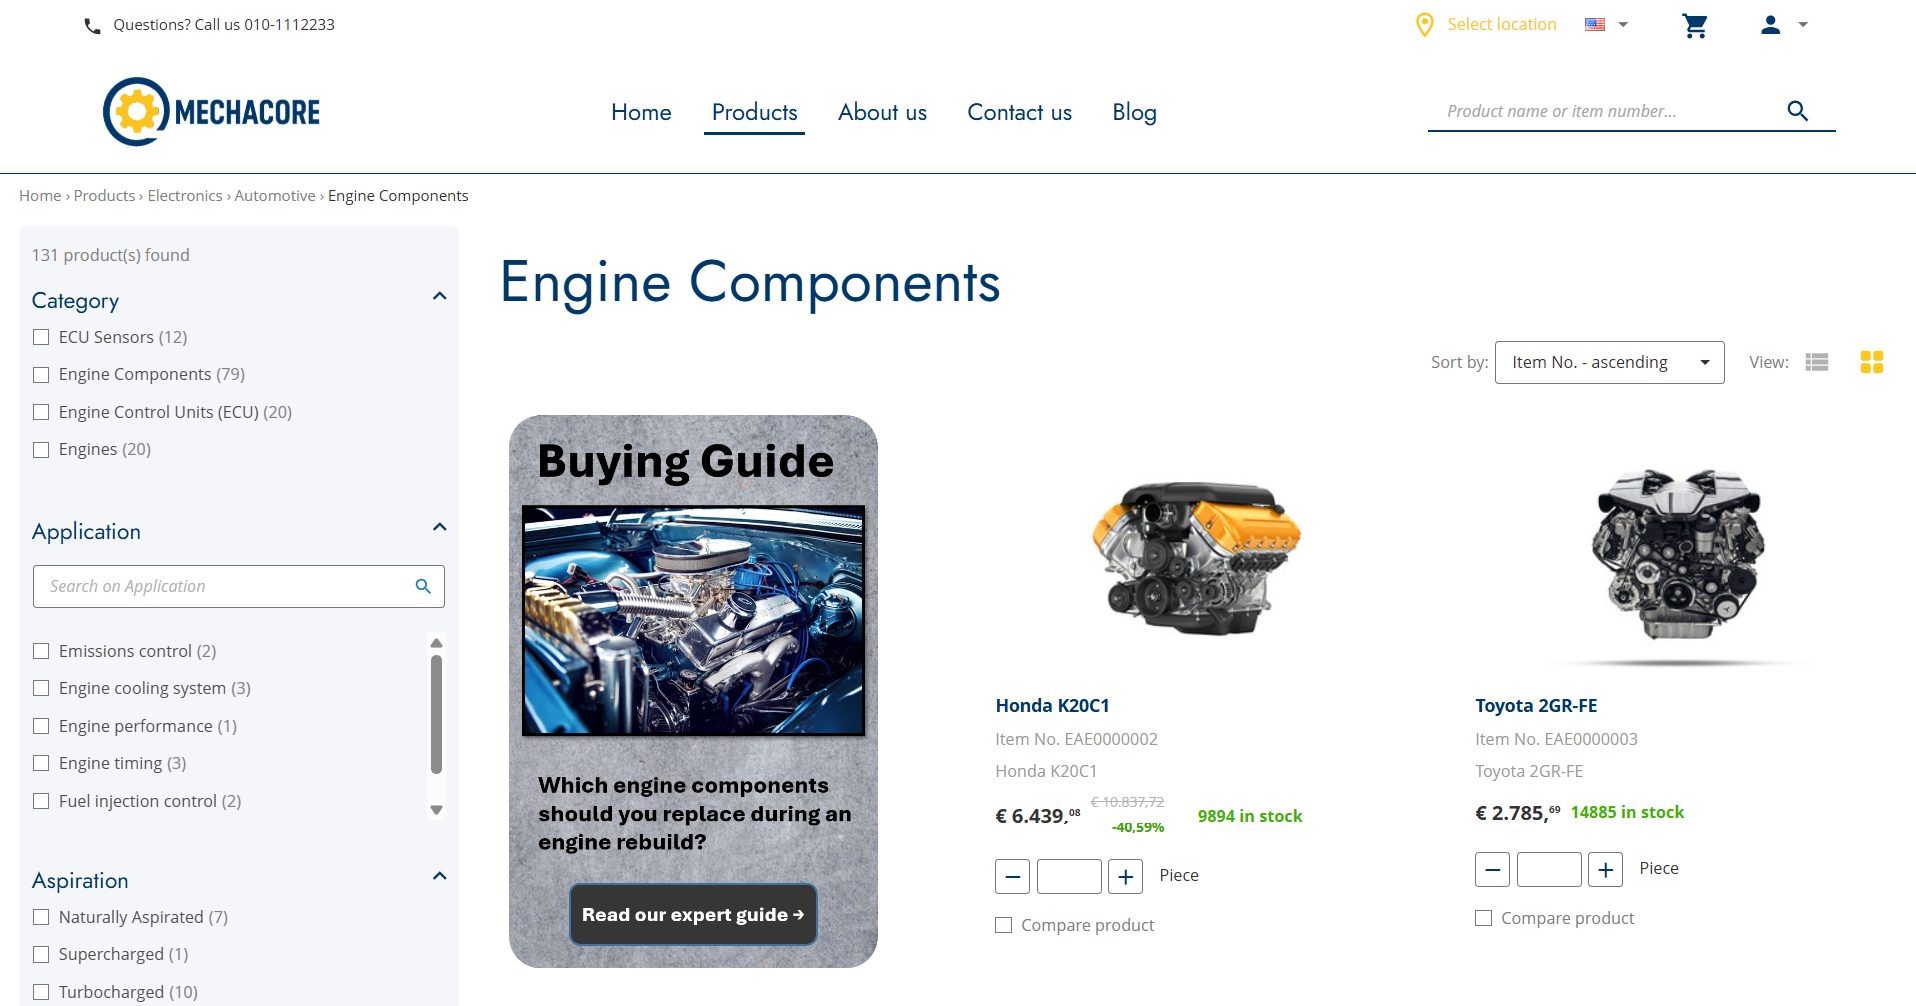
Visual component displayed on the product list page in grid view
What They're Used For?
Visual components are typically used to:
- Break up long product listings with branded or contextual imagery, so product list and search pages feel less like a spreadsheet and more like a curated shopping experience, whether they're shown as a grid or a list.
- Highlight campaigns, collections, or promotional pricing in a prominent spot, without needing a separate landing page.
- Show products in application (installation photos, equipment in use, technical diagrams) to help buyers understand fit and use case before purchasing.
- Reinforce brand and supplier identity by giving merchandisers control over how catalog pages present the business, rather than relying solely on generic product cards.
Benefits
- Higher engagement and conversion: contextual content helps buyers evaluate products faster and gives them more confidence before adding to cart, particularly for technical or specification-heavy items.
- No developer dependency: once configured, merchandisers can place, swap, or reposition visual components directly in the builder interface, without needing front-end code changes.
- Consistent, on-brand presentation: visuals are managed centrally, making it easy to keep messaging aligned across categories, supplier lines, and campaigns.
- Flexibility: components can be placed at any position within a listing, regardless of whether it's shown as a grid or a list, and updated as often as campaigns change, keeping category pages dynamic rather than static.
Configuring Visual Components
Creating a visual component in Tweakwise is only half the job. It still needs to make its way into your webstore through Sana Admin before shoppers can see it. The steps below cover both sides of that process, starting with initial setup and ending with the final sync.
Set Up the Item Type Attribute
Visual components are stored as items in Tweakwise, so you first need an attribute that identifies them as such.
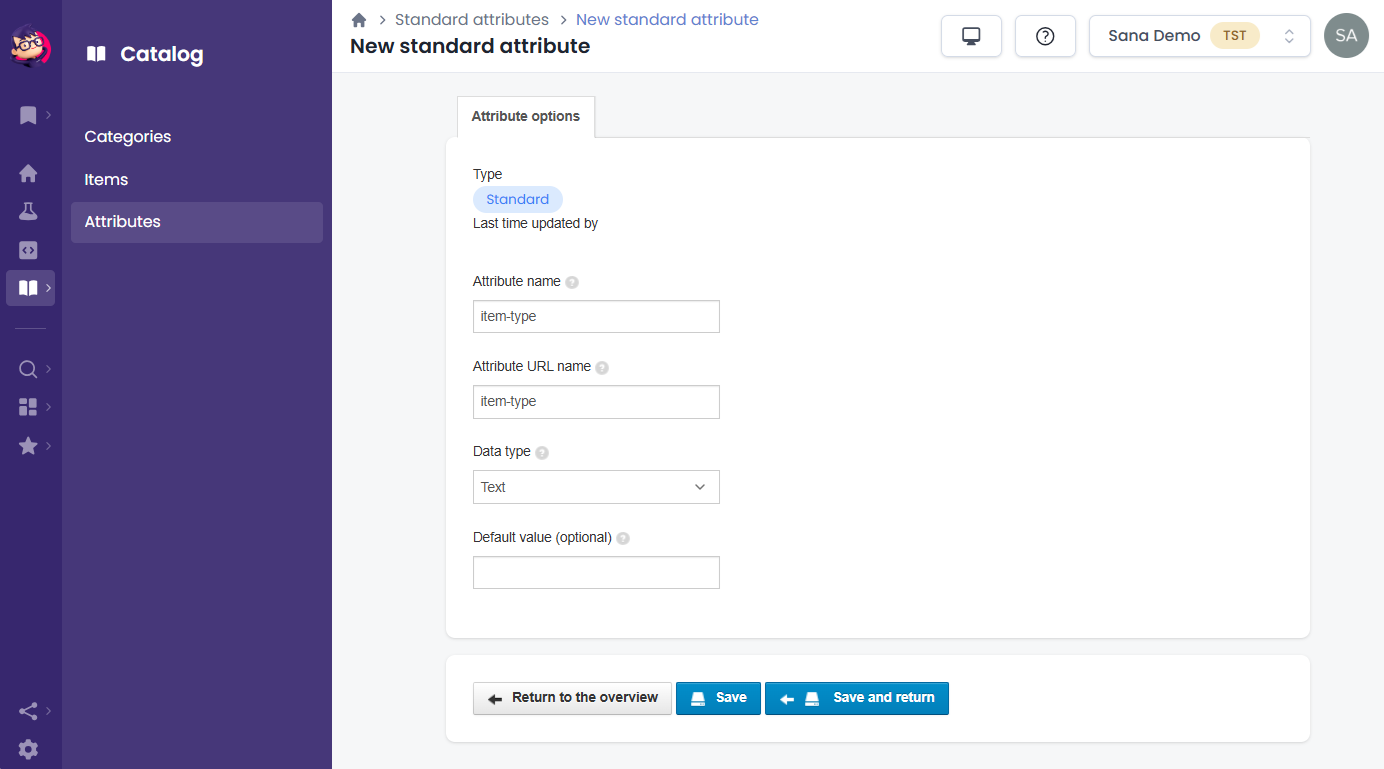
Step 1: In the Tweakwise dashboard click: Catalog > Attributes. Create a new attribute that will serve as the item type.
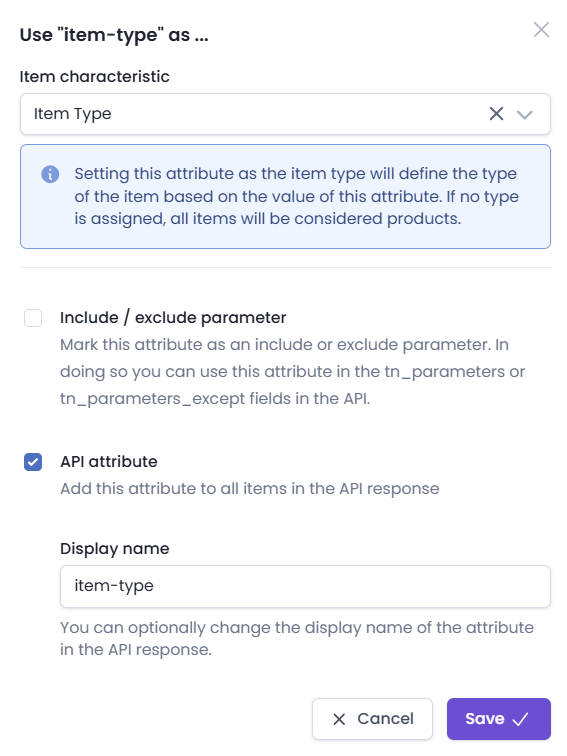
Step 2: Find the attribute in the attributes list and click Use as. In the Item characteristic field, select Item Type, select the API attribute checkbox, and enter a name for it.
Create the Image and Alt Text Attributes
Every visual component needs two additional attributes to store its image and accessibility text. Create both of the following, and for each one, open Use as and select the API attribute checkbox:
-
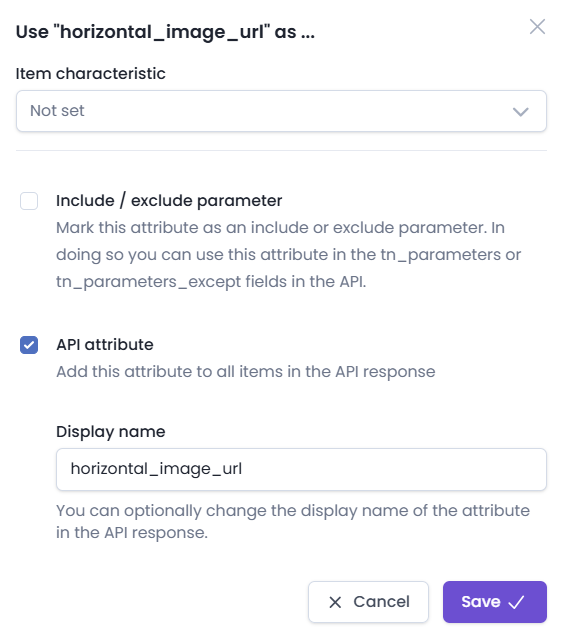
horizontal_image_url – stores the image shown when the webstore displays results in list mode.
-
alt_text – stores the alternative text for the image.
The Display name of each attribute must match these values exactly (horizontal_image_url and alt_text), since Tweakwise relies on these exact names to recognize them.
Create the Visual Component Item
Step 1: In the Tweakwise dashboard, click: Catalog > Items and start creating a new item.
Step 2: On the General tab, enter the following:
-
Type: select Visual.
-
Image URL: the image to display when results are shown in grid mode.
-
Item URL: the link the shopper is taken to when they click the visual component.
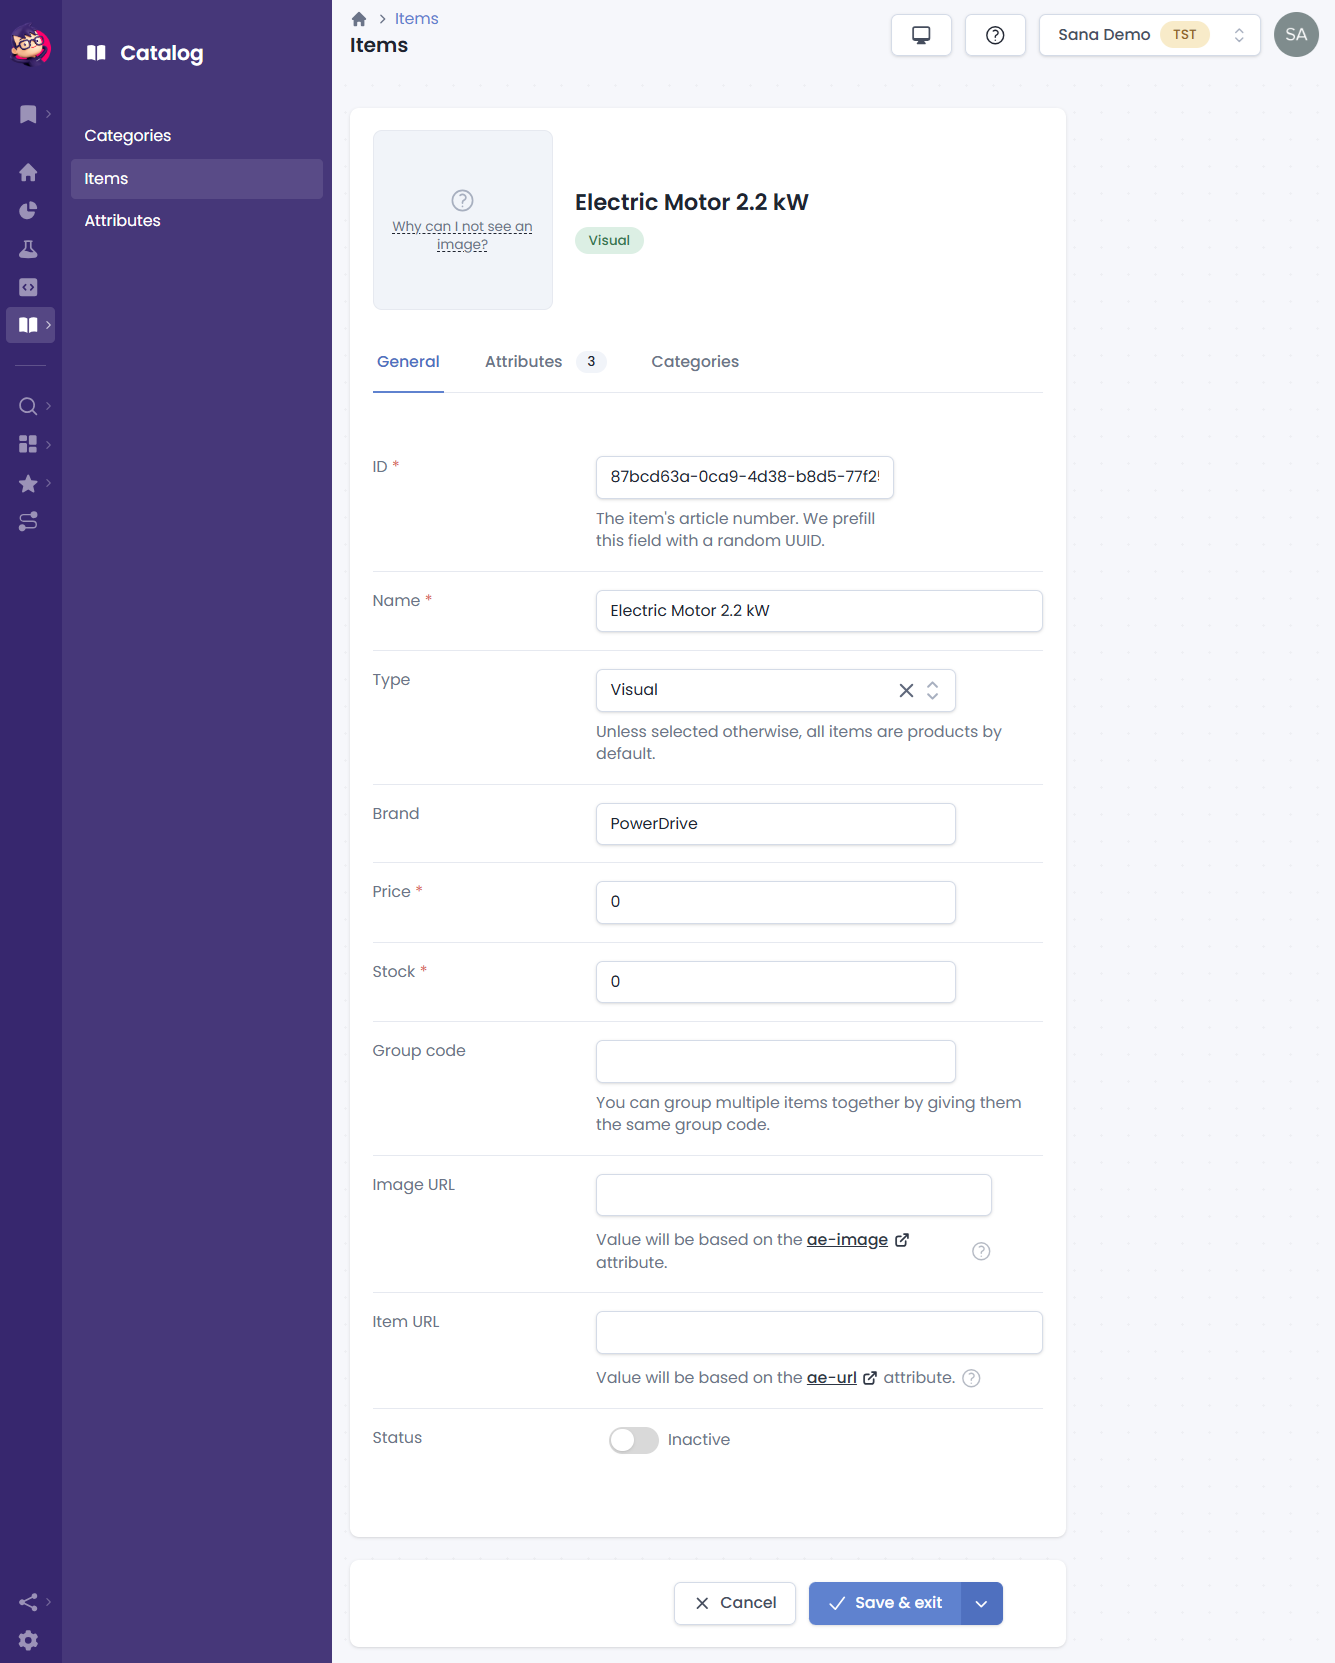
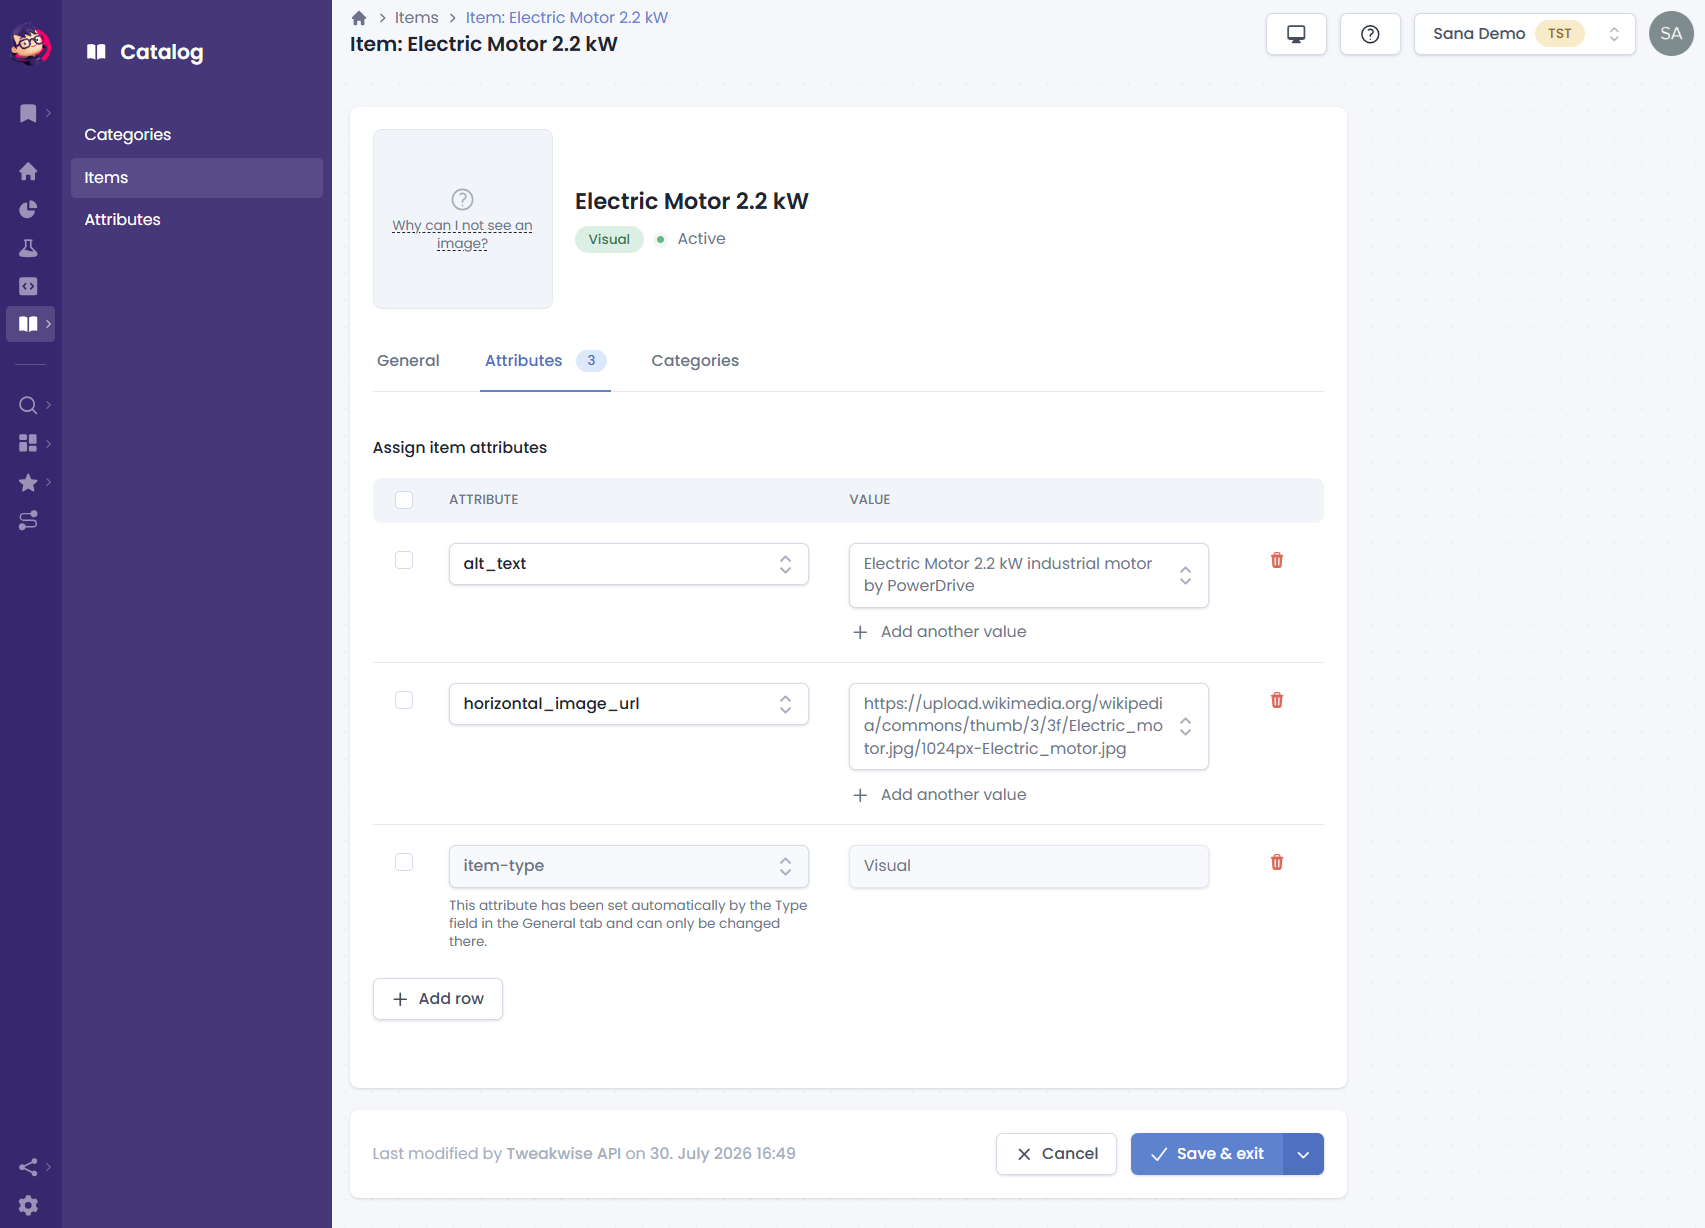
Step 3: Move to the Attributes tab of the item and set values for the horizontal_image_url and alt_text attributes. They should be created in advance, as described in Create the image and alt text attributes:
-
horizontal_image_url: the URL of the image to show when the webstore displays results in list mode. Note that this is a different image from the one you set in the Image URL field on the General tab, which is used only for grid mode.
-
alt_text: the alternative text for the image.
Add the Visual Component to a Builder
Builders act as templates for your search results and product list pages. A visual component only becomes visible to shoppers once it's placed inside a builder that's used on your webstore.
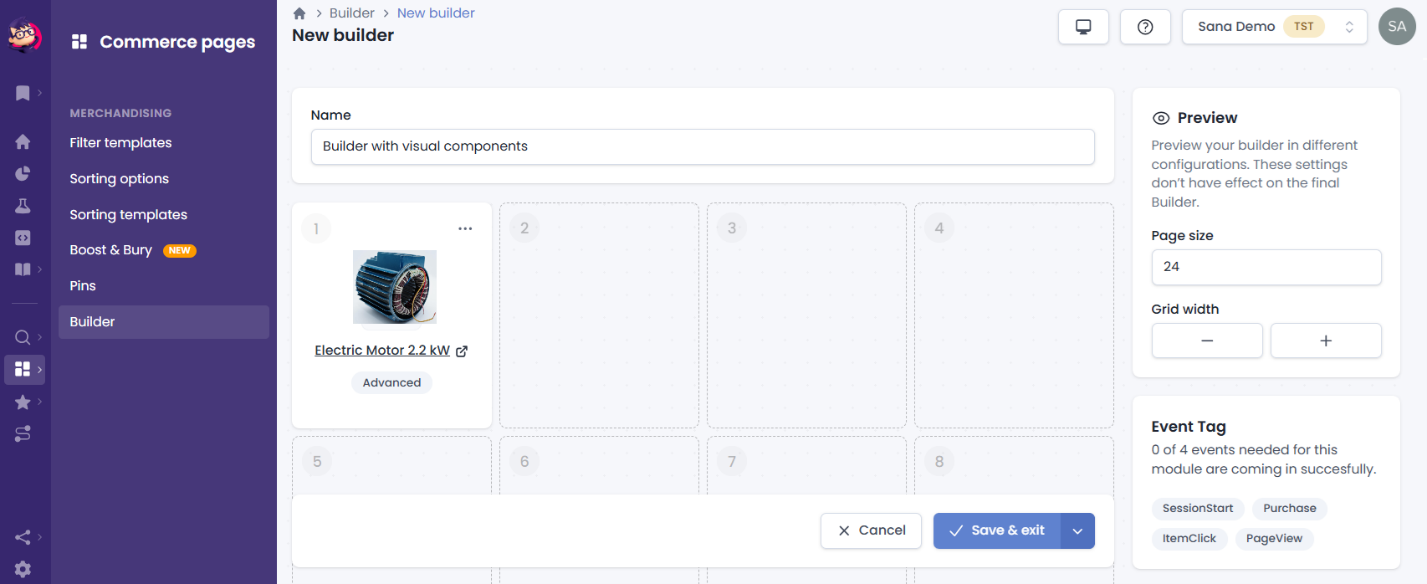
Step 1: In the Tweakwise dashboard, click: Commerce pages > Builder.
Step 2: Create a new builder and give it a name (or open an existing one).
Step 3: Click the tile where you want the visual component to appear and select Visual.
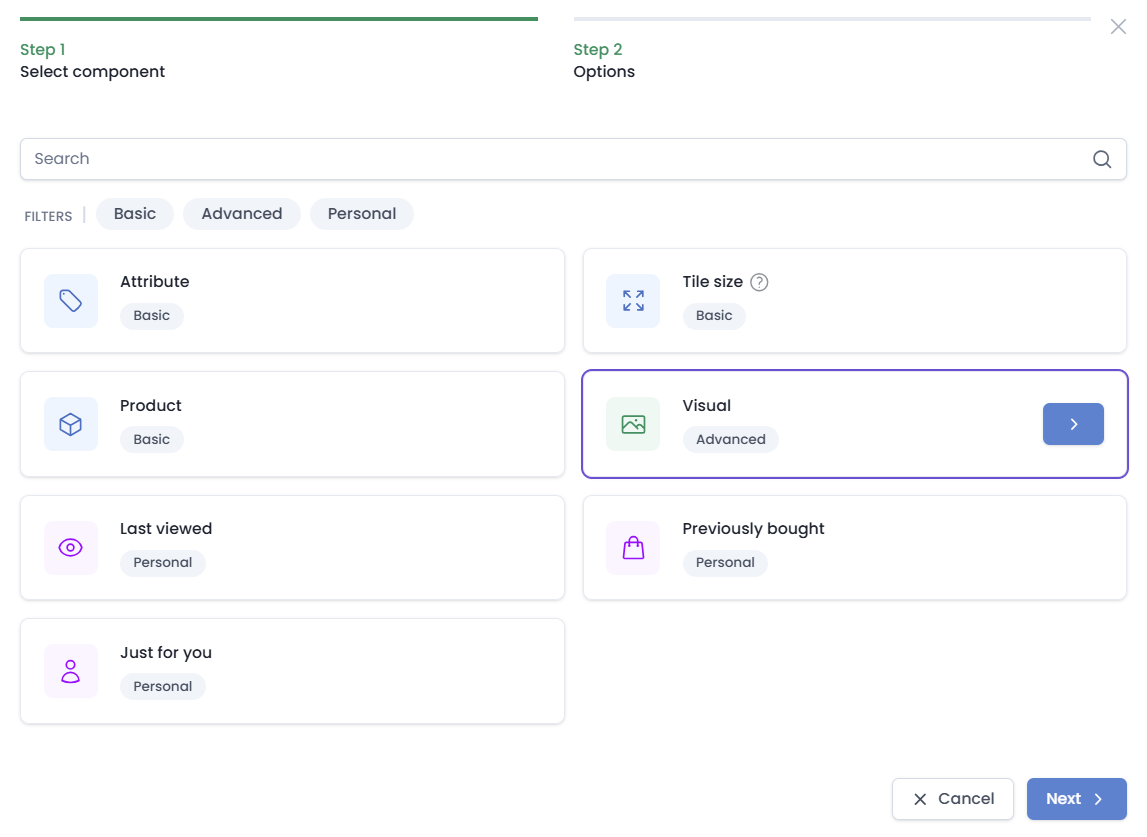
Step 4: Choose your visual component and insert it into that position.
Assign the Builder to Categories
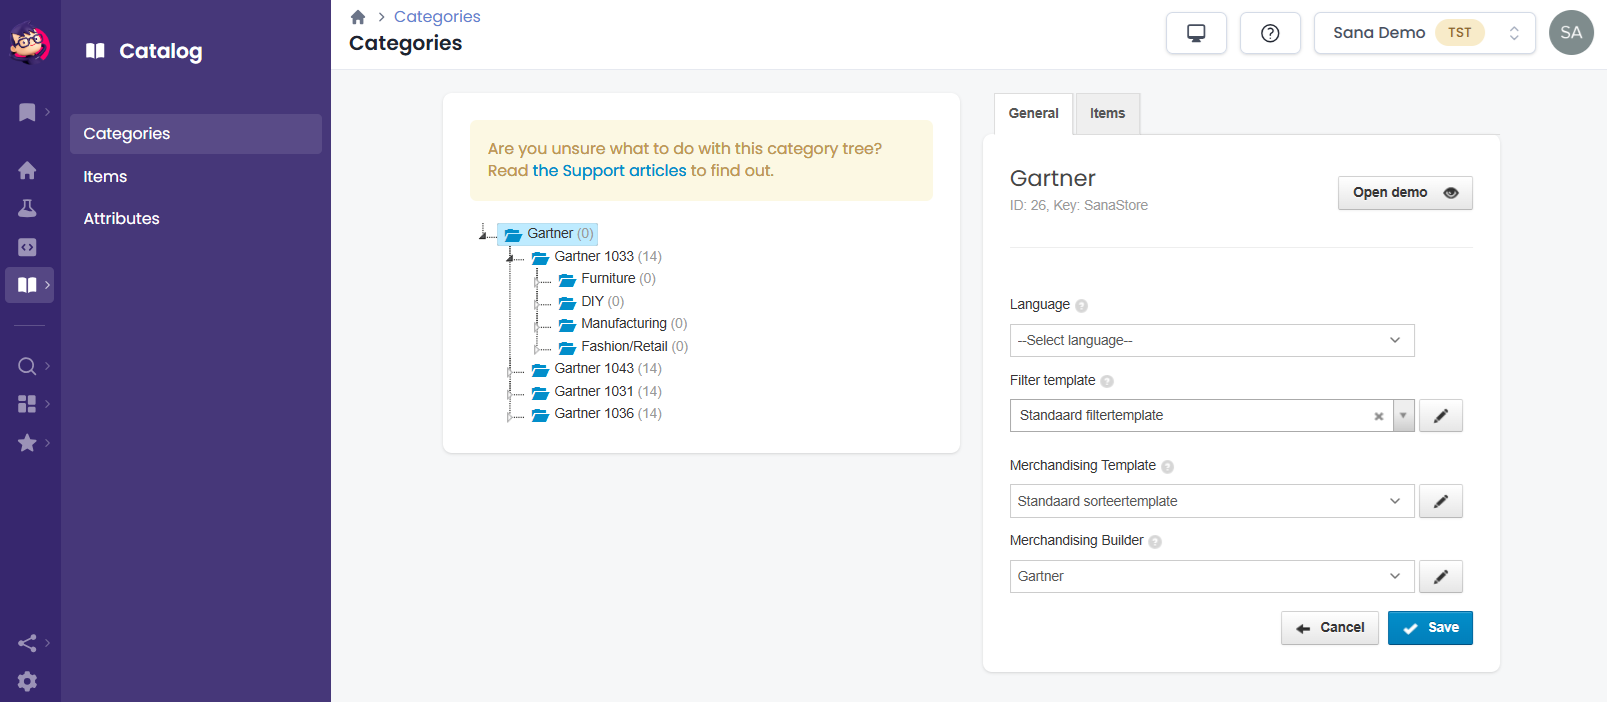
Step 1: In the Tweakwise dashboard click: Catalog > Categories.
Step 2: Open a category where the visual component should appear and assign your builder to it. Repeat for any other categories where the builder should be used.
Related Articles
Configure Tweakwise Search & Merchandising in Sana Admin
Builder
Publish Your Changes in Tweakwise
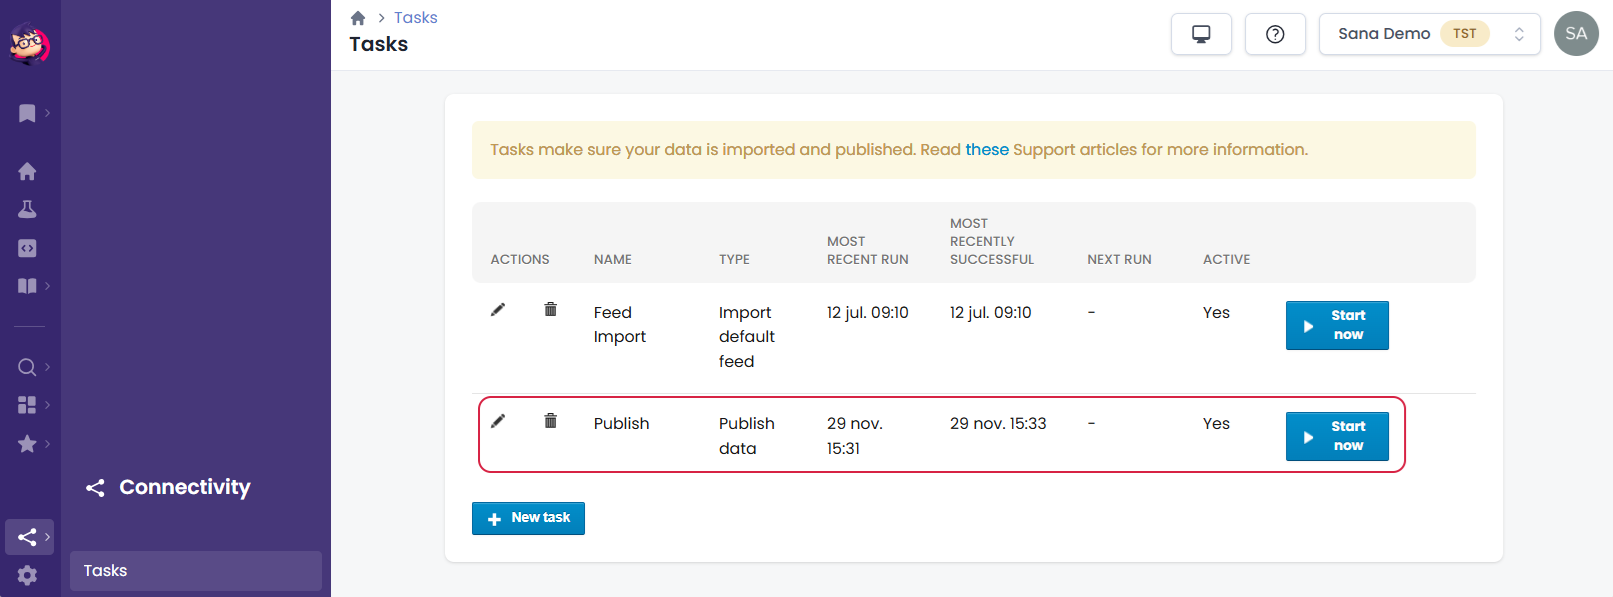
In the Tweakwise dashboard, click: Connectivity > Tasks and click Start now next to the Publish task. This pushes the latest data to your online webstore.
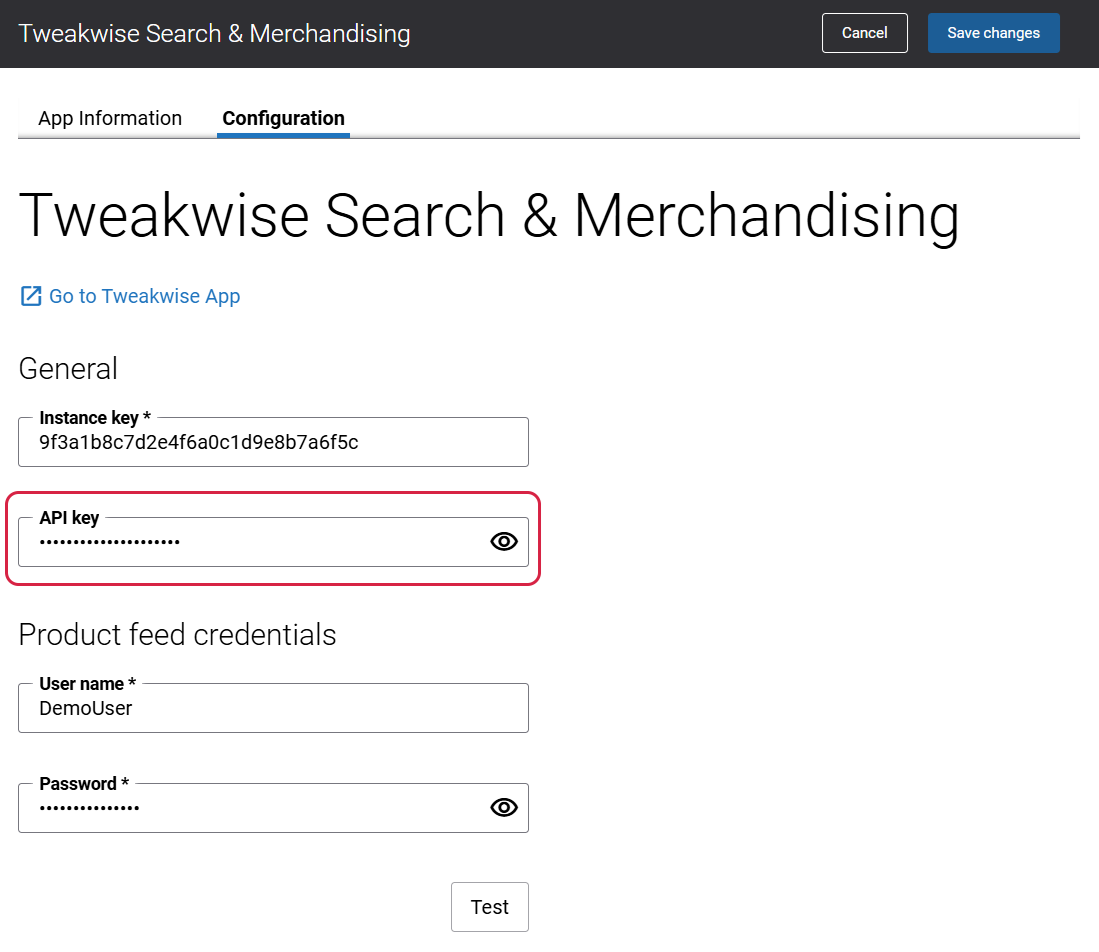
Configure the API Key
Visual components require an API key, so Sana Admin can retrieve builders from Tweakwise.
Step 1: In the Tweakwise dashboard, go to Settings and create an API key.
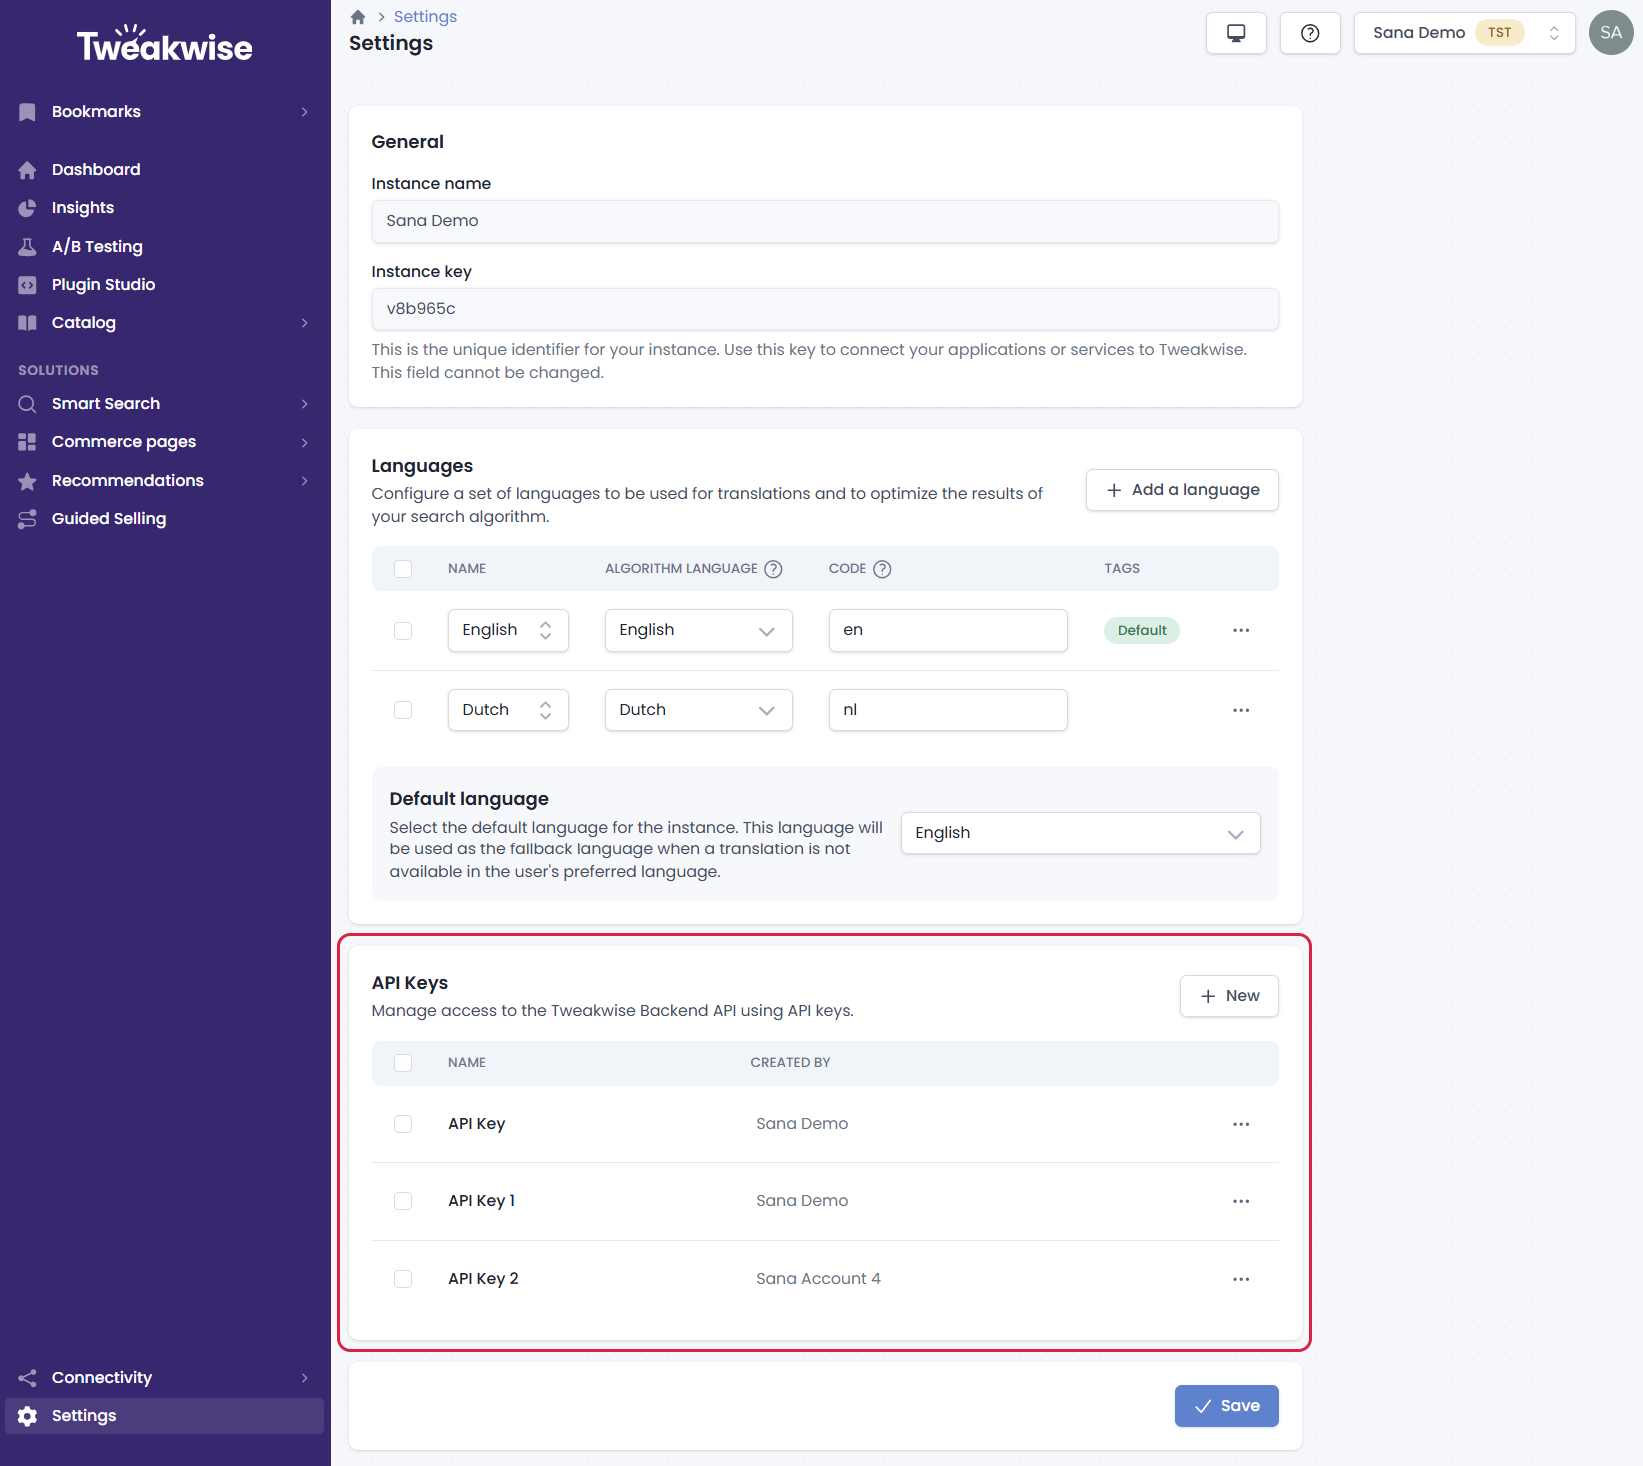
Step 2: Copy the API key and paste it into the API key field on the Tweakwise Search & Merchandising app configuration page in Sana Admin.
Run the Product Import in Sana Admin
In Sana Admin, click: System > Scheduled tasks. Run the Product import scheduled task. This retrieves the builder from Tweakwise and makes the visual component available in your webstore.
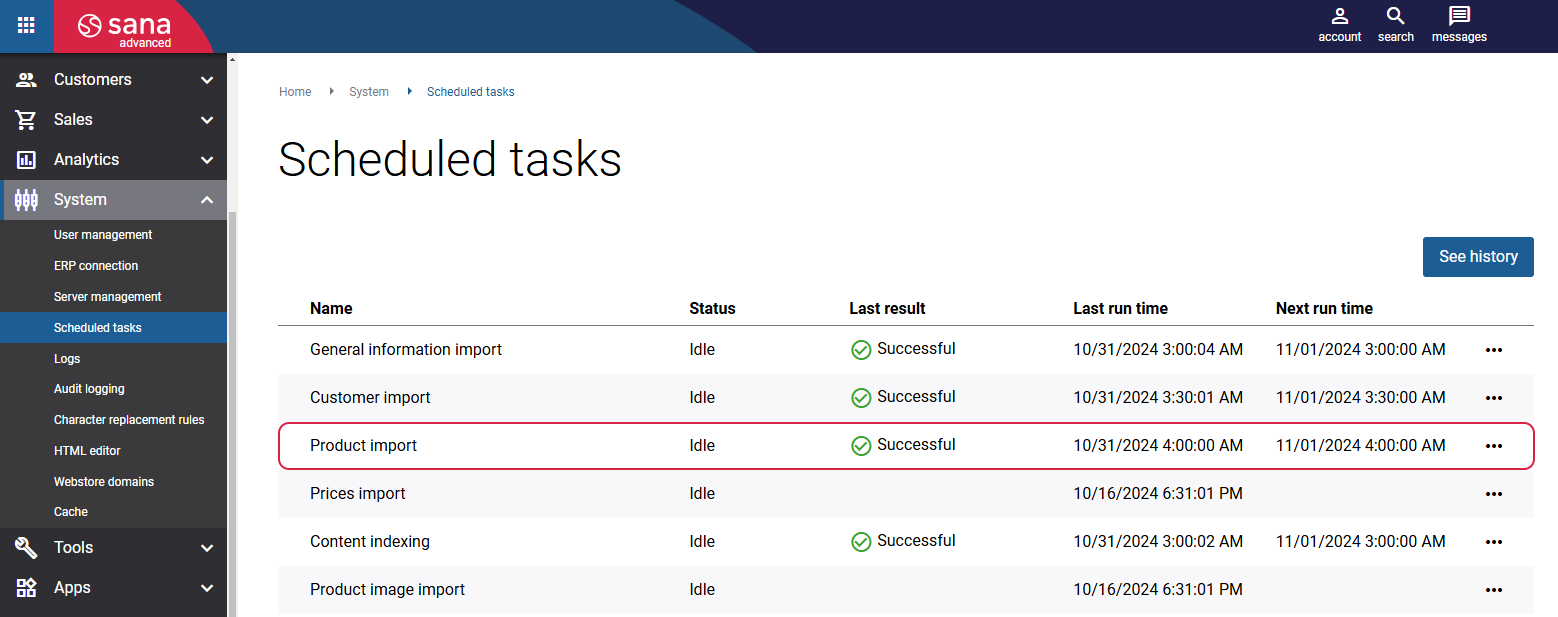
Repeat the Publish task in Tweakwise and the Product import task in Sana Admin every time you make changes involving a builder, for example, assigning a builder to a category, creating or deleting a builder, adding a visual component to a builder, or changing its position. Without running both tasks, your changes won't appear on the live webstore.
Related Articles
Visual in Lister Pages
Adding Visuals via Item Management
How Do I Add Visuals to the Builder?


