Configure PayFabric Payment Methods
When PayFabric is configured in Sana Admin, you can create the necessary payment methods supported by PayFabric.
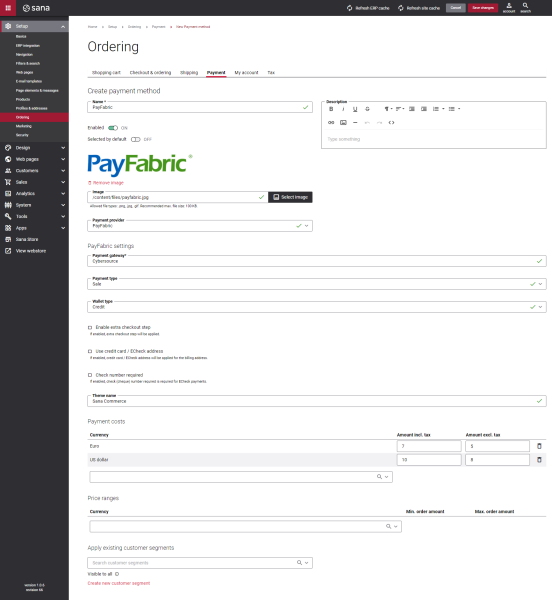
Step 1: In Sana Admin, click: Setup > Ordering > Payment.
Step 2: On the Payment tab, create and configure the necessary payment methods. For more information about how to create and configure payment methods in Sana Admin, see Online Payment Methods.
The table below provides the description of the PayFabric payment method specific fields.
| Field | Description |
|---|---|
| Payment Gateway | Enter the name of the payment gateway. The name must be the same as the one selected on the Settings page, the Gateway Account section, on the PayFabric portal.
This filed is mandatory, and if its value is invalid, customers will not be able to pay orders. |
| Payment Type | Enter the PayFabric transaction type. Supported transaction types are:
This filed is mandatory, and if its value is invalid, customers will not be able to pay orders. If you want to use the ECheck wallet type, you must select the Sale payment type. |
| Wallet Type | There are two available options:
|
| Enable extra checkout step |
|
| Use the credit card / ECheck address |
If a customer chooses the saved credit card / ECheck from the list on the hosted page, the billing address will be replaced by the credit card / ECheck address for the transaction on the PayFabric portal. |
| Check number required |
Check number is mandatory for the PayPal ECheck payment gateway. |
| Theme name | Enter the name of the theme. The name must be the same as the one created on the Themes page, on the PayFabric portal.
This field is optional. If you do not create a theme for a Sana webstore on the PayFabric portal, the default PayFabric theme will be used. |
Test the payment flow to see if everything works fine using the created payment methods.
