Verify Your Sana Webstore
Verifying your Sana webstore is one of the essential steps in setting up your Merchant Center account. In most cases, once it is done, you will not have to do it again.
Step 1: Sign in to your Merchant Center account.
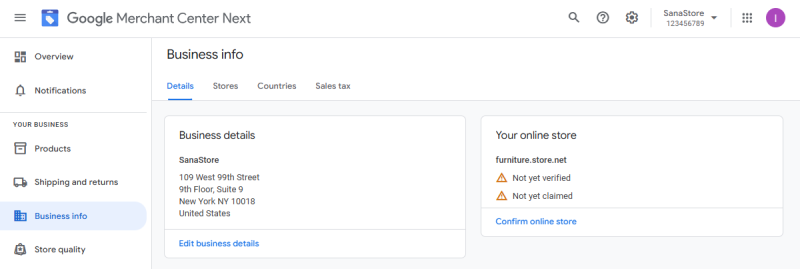
Step 2: From the left-side navigation menu, click Business info.
Step 3: In the Your online store section, click Confirm online store.
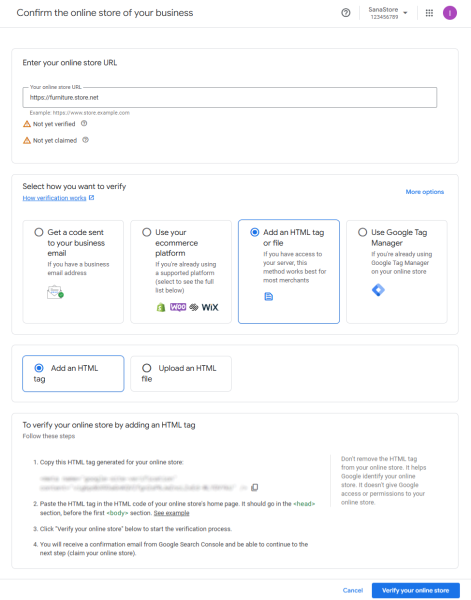
Step 4: In the Select how you want to verify section, select Add an HTML tag or file. Verify your website by adding an HTML tag. The HTML tag acts as a marker to help Google identify your website and does not provide access or permissions to your website.
Step 5: Copy the HTML tag generated for your website.
Step 6: In Sana Admin click: Setup > Page elements & messages > HTML injections.
Step 7: Paste the HTML tag which you copied in Step 5 to the Head field of the HTML injections.
Do not remove the HTML tag even after you have been verified. If you remove the tag, you will lose your verification.
Step 8: In Sana Admin click Save changes.
Step 9: In Sana Admin click: System > Cache. Click Refresh site cache.
Step 10: In Google Merchant Center, click Verify website to submit your website for verification.
Then you will receive a confirmation email from Google Search Console and you will be able to claim your website.
More detailed information about how to verify and claim your website you can read in the official Google Merchant Center Help documentation.


