Configure UPS
Before configuring UPS you should create a UPS merchant account and register for the UPS Web Services Access to receive the Username, Password, and Access Token from UPS.
-
Register for a test account
The UPS test environment does not return the actual calculated shipping costs. When you test delivery via UPS using the test account, UPS returns the predefined rate. Only the UPS production environment will return the actual negotiated rate.
-
Request a production access
When you have all the necessary information from UPS, you can start configuring the UPS shipping provider in Sana Admin.
Step 1: The UPS shipping provider is available as an app. It can be installed from the Sana App Center. In Sana Admin click: App Center > Apps > Apps Explorer. When the UPS app is installed, you can configure it.
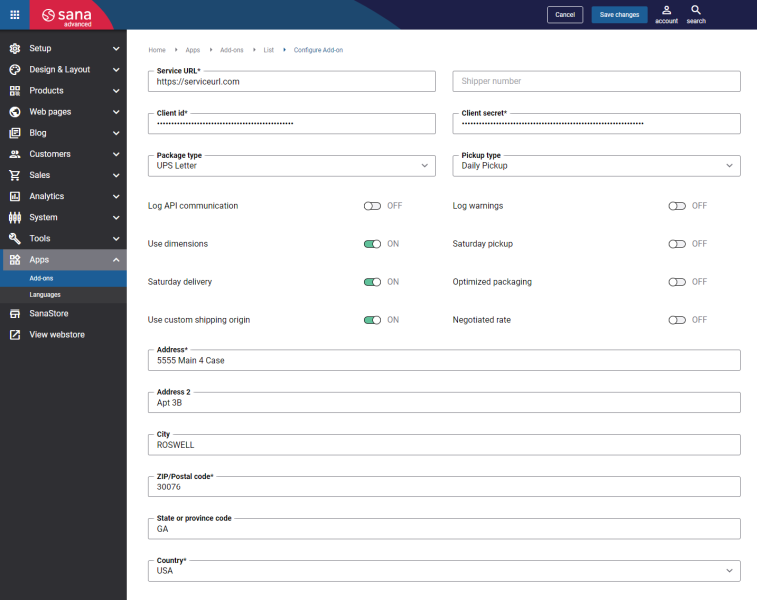
Step 2: Configure the UPS connection settings. Enter the following information provided by UPS:
- Service URL
- Client id
- Client secret
For more information about how to create Client id and Client secret, see Obtain Your OAuth Credentials.
Step 3: In the Package type dropdown, select the type of packages to be delivered to UPS.
| Package type | Description |
|---|---|
| UPS Letter | Select for Next Day Air Early AM, Next Day Air, Next Day Air Saver, 2nd Day Air AM, 2nd Day Air, Worldwide Express, and Worldwide Express Plus services. |
| Package | Select for packages delivered in boxes, cartons, or any other non-letter enclosure. |
| Tube | Select for protecting documents that must be rolled rather than folded. Its dimensions are 38" x 6" x 6" (or local equivalent). Use the tube for single-piece shipments for Next Day Air Early AM, Next Day Air, Next Day Air Saver, Worldwide Express, and Worldwide Express Plus services. |
| Pak | Select for protecting shipments that need a 16" x 13" x 1" (or local equivalent) container of tear-resistant material. Use for Next Day Air, 2nd Day Air, Worldwide Express, and Worldwide Expedited services. |
| 25KG Box | Select for shipments weighing up to 25 KG (55 pounds). The box's dimensions are 19" x 17" x 14" (or local equivalent). Use the box for prepaid shipments from the United States and Puerto Rico for Worldwide Express and Worldwide Express Plus services. |
|
10KG Box |
Select for shipments weighing up to 10 KG (22 pounds). The box's dimensions are 17" x 13" x 11" (or local equivalent). Use the box for prepaid shipments from the United States and Puerto Rico for Worldwide Express and Worldwide Express Plus services. |
| Pallet | Select for palletized shipments. A pallet is a low portable platform of wood, plastic, metal, fiberboard, or combinations thereof, that is elevated enough to allow forklift access. A pallet assists in consolidation and handling of packages and decreases the amount of time it takes to move packages.
This package type code appears only for United Kingdom (GB) to United Kingdom (GB) and Poland (PL) to Poland (PL) shipments. |
| Small Express Box | Select for smaller shipments, such as books and tapes. The box's dimensions are 13" x 11" x 2". Use the box for Next Day Air Early AM, Next Day Air, Next Day Air Saver, 2nd Day Air, Worldwide Express, and Worldwide Express Plus services. |
| Medium Express Box | Select for smaller shipments, such as books and tapes. The box's dimensions are 15" x 11" x 3". Use the box for Next Day Air Early AM, Next Day Air, Next Day Air Saver, 2nd Day Air, Worldwide Express, and Worldwide Express Plus services. |
| Large Express Box | Select for shipments weighing up to 30 pounds (or local equivalent). The box's dimensions are 18" x 13" x 3". Use the box for Next Day Air Early AM, Next Day Air, Next Day Air Saver, 2nd Day Air, Worldwide Express, and Worldwide Express Plus services. |
Step 4: In the Pickup type dropdown, select the method by which the packages are to be delivered to UPS.
| Pickup Type | Description |
|---|---|
| Daily Pickup | A UPS driver stops at your location once each business day (Monday - Friday) to pick up ground, air, or international shipments. This option is best suited for those who ship every day and want the convenience of an automatic pickup time. |
| Customer Counter | Pay shipping charges and ship packages to a retail location such as The UPS Store™ or UPS Customer Center. |
| One Time Pickup | Arrange by phone for UPS to pick up packages. |
| Letter Center | Drop off a pre-paid package at any location accepting UPS packages. |
Step 5: Set up other UPS settings.
| Settings | Description |
|---|---|
| Shipper number | Enter a valid shipper number. It is required to receive the negotiated rates, when the option Negotiated rate is enabled. |
| Log API communication | Use this option to enable or disable logging of the UPS related requests and responses. |
| Use dimensions | Use this option to enable or disable the ability to pass package dimensions (length, width, height) in the UPS shipping rates calculation request. When the Use dimensions option is enabled:
|
| Saturday delivery | Use this option to enable or disable Saturday delivery for time-critical shipments.
If the option Saturday delivery is enabled, only shipping methods that include a service type supporting Saturday delivery will be shown at checkout. For example, the Next Day Air Saver service type does not support Saturday delivery. Therefore, any shipping methods that include the Next Day Air Saver service type will not be shown at the checkout if this option is enabled. For more information, see UPS Saturday Delivery. |
| Log warnings | Use this option to enable or disable logging of the UPS API generated warnings. |
| Saturday pickup | Use this option to enable or disable Saturday pickup to allow UPS to collect your packages on Saturday at your request.
For more information, see UPS Saturday Pickup. |
| Optimized packaging | Enable this option to optimize shipping rates calculation for large orders, for example, if your customers need to get a shipping rate for up to 1000 packages when they create orders.
If your customers often create large orders, for example, orders containing more than 200 items, we recommend to enable this option. By default, this option is disabled. |
| Negotiated rate | Use this option to enable or disable receiving the negotiated rates. For more information, see Account-Specific Negotiated Rates.
When this option is enabled and the shipper number is authorized for web / promotional discounts, the negotiated rates will be received. |
Step 6: Configure the webstore shipping origin:
-
If the option Use custom shipping origin is disabled, then the shipping origin will be retrieved from the ERP system. For the shipping cost calculation, the address of the warehouse that you ship from when delivering goods to the customer will be used. In case of an anonymous webstore visitor, the warehouse address of the template customer will be used.
-
If the option Use custom shipping origin is enabled, then the shop administrator should manually enter the webstore shipping origin address. All shipping costs will be calculated based on this address.
When UPS is configured, you can create UPS shipping methods.
Obtain Your OAuth Credentials
Step 1: Log in to the UPS account.
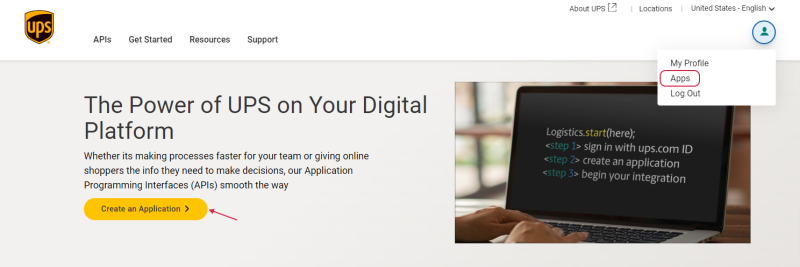
Step 2: In the UPS developer portal, click Create an application or in your profile menu, click Apps.
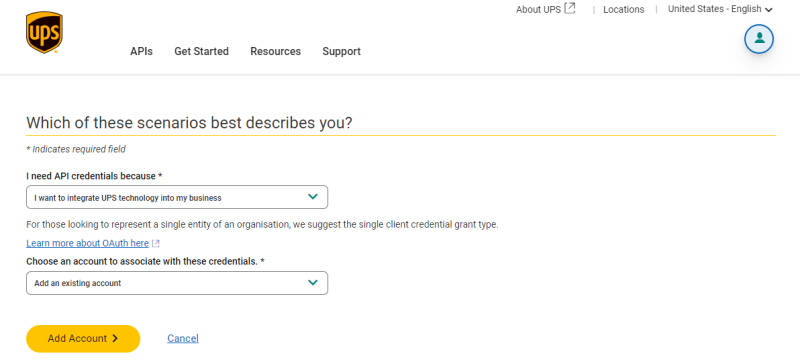
Step 3: Select your use case. In the field I need API credentials because, we recommend to select I want to integrate UPS shipping capabilities into my business.
Also, select a shipper account.
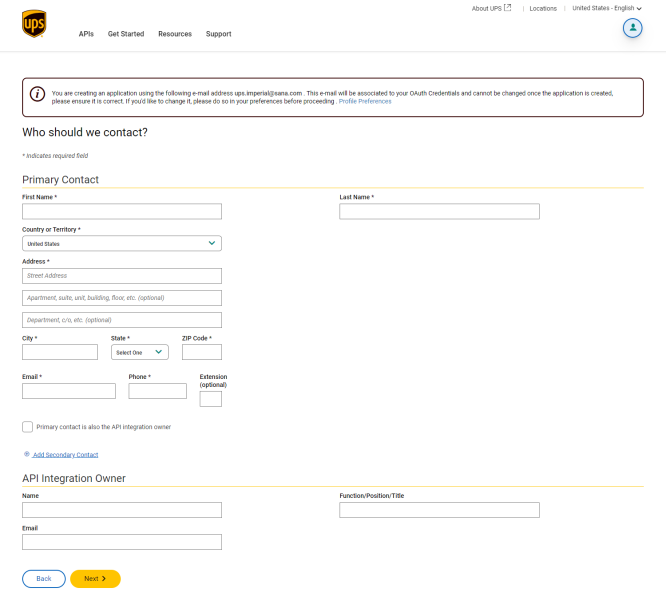
Step 4: Enter your contact information.
Make sure the e-mail address displayed in the information message at the top of the screen will be reachable by you or someone at your company permanently. This e-mail will be associated to your OAuth Credentials and cannot be changed once the application is created, please ensure it is correct.
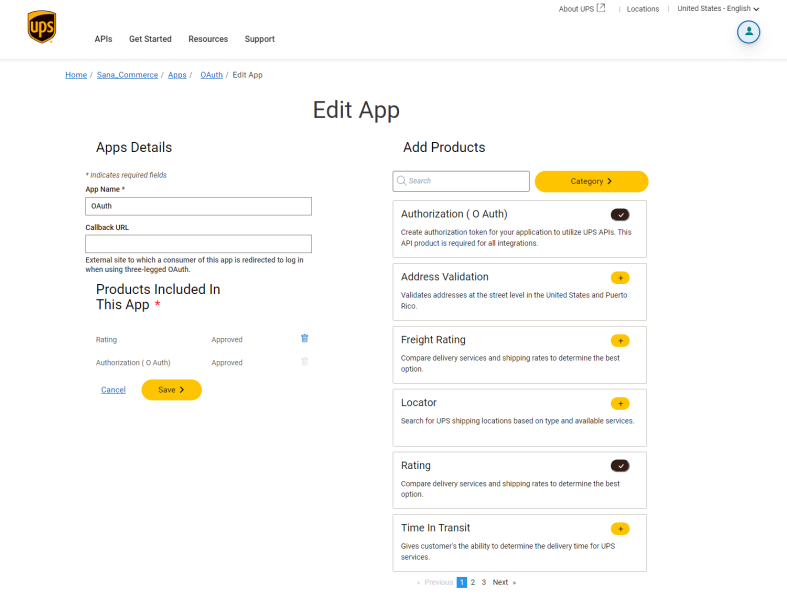
Step 5: Add the Authorization (O Auth) and Rating products to your application.
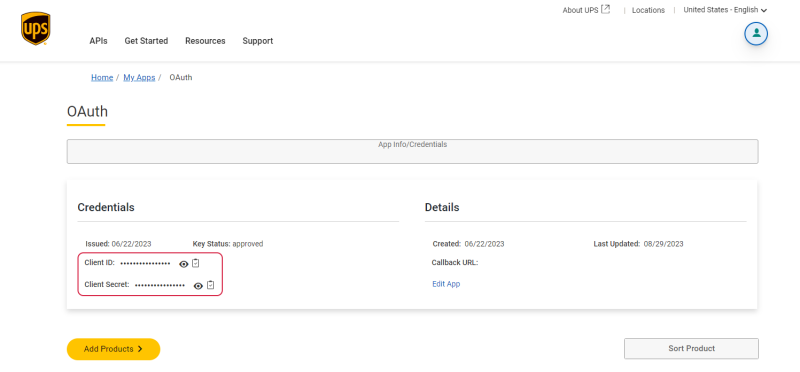
Step 6: Once you created and saved your application, Client ID and Client Secret have been generated. Do not share these credentials with anyone.
For more information about how to obtain the OAuth credentials, in the UPS developer portal click: Get Started > Obtain Your OAuth Credentials.
