Install Sana Web Service
A Sana web store connects to SAP Business One through the Web service implemented by Sana. The Sana Web service for SAP Business One is hosted in the Internet Information Services (IIS) Manager and must be installed on the same machine where the DI Server components are installed. The Sana Web service uses the DI Server to communicate with SAP Business One.
Sana delivers the installer to install and configure the Sana Web service for SAP Business One.
Prerequisites
-
The Sana Web service for SAP Business One. Only registered Sana partners can download it from the Sana Community web site. If you are a customer, please contact your Sana partner or Sana project manager.
-
Internet Information Services (IIS) Manager 7.5 or later.
-
Anonymous Authentication role service must be installed on the server. Anonymous Authentication is used to gain access to the Sana Web service for SAP Business One.
-
.NET Core 3.1.0 or later. You can download it here.
-
It is required to secure data transfer between the Sana web store and SAP Business One. Thus, you must obtain the SSL certificate for the Web service domain. SSL certificate is issued by a certificate authority (CA), which takes steps to verify that your web address actually belongs to your organization. The server where you install the Sana Web service for SAP Business One must support TLS 1.2.
Install Sana Web Service for SAP Business One
Step 1: Run Web Service Installer.exe on the server where the SAP Business One DI Server components are installed. You can find the Sana Web Service Installer in the Connector folder of the Sana add-on package for SAP Business One.
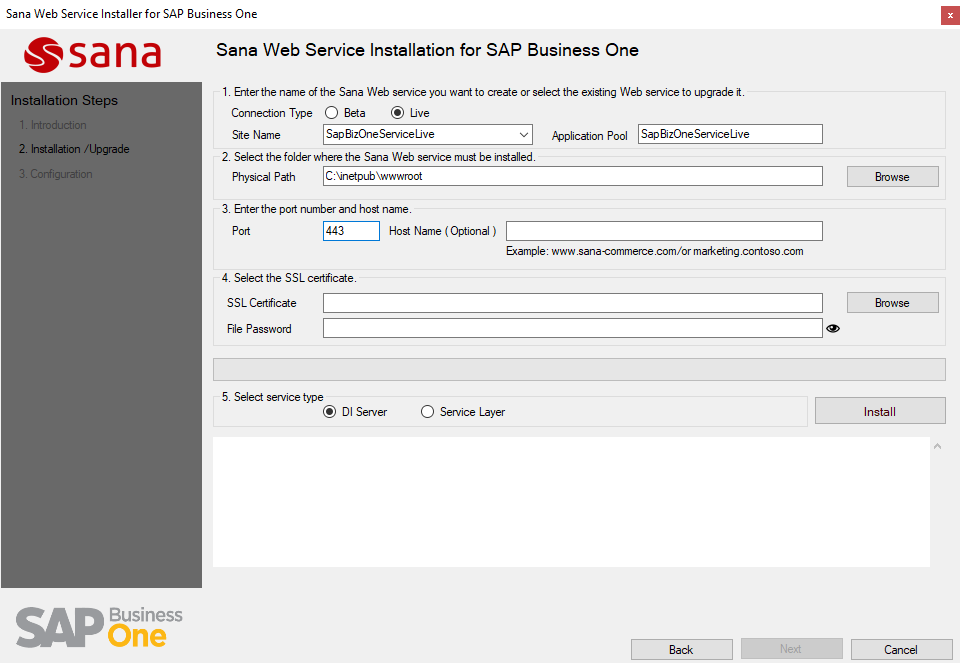
Step 2: Go to the Installation/Upgrade step. Fill in the fields and set up the necessary settings.
| Field | Description |
|---|---|
| Connection Type (Beta / Live) | Select the connection type, Beta or Live.
When you select the connection type, the fields Site Name and Application Pool will be automatically prefilled with the default name, but you can change it. |
| Site Name and Application Pool | Enter the web site name which will be used in the IIS Manager for the Sana Web service. The name of the application pool is automatically predefined with the web site name.
In the Site Name field, you can see all web sites that are available in the IIS Manager on the server. If the Sana Web service for SAP Business One is already installed and you need to upgrade it to the latest version, you can also use the installer. You can select the existing web site which hosts the Sana Web service for SAP Business One and upgrade it. If you need to upgrade the Sana Web service, at first create the backup of your existing Web service. |
| Physical Path | Select the location where the Sana Web service must be installed. This is the path where the Sana Web service content will be stored.
By default, the Sana Web service is installed to this folder: |
| Port | Enter the port on which the Sana Web service for SAP Business One must run. The requests to the Sana Web service are made through this port. |
| Host Name (Optional) | Enter the host name, if you want to access the Sana Web service for SAP Business One by the domain name. The host name is not required. If you leave this field empty, you will be able to access the Sana Web service by the server IP address. |
| SSL Certificate | Add the SSL certificate and enter the password, if it is password-protected.
By encrypting your Sana Web service for SAP Business One using SSL, you make your data and the network more secure and more reliable. The Sana Web service will run over HTTPS. If you don't have the SSL certificate yet, you can install the Sana Web service without it, and secure it with SSL manually once you obtain the security certificate. For more information, see Secure Sana Web Service with SSL. |
| Select service type | Select DI Server.
This integration method is used to connect Sana to SAP Business One using the DI Server. |
Step 3: Click Install.
The Sana Installer will create the web site and application pool for the Web service in the IIS Manager, extract the Web service files to the installation folder, and set up the Web service authentication. If you have added the SSL certificate, it will also set up the Sana Web service to use SSL.
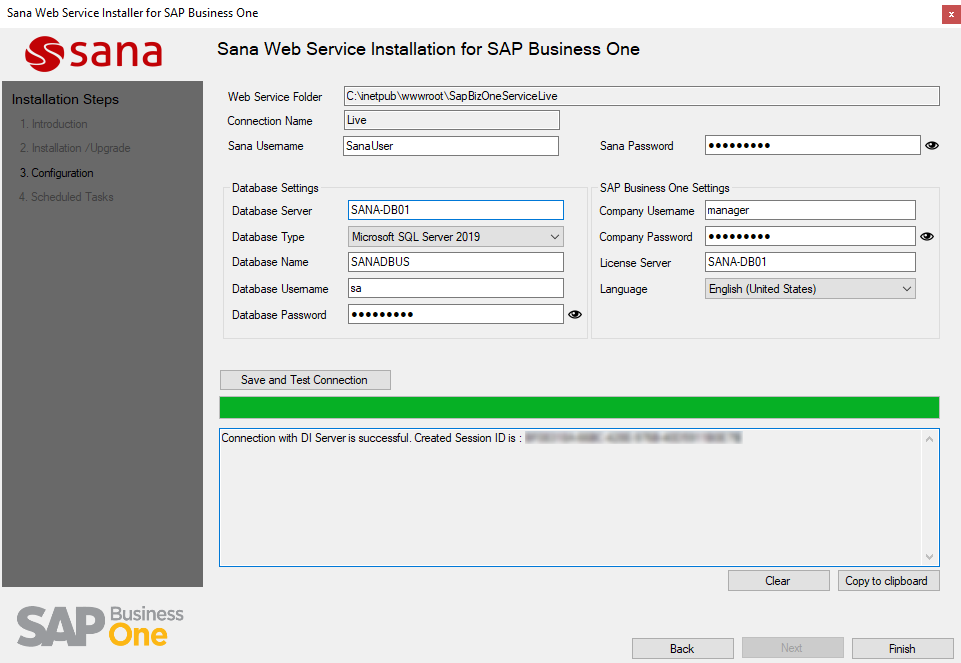
Step 4: When the Sana Web service is installed, click Next. On the Configuration step, fill in the fields and set up the necessary settings to configure the Sana Web service.
| Field | Description |
|---|---|
| Sana Username | Enter the credentials of the user that is used to authenticate the Sana Web service for SAP Business One. You can enter any username and password.
You will need to enter the credentials of this user and Sana Web service URL in the ERP connection settings in Sana Admin. |
| Sana Password | |
| Database Settings | |
| Database Server | Enter the SQL or HANA database server name SAP Business One connects to. This can be either the name or the IP address of the server where the License Server is installed. |
| Database Type | Select the database type, either the SQL Server version or the SAP HANA database. |
| Database Name | Enter the name of the SQL or SAP HANA database that you need to connect to. |
| Database Username | Enter the user credentials of the SQL or HANA database. |
| Database Password | |
| SAP Business One Settings | |
| Company Username | Enter the credentials of the user that is used to log in to the SAP company the Sana add-on is assigned to. This must be a super user in SAP Business One. |
| Company Password | |
| License Server | Enter the name of the SAP License server. |
| Language | Language is the mandatory parameter for DI Server connection. It is used to get information and error messages from SAP Business One in the selected language. Usually, this is the same language as the default language of SAP Business One, but you can choose another language. |
Step 5: Click Save and Test Connection.
If the Sana Web service has been successfully configured and connected to the DI Server, there is another step called Scheduled Tasks.
Step 6: On the Scheduled Tasks step, you can create two tasks required for the DI Server.
This step is available in Sana Commerce Cloud 1.0.51 for SAP Business One and later.
- DI Resolver: Restarts the DI Server automatically when it crashes or a connection issue occurs.
- DI Server Restart: Restarts the DI Server based on the configured schedule. This reduces the number of DI Server failures and connection problems.
Both tasks are created in the Windows Task Scheduler.
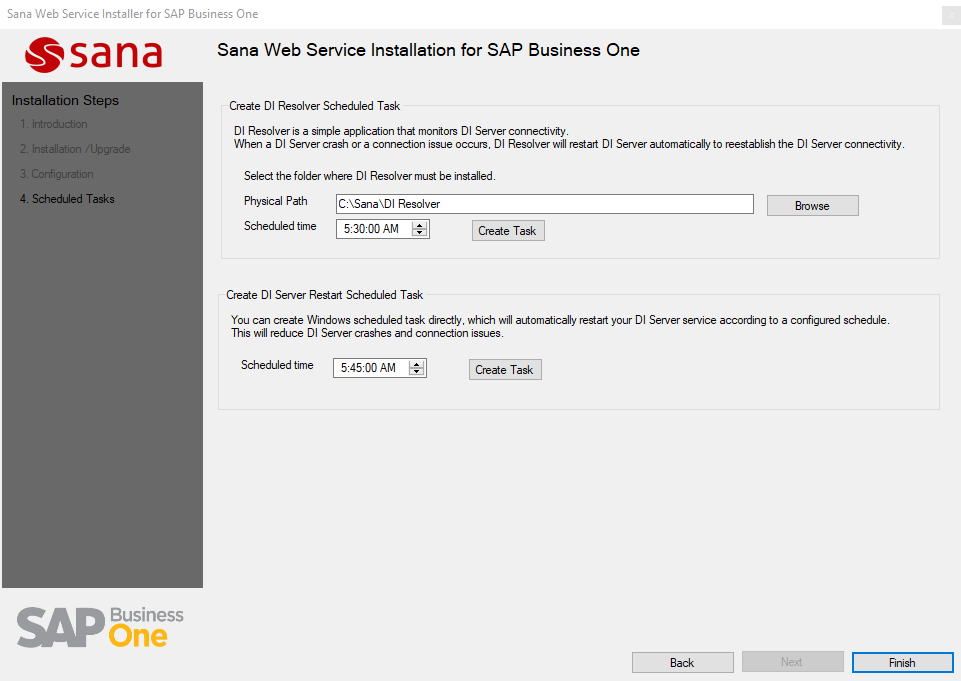
Step 7: Click Finish.
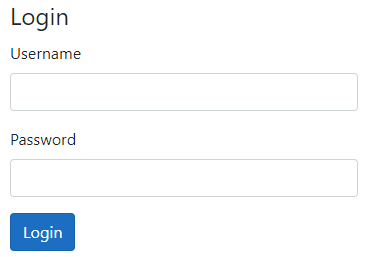
When the Sana Web service for SAP Business One is installed, it will automatically open in the default Web browser. If you can see the Web service login page, then the Sana Web service has been installed successfully.
When the Sana add-on is installed inside SAP Business One, you can reconfigure the Sana Web service at any time, if there is a necessity. For more information, see Configure Sana Web Service.
When the Sana Web service is installed, you will need to enter the URL of the Web service and user credentials on the ERP connection page in Sana Admin to establish connection between Sana Commerce Cloud and SAP Business One. If you don't have access to Sana Admin, send the Sana Web service URL and user credentials to the person who is responsible for the Sana webstore maintenance. For more information, see ERP Connection.