Create App Tiles in the SAP Fiori Launchpad
To create tiles for the Sana apps, use the SAP Fiori Launchpad Designer.
You can open it using URL in the following format:
https://<domain>:<port>/sap/bc/ui5_ui5/sap/arsrvc_upb_admn/main.html?scope=CONF
Don’t use the client in the URL to be able to attach the changes to the transport request and transfer them.
Step 1: In the SAP Fiori Launchpad Designer, click Catalogs and then Create Catalog.
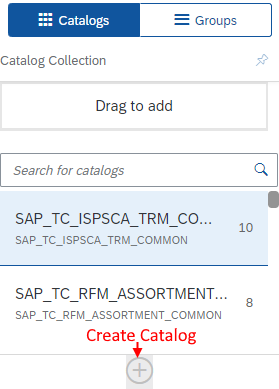
Step 2: Enter catalog details and click Save.

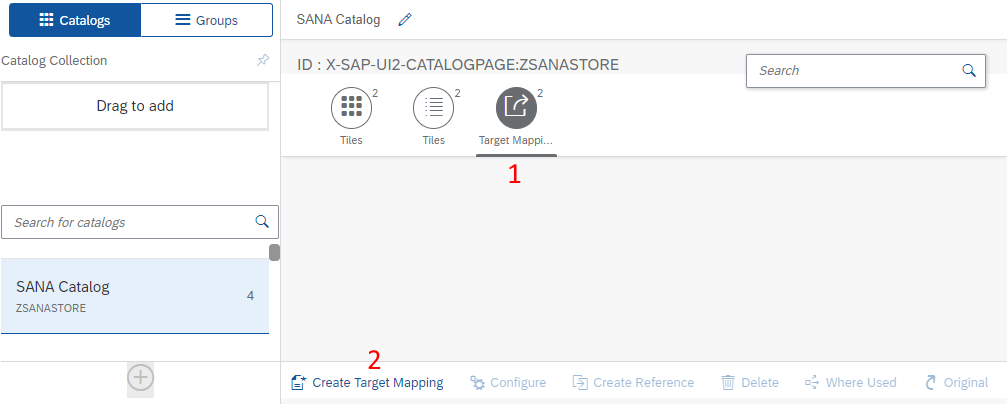
Step 3: Open the created catalog and create a target mapping. Click: Target Mapping and then Create Target Mapping.
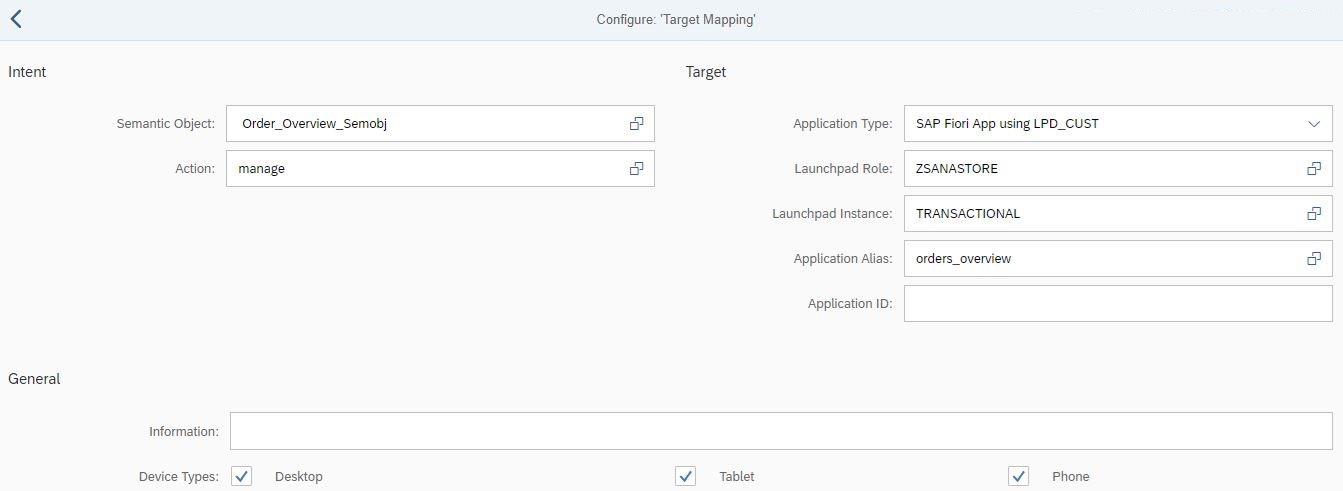
Enter the target mapping details listed in the table below and save it.
The semantic object and application alias in the table and on the screenshot below are provided as an example.
You must create target mappings for all Sana apps.
| Semantic Object | Enter semantic object, for example, order_overview_semobj. |
| Action | manage |
| Application Type | SAP Fiori App using LPD_CUST |
| Launchpad Role | ZSANASTORE |
| Launchpad Instance | TRANSACTIONAL |
| Application Alias | Enter application alias, for example, orders_overview. |
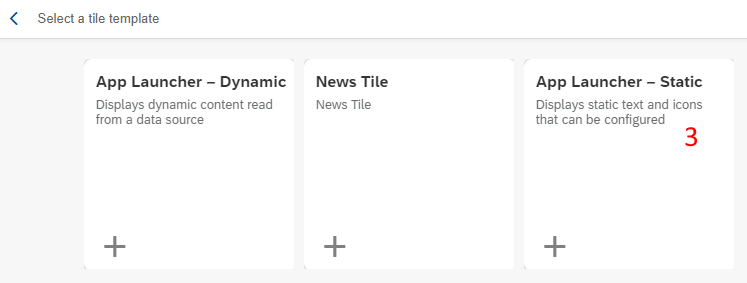
Step 4: Create a static tile. To do this, in the created catalog, click Tiles and then Create Tile. Select the App Launcher – Static tile template.

Step 5: Enter tile details and save it. The app tile will appear in the catalog. You must add tiles for all Sana apps.
| Application Name | Semantic Object | Action | Icon |
|---|---|---|---|
| Webstore Wizard | webstre_semobj | create | sap-icon://Fiori4/F0673 |
| Webstore Configuration | webstre_semobj | change | sap-icon://Fiori5/F0768 |
| Order Overview | orderoverw_semobj | manage | sap-icon://Fiori2/F0003 |
| Catalog Overview | catalog_overview_semobj | manage | sap-icon://Fiori4/F0544 |
| Webstore Rules | webstore_rulesemobj | manage | sap-icon://Fiori5/F0551 |
| Customer Overview | customer_overview_semobj | manage | sap-icon://personnel-view |
| Attachment Overview | attachment_semobj | manage | sap-icon://chain-link |
| Customer Assortment | cusassortment_semobj | manage | sap-icon://Fiori7/F0850 |
| Extra Field Mapping | field_map_smeobj | manage | sap-icon://Fiori2/F0260 |
| Integrity Check | integrity_check_semobj | manage | sap-icon://validate |
| Invoice Overview | invoice_payment_semobj | manage | sap-icon://payment-approval |
| SDK Management | sdkmanage_semobj | manage | sap-icon://TNTIcons/splitter |
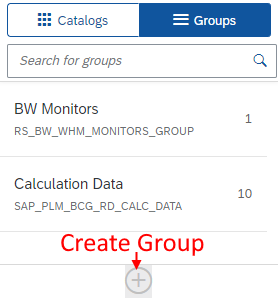
Step 6: Click Groups and then Create Group.
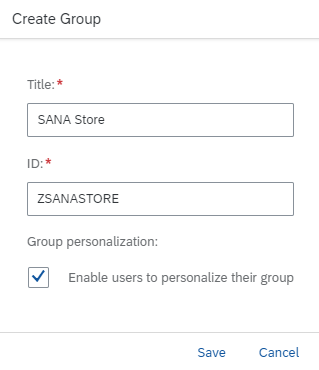
Step 7: Enter group details and click Save.
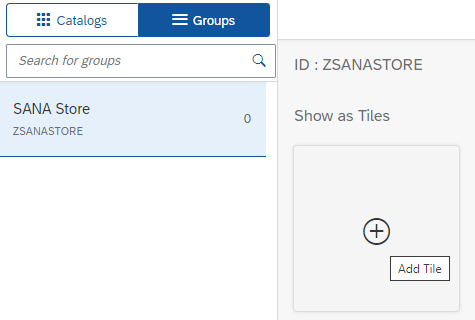
Step 8: Assign the catalog to the group. To do this, in the created group, click Add Tile.
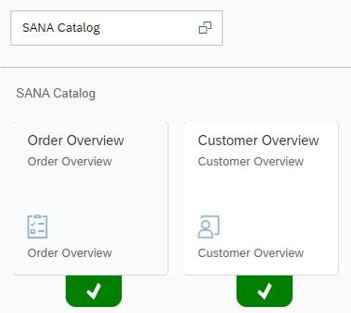
Step 9: Select the catalog created earlier.
Step 10: Click on the plus sign below each tile. They will turn into green checkmarks, indicating that the tile has been successfully added.
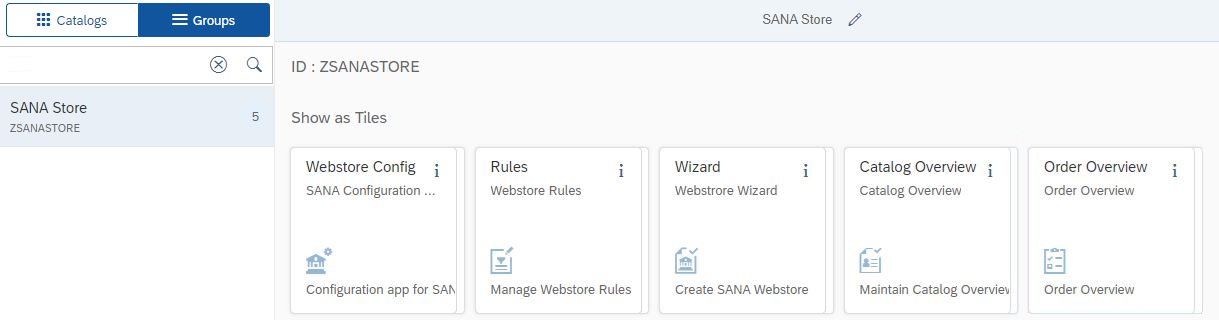
Now, you can see the group with Sana app tiles.