Credit Limit
WATCH THE VIDEO
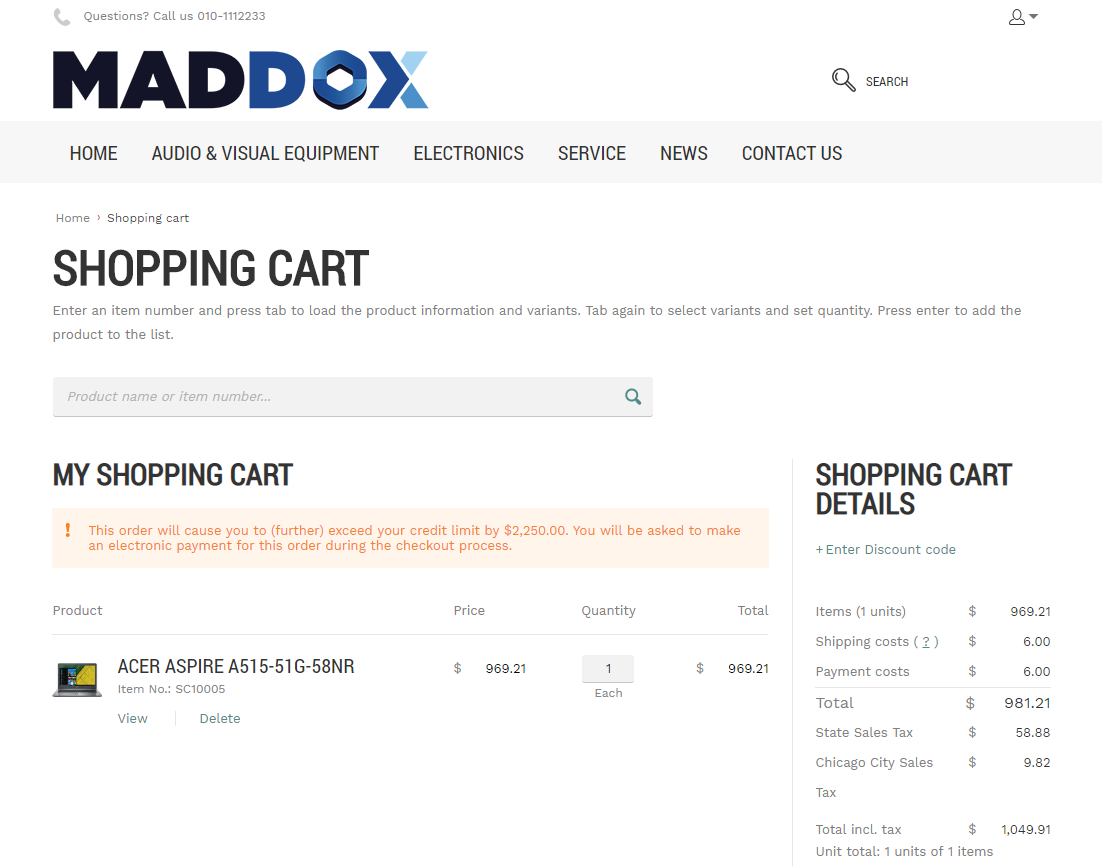
Different businesses might have their own credit management needs. In SAP S/4HANA you can set up automatic credit checks. Credit management allows you to reduce the credit risk by setting up the credit limit for your customers. If customers place an order which exceeds their credit limit set in SAP S/4HANA, customers will see a warning or error message in the shopping cart of the Sana webstore depending on the credit limit setup. A warning message is also shown on all checkout steps. A warning message is available in one step checkout and multistep checkout.
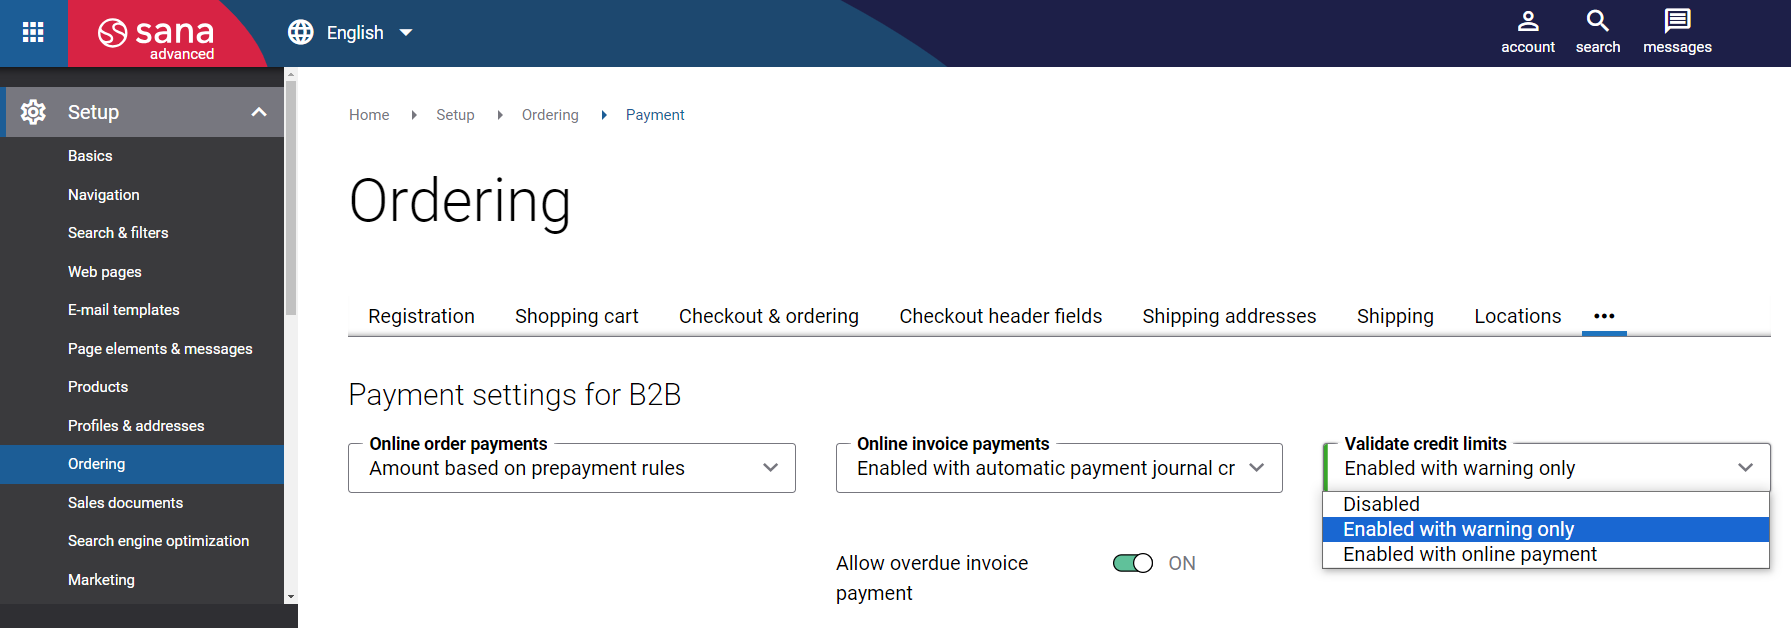
Credit limits must be set up in SAP S/4HANA and in Sana Admin (Setup > Ordering > Payment). For information about how to set up credit limits in Sana Admin, see Credit Limit.
In this article, you will learn how to set up credit limits in SAP S/4HANA. Take into consideration that the configuration of credit limits described in this article is the basic setup and there are some other standard credit limit settings in SAP S/4HANA which should be configured.
Also, in this article, we describe one of the possible ways of configuring credit limits in SAP S/4HANA, you can configure credit limits differently to meet your business needs.
Set Up Credit Limit in SAP S/4HANA
Set Up Automatic Credit Check Rules
Step 1: Call the transaction OVA8 (Automatic Credit Checks).
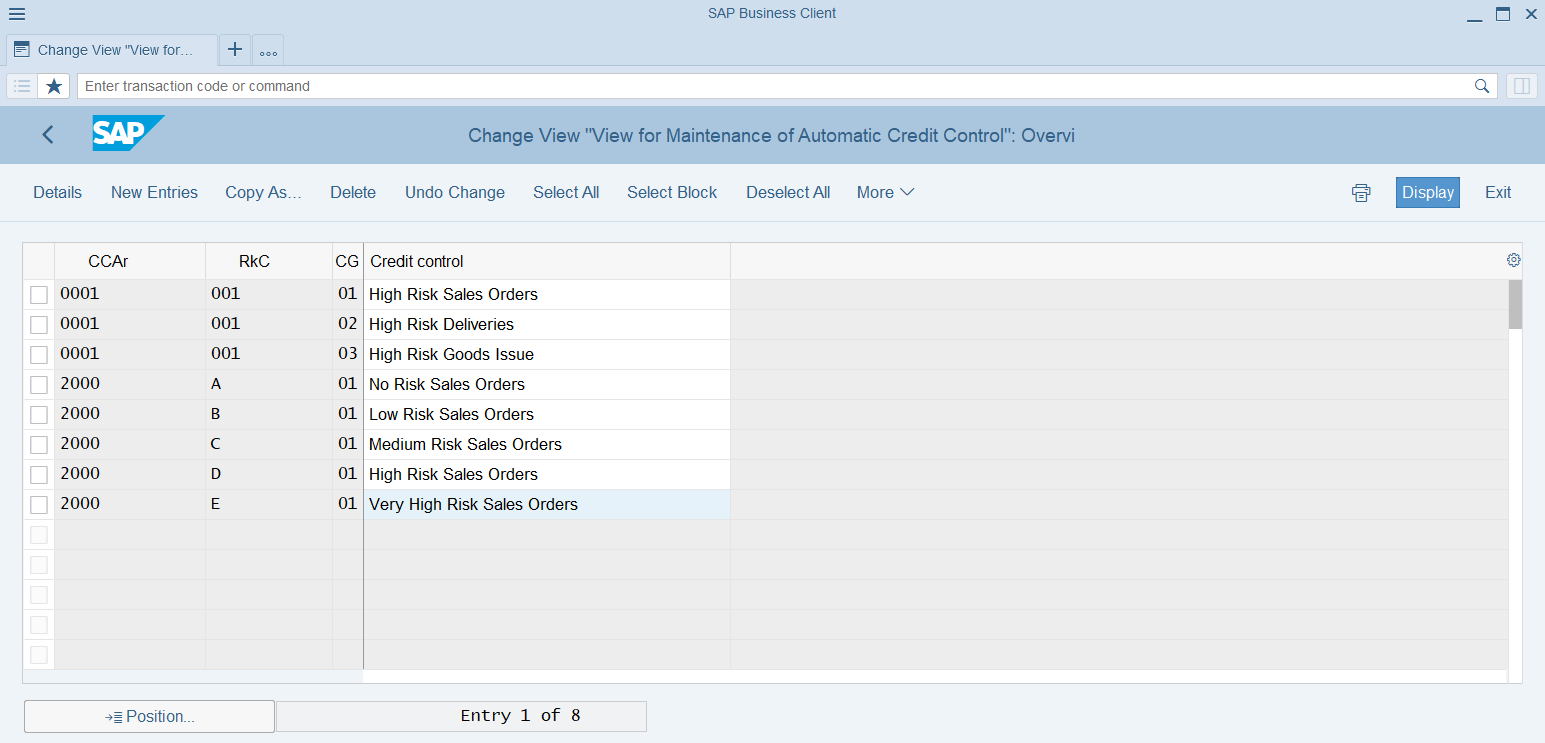
In SAP S/4HANA each automatic credit check rule is defined by the unique combination of Credit Control Area, Risk Category and Credit Group.
Risk categories should be created in advance. When you create the risk categories, make sure that you give them the correct IDs, like A, B, C, D, E. The system maps the risk categories you created to the relevant risk classes which are standard in SAP S/4HANA, using these IDs. That is why the IDs of risk categories and risk classes should coincide. When you set the risk class for your customer, the automatic credit check rule from the relevant risk category will be used for this customer.
Use Automatic Credit Checks to set the necessary automatic credit check rule for each risk category you are using. To do this, click New Entries. Fill in the necessary data.
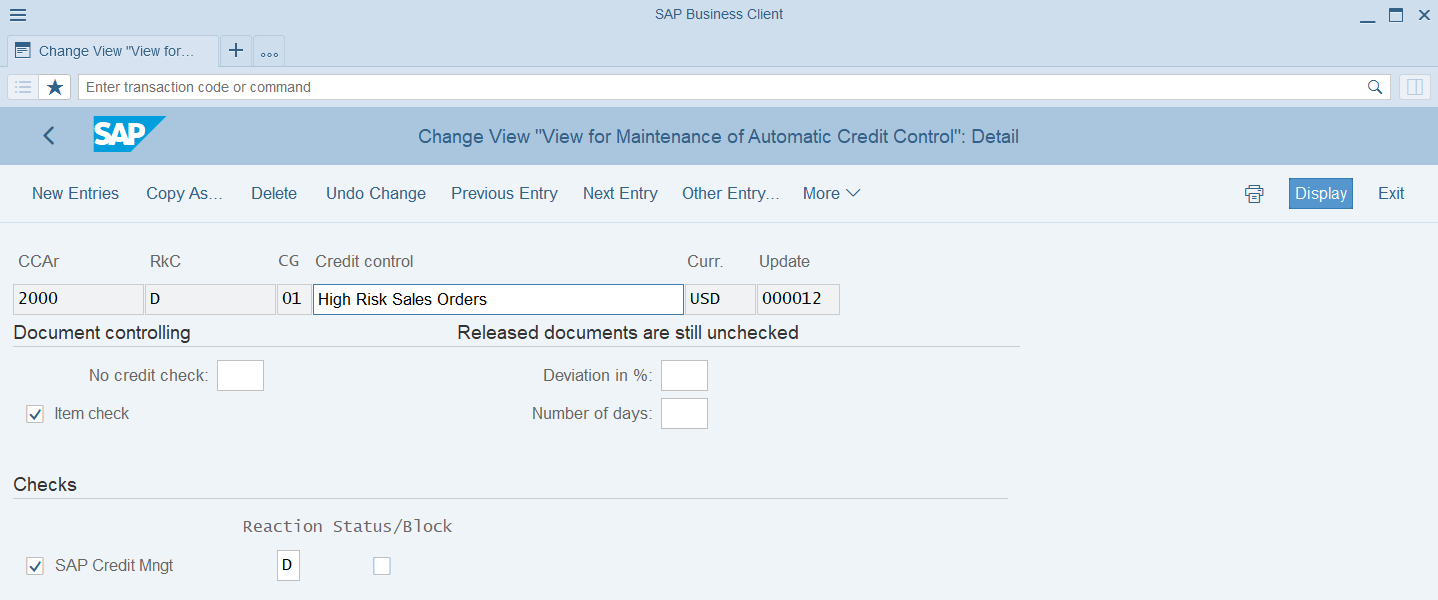
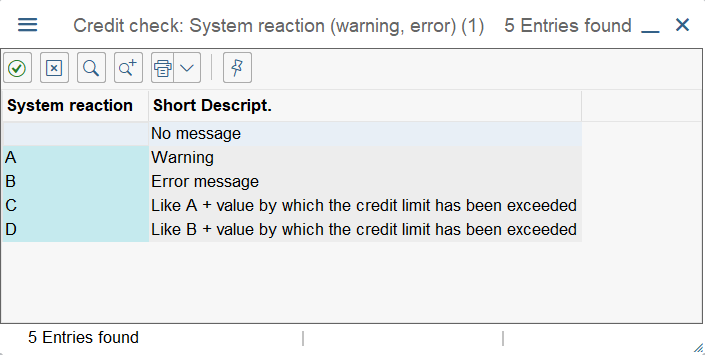
Step 2: In the Checks section, select the SAP Credit Mngt checkbox and in the Reaction field, select what message, warning or error, should be shown to a customer in the shopping cart when the credit limit is exceeded, if this risk category is used for a customer.
You can set up the automatic credit check rules for the risk categories just the way you need.
In the configuration we created, if the A, B or C risk category is used, then customers will see a warning message in the shopping cart and on all checkout steps, if they exceed the credit limit.
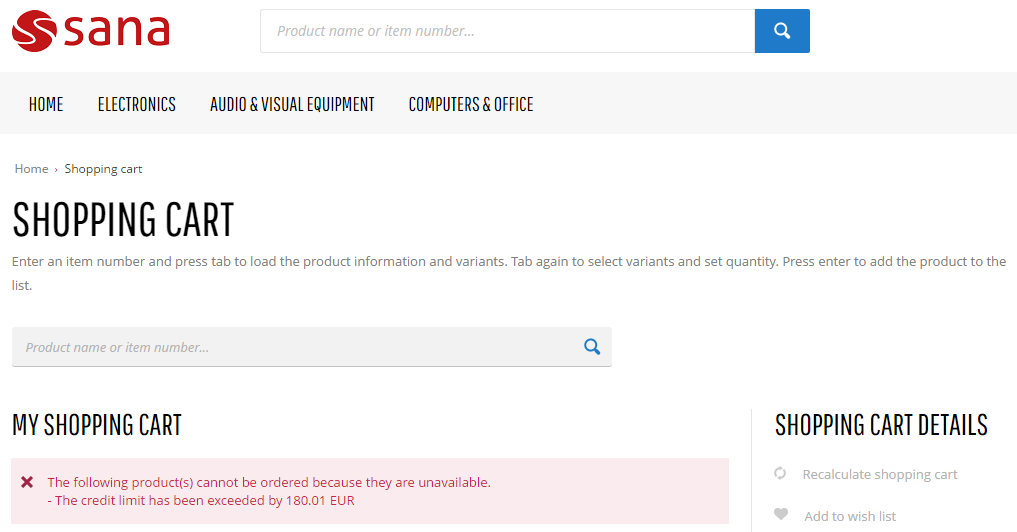
If the D or E risk category is used, then customers will see an error message in the shopping cart, if they exceed the credit limit. Customers will not be able to place an order, until they pay the invoices.
Set Up Credit Limit Check for a Sales Document Type
You need to assign the necessary credit limit check to a sales document type (sales order) you are using. In SAP S/4HANA you can set up different sales document types for the Sana webstore. For more information, see Supported Order Types.
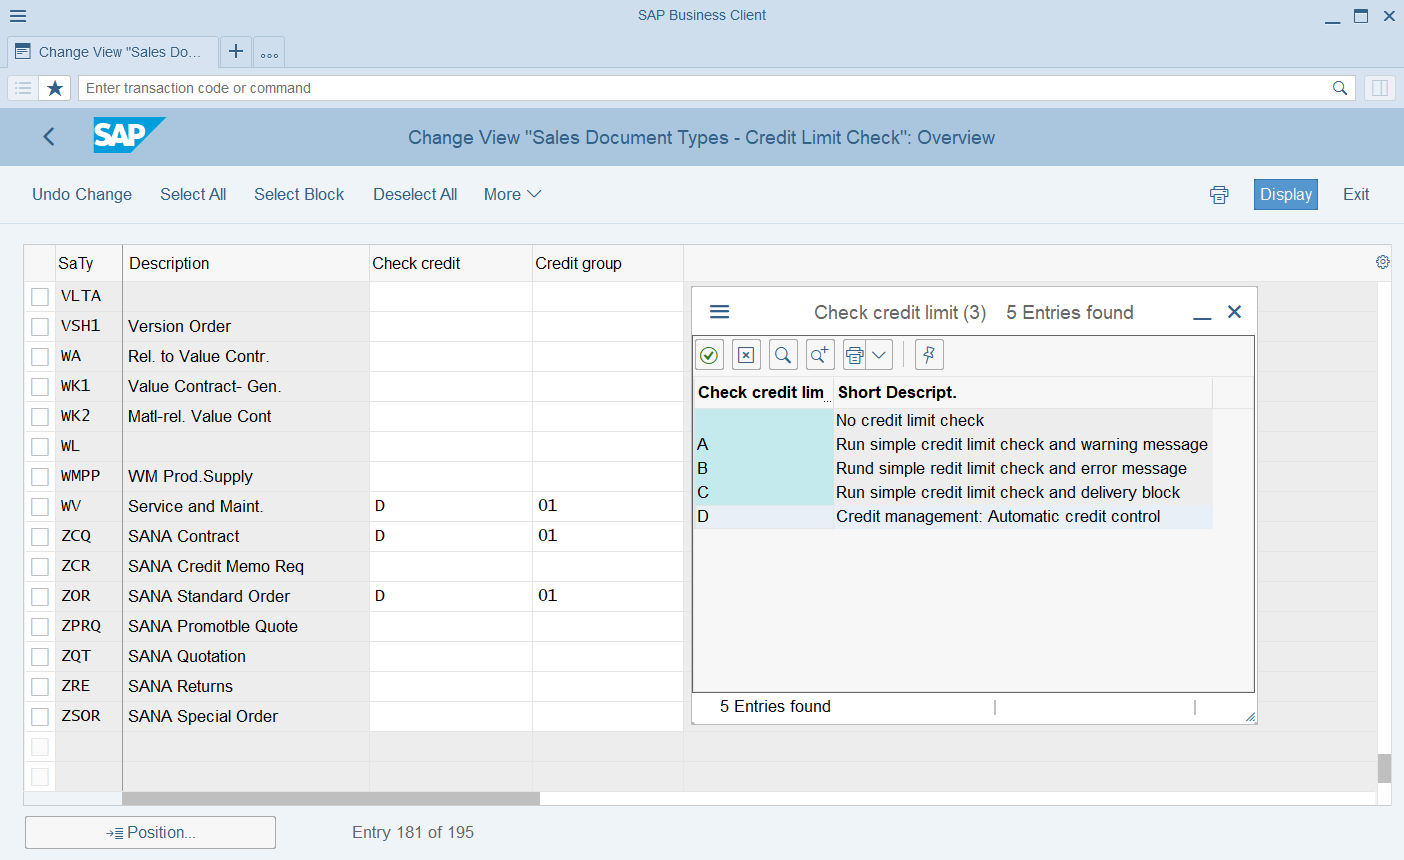
Step 1: Call the transaction OVAK (Sales Order Type Assignment).
Step 2: Find the sales document type (sales order) you are using for the Sana webstore and select the value D (Credit management: Automatic credit control). This is necessary to map the sales document type (sales order) you are using for the Sana webstore to the automatic credit checks. Only if this mapping is done, the automatic credit check rules you previously configured will work and a customer will see a warning or an error message in the shopping cart when the credit limit is exceeded.
Set Up Credit Limit for a Customer
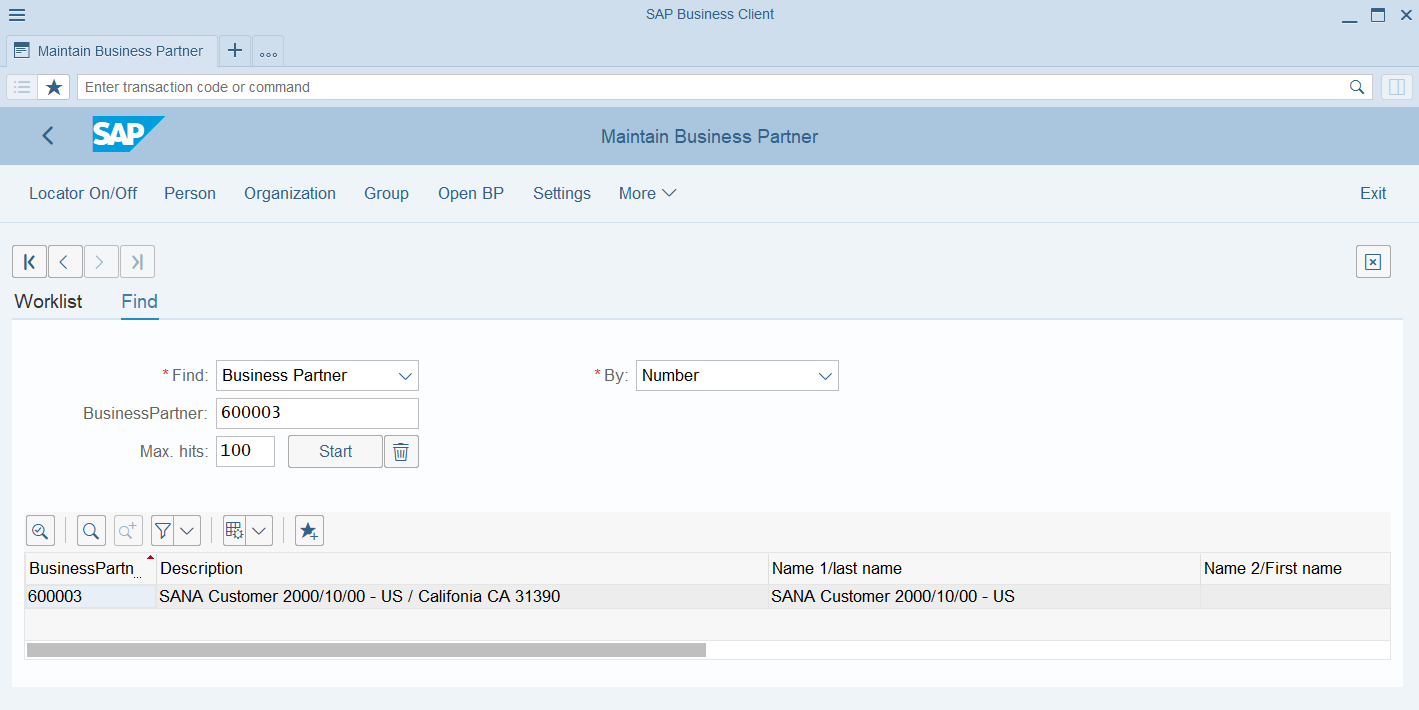
Step 1: Call the transaction BP (Maintain Business Partner). Open the necessary business partner.
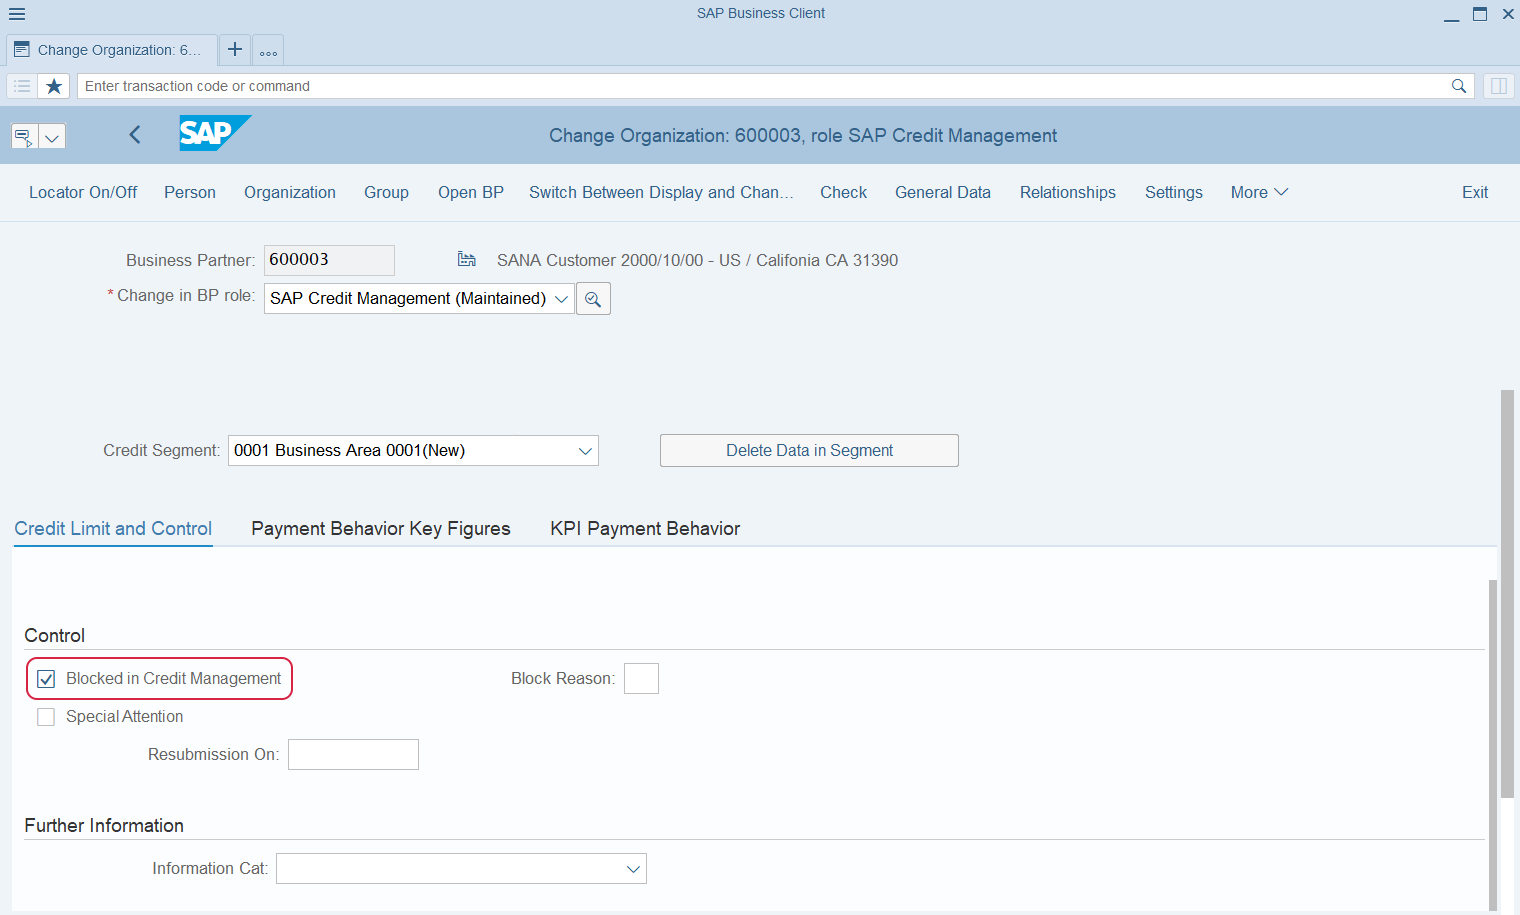
Step 2: Switch to the change view and in the Change in BP role field, select SAP Credit Management.
Step 3: Open the Credit Profile tab and fill in the necessary data.
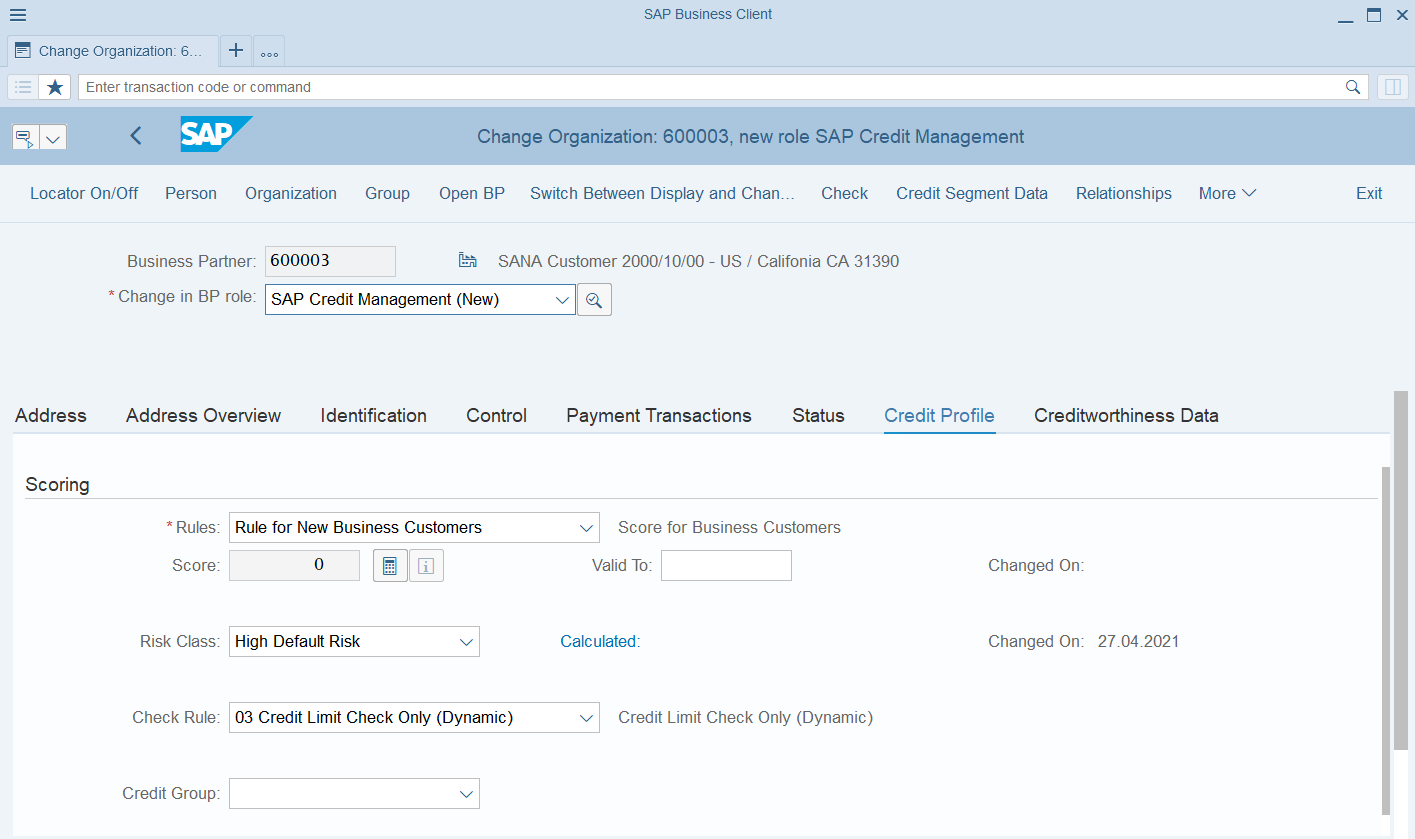
Step 4: Select the necessary risk class in the Risk Class field. Risk classes are directly mapped to the risk categories. When you select a risk class, the automatic credit check rule set for the relevant risk category will be applied to a customer. Depending on how the automatic credit check rule is configured for the risk category, a customer will see a warning or an error message in the shopping cart when the credit limit is exceeded.
Step 5: Click Credit Segment Data at the top of the window.
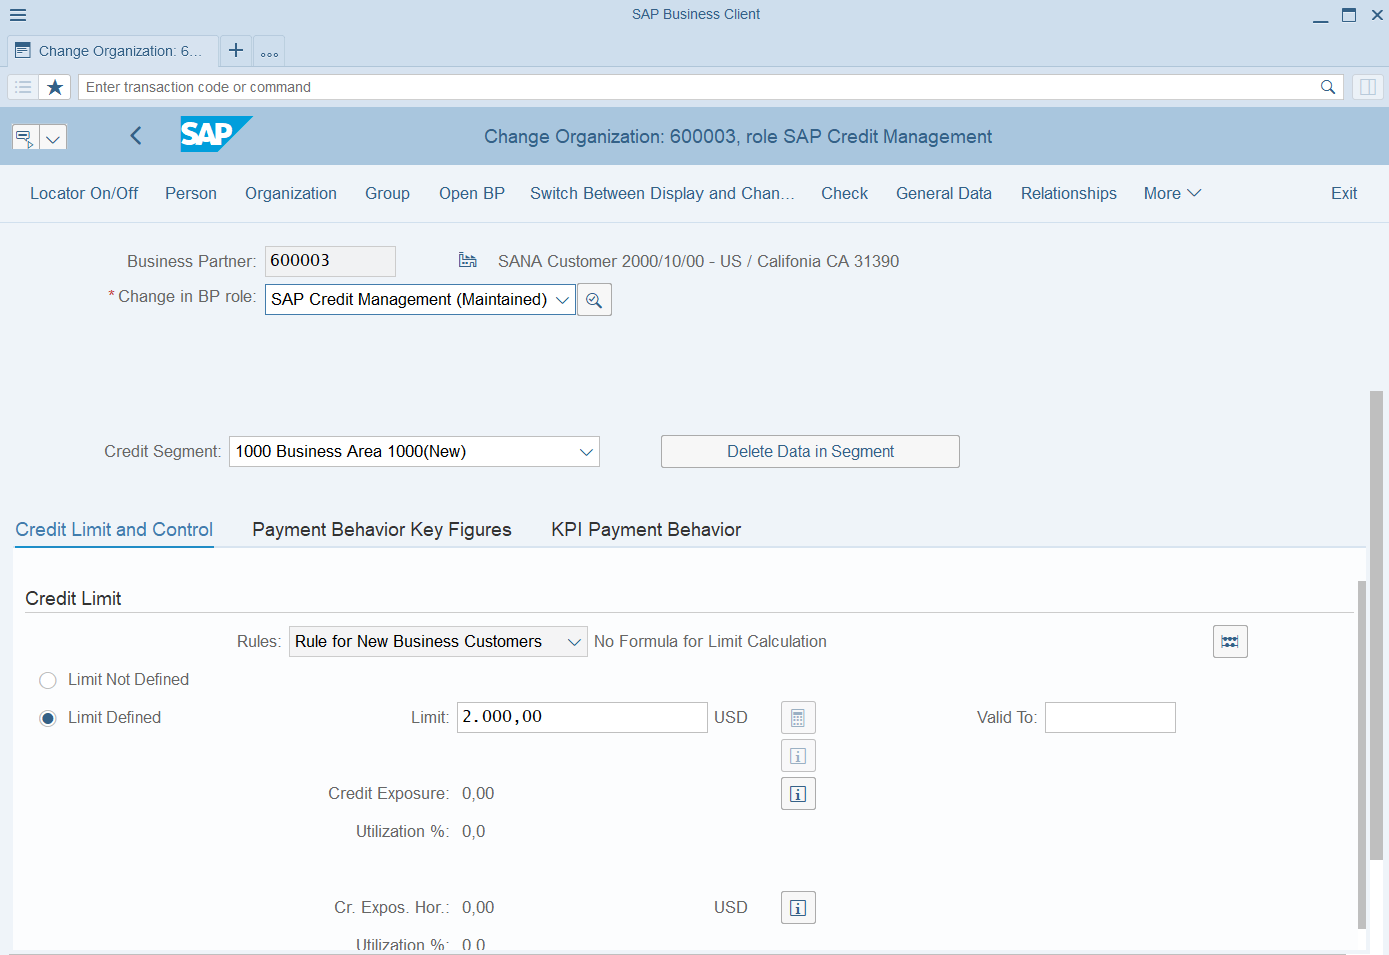
Step 6: Select the correct credit segment in the Credit Segment field. When the credit segment is selected, you can set the credit limit for your customer.
Step 7: On the Credit Limit and Control tab, select the Limit Defined option, then enter the credit limit amount for your customer in the Limit field.
Step 8: If you select the checkbox Blocked in Credit Management on the Credit Limit and Control tab, the customer will be blocked for all credit management business transactions. If the credit limit is exceeded, customers will not be able to place an order, until they pay the invoices. The message will not be shown in the shopping cart.
This is another method that you can use to block certain customers from placing an order if they exceed a credit limit.