Quantity Discounts
Important: If you are considering migrating your ERP to Unified pricing management, please contact your Sana representative before making any changes. We want to ensure a smooth transition by working with you on an individualized plan tailored to your business needs.
A quantity discount is a discount that is given to customers when they purchase a particular quantity of a product. The discount is based on the total quantity ordered, not the quantity per product line.
Examples
- Buy five or more spare parts or machine accessories, and get 20% off.
- Buy six or more units of machinery components, and get 30% off.
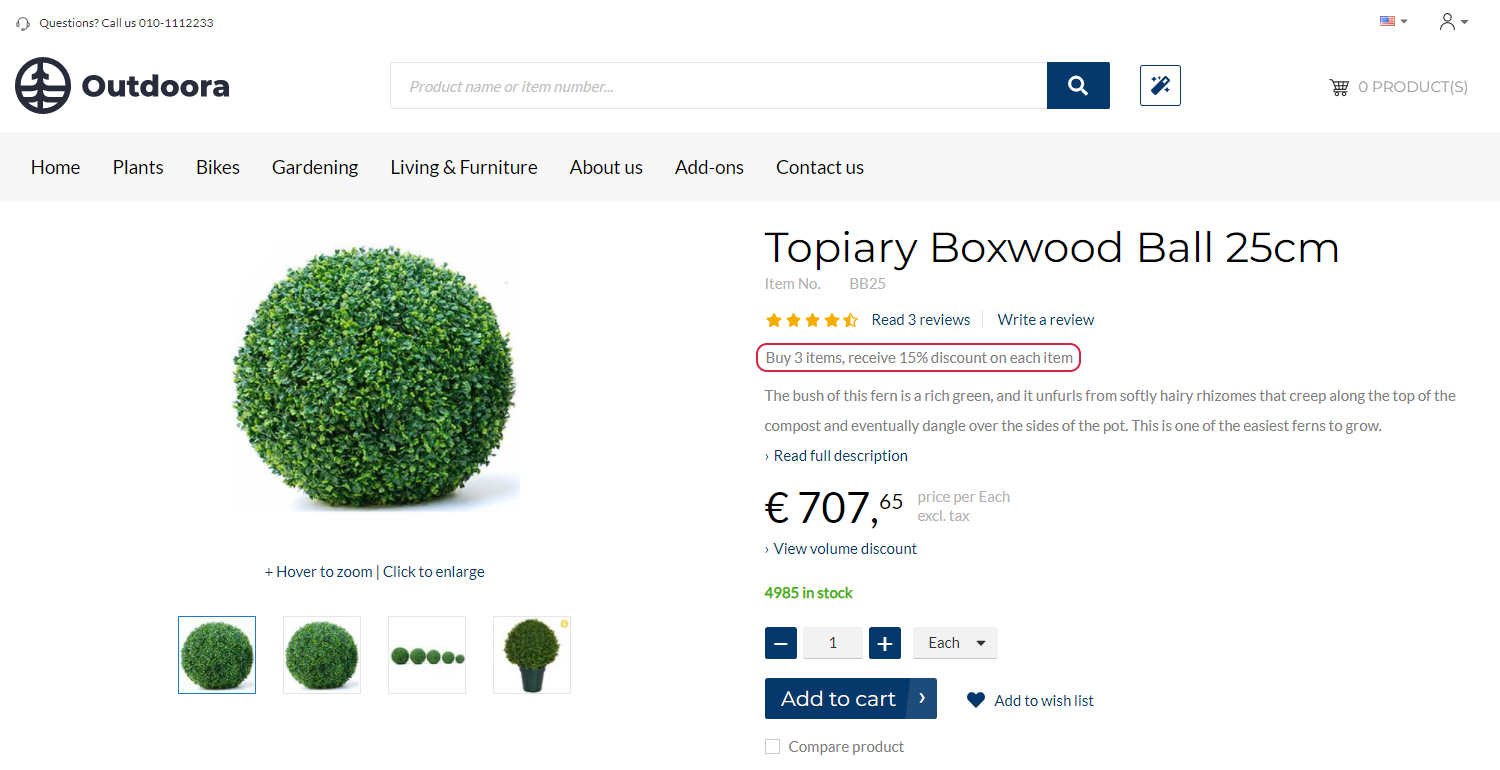
If a discount is valid for a product, a discount name will be shown in the webshop on the product details page. The discount offer description is shown on the product details page using the Discount offer text content element.
For more information about quantity discounts, refer to the official Microsoft documentation:
Discount Types
Pricing Rules for Discounts and Margin Price Adjustments
Configure Quantity Discounts
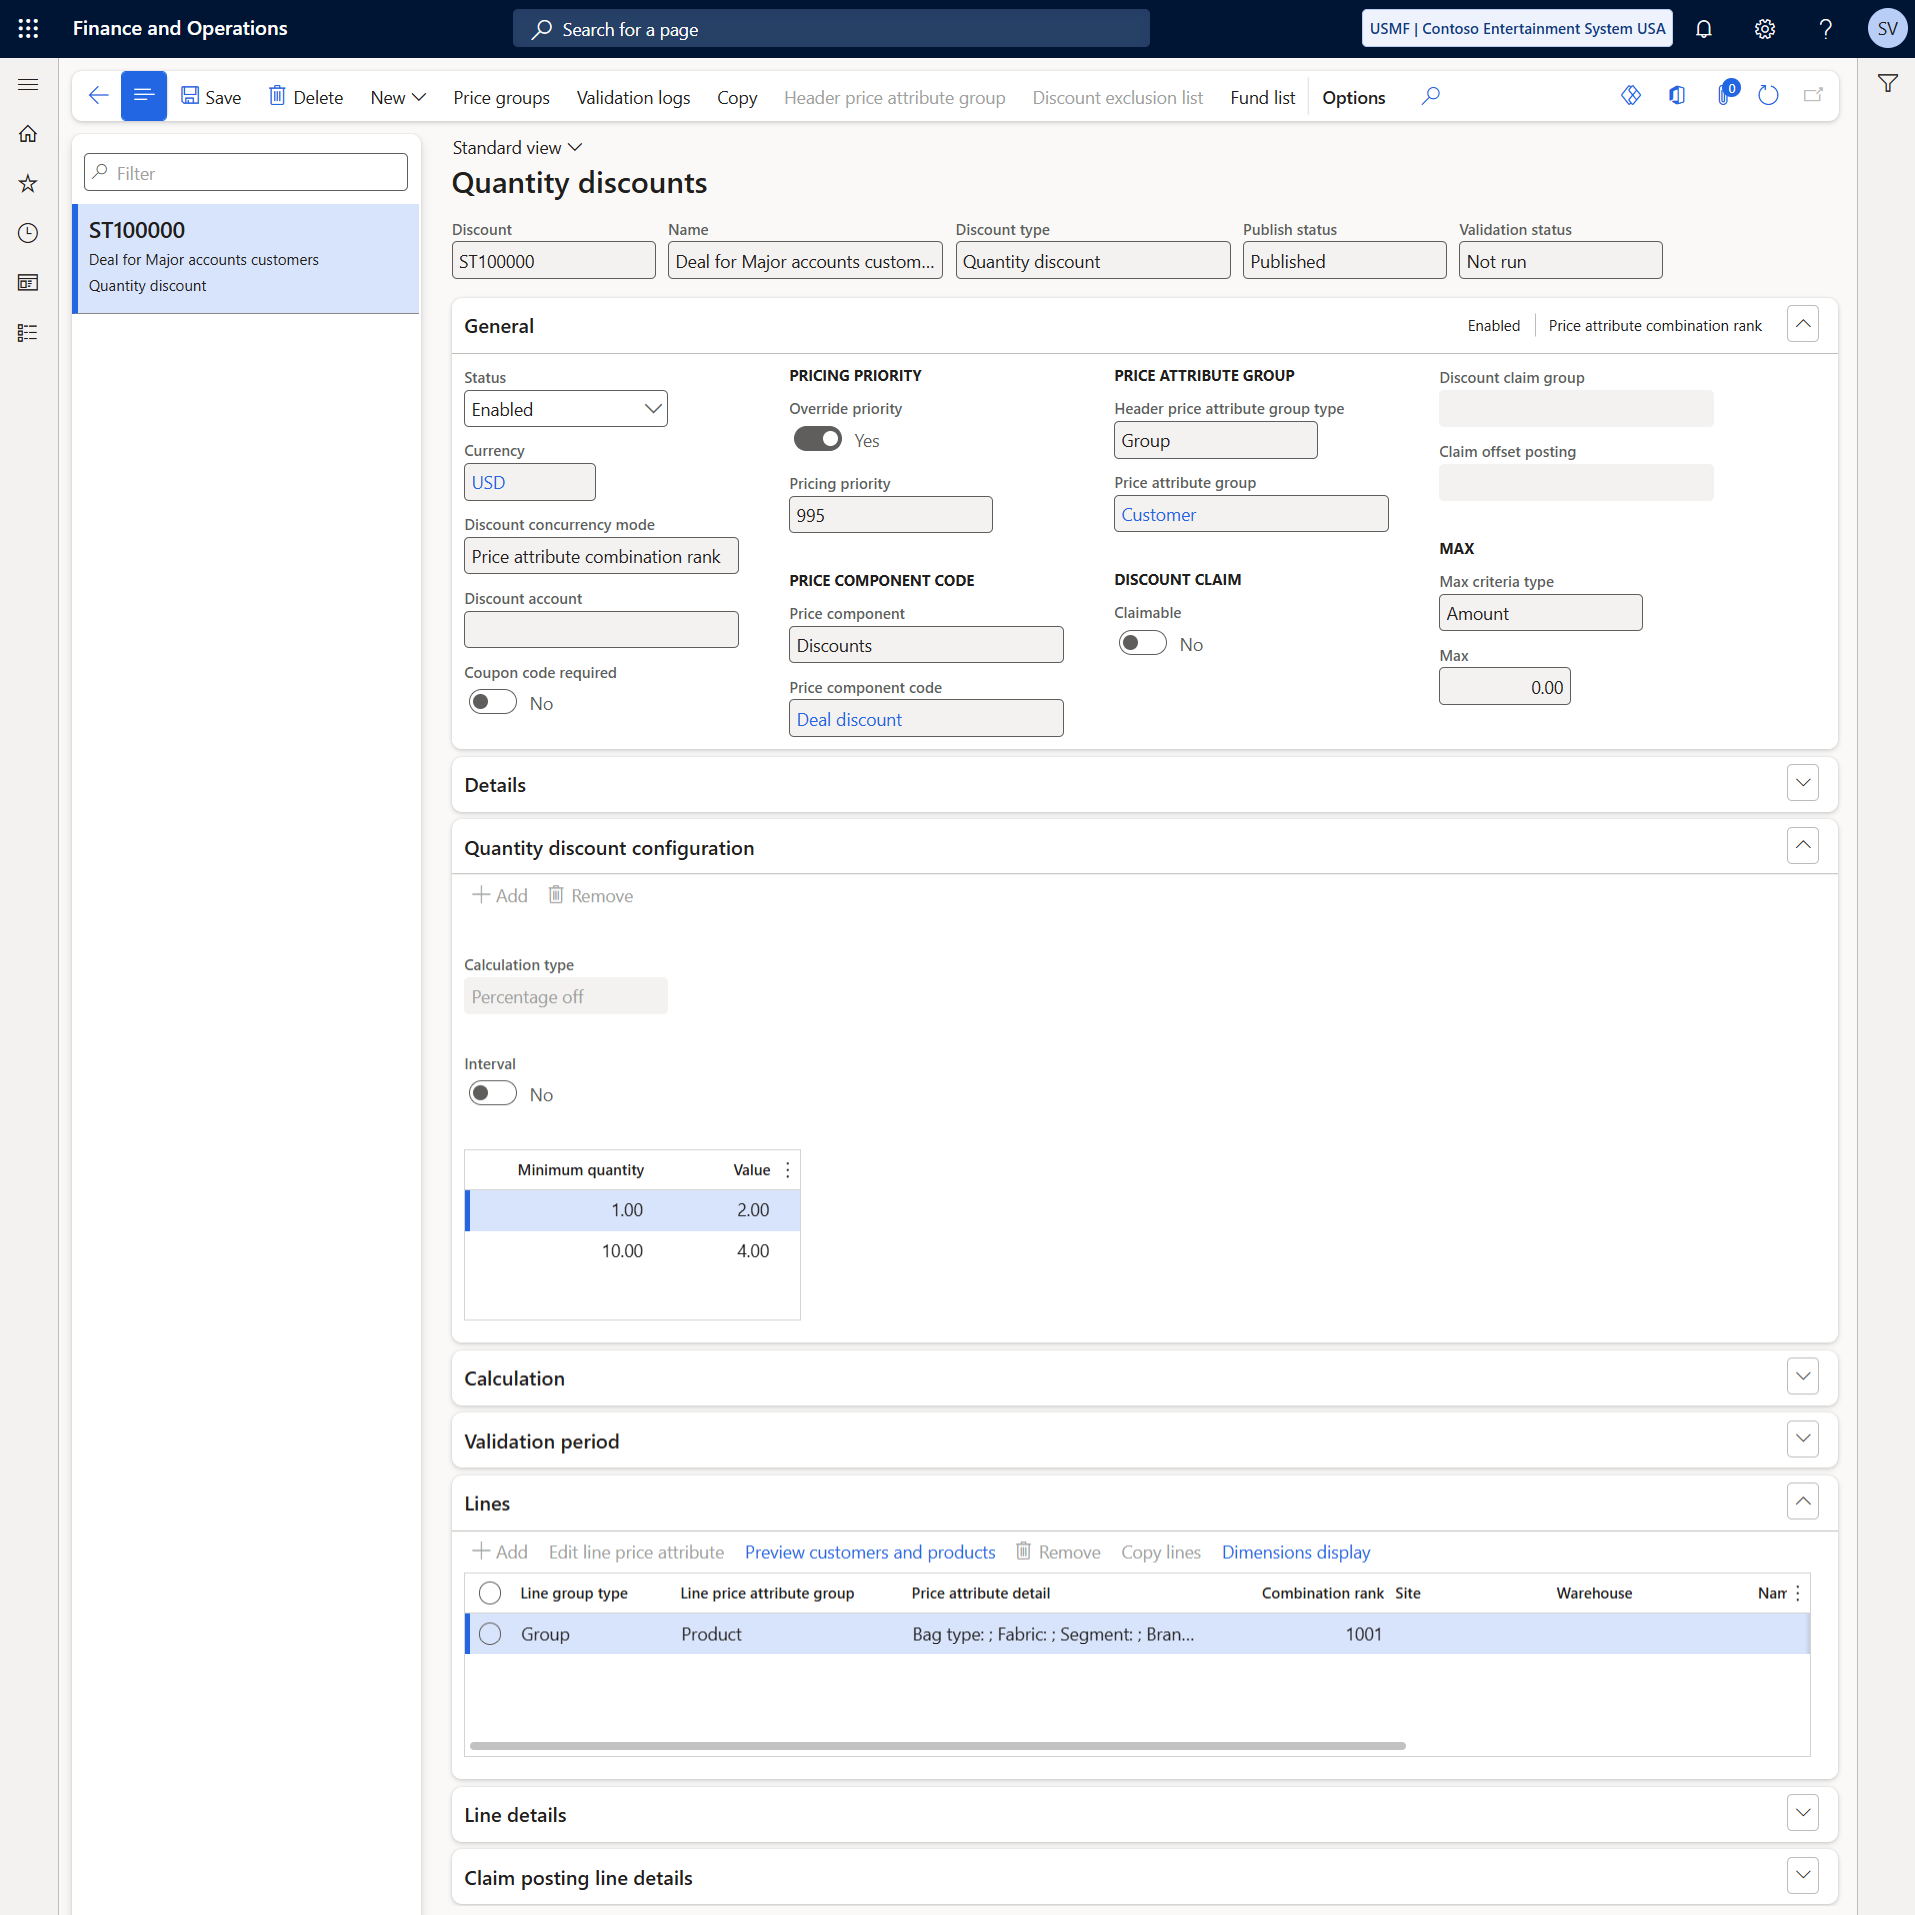
To set up quantity discounts, in Microsoft Dynamics 365 for Finance and Operations click: Pricing management > During-sales pricing > Discounts > Quantity Discounts.
This article outlines the key settings required to configure quantity discounts. For more detailed information on how to set up quantity discounts, please refer to the official Microsoft documentation.
The table below provides description of the fields on the General, Quantity discount configuration, Validation period FastTabs and in the general area.
| Field | Description |
|---|---|
| Discount | Provide a unique identifier for the quantity discount. If number sequences are set up, Microsoft Dynamics 365 for Finance and Operations automatically generates the ID numbers. |
| Name | Provide a descriptive name for the quantity discount. |
| General FastTab | |
| Status | Use this field to either enable or disable the quantity discount. Only enabled quantity discount is available for calculations. New quantity discount is initially disabled and can only be enabled once all required fields are filled out. |
| Currency | Select a currency for which the quantity discount should be valid. |
| Discount concurrency mode |
Choose one of the following options to determine how the system should handle cases where multiple discount rules apply to the same price component code in a price structure. The following options are available:
For more information, refer to the official Microsoft documentation: Resolve Concurrency Within Price Component Codes.
|
| Discount account |
Select the necessary discount account. You can post discount amounts for a transaction to a separate general ledger (GL) account.
This field overrides the similar field that's available for price structures (price trees). For more information, refer to the official Microsoft documentation: Price Component Posting. |
| Coupon code required |
Enable this option if you need to use coupons.
The quantity discount must be linked to the coupon. In this way the quantity discount will be applied to an order when a customer enters the coupon code in the shopping cart in the Sana webshop. The quantity discount will be triggered only if the coupon code is entered. If you need to apply quantity discounts to the shopping cart without coupons, then disable the Coupon code required option. If the Coupon code required option is enabled, the Status field, Effective date and Expiration date fields will not be available. To create coupons, in Microsoft Dynamics 365 for Finance and Operations click: Pricing management > During-sales pricing > Coupons. |
| Price component code | Select the price component code that the quantity discount applies to. |
| Claimable | If this setting is enabled, the quantity discount will be made claimable. This means the discount is vendor-sponsored and can be charged back to the vendor. |
| Discount claim group | If the Claimable setting is enabled, select the appropriate claim group. |
| Claim offset posting | If the Claimable setting is enabled, choose the offset account where the claim should be posted. |
| Max criteria type |
If a maximum quantity discount per order is applicable, choose the type of limit you want to apply. The following options are available:
|
| Max | If a maximum quantity discount per order is applicable, enter the value for the limit. |
| Max quantity unit | If the Max criteria type field is set to Quantity, select the unit of measure that corresponds to the value entered in the Max field. |
| Quantity discount configuration FastTab | |
| Calculation type |
Specify how the quantity discount will be calculated. The following options are available:
|
| Interval | This setting is applicable only when the Calculation type field is set to Amount off. Enable the Interval option to apply a stepped calculation for each quantity tier. |
| Minimum quantity |
Use the grid to define a set of quantity tiers and the discount that applies to each tier. You can add and remove rows from the grid using the buttons on the toolbar. For each row, specify the following fields:
|
| Value | |
| Validation period FastTab | |
| Use the fields on the Validation period FastTab to define the period during which the quantity discount is valid. You can configure the validation period using either standard or advanced rules. | |
After configuring the general settings, proceed with setting up the lines.
Header Price Attribute Group Settings
All lines within a pricing rule apply to the same set of customers, which you can configure in the header price attribute group settings. These settings can be accessed by selecting Header price attribute group on the Action Pane. The Edit price attributes dialog box appears, allowing you to configure the logic for identifying the customers to whom the current pricing rule will apply. The limits set here will apply to all lines and products covered by the rule.
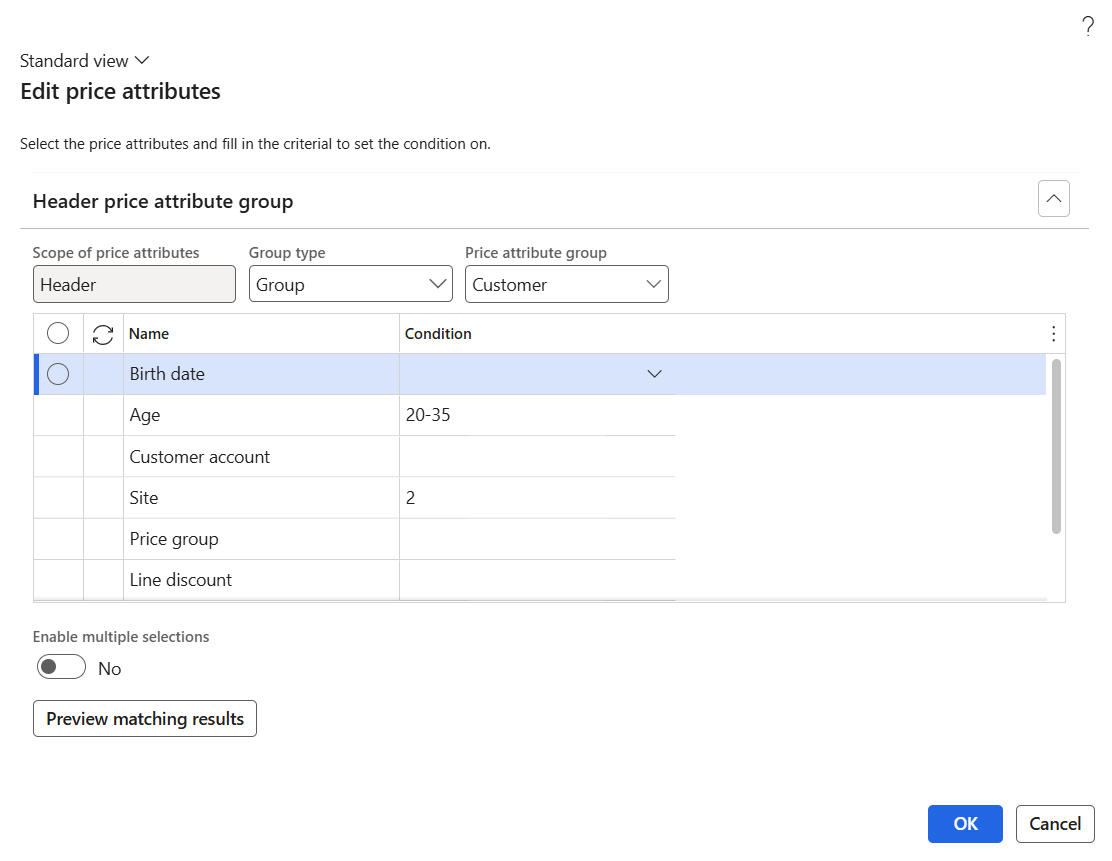
Configure the Header price attribute group settings:
Step 1: In the Group type field, choose the customer selection type you want to set up. The available options depend on the price attribute combinations associated with the selected price component code:
- Group: By selecting this option, the dialog box will present a set of header attributes that you can assign values to, enabling you to narrow down the group of customers the pricing rule applies to.
- All: The pricing rule will be applied to all customers.
Step 2: If you selected the value Group in the Group type field, in the Price attribute group field, choose a price attribute group. The available options depend on the attribute groups enabled for the selected price component code. The value you select will determine the set of attributes you can work with in the dialog box.
Step 3: If you selected a price attribute group, its attributes will appear on the Header price attribute group FastTab. For each row, enter or select one or more values in the Condition column to specify the rules for customer selection.
Step 4: Select Preview matching results to see a preview of the settings you have configured. A dialog box will display a list of customers that meet the conditions you have configured.
Line Price Attribute Group Settings
Use the Lines FastTab to specify pricing rule that will apply to each product.
Click New on the Lines FastTab to add a line. The Edit price attributes dialog box appears, allowing you to configure the logic for determining which products the current line will apply to.
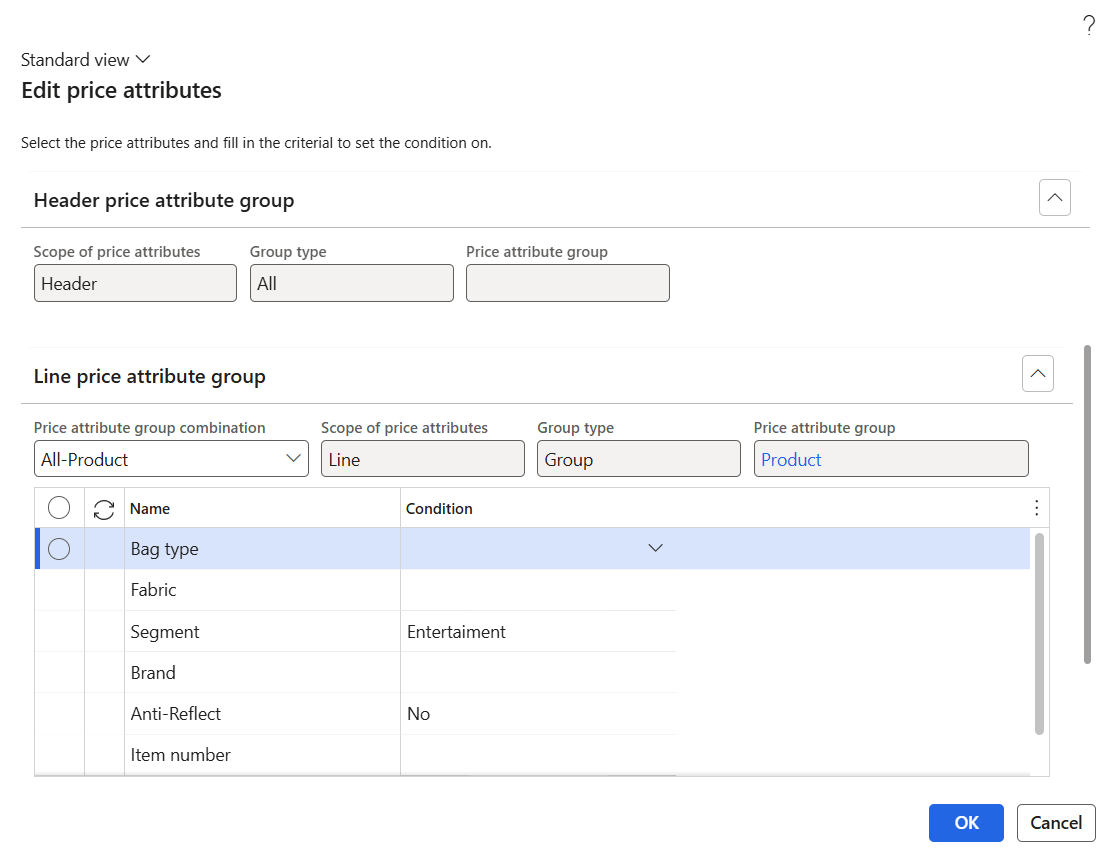
Configure the Line price attribute group settings:
Step 1: On the Header price attribute group FastTab, review the logic used to select the customers to whom the current pricing rule applies. The values set here will apply to all lines within the current pricing rule.
Step 2: In the Price attribute group combination field, on the Line price attribute group FastTab, select the combination of price attributes that will define the products for the current line. The available combinations are determined by the price component code selected for the current pricing rule. Select the price attribute group combination where the right side of the name corresponds to how you want to define the collection of products the line will apply to. The left side of the price attribute group combination name is related to the header price attributes, and they are common to all lines for the pricing rule.
Step 3: On the Line price attribute group FastTab, enter or select one or more values in the Condition column to define the rules for selecting products. The displayed set of attributes is based on the price attribute group combination you selected. The attributes will not be available on the Line price attribute group FastTab, if the selected price attribute group combination applies to all products.
Step 4: Select Preview matching results to see a preview of the settings you have configured. A dialog box will display a list of products that meet the conditions you have configured.
Once you have defined the products and customers the line will apply to, configure the settings required to create the line.
Create the Lines
The table below provides description of the fields on the Lines FastTab.
| Field | Description |
|---|---|
| Dimensions |
You can select one or more dimensions of a product as discount lines.
Click Display dimensions on the toolbar on the Lines FastTab to add the necessary dimensions to the table. Fill in the dimensions fields to restrict the line so that it applies only to products that correspond to the specified dimension values. For example, you can specify a discount on products with a specific style or you can specify a discount on products that are of a specific color and style. |
| Site | The site and warehouse where the product is stored. |
| Warehouse | |
| Unit | Select the unit of measure of a product for which the discount will be valid. |
| Line type |
Using this field, you can either include or exclude a line from the quantity discount. The following options are available:
|
When a customer adds the product to the shopping cart, the price is automatically updated to reflect any price adjustments or discounts. If the discount has been applied, it is also shown in the shopping cart.