How to Make a Refund
Automated refunds are available only in Sana Pay+.
In this article, you will learn what you need to do to allow refunds through Sana Pay.
Step 1: When you create a payment method in Sana Admin for Sana Pay, you must enable the option Allow refund. You must enable this option for all Sana Pay payment methods that can be used for refunds. Make sure that the payment method supports refunds.

Step 2: If a customer returned an item or multiple items, you must create a credit note (memo) in your ERP system and post it. It must be created for the invoice of the order created by a customer in the Sana webstore. You can refund a payment only for the orders that are created in the Sana webstore.
A credit note must be created based on a posted invoice in your ERP system. Credit notes created without the reference to the invoice will not be processed.
You can only refund a payment after it has already been captured. You can refund either the full captured amount (order total) or a part of it if multiple invoices were created for one order. If there are multiple invoices for the order, you can make multiple partial refunds, but their sum cannot exceed the order total.
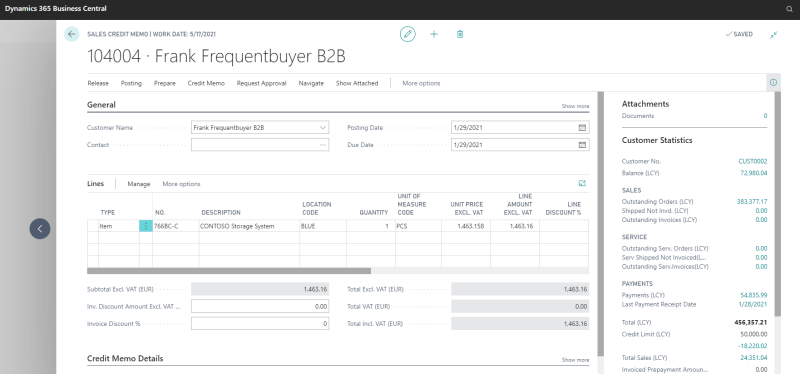
On the screenshot below, you can see the sales credit memo in Microsoft Dynamics 365 Business Central as an example.
Step 3: When the credit note (memo) is posted in your ERP system, you must run the Payment refunds scheduled task in Sana Admin: System > Scheduled tasks.
The Payment refunds scheduled task checks the posted credit notes in the ERP system and sends requests to Sana Pay to refund payments based on the available credit notes.
This task is available only when the Sana Pay app is installed.
You can set up this task to run automatically at a specific interval or time, allowing it to periodically check posted credit notes in ERP and refund payments. It can also be run manually when needed. When manually triggered, it will affect the next scheduled run time. For example, if the task is set to run every 60 minutes and the next execution is at 14:00, manually running it at 13:50 will cause the next run to occur at 14:50.
In the log file of the Payment refunds scheduled task, you can see what this task is doing and payment refunds.
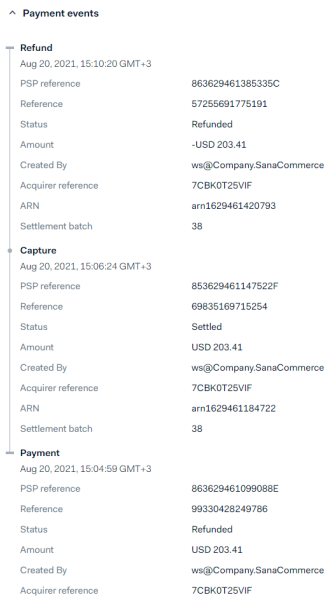
A merchant can also see the refunded payments in Essentials. For example, on the screenshot below you can see that the payment was first captured and then refunded.
If you make multiple partial refunds, for example, when a customer returns several items at different times, make sure that their sum doesn't exceed the captured amount. This situation can occur with some ERP systems, for example, when ERP rounds up the refund amount. Otherwise, you will not be able to refund a payment.
On the screenshot below you can see the payment transaction in Essentials with two captures and refunds. The first refund was for 203.41 instead of 203.40. To make a full refund, the accountant manually changed the amount of the second refund in the credit note (memo) in ERP to 206.29 instead of 206.30.
When a refund transaction is completed successfully, a payment journal is created in the ERP system for the corresponding credit note (memo).
Manual Refund
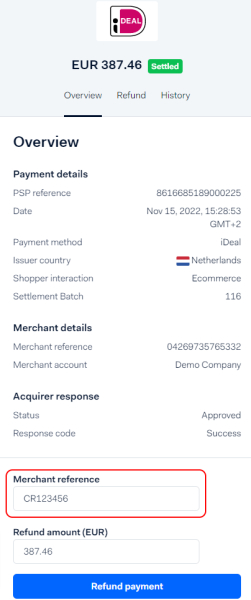
If you manually refund funds in Essentials, you must enter the credit note (memo) number in the Merchant reference field for which you are performing the refund. Do not leave it blank and do not enter any data other than the credit note (memo) number.


