Universal Analytics
WATCH THE VIDEO
Google Analytics 4 replaced Universal Analytics. Starting on July 1, 2023, standard Universal Analytics properties stopped processing new data, and all customers will lose access to the Universal Analytics interface and API starting on July 1, 2024. Therefore, you must use Google Analytics 4. For more information, see Google Analytics 4 has replaced Universal Analytics.
How to Set Up Google Tag Manager for the Sana Webstore?
Step 1: Create Google Tag Manager account. Enter the account name and then click Continue.

Step 2: Set up Google Tag Manager container. Enter the container name and select the Web type of content. Click Create.

When the container is created, you will see the container ID in the following format GTM-XXXXXXX. It is automatically generated by GTM. For more information, see Setup and installation.

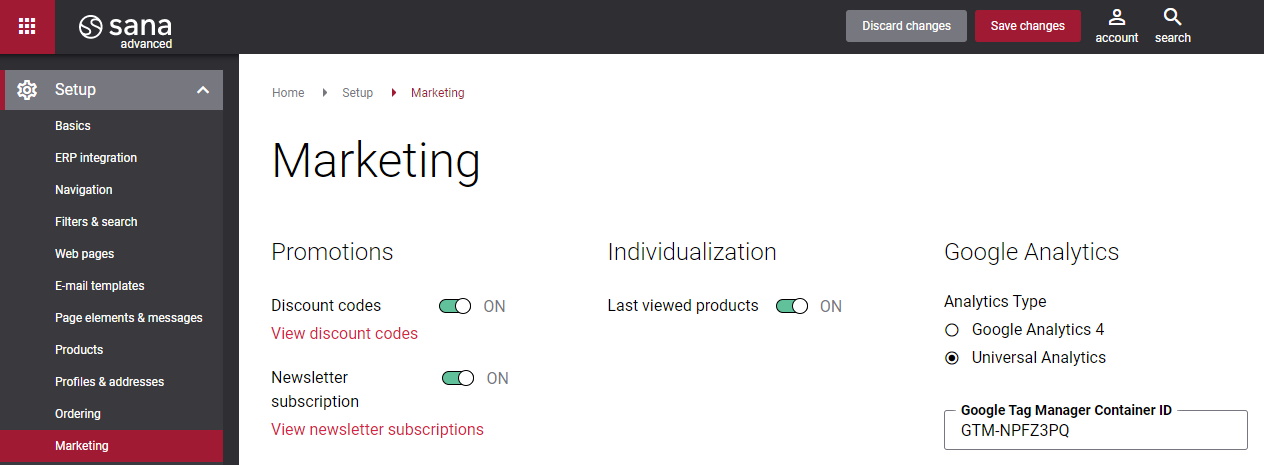
Step 3: Copy the container ID. In Sana Admin click: Setup > Marketing. In the Google Analytics section, select Universal Analytics. Enter the container ID in the Google Tag Manager Container ID field and save your changes.
Set Up Google Analytics via Google Tag Manager
Google Tag Manager integrated with Google Analytics reduces errors, allows to quickly deploy tags on your webstore and thus makes the tracking procedure easier.
Google Analytics is a free analytics tool that enables you to gather all kind of information and generate reports that will help you with your marketing.
Integrating your webstore with Google Analytics is a simple process that will give you access to the detailed statistics of the traffic in your webstore, like page views, webstore visitors, transactions, users interactions with your webstore content, and their shopping behavior.
Start Using Google Analytics
Basic Page View Tracking
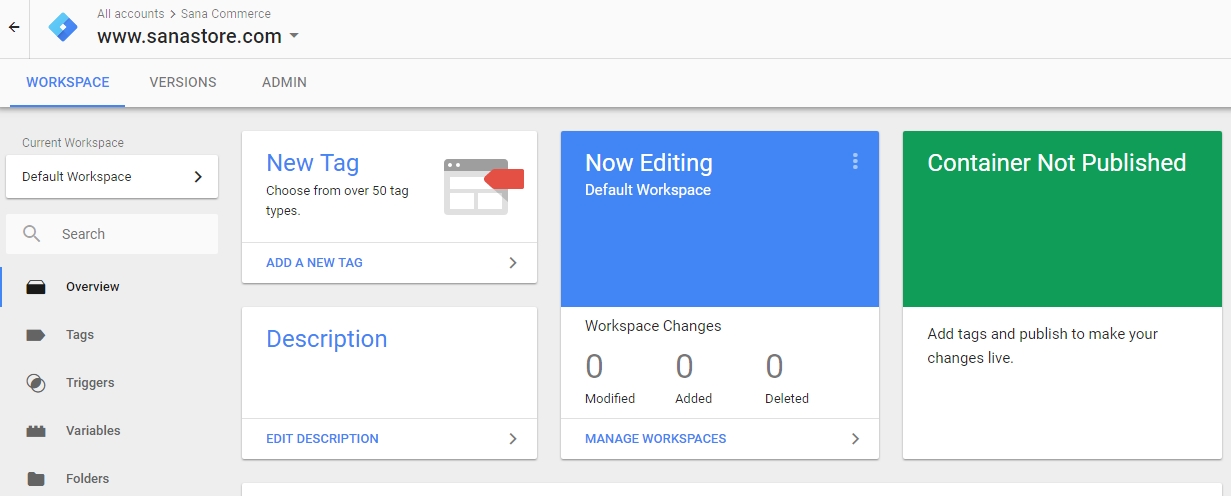
Step 1: In Google Tag Manager, select your account.
Step 2: On the left, click Variables and create at least the listed below required data layer variables.
2.1 To create a variable, in the User-Defined Variables section click New.

2.2 Enter the variable name. You can enter any name.
2.3 Click Choose a variable type to begin setup… and choose Data Layer Variable.

Required variables that should be created to track page views
- Page title – the title of the viewed page. The data layer variable name must be pageTitle.

- Page URL – the URL of the viewed page. The data layer variable name must be pageUrl.


Optional variables that can be created
- Page URL fragment – the URL fragment of the viewed page. The data layer variable name must be pageUrlFragment.

- Old page URL – the URL of the previously viewed page. The data layer variable name must be oldPageUrl.

- Old page URL fragment – the URL fragment of the previously viewed page. The data layer variable name must be oldPageUrlFragment.


On the screenshot below you can see an example of the user-defined data layer variables that you can create in Google Tag Manager for basic page view tracking.

Step 3: Create a new tag. You can do this either from the workspace or from the navigation menu on the left.
Step 4: Enter the tag name and choose the Google Analytics: Universal Analytics tag type. When you create a new tag, you should always choose Google Analytics: Universal Analytics.

Step 5: Select the Track Type.
For basic Google Analytics page view tracking, you must create a Google Analytics tag with the Page View track type.

Step 6: Click on Choose a trigger to make this tag fire… to create a trigger.
6.1 Click on the New trigger  button at the top right corner.
6.2 Enter the trigger name. You can enter any name.
6.3 Click Choose a trigger type to begin setup… and choose Custom Event.

6.4 Enter pageView in the Event name field and save your changes.

Step 7: In the tag configuration select the option Enable overriding settings in this tag. Expand More settings and then Fields to Set.
Add the fields page and title and choose the previously created pageTitle and pageUrl variables in the Value field as shown on the screenshot below.

This is all you need for basic page view tracking. The optional data layer variables documented in step 2 can be used to configure additional conditions to fire a page view trigger. See example below.

Enhanced E-Commerce Tracking
However, if you track events or e-commerce transactions, you'll need to add additional Google Analytics tags.
The most suitable track type for e-commerce tracking is Event tracking, which is used to track a specific action or event, such as a button click. Below you can see the list of events that are supported by the Sana webstore and which you can set up in Google Tag Manager.
Step 1: Create a tag. Enter the tag name and choose the Google Analytics: Universal Analytics tag type. When you create a new tag, you should always choose Google Analytics: Universal Analytics.

Step 2: When the Event track type is used, enter Category name and Action. The category name can be anything that reflects the action you want to track. The Action value is used to name the type of event or interaction you want to track for a particular web object.
The table below provides the list of actions which can be tracked on the Sana webstore.
|
Action |
Description |
|---|---|
|
impression |
Triggers on the product list and search results pages, and when the last viewed products are shown. Measured when the page loads and is sent with the initial page view. |
|
detail |
A view of products details. |
|
productClick |
A click on a product or product link for one or more products. |
|
addToCart |
Adding one or more products to a shopping cart. |
|
removeFromCart |
Remove one or more products from a shopping cart. |
|
checkout |
Initiating the checkout process for one or more products. |
|
checkoutOption |
Sending the option value for a given checkout step. |
|
purchase |
The sale of one or more products. |
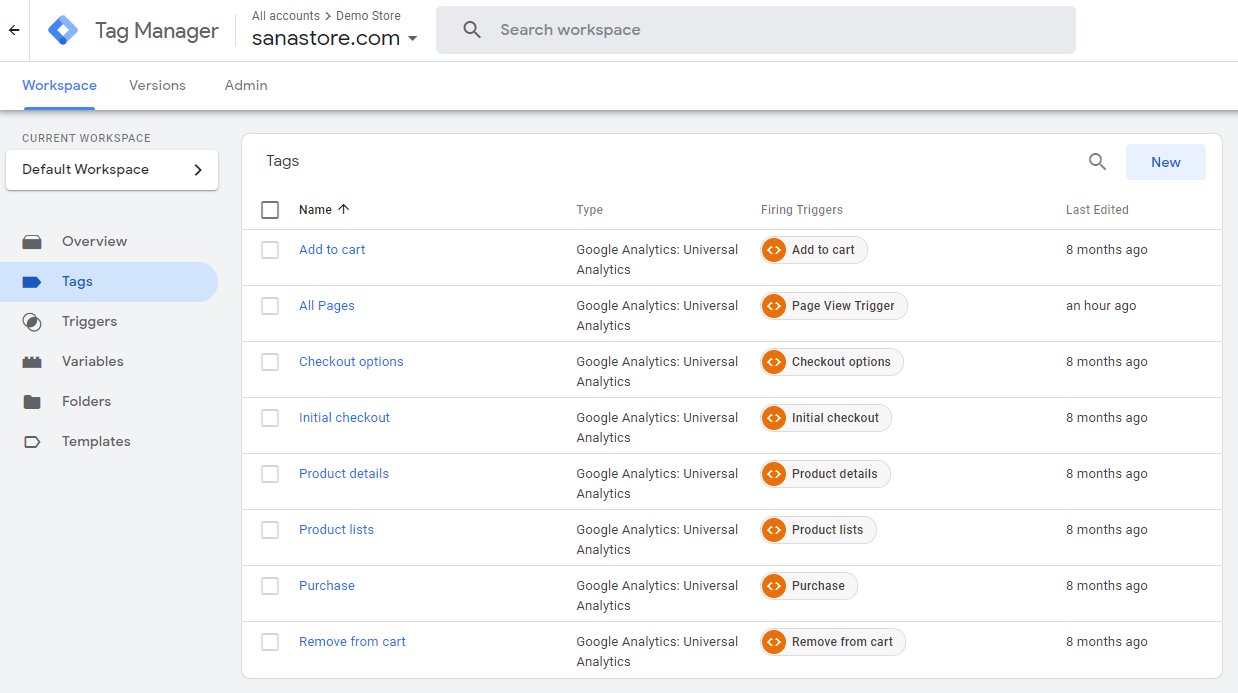
On the screenshot below you can see an example of the tags and triggers that you can create in Google Tag Manager for basic and e-commerce tracking.
Step 3: In the Google Analytics Settings field, select the existing or create a new Google Analytics Settings Variable. It contains your Google Analytics Tracking ID. All settings from that variable will be applied to your tag.
Google Analytics Settings Variables enable you to easily reuse and maintain settings across tags. If necessary, you can configure settings for a certain tag independently by selecting the checkbox Enable overriding settings in this tag. If you don't select a Settings Variable, you must set your Tracking ID via the override settings.
When you create a new Google Analytics Settings Variable, go to: More Settings > Ecommerce. Enable the options Enhanced Ecommerce Features and Use data layer.
Enabling ecommerce features is important to track e-commerce related interactions. This will allow to see when customers have added the products to the shopping cart, when they have started the checkout process, and when they have completed a purchase.
If you do not see any e-commerce data in your Google Analytics account, you could try an alternative solution for step 6. In that case, we recommend keeping the Google Analytics Settings variable empty, select the checkbox Enable overriding settings in this tag, and add your Google Analytics Tracking ID. Please, don't forget to enable also the Enhanced Ecommerce Features and Use data layer under the Advanced Settings menu item.
For more information, see Deploying Google Analytics.

Please, note that Google Analytics accepts only integers as the product quantity for sales orders. If your webstore also supports decimal quantities for products (e.g. customers can order 0.5 piece of a product), these numbers will be rounded to the closest integer and sent to Google Analytics. Example: 0.5 piece will be sent to Google Analytics as 1 piece.
At the moment there is an issue that 0.5 piece of a product is rounded to 0 and such products are not shown in the sales order transactions in Google Analytics. But all other data of the sales transactions, like revenue, is calculated correctly in Google Analytics. The issue with rounding 0.5 piece of a product to 0 will be fixed in the next Sana release.
Step 4: Choose your firing triggers. The best trigger for event tracking is Custom Event with the expected event name, but you can select other triggers suitable for your scenario.
To add the Custom Event trigger, create a new trigger of the Custom Event trigger type.
Enter the title of the trigger and Event name. The event name should be the same as the name of the action.
For more information about tag firing, see Triggers.

Step 5: Save the tag.

This way you can create all the necessary tags and triggers. When you are ready, you can preview and debug the container, and publish your changes.
When Google Tag Manager is configured with Google Analytics, you can check the shopping and purchasing behavior of your webstore visitors and customers. Each time when a user performs some action in the webstore, like views the product details or adds a product to the shopping cart, a certain event is triggered, and the information about this action is sent to and tracked by Google Analytics. The shopping analysis reports give you insight into the shopping activities, like product and product list views, adding and removing products from shopping carts, initiated, abandoned, and completed transactions.