Configure Versapay Payment Methods
When the Versapay payment provider is configured in Sana Admin, you need to set up the necessary payment methods supported by Versapay.
Step 1: In Sana Admin click: Setup > Ordering > Payment.
Step 2: On the Payment tab, create and configure the payment methods.
For more information about how to create and configure payment methods in Sana Admin, see Online Payment Methods.
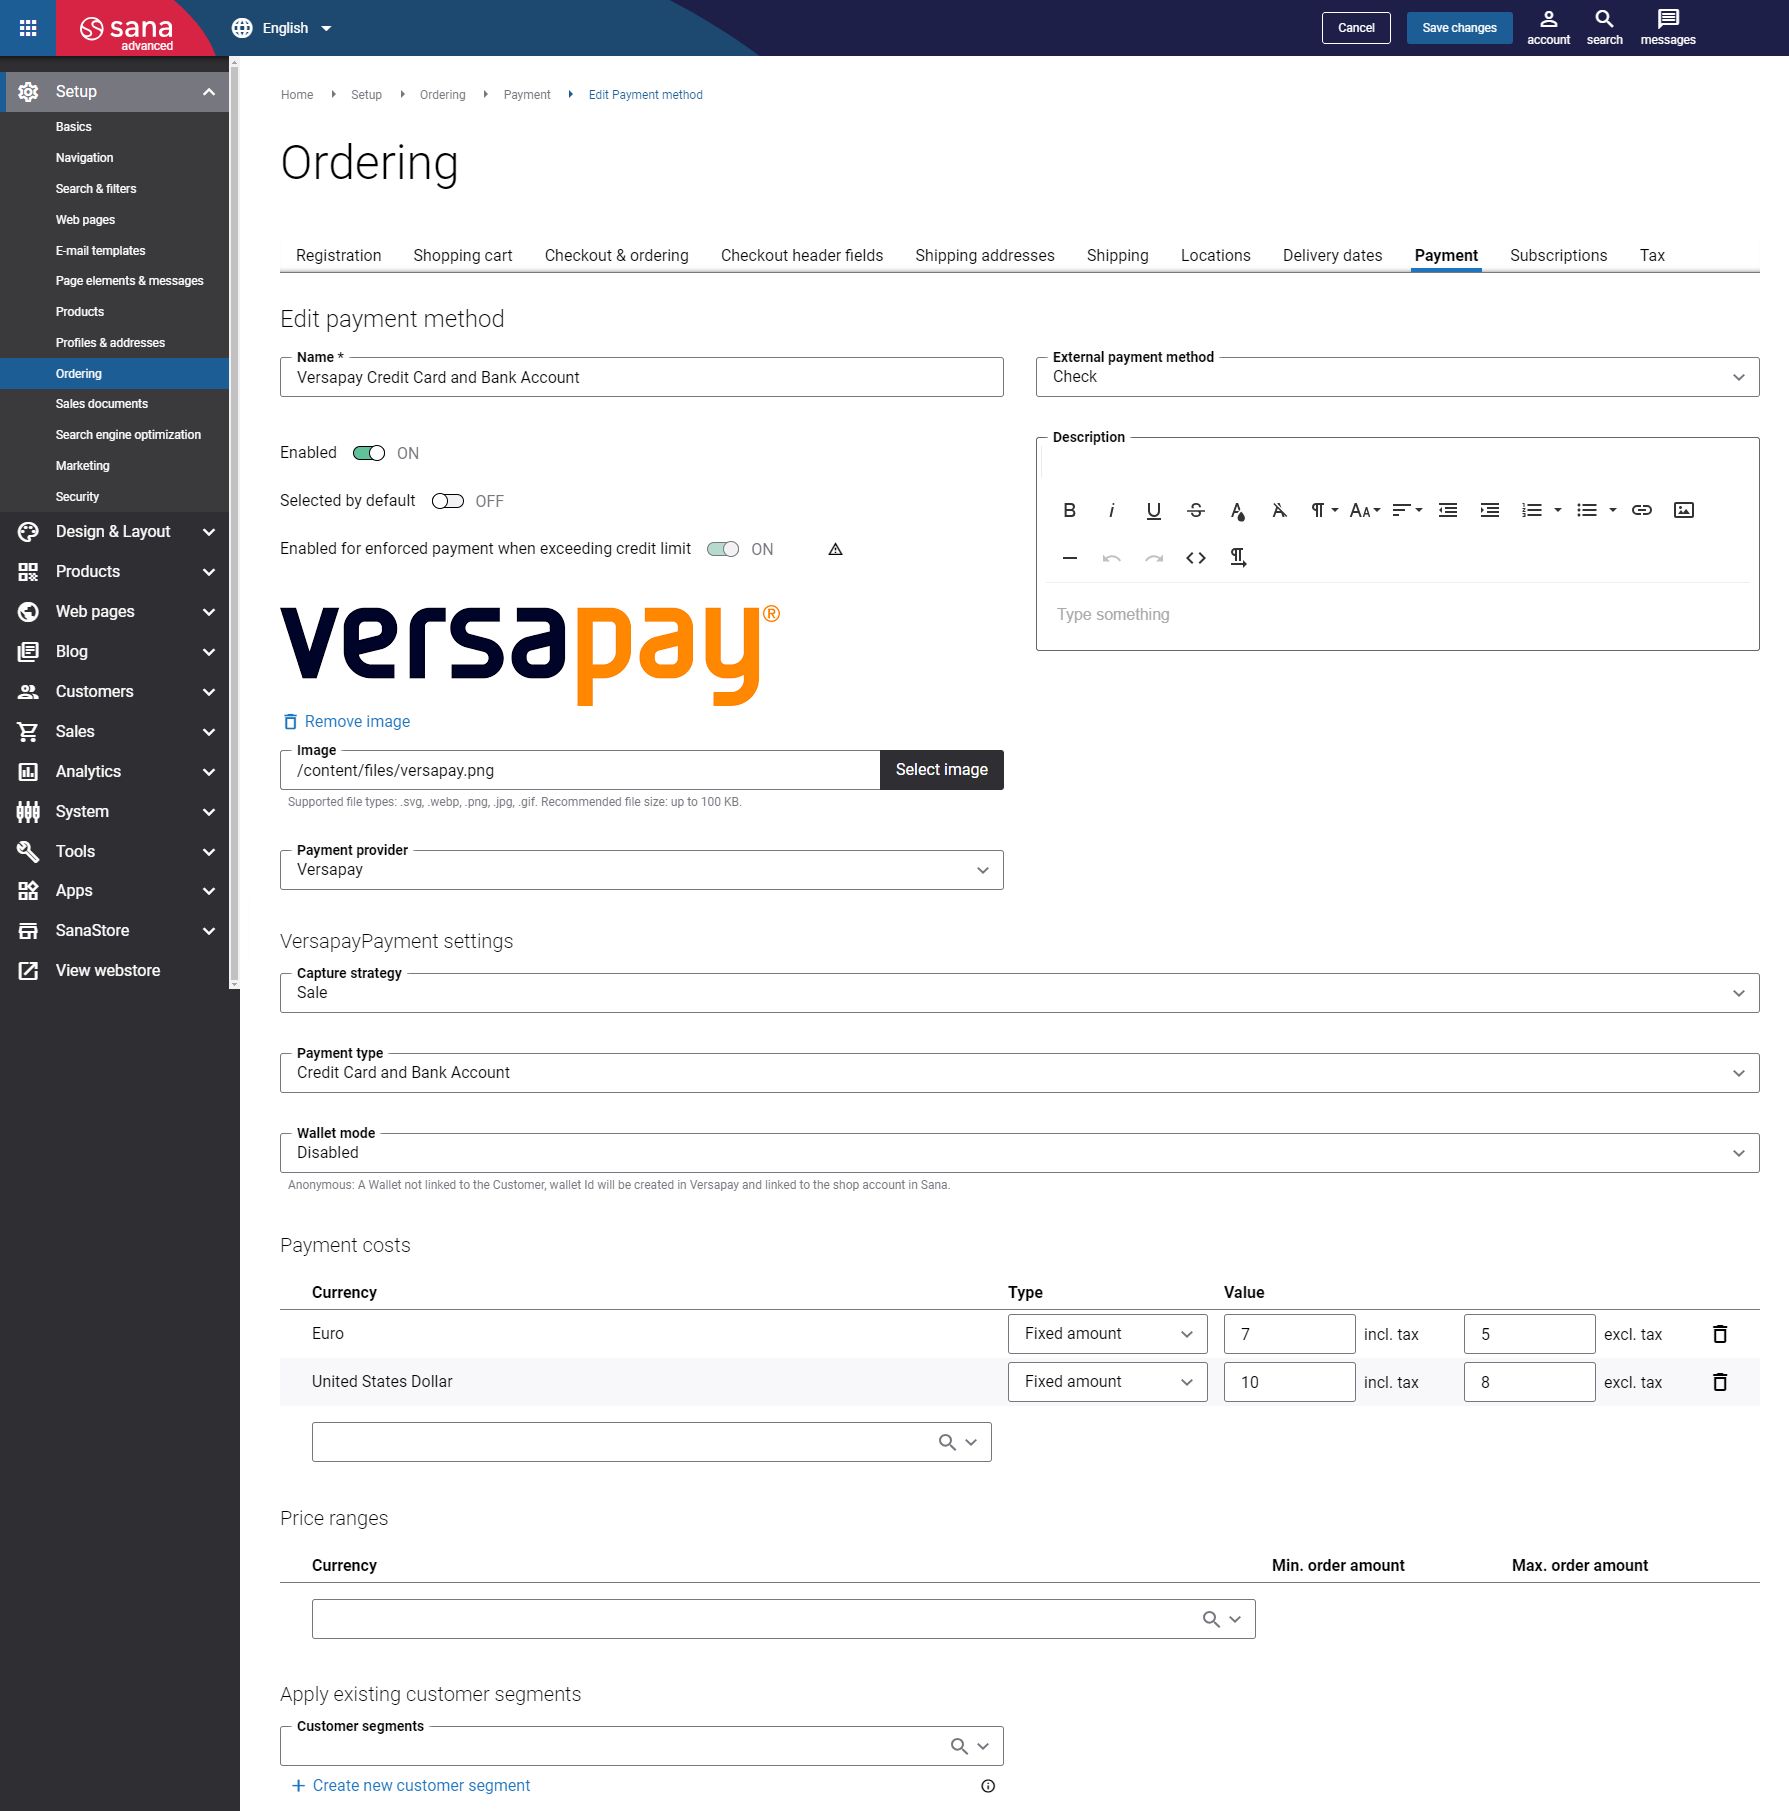
The table below provides the description of the Versapay payment provider specific fields.
|
Field |
Description |
|---|---|
|
Capture strategy |
Define how the payment transactions should be processed. The available options are:
|
|
Payment type |
Select the payment method to offer your customers during checkout in the Sana webstore. The available options are:
|
|
Wallet mode |
Select the wallet mode within the Versapay payment interface. The available options are:
|
Test the payment flow to see if everything works fine using the created payment methods.
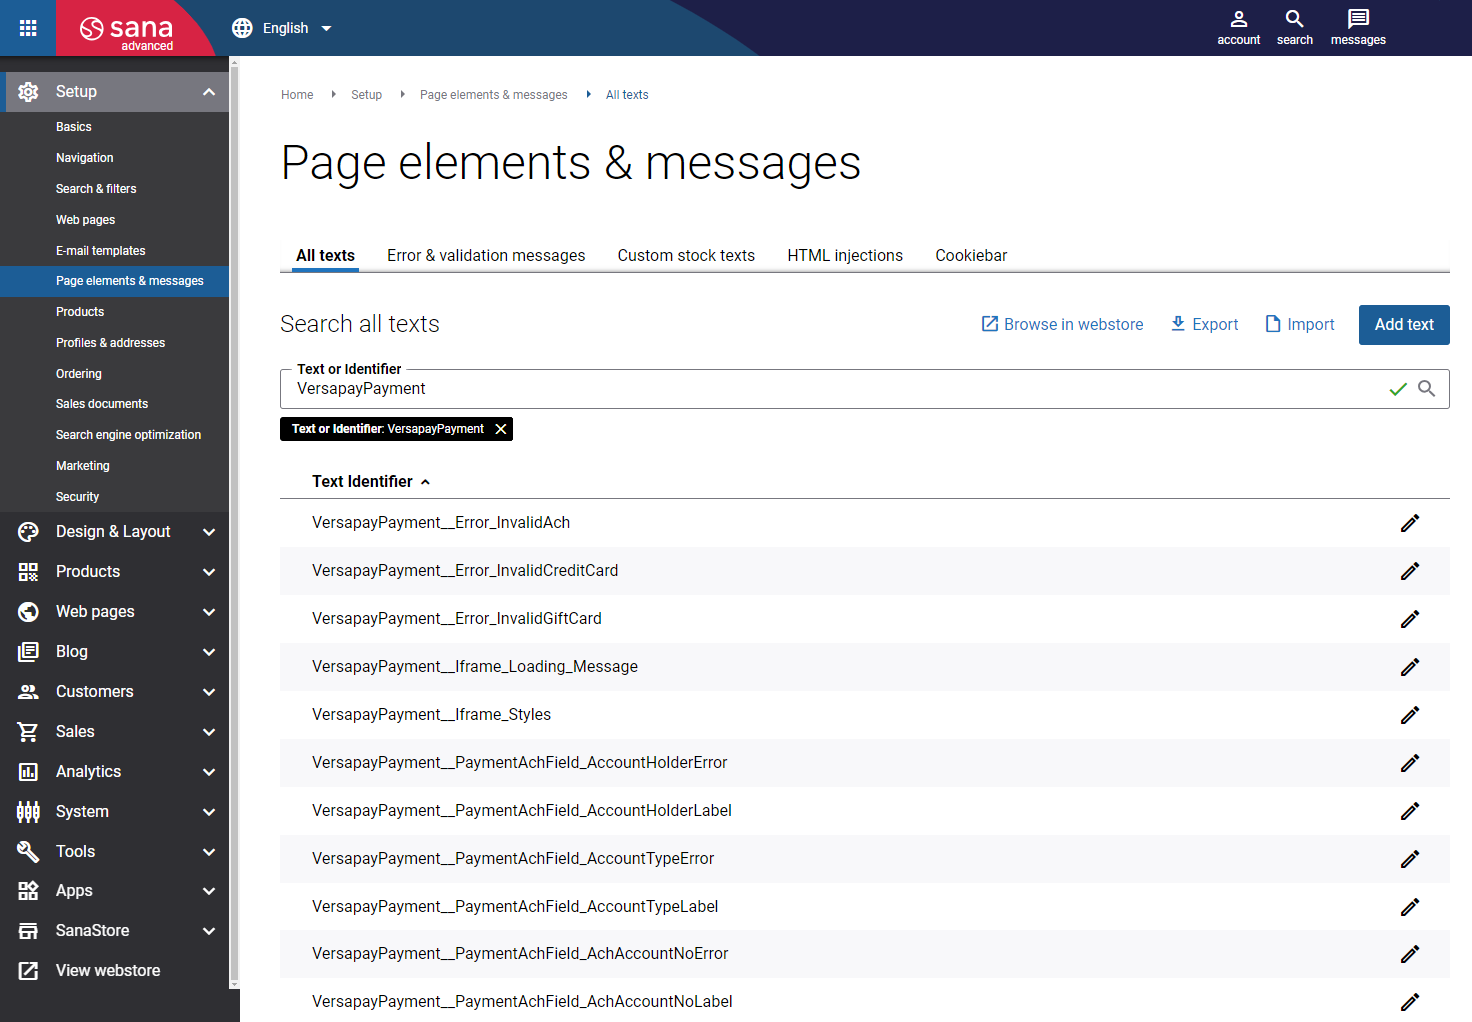
Change the Texts of the Versapay Payment Details
At the checkout process, Versapay’s extra payment step, where customers should enter their payment details, is shown using the iFrame.

You can change some texts and validation messages of the Versapay iFrame in the English language or any other installed webstore language.
You can find the default texts of the Versapay iFrame in Sana Admin and change them. For more information, see Webstore UI Texts.
In Sana Admin click: Setup > Page elements & messages. On the All texts tab, search for the necessary IDs. The default Sana text IDs for the Versapay payment service provider are with the VersapayPayment prefix.