Configure Webhooks in PostFinance Checkout
You need to configure webhooks in the PostFinance Checkout portal.
Webhooks are used to inform Sana Commerce Cloud about payment status updates. They also notify merchants about other events and ensure that all payment stages have been processed.
For more information, see the official PostFinance Checkout documentation Webhooks.
Step 1: Sign in to PostFinance Checkout portal.
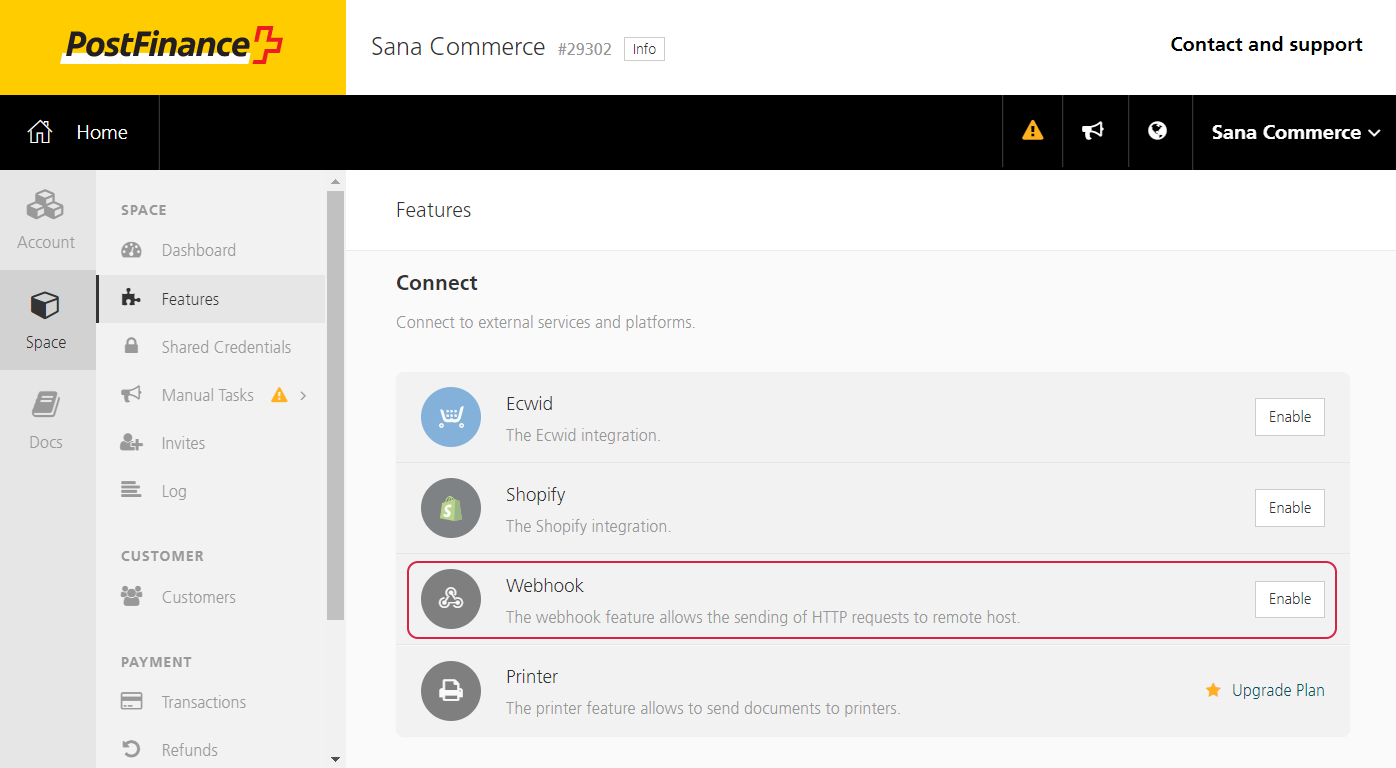
Step 2: To enable webhooks, in PostFinance Checkout portal click: Space > Features. Click Enable next to the Webhook feature.
Step 3: To create a webhook, go to: Space > Webhooks > URL and click on the Create webhook URL button.
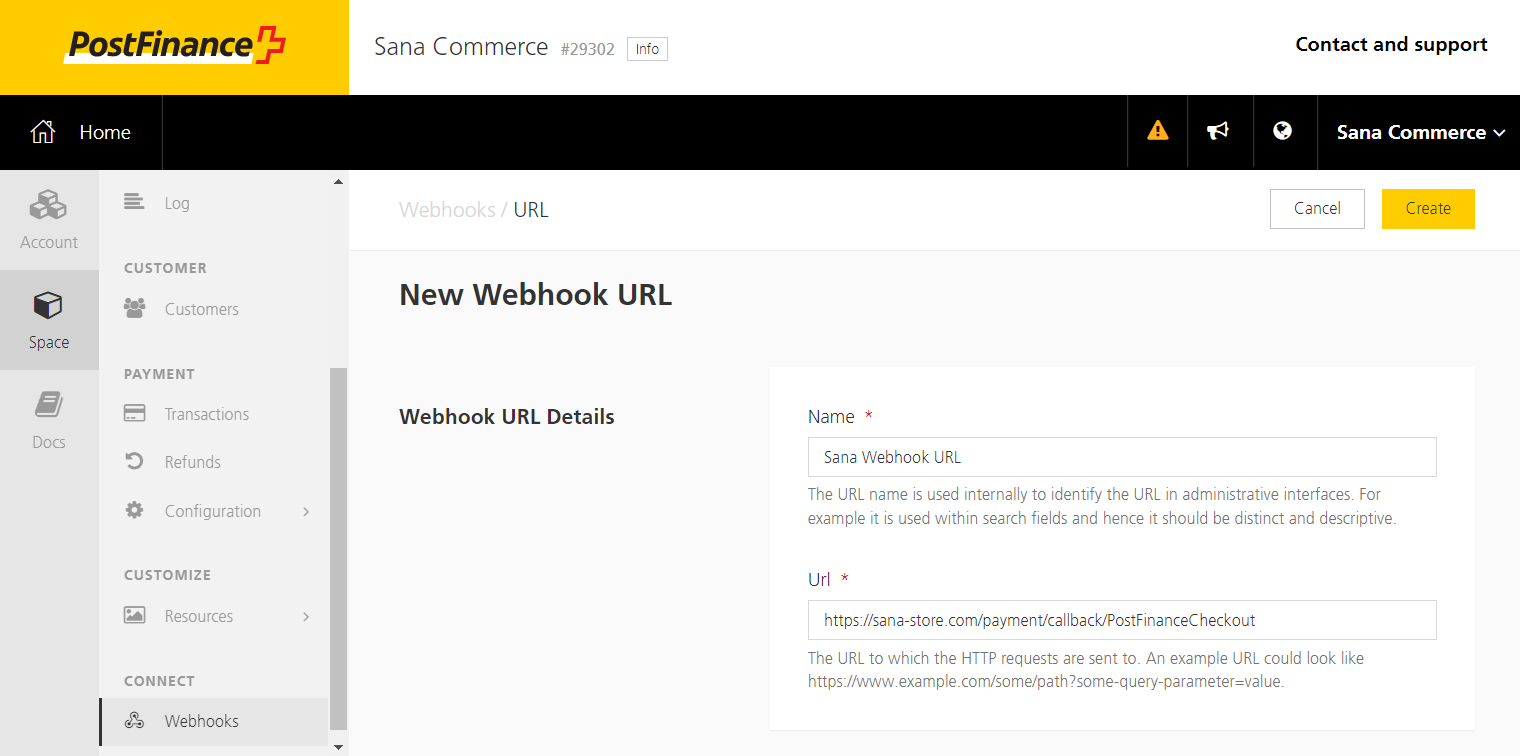
The webhook URL should be in the following format: {website callback url}/{ PostFinanceCheckout}.
Example: https://sana-store.com/payment/callback/PostFinanceCheckout.
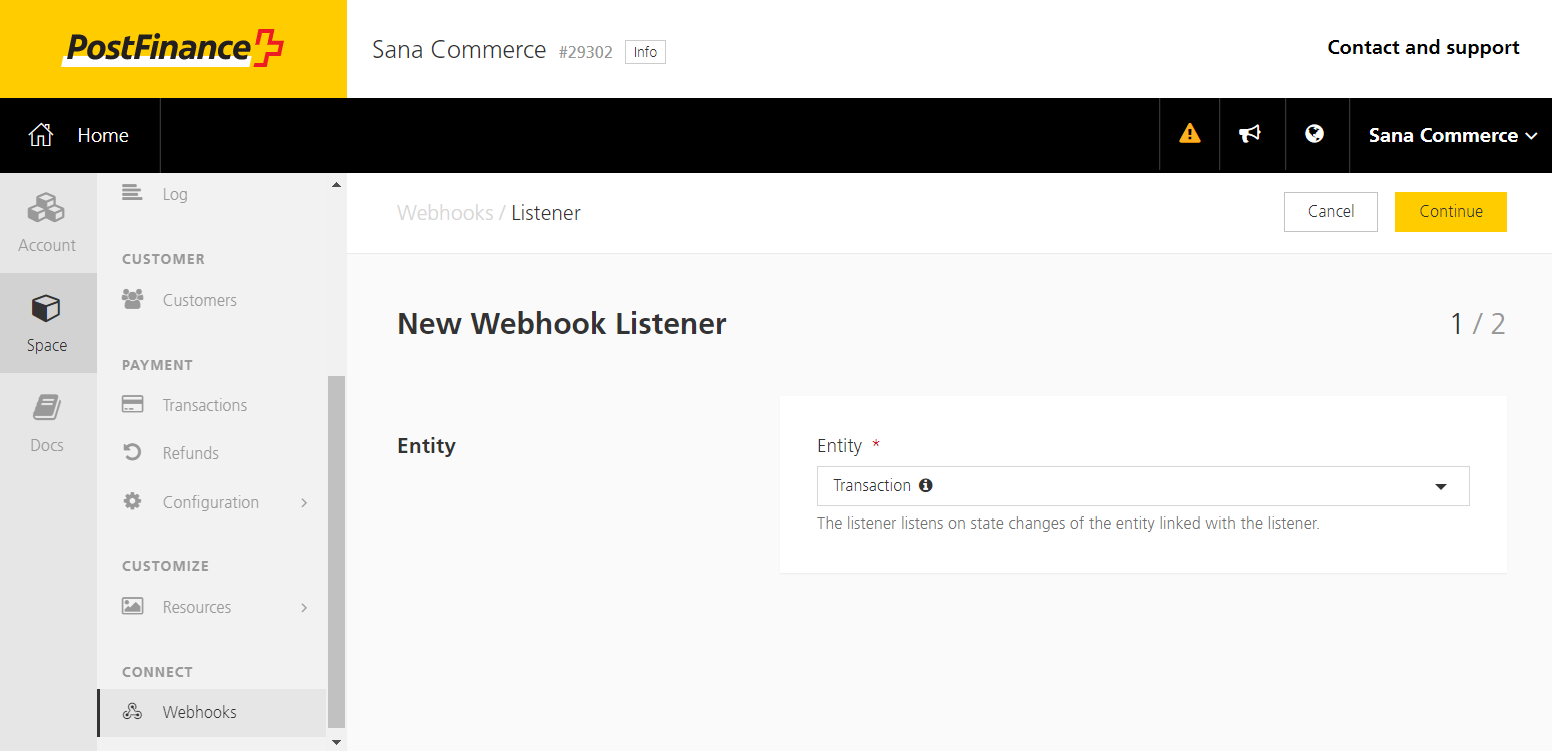
Step 4: Once the webhook URL is created, you need to create and configure the webhook listener for the webhook URL. Go to: Space > Webhooks > Listener and click on the Create webhook listener button. In the next window, select Transaction in the Entity field and click Continue.
To configure the webhook listener, do the following steps in the New Webhook Listener window.
-
In the Name field, enter the webhook listener field.
-
In the URL field, select the webhook URL which you created in the previous step.
-
In the Entity state field, specify the necessary payment statuses. The webhook will be triggered for the payment statuses specified in this field.
-
Select the Notify Every Change checkbox.
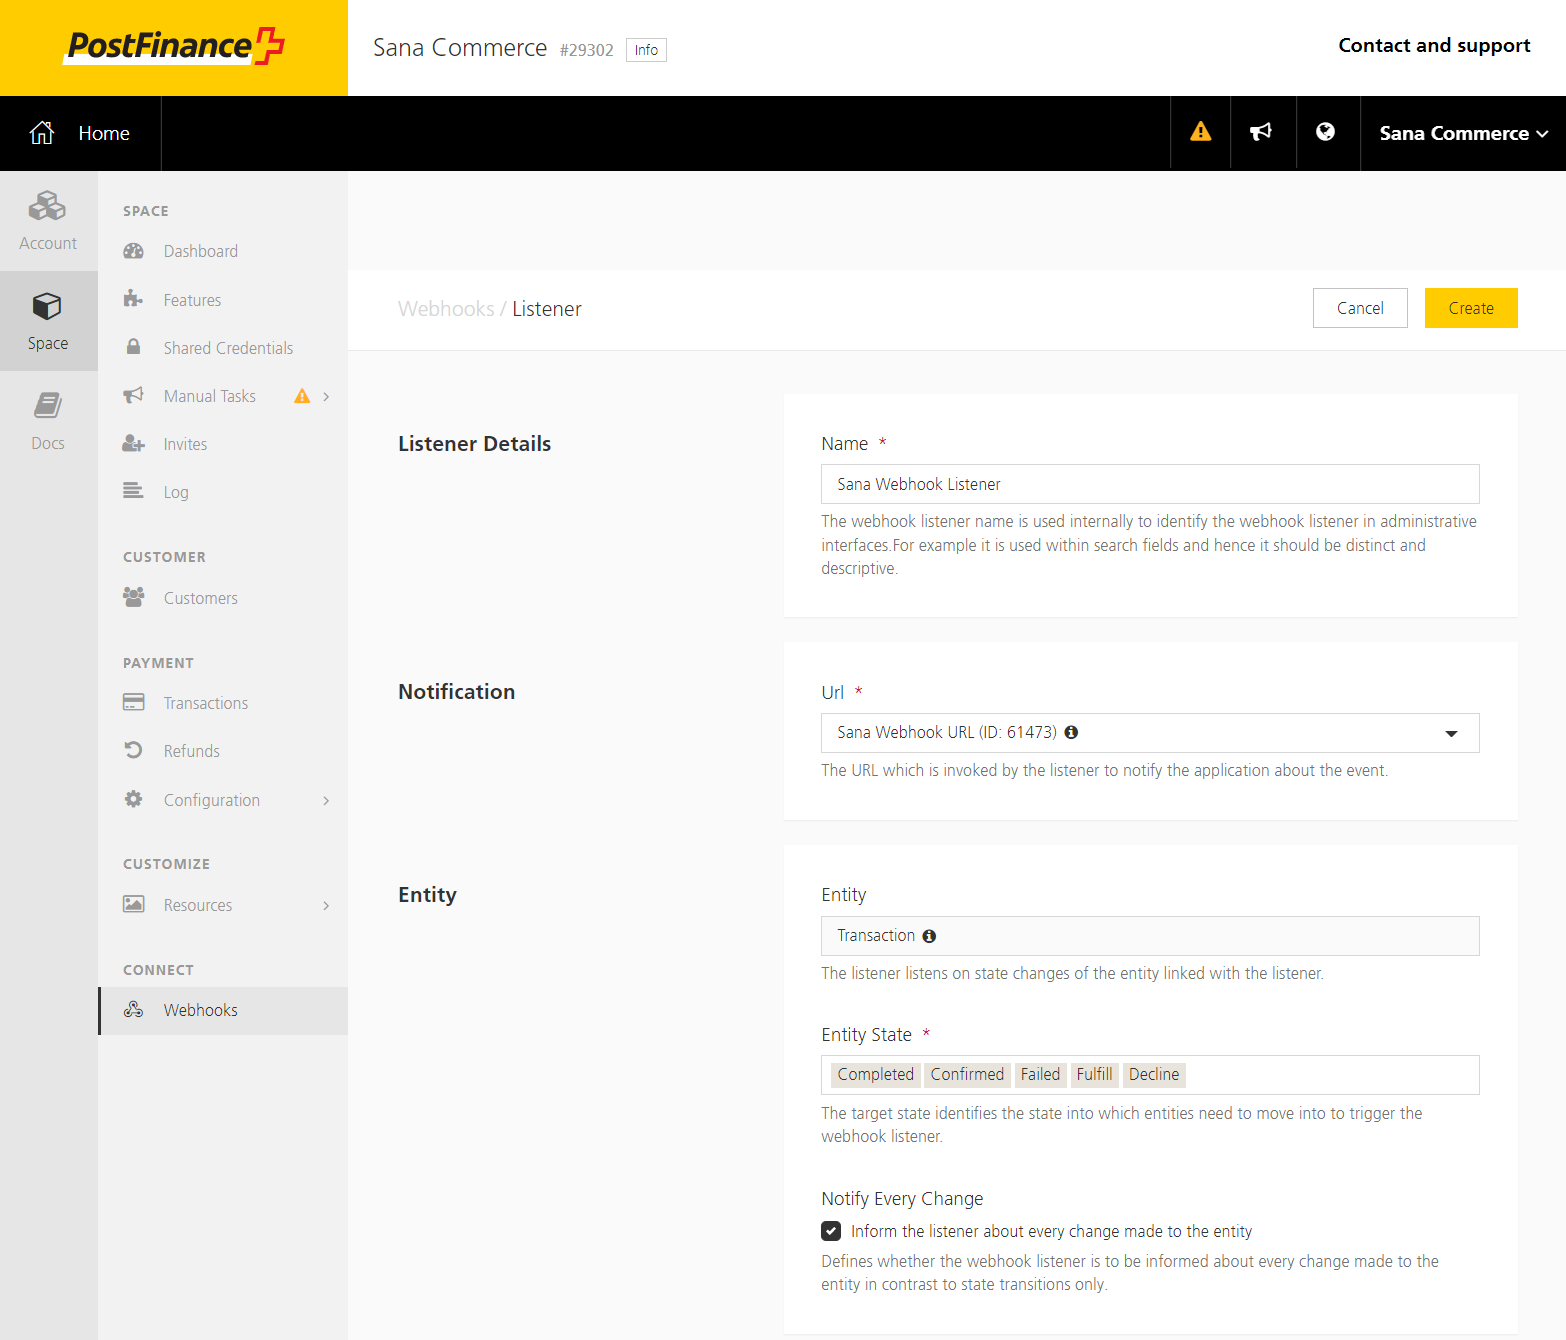
When the webhook listener is configured, click Create.