Set Up KBC Paypage Account
When the KBC Paypage payment provider is installed, it should be configured in the KBC Paypage BackOffice and in Sana Admin. To configure the KBC Paypage payment provider and payment methods, you should have the KBC Paypage test / live account with all the necessary data.
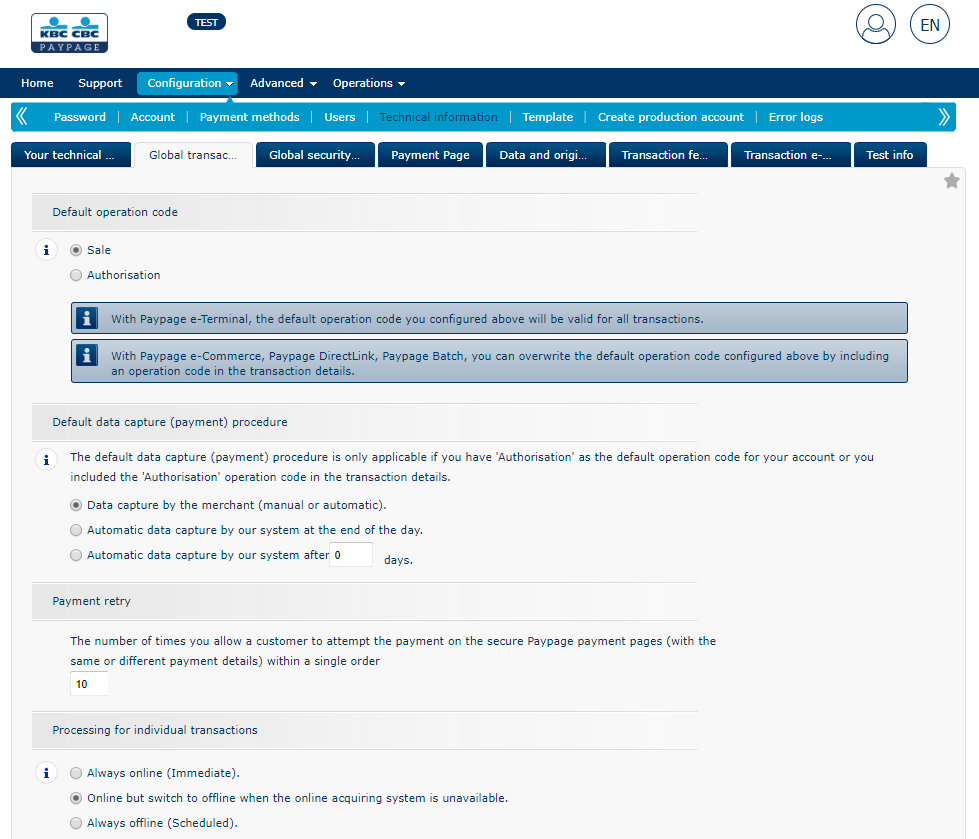
Step 1: In the KBC Paypage BackOffice click: Configuration > Technical information > Global transaction parameters.
The table below provides the description of the required settings.
|
Settings |
Value |
|---|---|
|
Default operation code |
Select Sale. |
|
Processing for individual transactions |
Select Online but switch to offline when the online acquiring system is unavailable. |
Step 2: Click: Configuration > Technical information > Global security parameters.

The table below provides the description of the required settings.
|
Settings |
Value |
|---|---|
|
Hash algorithm |
Select SHA-512 in order to comply with the highest data security standards. NOTE
The same value should be set in Sana Admin (Hash algorithm). |
|
Character encoding |
Select UTF-8. |
Step 3: Click: Configuration > Technical information > Payment Page.
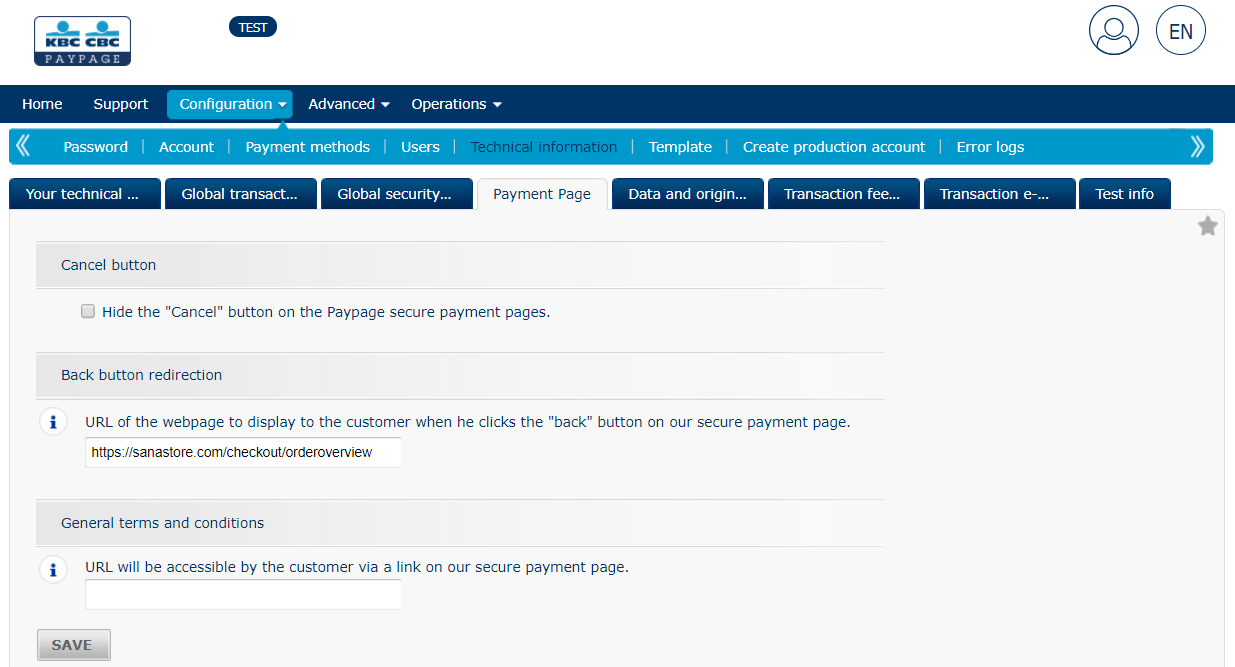
Set up Back button redirection by specifying the URL of the web page that should be shown to a customer when he clicks on the back button on the KBC Paypage secure payment page.
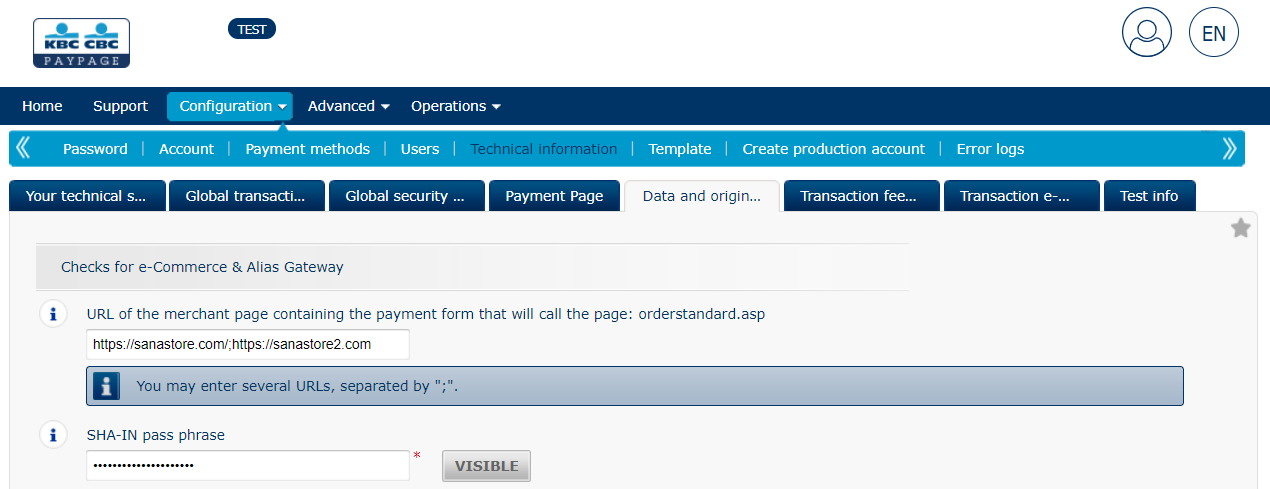
Step 4: Click: Configuration > Technical information > Data and origin verification.
|
Checks for e-Commerce & Alias Gateway |
|
|---|---|
|
URL of the merchant page containing the payment form that will call the page: orderstandard.asp |
KBC Paypage checks the origin of the payment request. You must enter the domain of your web store with the protocol at the beginning. If you have several web stores, you can enter all your web store domains separated by the semicolon ";" with no spaces before and after the semicolon. Example: https://sanastore1.com;https://sanastore2.com |
|
SHA-IN pass phrase |
The value of the SHA-IN pass phrase parameter should match the value of the SHAIN deliminator parameter in Sana Admin. |
Step 5: Click: Configuration > Technical information > Transaction feedback.
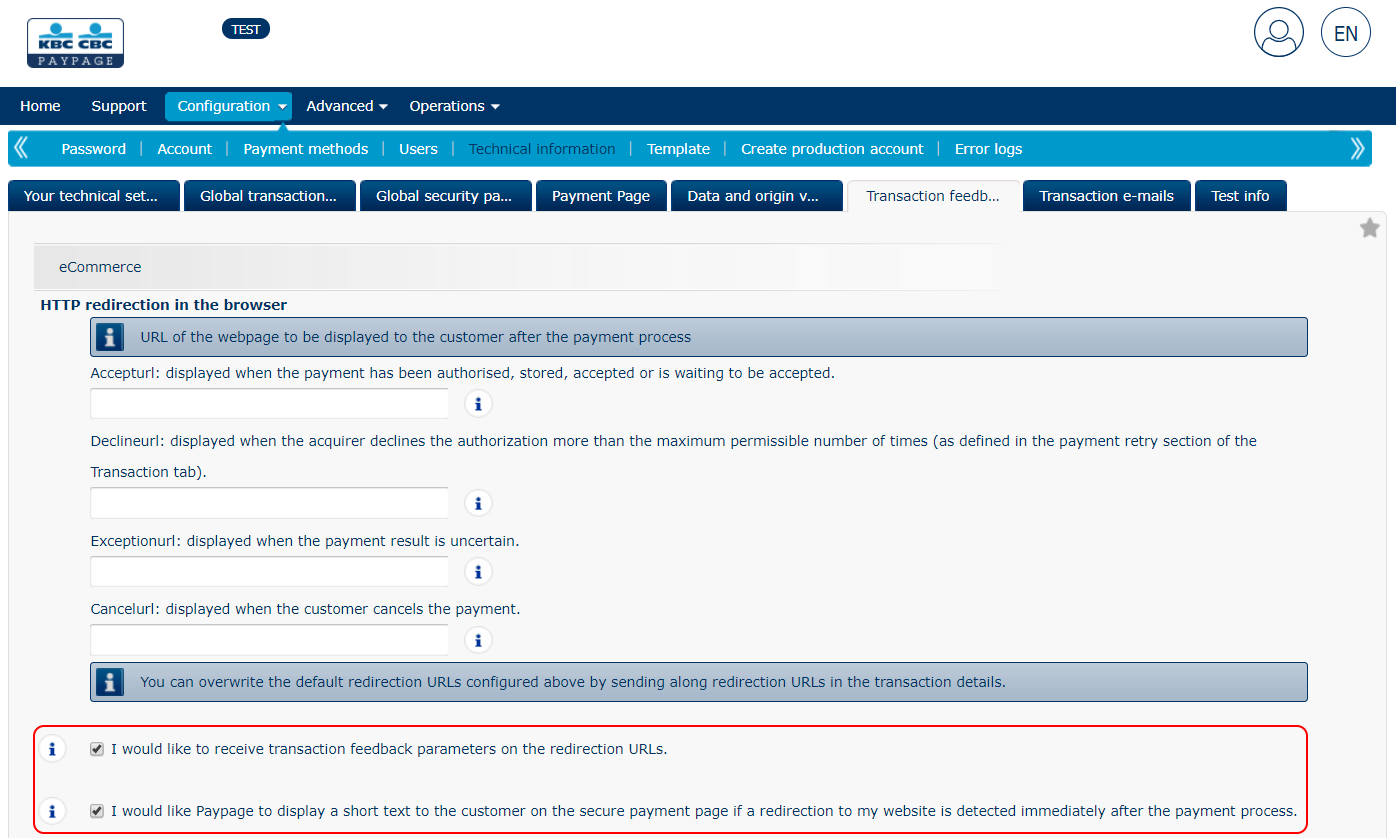
Configure HTTP redirection in the browser. Select the checkboxes:
-
I would like to receive transaction feedback parameters on the redirection URLs.
-
I would like Paypage to display a short text to the customer on the secure payment page if a redirection to my website is detected immediately after the payment process. - This option is not essential for the correct functioning of KBC Paypage.
Step 6: In case KBC Paypage cannot connect to Sana for some reason to update the payment status of the order, it can be updated later, if you set up server-to-server communication.
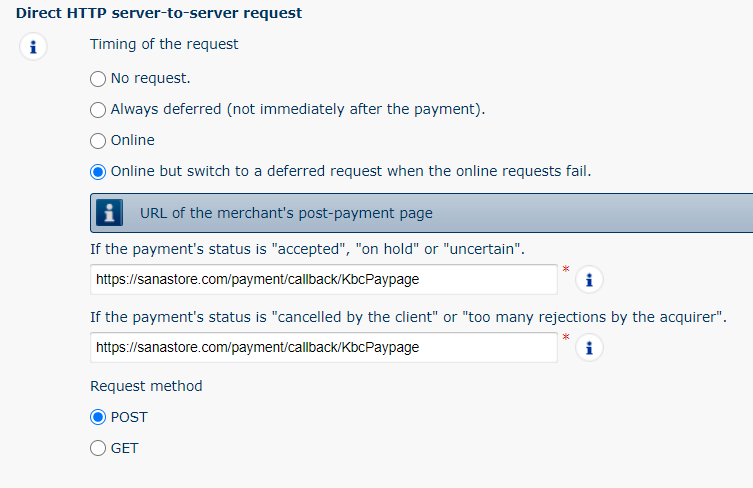
On the Transaction feedback tab, set up the Direct HTTP server-to-server request settings.
|
Direct HTTP server-to-server request |
|
|---|---|
|
Timing of the request |
Select Online but switch to deferred request when the online request fail. |
|
URL of the merchant's post-payment page |
Enter the following URL with the protocol in both fields. Replace "[DOMAIN]" with your web store domain. https://[DOMAIN]/payment/callback/KbcPaypage |
|
Request method |
Select POST. |
Step 7: On the Transaction feedback tab, set up the Dynamic e-Commerce parameters.
NCERROR, PAYID, ORDERID and STATUS are default parameters. Select other parameters which you wish to receive as feedback for a transaction.

Step 8: Make sure that the following options are not selected on the Transaction feedback tab.

Step 9: On the Transaction feedback tab, set up the Security for request parameters.
The value of the SHA-OUT pass phrase parameter should match the value of the SHAOUT deliminator parameter in Sana Admin.

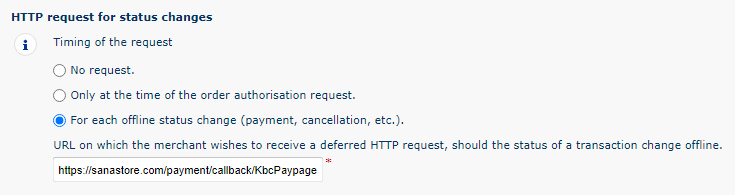
Step 10: On the Transaction feedback tab, set up HTTP request for status changes.
Select For each offline status change (payment, cancellation, etc.).
Enter the following URL and replace [DOMAIN] with your web store domain.
https://[DOMAIN]/payment/callback/KbcPaypage
Step 11: Click: Configuration > Technical information > Transaction e-mails.
In the E-mails to the merchant parameters, enter the e-mail address to which the information messages from KBC Paypage should be sent. Determine what type of messages you want to receive.
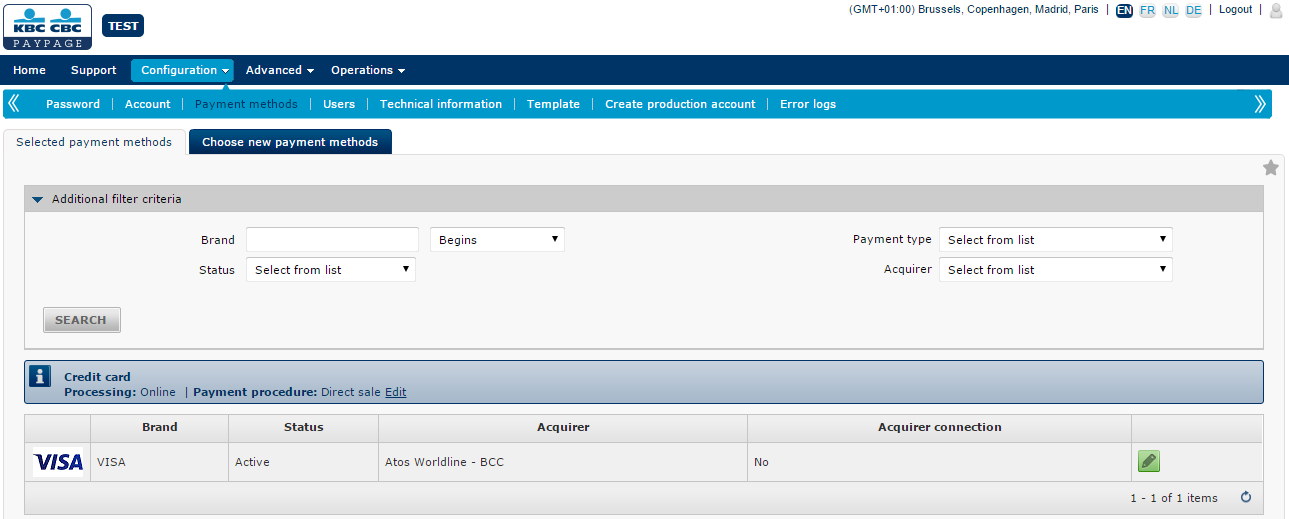
Step 12: Click: Configuration > Payment methods. Here you can set up the necessary payment methods.