Configure Adyen in Sana Admin
There is no separate add-on for Adyen. There are several scenarios when you can use Adyen as a payment service provider for the Sana webstore. In this case, the Sana Pay add-on is used to integrate with Adyen, because the basic configuration of Sana Pay and Adyen is identical.
If you use Adyen as your payment service provider to accept online payments, you must configure it in Sana Admin using the Sana Pay add-on. There is no separate add-on for Adyen.
In Sana Admin click: Apps > Add-ons. When the Sana Pay add-on is installed, you can configure it from any tab on the Add-ons page by clicking on the Configure button ![]() .
.
General Settings
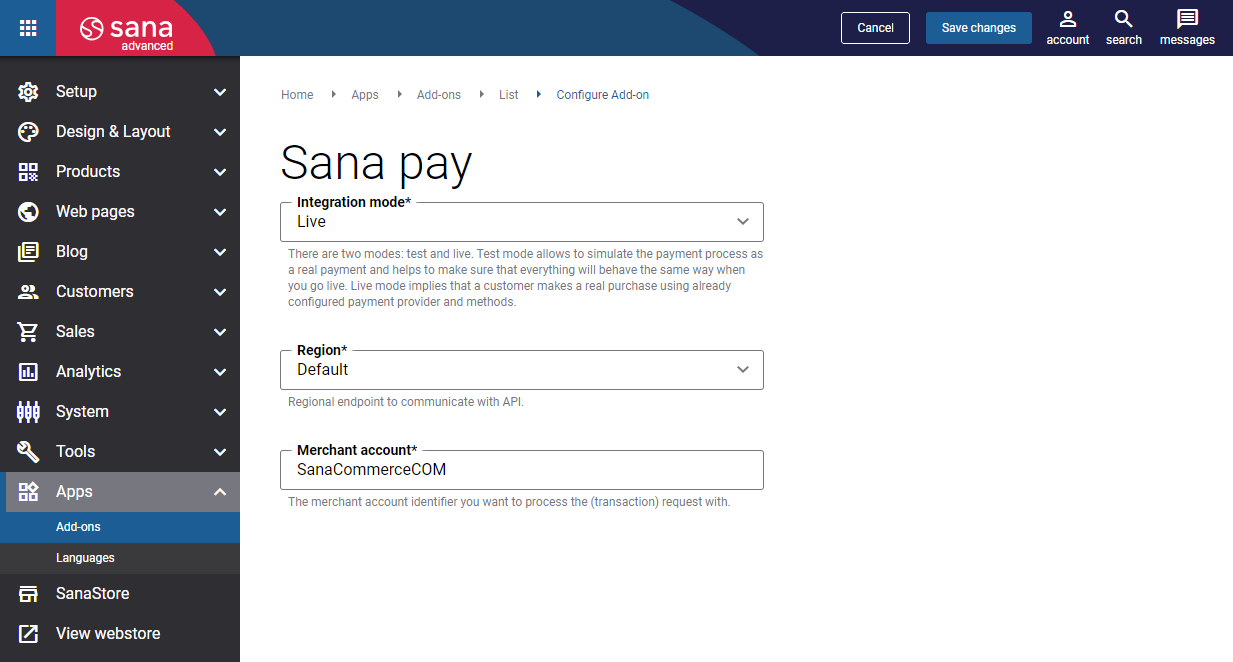
Step 1: Choose the appropriate payment integration mode.
There are two modes: test and live. Test mode allows to simulate the payment process as a real payment and helps to make sure that everything will behave the same way when you go live. Live mode implies that a customer makes a real purchase using already configured payment provider and methods.
Step 2: Select the region. It is used for communication between Sana Commerce Cloud and Adyen (live account) by a region-specific URL that matches the region of your live endpoint. Setting the appropriate region improves the reliability and availability of the service during the checkout process.
Step 3: Enter your merchant account. This is the merchant account you want to process all your payment transactions with. You can use one merchant account for all payment transactions or different merchant accounts for different payment methods.
To see your merchant accounts, log in to the Adyen Customer Area and click: Settings > Merchant accounts.
For more information, see Merchant Accounts.
API Credentials
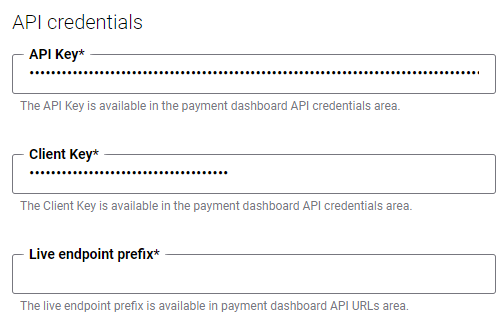
Step 1: Set up API credentials to connect Sana Commerce Cloud to your Adyen account.
|
Field |
Description |
|---|---|
|
API Key |
Enter the API Key. The API Key is available in the Adyen Customer Area at the following location: Developers > API credentials. Open user details, go to Server settings and in the Authentication section click Generate API key. Copy the API key and insert it in Sana Admin. |
|
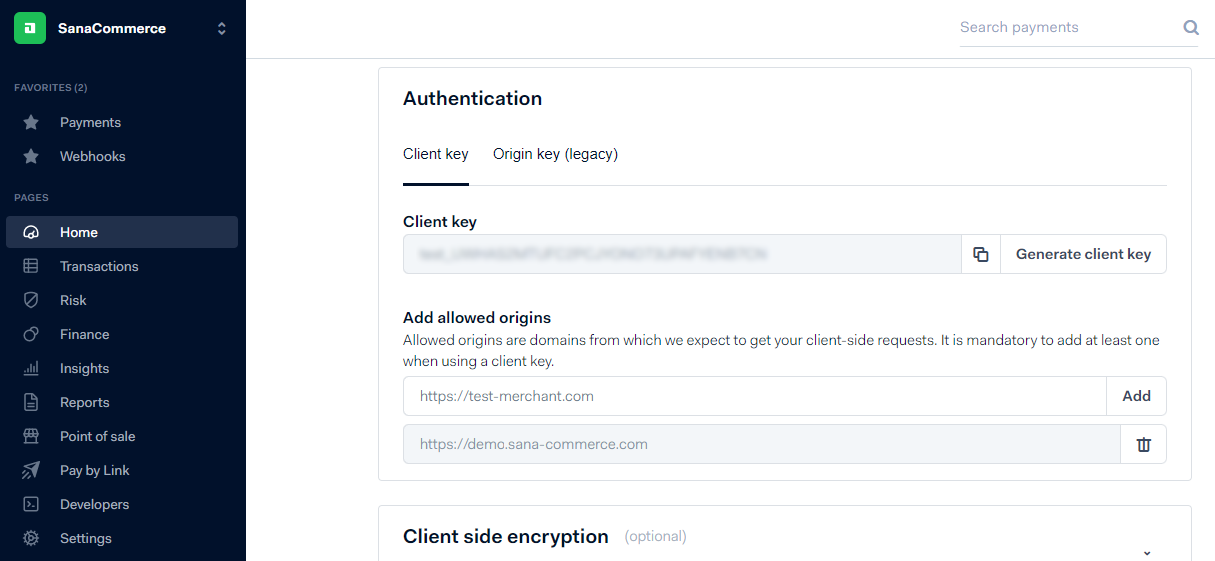
Client Key |
Enter the Client Key. The Client Key is available in the Adyen Customer Area at the following location: Developers > API credentials. Open user details, go to Client settings and in the Authentication section copy the Client key. |
|
Live endpoint prefix |
NOTE
This setting is required only for the Live integration mode. To communicate with Adyen, you should submit HTTP POST requests to the corresponding endpoints. These endpoints differ for test and live accounts. To find your Adyen live endpoints:
For example, if your live endpoint URL is:
Then, the live endpoint URL prefix is:
|
Step 2: Click Test credentials to check if the API credentials are valid and Sana Commerce Cloud can connect to Adyen.
Notification Settings
Notifications are webhooks that are used to inform Sana Commerce Cloud about payment status updates. They notify merchants about authorized, captured and modified payments, as well as other events and ensure that all payment stages have been processed.
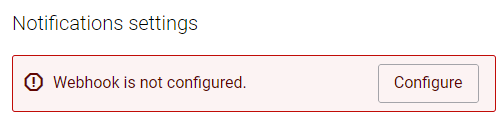
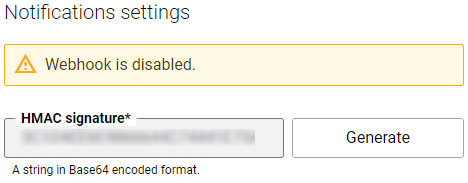
In the Notification settings, click Configure to create and configure the webhook in Adyen.
When you click Configure, and if the API credentials are correct, the webhook will be created in the Adyen Customer Area. You will see the generated HMAC signature, and the webhook status should be active.
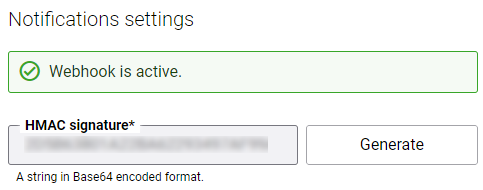
If you disable the webhook in the Adyen Customer Area, its status will change to disabled in Sana Admin and the webhook will be deactivated.
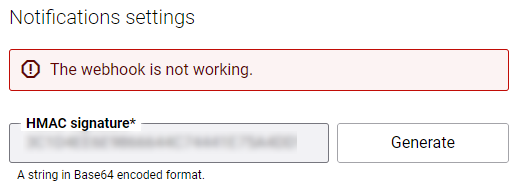
If the webhook doesn't work for some reason, you will also see the corresponding status in Sana Admin.
Keep in mind that if you change your webstore domain, you must also reconfigure the webhook from the Sana Pay add-on.
Notifications Troubleshooting
In some cases, Sana Commerce Cloud may not receive notifications from Adyen. This can occur because of the following reasons:
-
Security issues of the notification. For example, HMAC was changed and the one in Sana Admin does not match the HMAC key in the Adyen Customer Area.
-
Adyen cannot update the payment status of the order in Sana for some reason, for example because of the connection issues or the Web server is down.
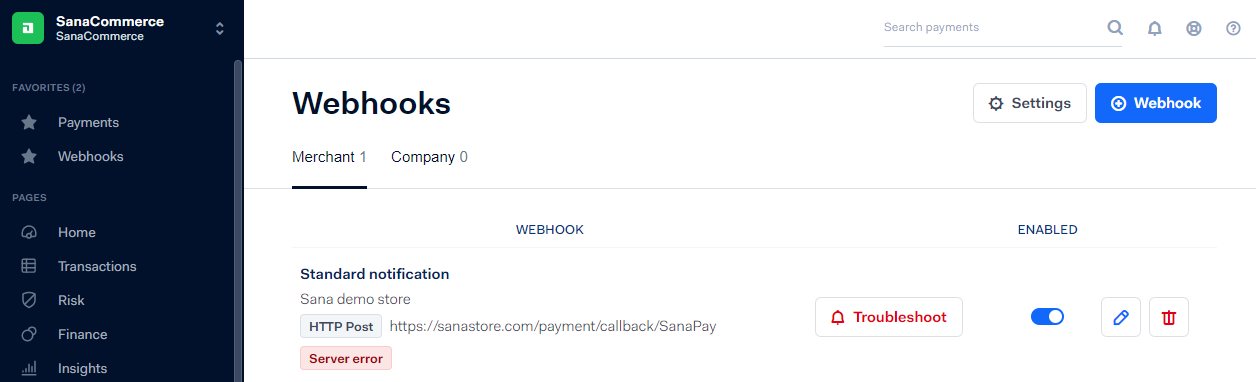
You can see your notification instances configured for Sana Commerce Cloud in the Adyen Customer Area: Developers > Webhooks. All notifications are queued. The notifications which Sana does not accept will be with the error.
If Sana Commerce Cloud does not accept the notification sent from Adyen due to the reasons listed above, then Adyen will retry sending the notification until it is accepted. Retry attempts happen regularly for up to 7 days.
In case the HMAC key was changed and the one in Sana Admin does not match the HMAC key in the Adyen Customer Area, then Sana Commerce Cloud will not accept the notifications containing the old HMAC key. Therefore, these notifications need to be discarded in the queue in the Adyen Customer Area. Adyen will resend every notification one by one over a course of 7 days.
If your endpoint is not accepting notifications properly, you can troubleshoot the issue yourself.
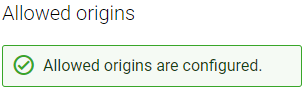
Allowed Origins
Allowed origins are your webstore domains from which Adyen expects to get requests. They are linked to the API credential in the Adyen Customer Area.
In the Allowed origins section, click Configure to configure allowed origins in Adyen.
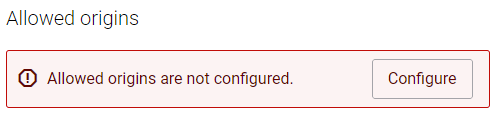
When you do this, all of your webstore domains will be automatically added to the Adyen Customer Area, if the API credentials are correct.
To find allowed origins in the Adyen Customer Area, see Manage allowed origins on the Adyen website.
Keep in mind that if you change your webstore domain, you must also reconfigure the allowed origins from the Sana Pay add-on.
When Sana Pay is installed and connected to Adyen, you can set up the necessary payment methods in Sana Admin that are supported by Adyen.