Connect Sana to inriver
inriver is available as an app. It can be installed from the Sana App Center.
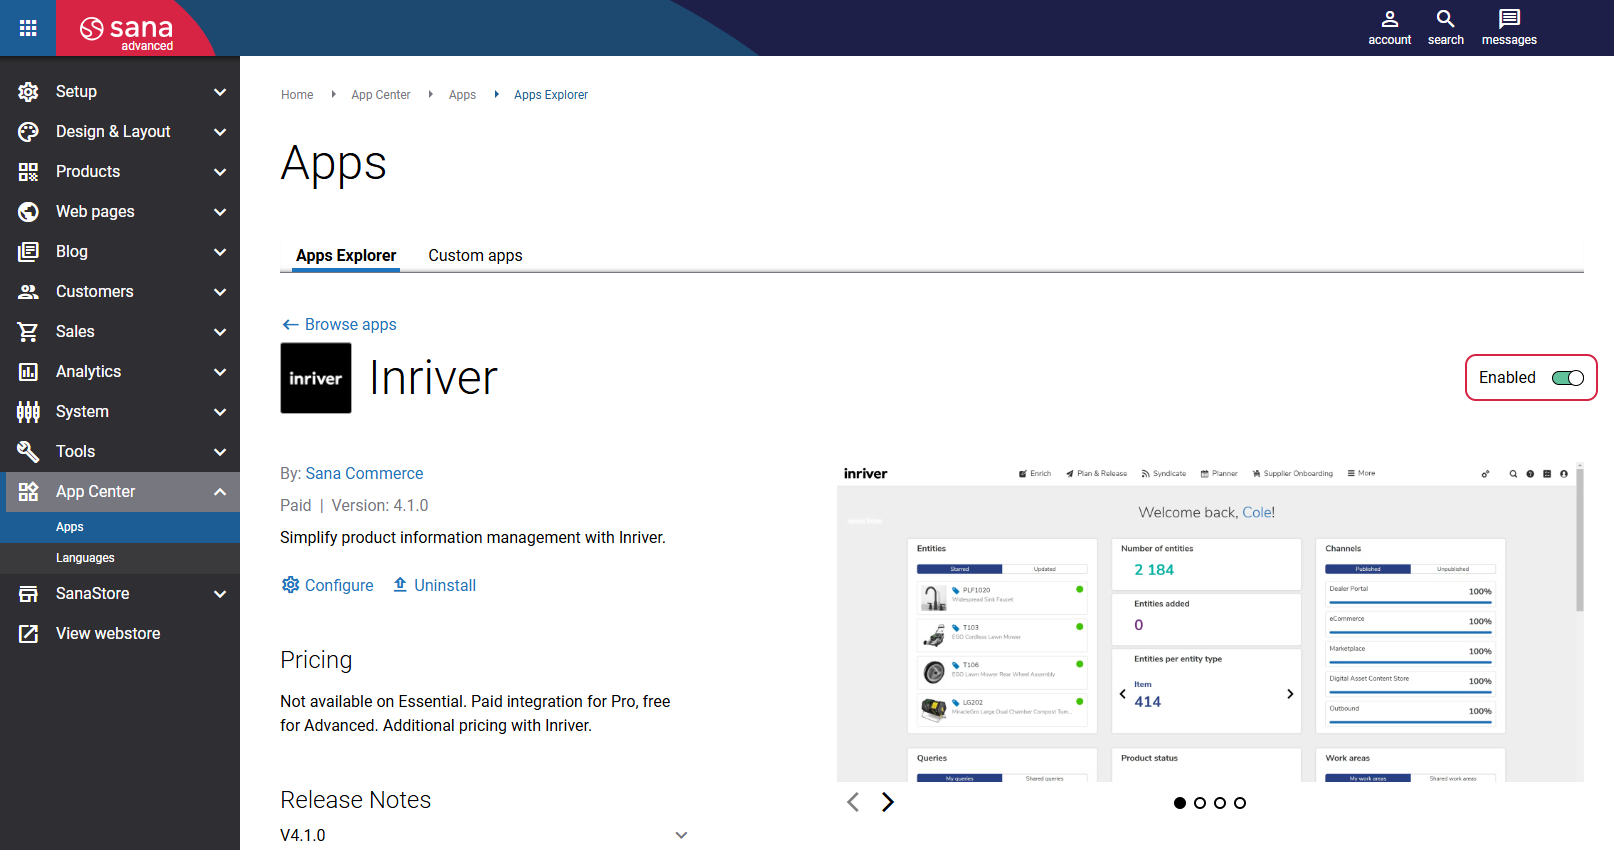
In Sana Admin click: App Center > Apps > Apps Explorer. When the inriver app is installed, you can configure it.
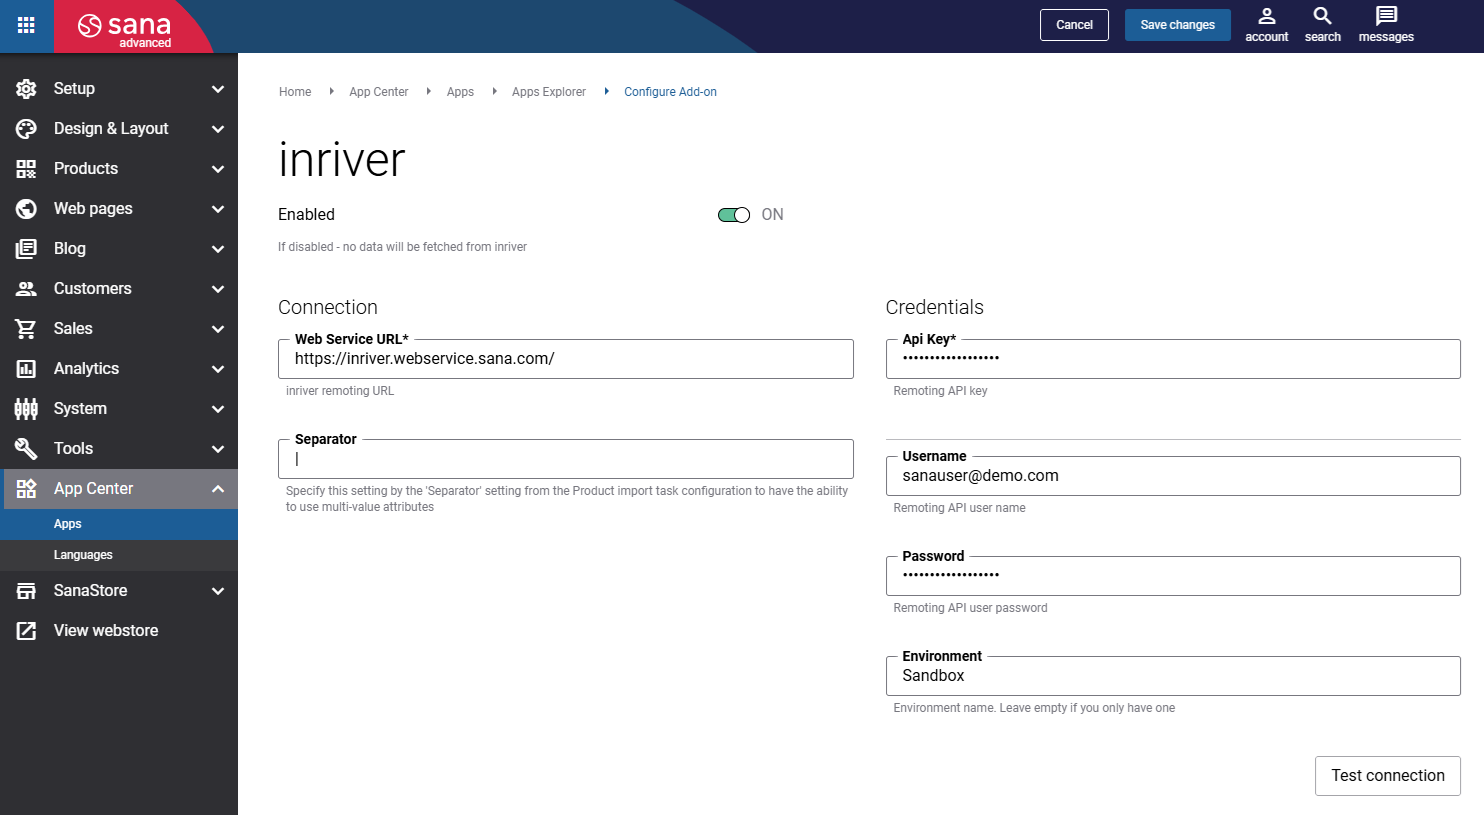
The table below provides the description of the inriver app connection settings.
| Field | Description |
|---|---|
| Enabled |
Use this option to enable or disable the inriver app.
There are two options using which you can enable or disable the inriver app. See the explanation below the table. |
| Connection | |
| Web Service Url |
Sana Commerce Cloud integrates with inriver PIM (SaaS version) through the Web service.
Enter the Web service (remoting) URL to establish connection between Sana Commerce Cloud and inriver. If you do not have the Web service URL, contact inriver or your partner. |
| Separator |
Enter the necessary separator.
This separator is used to separate product attribute values. It should coincide with the one entered in the settings of the Product import scheduled tasks. For more information, see Set Up inriver to Use Separate Product Attribute Values for Product Filtering. |
| Credentials | |
| Api Key |
Enter the API key and user credentials to connect Sana Commerce Cloud to inriver via the Web service.
You can find the user credentials in the inriver Control Center in the User Management module. You can use an existing inriver user or create a separate user dedicated exclusively to Sana. This user must have at least View permissions. For more information on how to configure the API key, see Configure inriver Remoting API Key. |
| Username | |
| Password | |
| Environment | In case you have several environments (for example, live and test), enter the name of the environment you need to connect to. |
When connection between Sana Commerce Cloud and inriver is configured, click Test connection to check whether the connection is available.
Configure inriver Remoting API Key
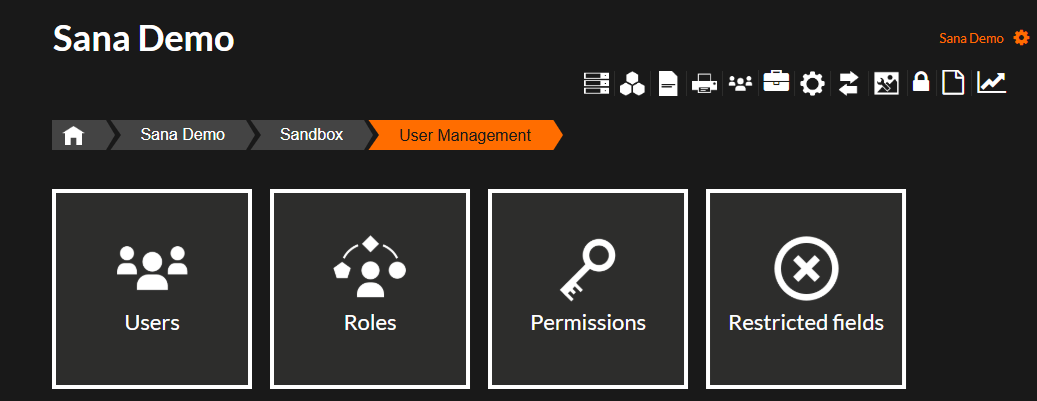
Step 1: Open the inriver Control Center and click: User Management > Users.
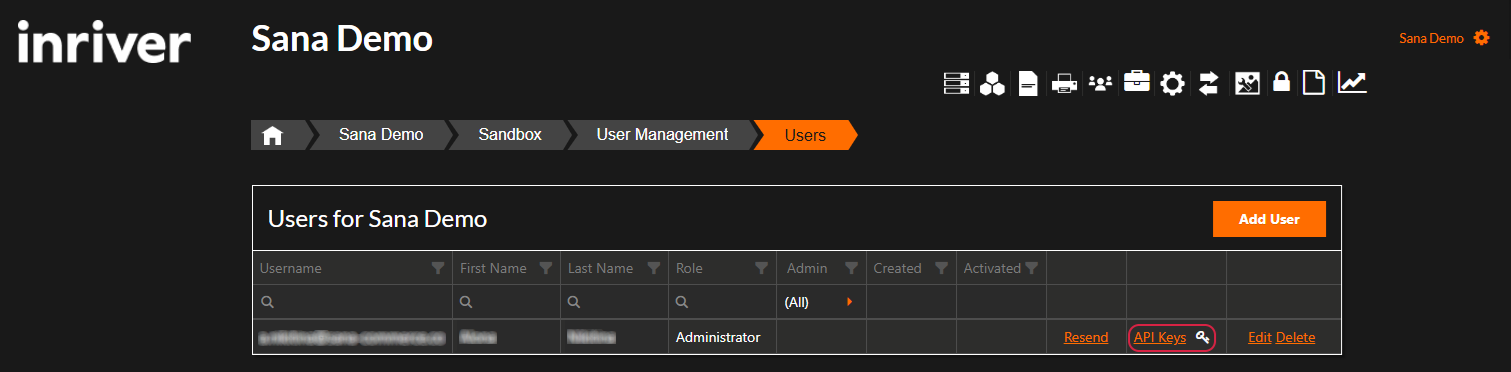
Step 2: In the Users section, find the necessary user and click API Keys.
You will see two different API keys. If no keys are displayed, click Generate to create one.
Step 3: You need the Remoting API Key. Click Save before using a key.
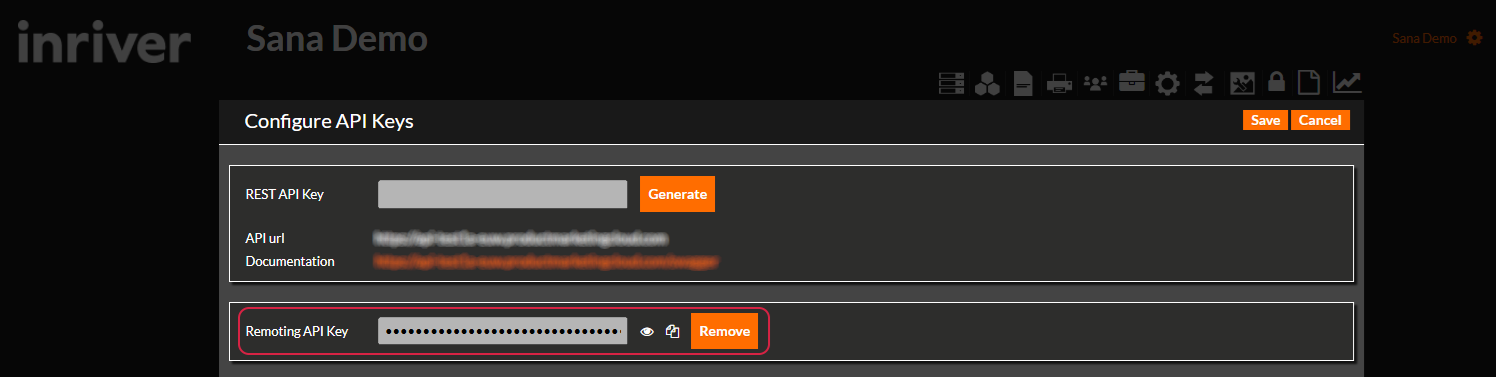
Step 4: Copy the generated Remoting API Key and paste it into the Api Key field on the inriver configuration app page in Sana Admin.
Step 5: After making the necessary changes, thoroughly test your application to ensure the API key-based authentication is functioning correctly.
When the connection between Sana Commerce Cloud and inriver is configured, click Test connection to check whether the connection is available.
Enable inriver App
There are two options in Sana Admin which are used to enable or disable the inriver app:
-
You can enable or disable the inriver app on the app details page.
-
On the configuration page of the inriver app, you can see the additional Enabled option. This additional option is used to disable the inriver app in the safe way.

When you run the Product import task for the first time after the inriver app is installed and configured, the fields from inriver will be imported and saved to Sana Commerce Cloud. If for some reason you disable the inriver app, then the next time you start the indexing of products, the Product import task will fail. It happens because Sana requests the inriver fields from the ERP system and the ERP system gives back errors in response, since it cannot find these fields.
To avoid the failure of the Product import task, you should disable the inriver add-on using the additional Enabled option. This option completely disables the inriver app. In this way, when the product indexing starts, the fields from inriver will be removed from the ERP request and the task will not fail.
Both Enabled options should be set up in the same way, for example, if you disable the inriver app using one option, the other one should be also disabled.
Inriver Connection Troubleshooting
While testing the connection between Sana Commerce Cloud and inriver, in certain cases, the system can throw errors, meaning that the connection has not been established. The connection can fail for various reasons, here you can see the information about some errors and how they can be fixed.
Exception during creating remote manager: There was no endpoint listening at ...
This message will be shown, if the Web service URL is incorrect or could not be resolved. You should check if URL is correct and there is the endpoint which listens to this URL. Contact Sana or inriver to get the details.
Exception during creating remote manager: Authentication failure
This message will be shown in case the connection via Web service was successfully established, but authentication failed.
Verify that you have entered the valid credentials (username, password), or try to enter your password again.
You should also check whether there are no leading or trailing spaces in the following fields:
- Username
- Password
- Environment
If some other errors besides those mentioned in this article are shown, you should contact Sana.