Upload Products to Amazon Seller Central
Below you can read about the basic steps of how to upload products to Amazon Seller Central.
For more information about how to upload products to Seller Central, see the Upload Your Inventory File article on the Seller Central Help.
Sign in to Amazon Seller Central and go to Inventory > Add Products via Upload > Upload your Inventory File.
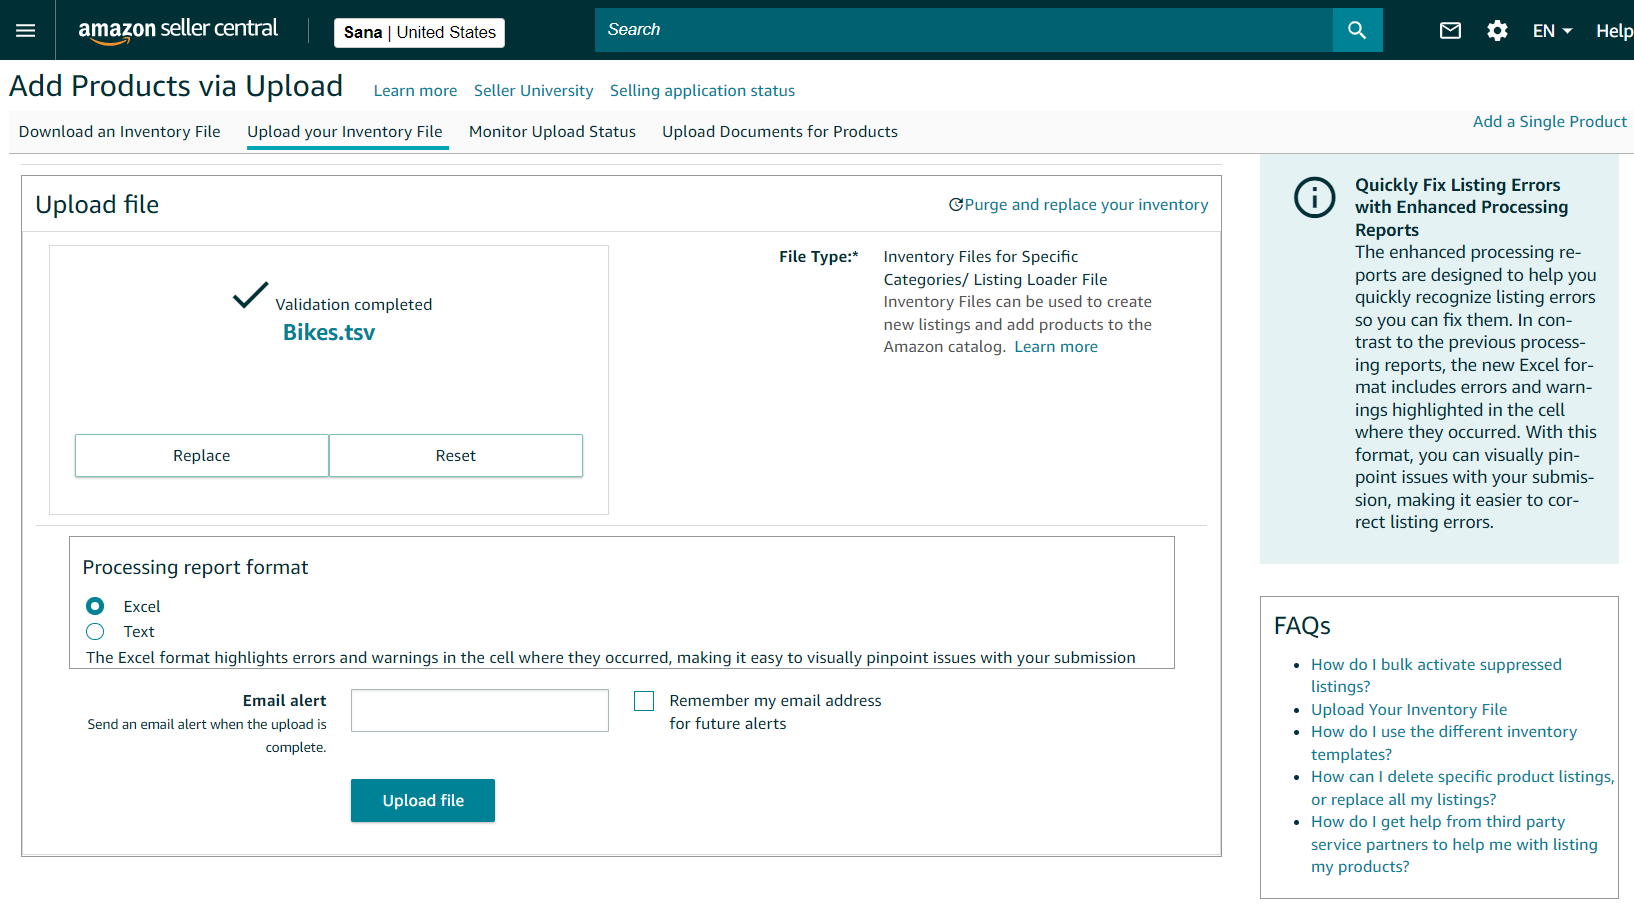
Step 1: Click Browse files and select the TSV file you downloaded from Sana Admin after running the Product data export scheduled task.
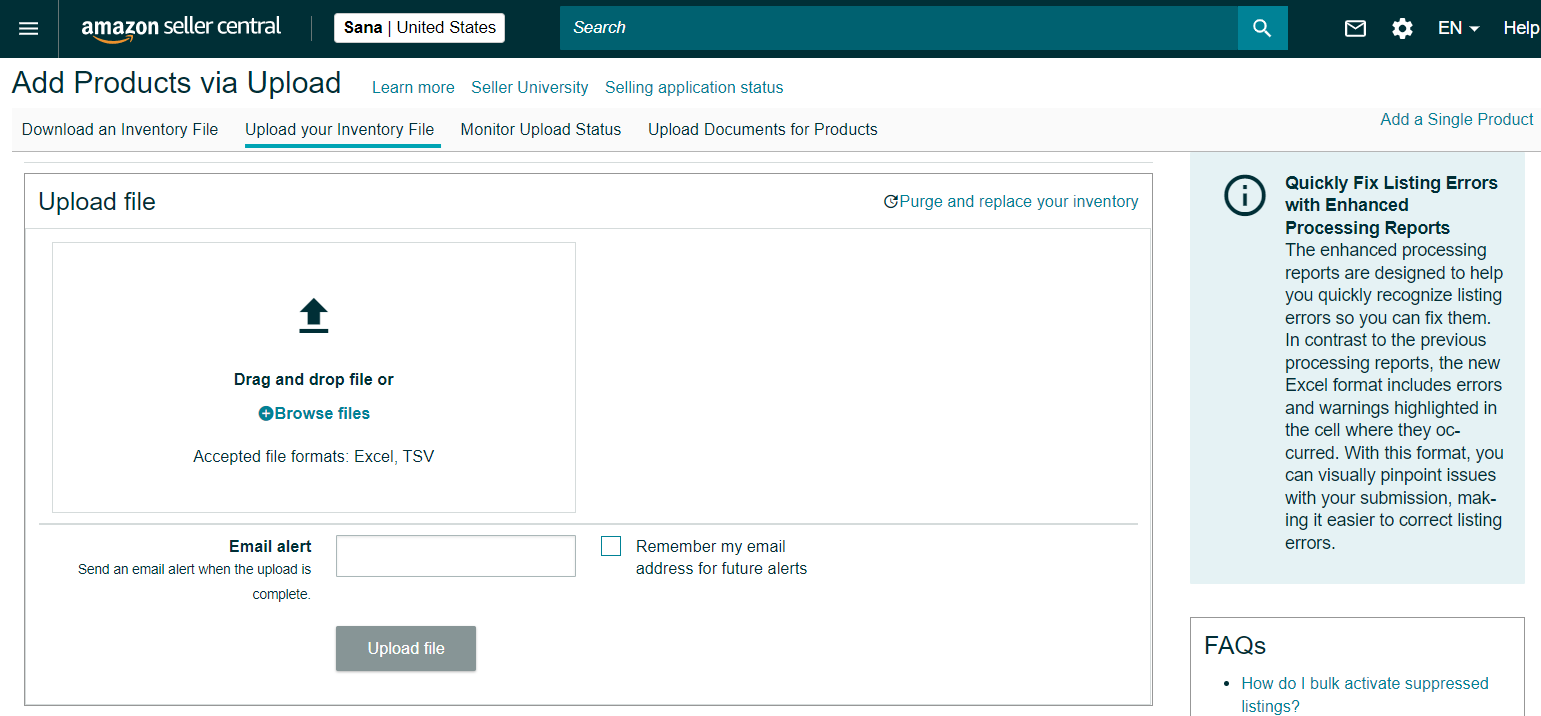
Step 2: Keep the processing report format as Excel. Optionally you can enter your email address to get an alert once the file is uploaded and processed. Click Upload file to start uploading the file.
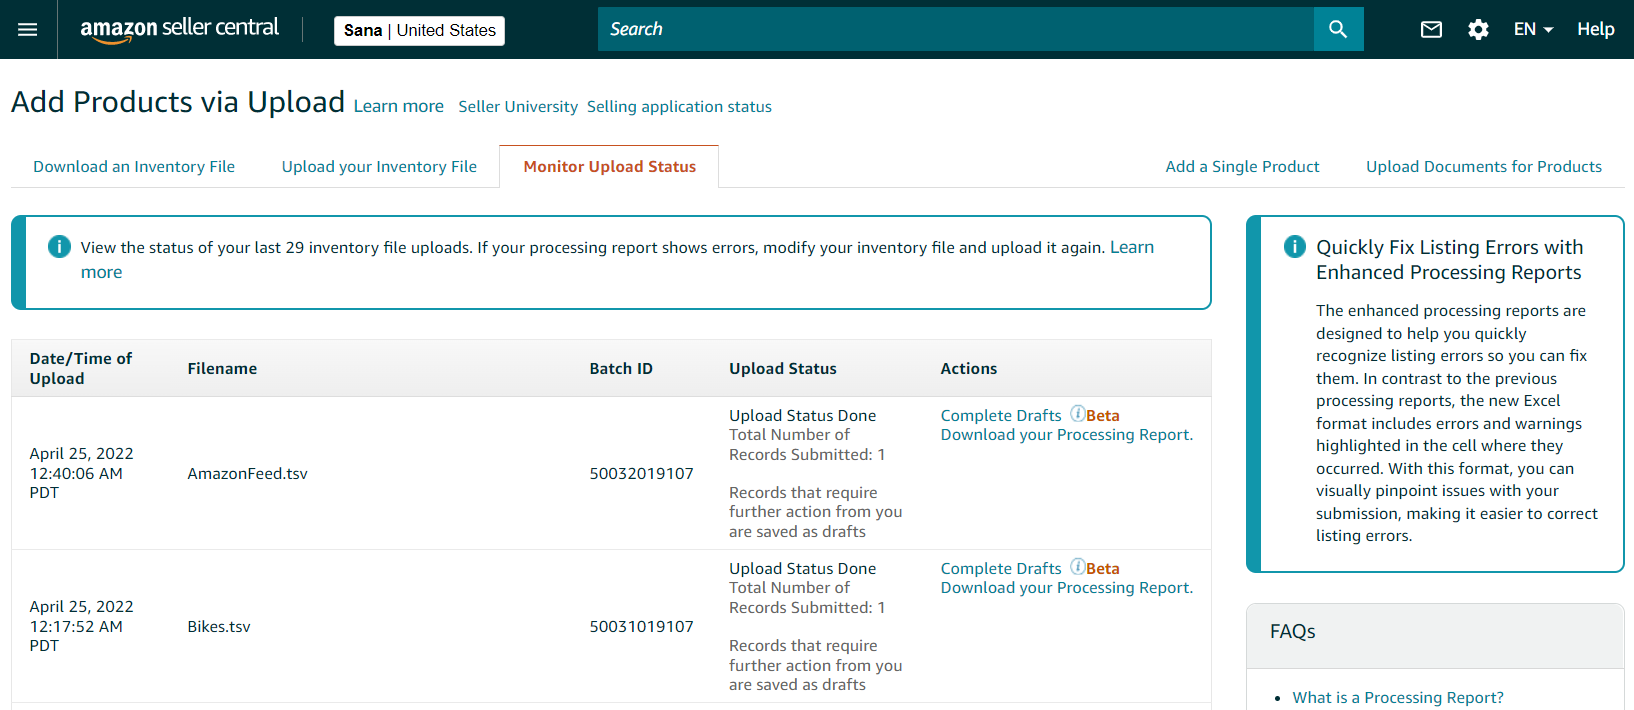
Step 3: Open the Monitor Upload Status tab. Here you can check the status of the uploaded file. Also, once the file is processed you can download the Processing Report. To do this, use the Download your Processing Report link in the Actions field. The Processing Report provides the information about how to correctly fill in the template, which values are accepted for specific fields, also it shows errors in case something is wrong with your template and displays invalid data. You can use this report to make necessary corrections in your inventory file, and then reload the file to correct your listings.
Step 4: Amazon requires approval for certain products, before listing products for sale.
To check whether there are some products which need to be approved by Amazon use the Complete Drafts link in the Actions field.

Fix all incorrect data and reupload your file to Amazon Seller Central. If there is no invalid data in the file, you will be able to upload your products successfully and use them in Amazon.