Configure Expivi 3D Configurator
The Expivi 3D Configurator app is developed, maintained, and supported by Expivi. To integrate Expivi with Sana Commerce Cloud, you may need help from your Expivi implementation partner. If you want to learn more about the integration between Expivi and Sana Commerce Cloud, you can contact your Expivi representative directly.
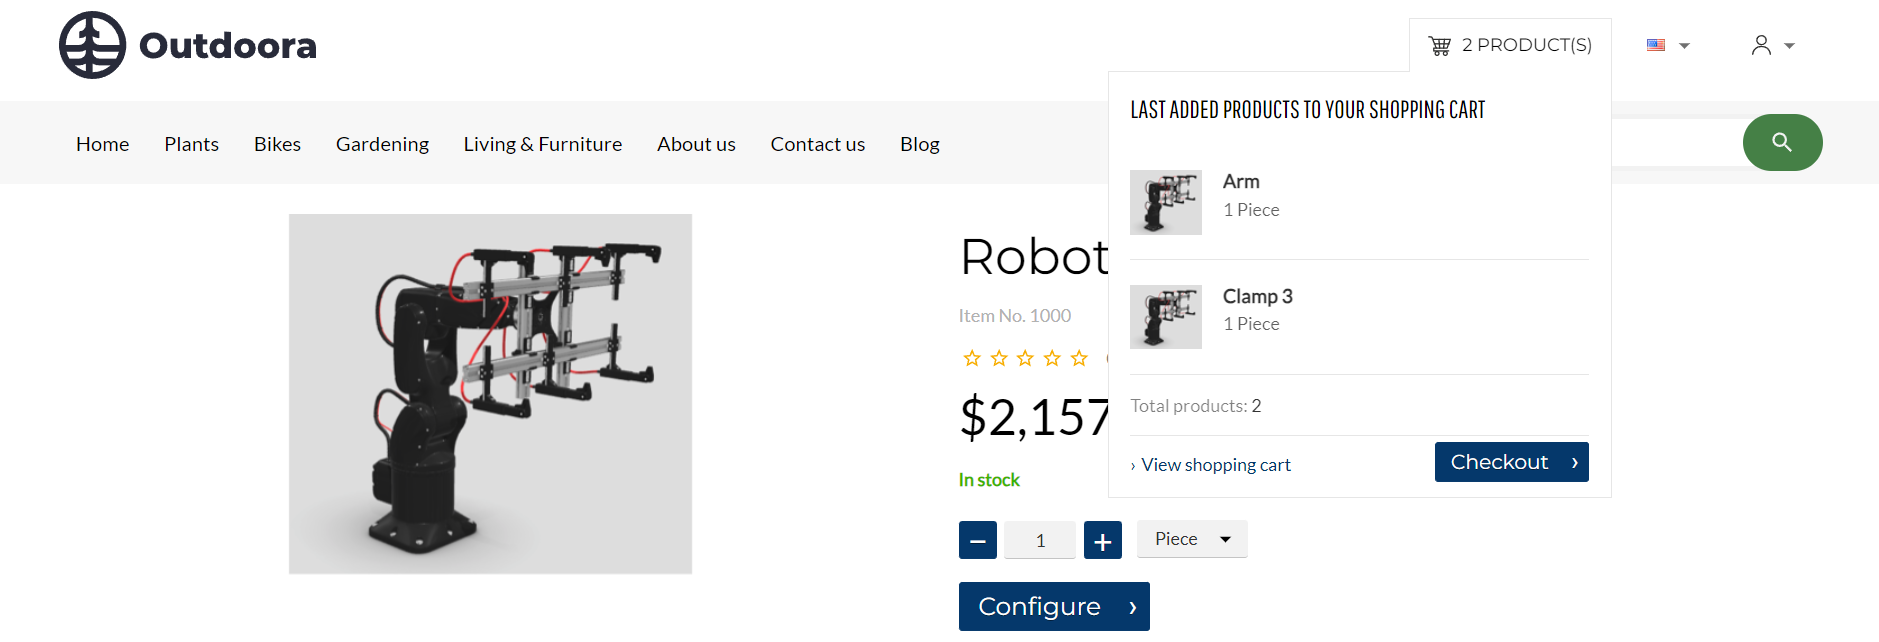
In the Sana webstore, customers can directly configure products according to their needs on the product details pages with real-time visualization using the Expivi 3D Configurator. Sana Commerce Cloud replaces the Add to cart button with a Configure button for customizable products. Clicking on the Configure button opens the Expivi 3D Configurator. When the product is configured, the customer can add it to the shopping cart. All product prices, discounts, taxes, etc. are calculated by the ERP system.
To use the Expivi 3D Configurator in the Sana webstore for product configuration, the following setup is required:
-
Create a theme and subdomain in the Expivi backoffice. For more information, see Expivi Theme on the Expivi website.
-
Install and configure the Expivi app in Sana Admin.
-
Link products in Sana Commerce Cloud to products in Expivi using Expivi's presets. The present name in the Expivi backoffice must match the product ID in Sana Commerce Cloud. For more information, see Configure on the Expivi website.
-
Specify the Expivi configurator model for products in your ERP system.
Install and Configure the Expivi 3D Configurator App in Sana Admin
Expivi is available as an app. It can be installed from the Sana App Center.
In Sana Admin click: App Center > Apps > Apps Explorer. When the Expivi app is installed, you can configure it.
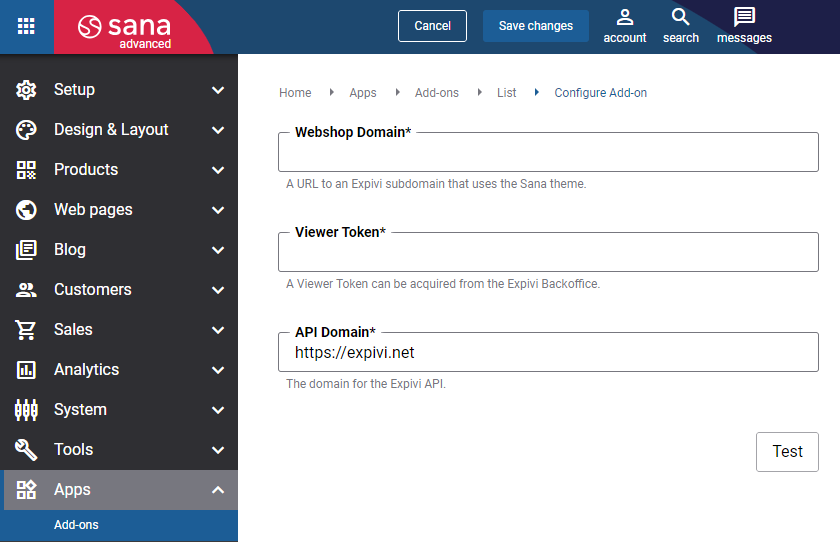
The table below describes the fields on the Expivi 3D Configurator app configuration page.
| Field | Description |
|---|---|
| Webshop Domain | Enter the subdomain created in the Expivi backoffice for the Expivi theme. |
| Viewer Token | Enter the API key created in the Expivi backoffice with the Viewer Token role. |
| API Domain | Do not change the API domain unless you want to connect Sana Commerce Cloud to a different Expivi environment, for example for testing purposes. |
Click Test to check if the setup is valid and Sana Commerce Cloud can connect to Expivi.
You can change the configurable products stock text using Custom stock texts.
Specify the Expivi Configurator Model for Products in ERP
Applies to: Microsoft Dynamics ERP systems.
In the Microsoft Dynamics ERP systems, there is the product (item) field related to Expivi 3D Configurator, called Configurator Model. This field is added by Sana Commerce Cloud.
If you want your customers to configure specific products in the Sana webstore using the Expivi 3D Configurator, you must enter Expivi in the Configurator Model field for those products.
Check the screenshots below to see where this field is in different ERP systems.
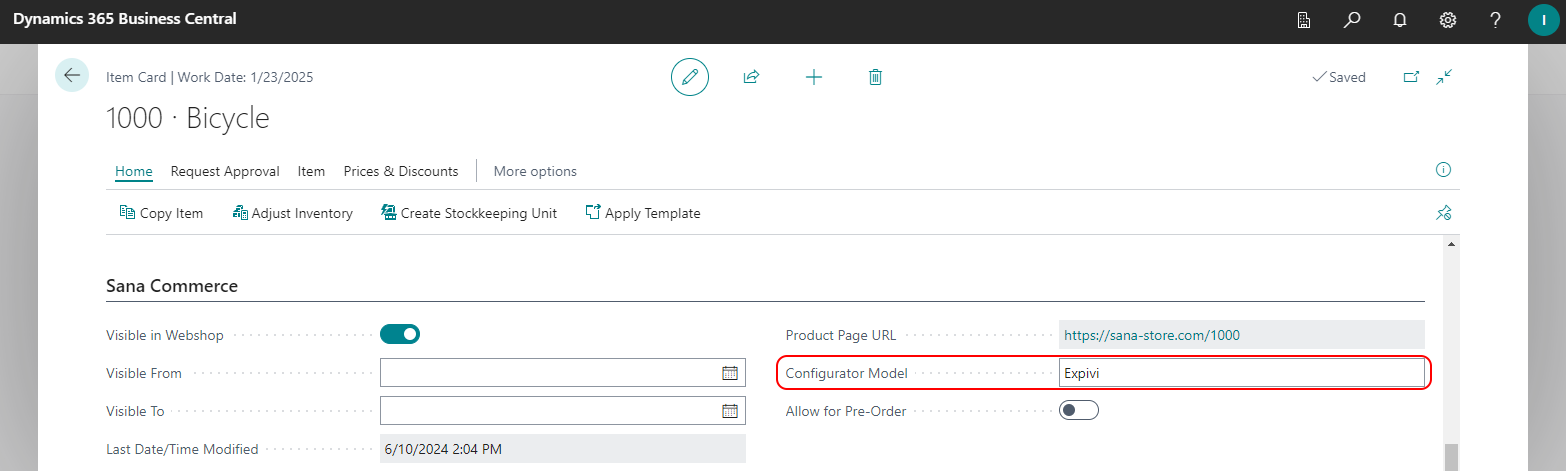
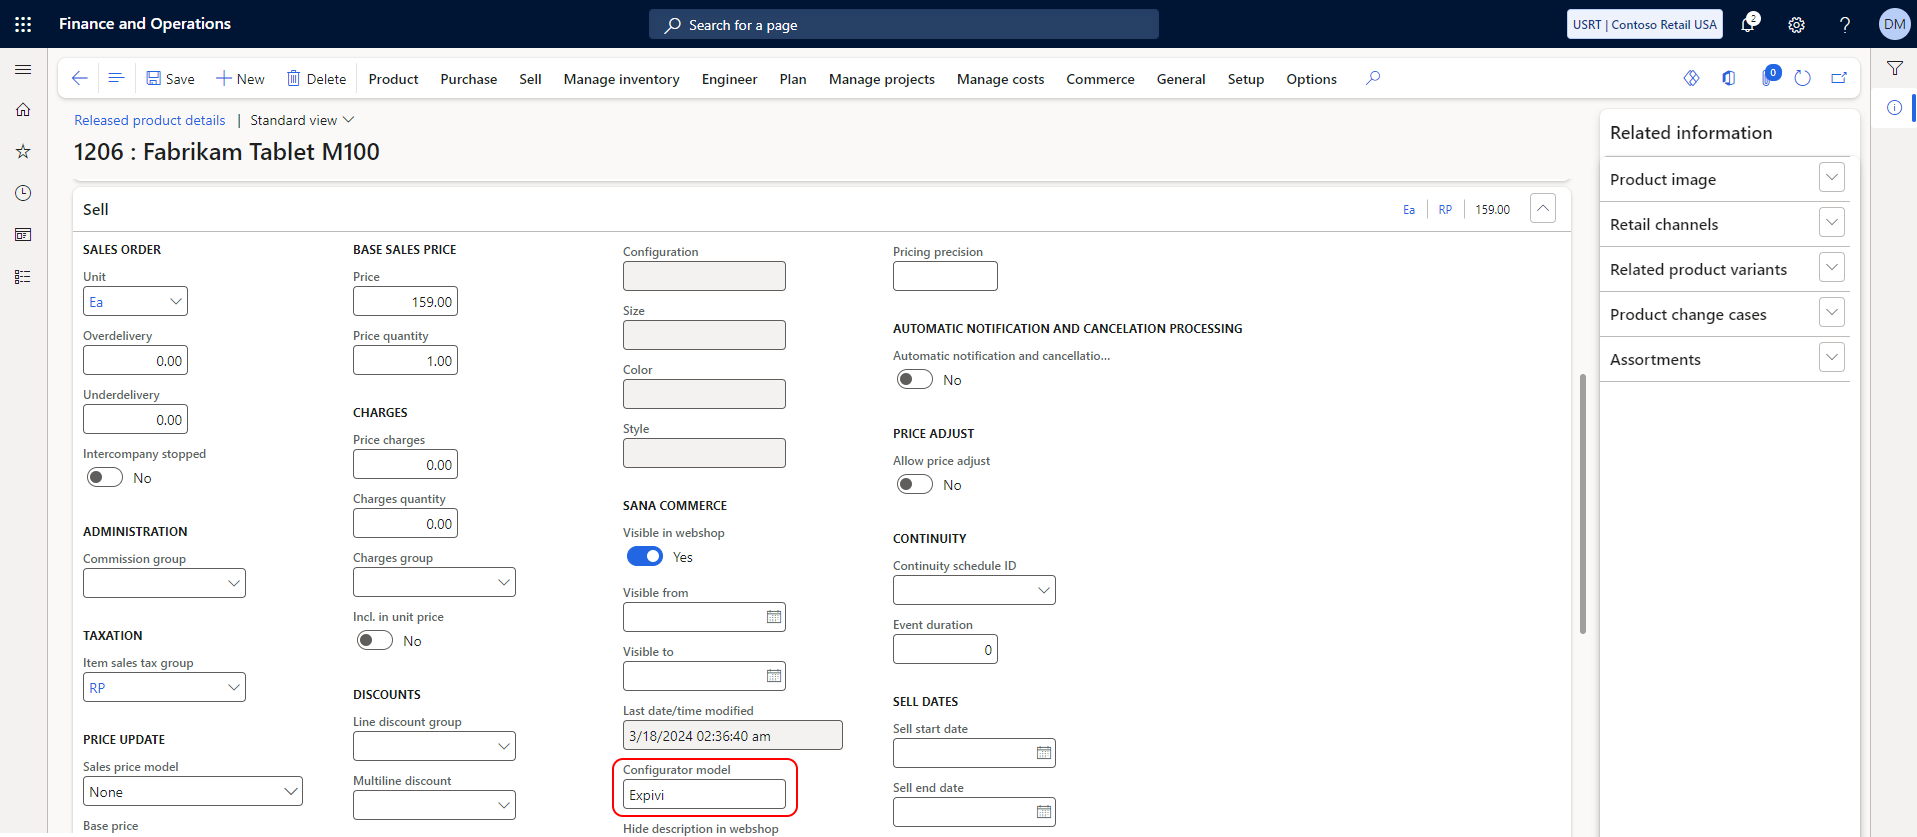
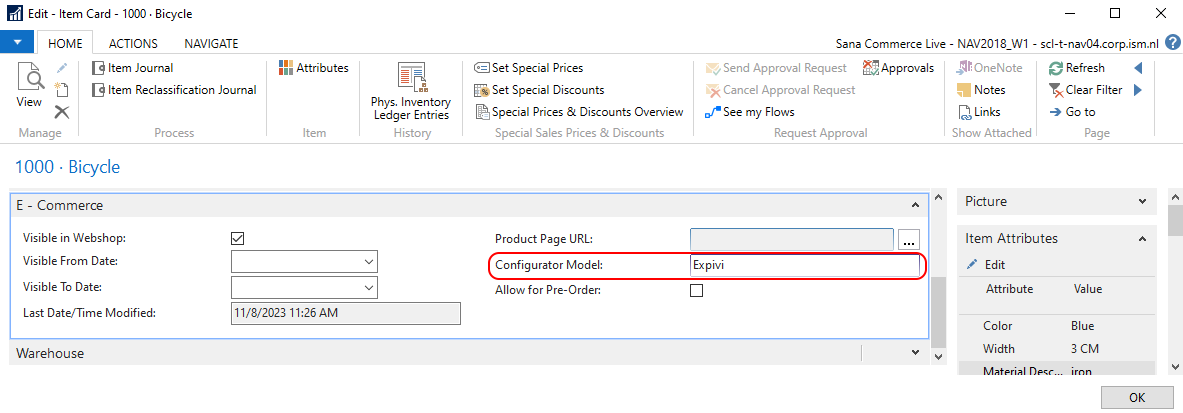
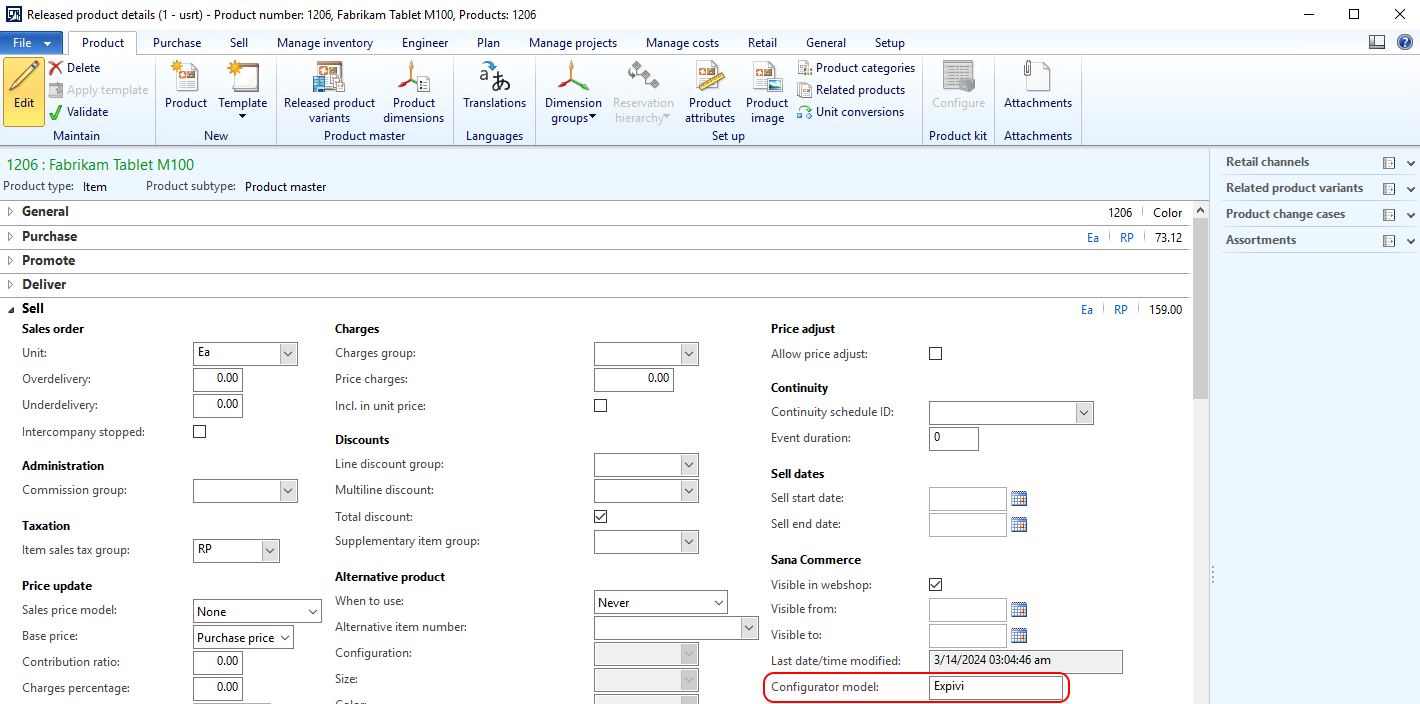
Sana Commerce Cloud uses the Configurator Model in ERP to distinguish configurable products from normal products. If a product has the Configurator Model set to Expivi in the ERP system, customers can configure this product on the product details page in a Sana webstore using the Expivi 3D Configurator. If the Configurator Model field for a product in ERP is either empty or set to a value other than Expivi, Sana Commerce Cloud will treat the product as a standard item without the option for configuration. Instead of the Configure button, the Add to cart button will be shown in the Sana webstore.