Install Sana Proxy Service for NAV 2009 Three-Tier Installation
Applies to: Microsoft Dynamics NAV 2009 Three-Tier Installation on Three Computers
If you have a different setup of Microsoft Dynamics NAV 2009, skip this article.
If each of the three Microsoft Dynamics NAV 2009 tiers (client, server and database) are installed on a separate computer, the so called three-tier installation on three computers, then you must also install the Sana proxy service to be able to connect the Sana webstore to your Microsoft Dynamics NAV 2009 system.
The Sana proxy service must be installed on the same computer where Microsoft Dynamics NAV Server is installed or on the customer network where it can connect to the NAV Server. You will need to deploy the Sana proxy service to IIS on the server.
The registered Sana partners can download the Sana proxy service on the Sana Community website where the Sana packages for Microsoft Dynamics NAV are stored.
Server Requirements
-
Microsoft .NET Framework 4.0 or higher
-
Internet Information Services (IIS) Manager and the following IIS components:
-
ASP.NET
- Anonymous Authentication
-
Basic Authentication
-
WCF activation
-
Prerequisites
-
Sana proxy service
-
Publicly available domain to use in IIS to access the Sana proxy service
-
Valid SSL certificate for the Sana proxy service domain
-
Information about Microsoft Dynamics NAV 2009 connection (Web service URL and user credentials)
-
Microsoft Dynamics NAV 2009 user with permissions to access application folder
Installation
Step 1: Copy the Sana proxy service to the server.
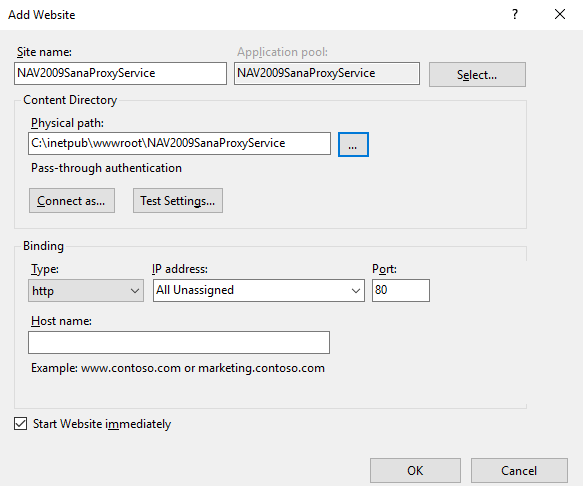
Step 2: Create a new website in IIS and specify physical path to the folder with the Sana proxy service.
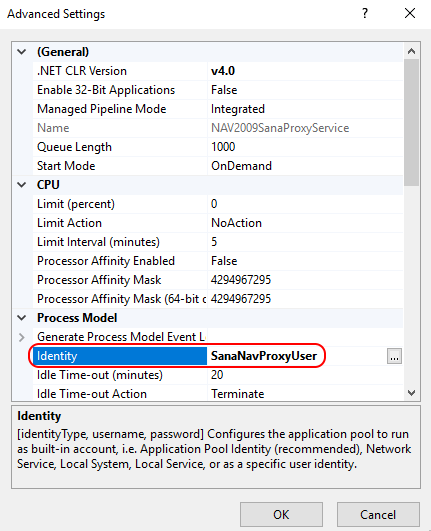
Step 3: Configure application pool identity to run under the NAV user.
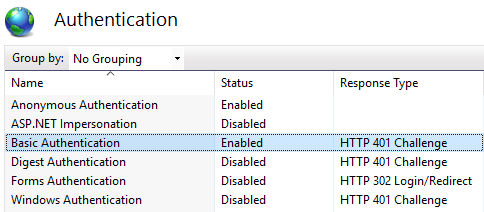
Step 4: Enable Anonymous and Basic Authentication for the website. All other authentication types must be disabled.
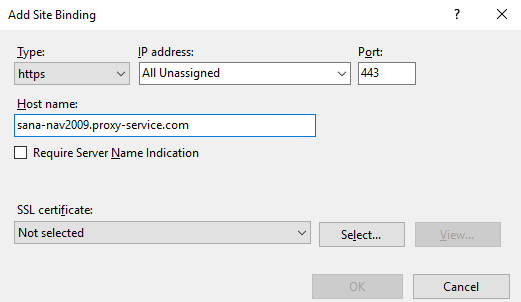
Step 5: Configure https binding for the website with the publicly accessible domain name and SSL certificate.
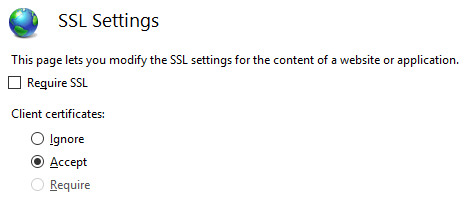
Step 6: Open SSL Settings of the website and in the Client certificates section, select Accept.
Step 7: Open the Web.config file of the Sana proxy service. Find the <appSettings> section and add the NAV Web service URL as the value of the Url parameter.
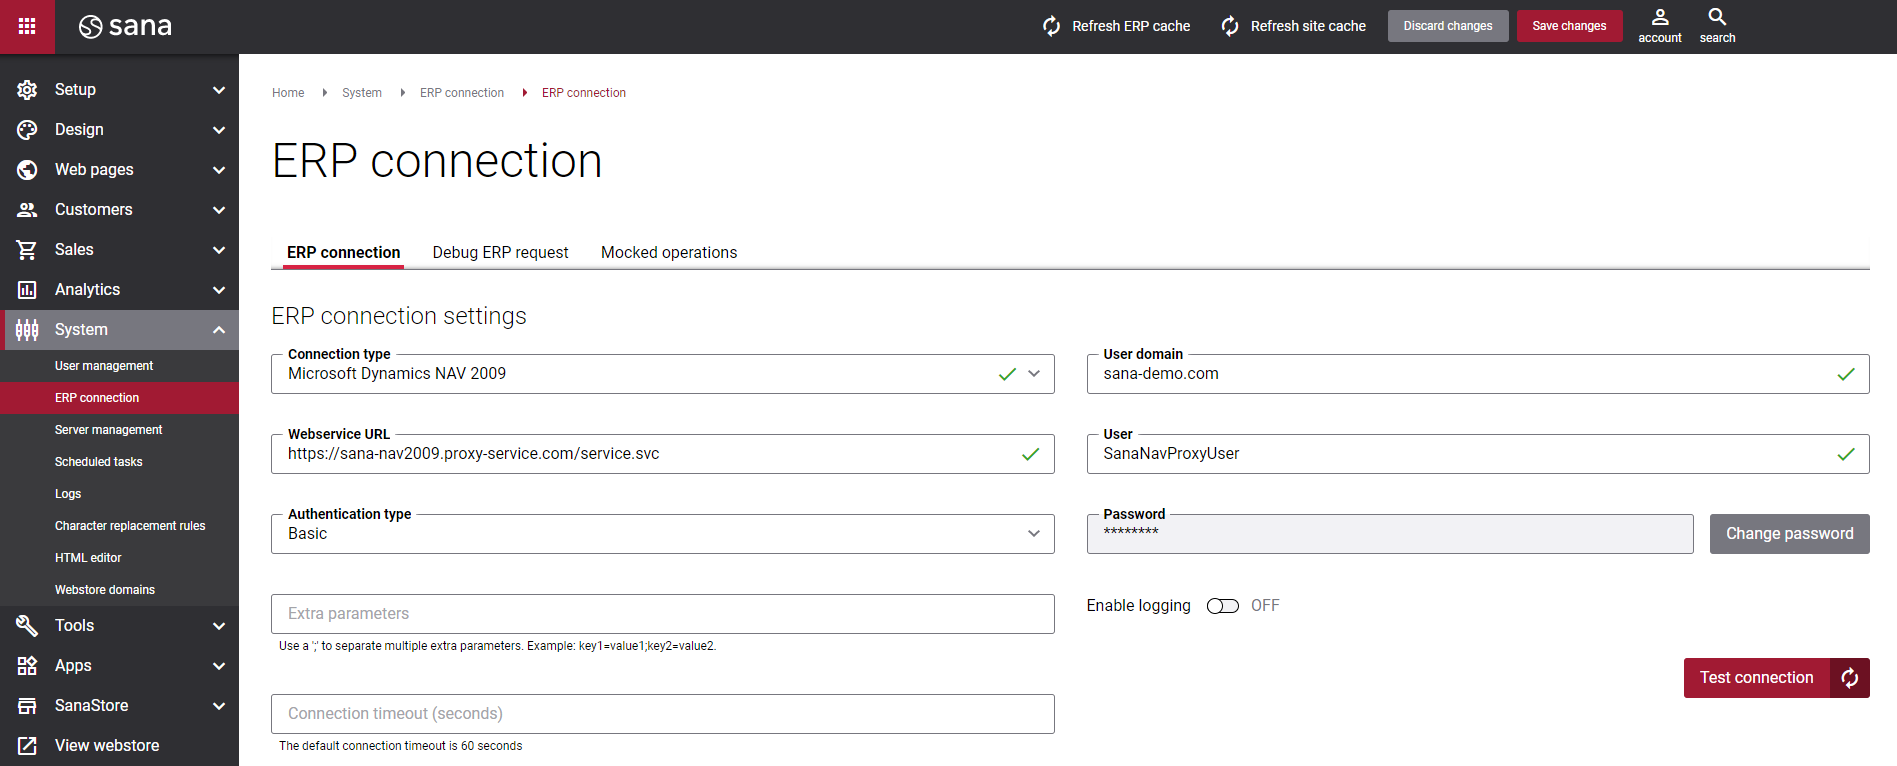
ERP Connection Settings
To connect the Sana webstore to the three-tier installation of Microsoft Dynamics NAV 2009, you must set up the following ERP connection settings in Sana Admin.
|
Field |
Value |
|---|---|
|
Connection type |
Microsoft Dynamics NAV 2009 |
|
Webservice URL |
Enter the URL of the created Sana proxy service. It must be in the following format: https://[Sana proxy service domain]:[custom port if there is any]/service.svc Example: https://sana-nav2009.proxy-service.com/service.svc |
|
Authentication type |
Basic |
|
User domain |
Enter Microsoft Dynamics NAV 2009 user credentials. You can enter user domain in the User domain field or in the User field before the user name in the following format: [User domain]\[User name]. |
|
User |
|
|
Password |