Install WCF Service
This step is only necessary when no other Sana Commerce projects are installed on the same machine, because this service component is shared between multiple Sana Commerce NAV services.
Step 1: Copy the content of the Services folder from the Sana Commerce solution folder to a local drive on the production server. We recommend placing it in a general components directory, since it can be used by multiple Sana Commerce solutions.
Step 2: Run the reregister.bat file which is located in the Services folder:
In case of a 64-bit operating system run the reregister.bat and reregister_x64.bat files.
To undo this step or register a new version:
Step 1: Open a command prompt and navigate to C:\WINDOWS\Microsoft.NET\Framework\v4.0.30319.
Step 2: Run the following command:
regasm.exe targetdirectory\Sana.Commerce.Navision.Service.dll /unregisterIn case of 64-bit system do also:
Step 3: Open a command prompt and navigate to C:\WINDOWS\Microsoft.NET\Framework64\v4.0.30319.
Step 4: Run the following command:
regasm.exe targetdirectory\Sana.Commerce.Navision.Service.dll /unregisterStep 3: Open the target (Service) folder, click right on the Sana.Commerce.Navision.Service.dll file and select Properties.
Step 4: Open the Security tab and add Read right for the SC_Nasuser and the network service user:
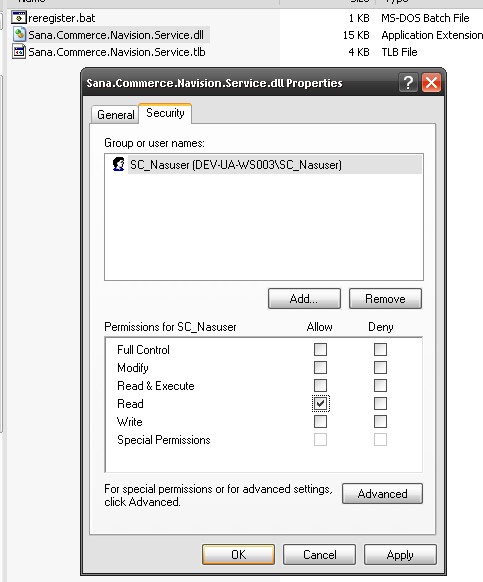
Step 5: Do the same for the Sana.Commerce.Navision.Service.tlb file.
Step 6: Install the Sana.Commerce.Navision.Service.dll assembly into the global assembly cache. To do this you should use the Global Assembly Cache tool. This tool is automatically installed with Visual Studio as a part of Windows SDK. For more information about Gacutil, see Gacutil.exe (Global Assembly Cache Tool) on the Microsoft website.
If the Gacutil is installed you can execute the following command at the command prompt to install the Sana.Commerce.Navision.Service.dll assembly into the global assembly cache:
gacutil /i Sana.Commerce.Navision.Service.dll