Install NAV Application Server (NAS)
Step 1: Run the NAS installer from the Microsoft Dynamics NAV installation disk (located in the NAS directory) on the production server.

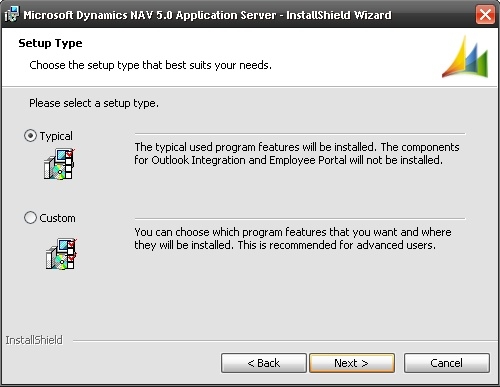
Step 2: Select Typical setup and finish the installation (leave the checkbox Start Microsoft Dynamics NAV Application service during the last step unchecked). This will create two windows services; one for native data stores and one for SQL server data stores. By default, the Network service is set as the Log On As user, meaning that the service will run on this account.
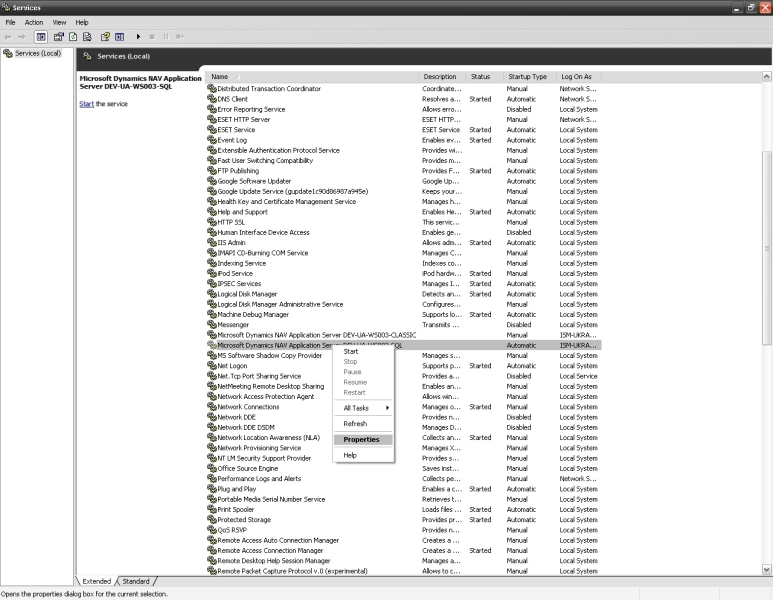
Step 3: Go to: Start menu > Control Panel > Administrative Tools > Services and locate Microsoft Dynamics Application Server (either native or SQL):
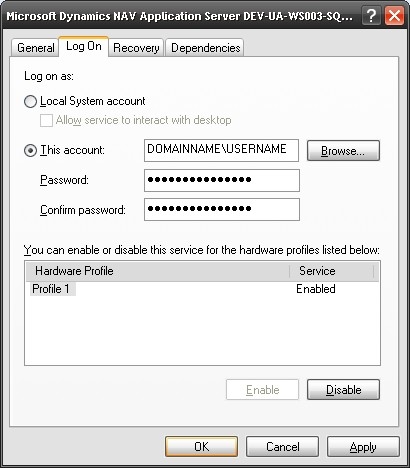
Step 4: Right click on Microsoft Dynamics Application Server, go to the Log On tab and select This account option. Enter the credentials for the earlier created SC_Nasuser that will be used.

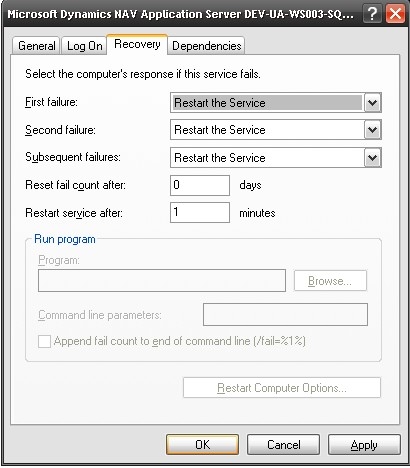
Step 5: Open the Recovery tab and select Restart the service for the options First failure, Second failure and Subsequent failures. This makes sure that the NAS service will be restarted when the connection to Microsoft Dynamics NAV has been lost.

Step 6: Click the Apply button at the bottom right and click OK.
Now, you need to give SC_Nasuser the access to the Microsoft Dynamics NAV database:
Step 1: Open the Microsoft Dynamics NAV client and connect to the NAV administration with credentials that have enough rights to allow access to other users (the Super or Security role). Ask your system administrator, if you do not have access yourself.
Step 2: Go to: Tools > Security > Windows logins and enter the user account (with domain name!) in an empty row.
Step 3: Click the Roles button at the bottom. If you do not have an appropriate role for the user under whom the NAS service is running, with a correct set of permissions, then you should create such role manually. For example, create the SС-USER role and set the permissions as shown on the screenshot below.

Step 4: When the role is created, assign this role to the user account in the Roles window.
