Set Up OAuth Authentication
Sana Commerce Cloud supports the OAuth authorization protocol for Web services to connect to Microsoft Dynamics 365 Business Central Cloud.
To enable OAuth authentication, you need to register an app in the Microsoft Entra ID (formerly known as Azure Active Directory).
Step 1: Sign in to Microsoft Azure Portal with the account you use to sign in to Microsoft Dynamics 365 Business Central.
Step 2: To register an app, search for App registrations. Click New registration to create an app.
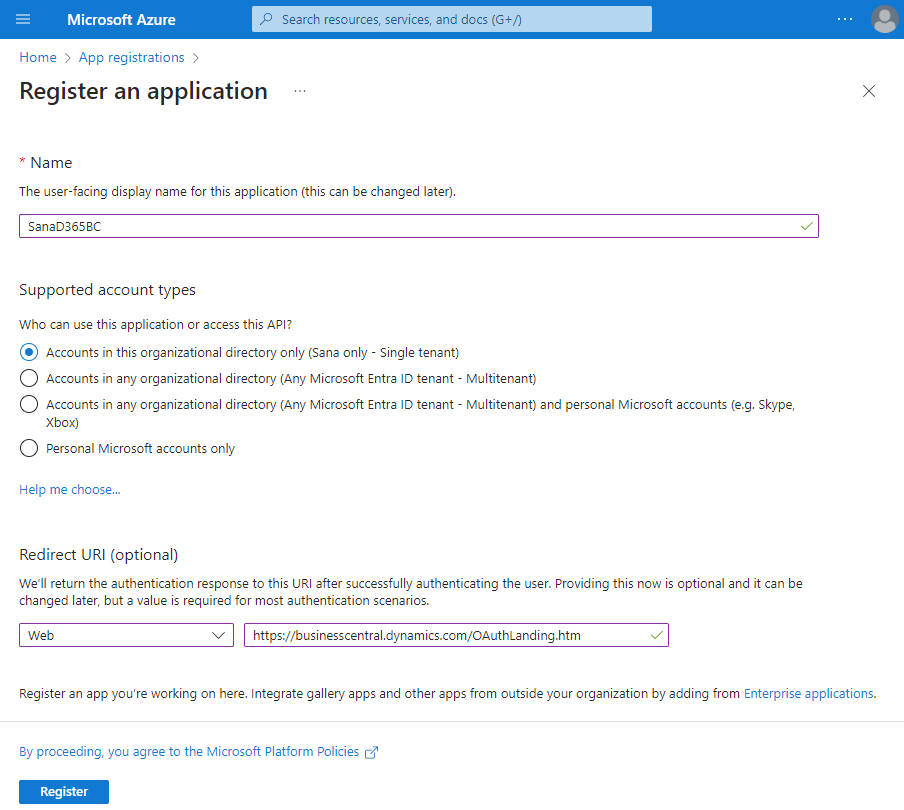
Step 3: In the Name field, enter any application name.
Step 4: Select the account type Accounts in this organization directory only.
Step 5: In the Redirect URI section select Web and enter the following URL: https://businesscentral.dynamics.com/OAuthLanding.htm
Step 6: Click Register to complete app registration.
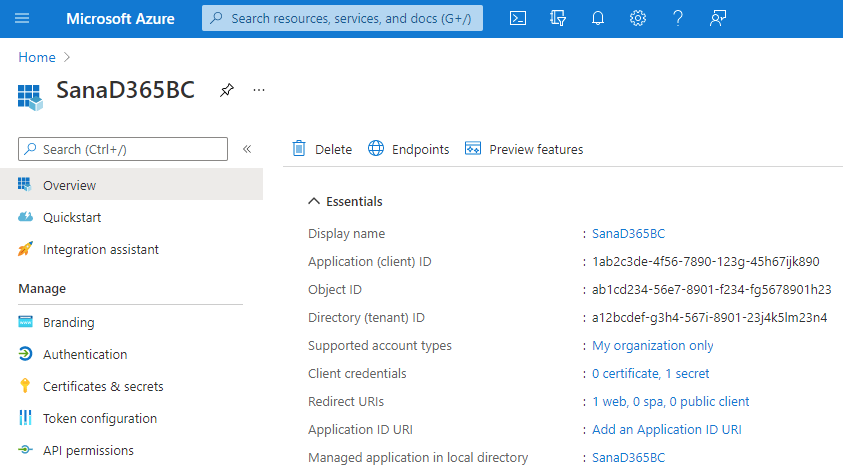
When the app is registered, the Application (client) ID, Object ID and Directory (tenant) ID will be generated. You will need the Application (client) ID and Directory (tenant) ID to set up ERP connection in Sana Admin.
Step 7: Go to Authentication and select the checkbox Access tokens (used for implicit flows). Save your changes.

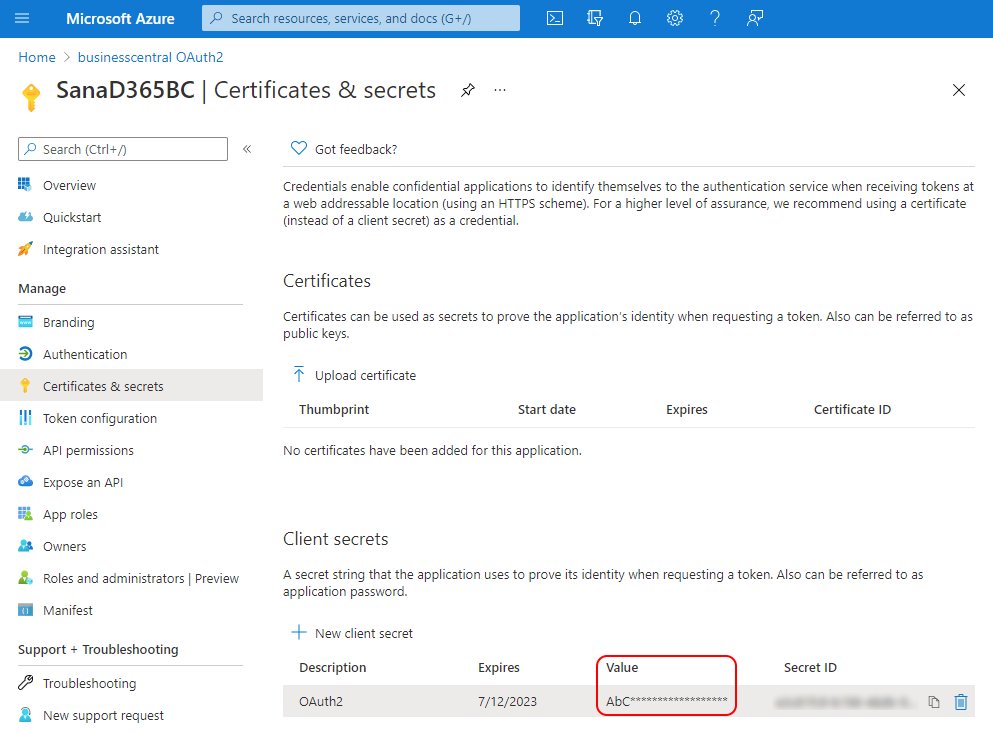
Step 8: Go to Certificates & secrets and click New client secret. Add a description for your client secret, select an expiration date and click Add.
Copy the secret's value as when you leave this page it will be hidden, and you will not be able to see it again. If you don't save it somewhere, you will need to create another client secret. You will need the client secret to set up ERP connection in Sana Admin.
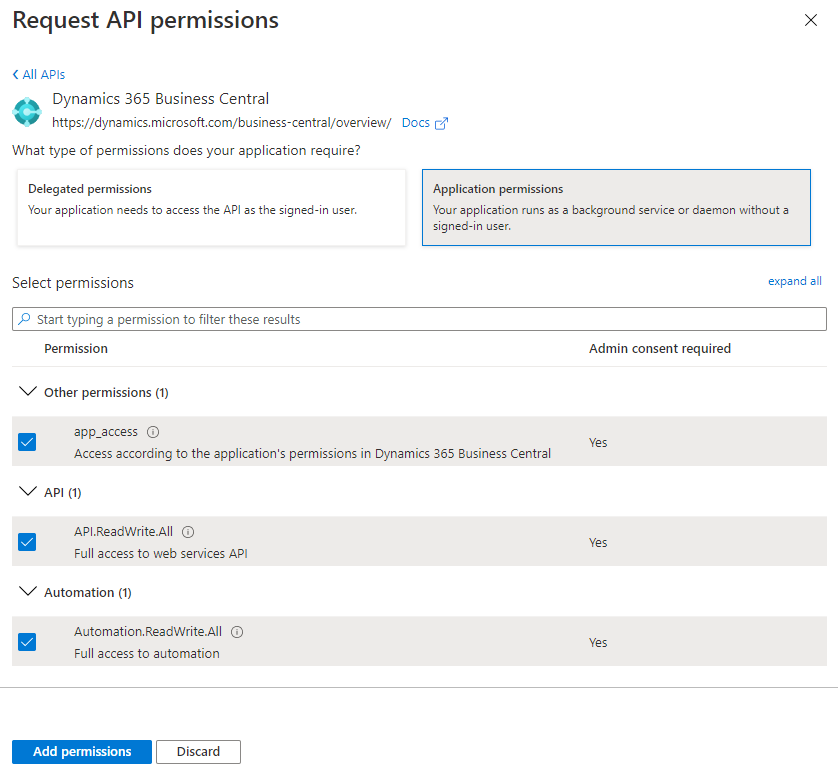
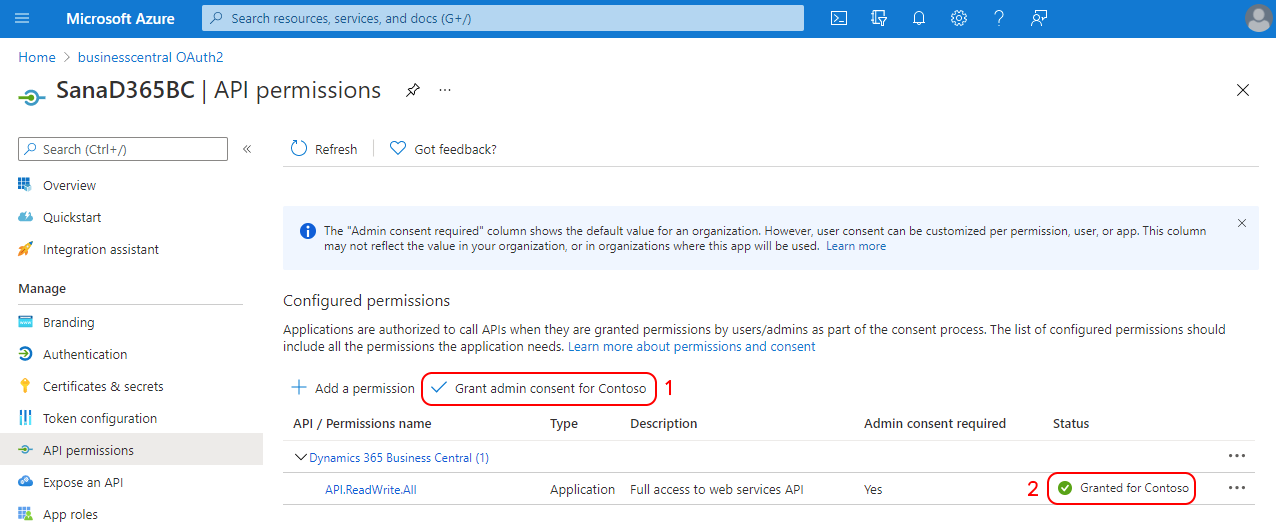
Step 9: Open API permissions. Click Add a permission.
Step 10: Click on Dynamics 365 Business Central and then Application permissions. Select permissions as shown on the screenshot below and click Add permissions.
Step 11: On the API permissions page, click Grant admin consent to grant the necessary permissions. The status must be Granted.
Step 12: Sign in to Microsoft Dynamics 365 Business Central and search for Microsoft Entra Applications (earlier Azure Active Directory Applications).
Step 13: Create a new application and configure the following settings.

| Field | Description |
|---|---|
| Client ID | Enter the application (client) ID of the app registered in the Microsoft Entra ID. |
| Description | Enter any application name. |
| Permission Set | Add the SC - SANA APP permission set. This permission set is sufficient and has enough rights to connect Sana Commerce Cloud to Microsoft Dynamics 365 Business Central. It gives access to all required business logic in Microsoft Dynamics 365 Business Central. |
| State | Select Enabled to enable the application. |
Step 14: Click Grant Consent to allow Sana Commerce Cloud to access data in Microsoft Dynamics 365 Business Central.
When the app is created in the Microsoft Entra ID and Microsoft Dynamics 365 Business Central, you can connect Sana Commerce Cloud to Microsoft Dynamics 365 Business Central.