Install Web Services on IIS
This chapter describes installation of the Microsoft Dynamics AX web services on Internet Information Services (IIS).
Documents that are exchanged using AIF are stored in the AIF document history. This leads to the log file and database growth, which can cause problems. Therefore, the AIF document history must be cleared from time to time.
Use this procedure to install the Microsoft Dynamics AX web services on IIS. If you are installing other Microsoft Dynamics AX components at the same time, the installation pages vary based on the components that you are installing.
Install the Microsoft Dynamics AX Web Services on IIS
Step 1: Run Microsoft Dynamics AX installer and follow the wizard.
Step 2: On the Select installation type page, click Custom installation and then click Next.
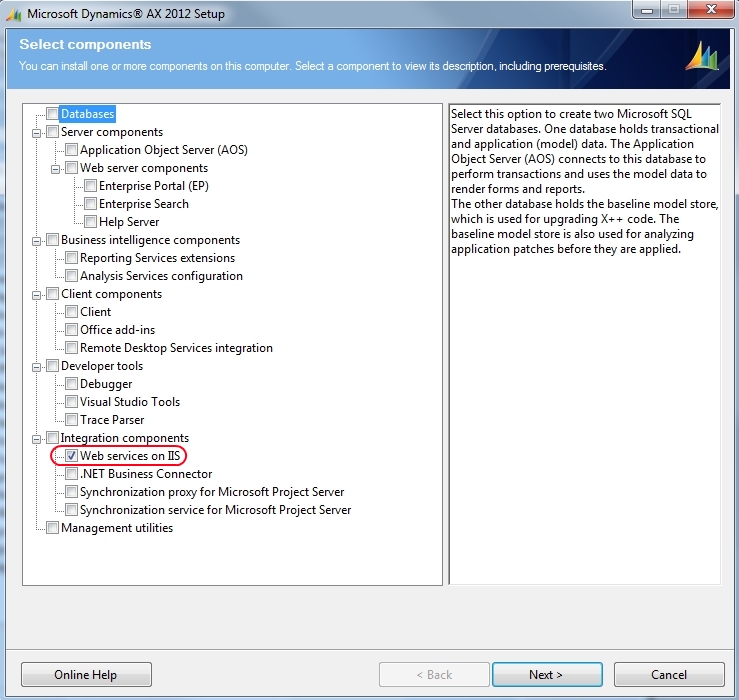
Step 3: On the Select components page, select Web services on IIS and click Next.

Step 4: On the Prerequisite validation results page, resolve any errors. If a checkbox is available in the Configure column, select it and then click the Configure button to resolve the issue.
Step 5: On the Specify Business Connector Proxy account information page, enter the password for the proxy account used by the .NET Business Connector. Click Next.
Step 6: On the Configure IIS for Web services page, accept default values or provide information for the website, application pool, and virtual directory. Setup will create a virtual directory and an application pool for the Microsoft Dynamics AX web services under the selected website. The application pool will run as the .NET Business Connector proxy user that you entered in the previous step.
The website will be also created in Microsoft Dynamics AX automatically at the following location: System administration > Setup > Services and Application Integration Framework > Web sites.
You must restart IIS after web services are installed. Select Restart IIS after installation is completed to automatically restart IIS.
Step 7: On the Specify an AOS account page, provide the service accounts for the AOS instances that you will use with web services on IIS. Click Next.
If an AOS instance is running under the Network Service account, format the account name in the following way: Domain\ComputerName$.
Step 8: On the Prerequisite validation results page, resolve any errors. If a checkbox is available in the Configure column, select it and then click the Configure button to resolve the issue.
Step 9: On the Ready to install page, click Install.
IIS will be restarted after the web services are installed.
Step 10: In IIS, configure authentication settings for the web services website. You should enable Windows Authentication for the website, all other types of authentication should be disabled.
If all steps have been followed and performed, then web services are installed on IIS.