Unified Pricing Management Basic Configuration and Functional Scenarios
This article provides a concise guide to configuring Unified pricing management, focusing on core setup steps like defining attributes, creating price structures, and setting up pricing components. It also includes some scenarios to show you how attribute-based pricing actually works in practice whether you're setting up discounts, running promotions, or making other pricing adjustments.
Core Configurations Steps for Unified Pricing Management
1. Define Attributes
Identify the attributes that will be used in pricing rules.
2. Configure Attribute Groups
Create attribute groups and add all the necessary attributes to a group. For example, you can create a customer attribute group and a sales order attribute group, then add the attributes that will be used in the pricing rules to these groups.
For product attributes, assign them to relevant products through the procurement category hierarchy or group them into price attribute groups, then you can assign these attribute groups to Commerce categories.
- Add the created customer attribute and sales order attribute groups to Pricing management parameters.
- Assign product, customer, sales order price attribute values to products, customers, sales orders.
3. Create Price Attribute Groups
The main purpose of price attribute groups is to indicate to the system that these attributes should be used in price calculations. Essentially, this grouping is tailored specifically for pricing strategies and rules. There are two scopes for price attribute groups: header (these are the attributes that are found on sales order headers and they describe the overall sales order) and line (these are the attributes that are found on sales order lines and they describe each individual order line).
4. Create Price Component Codes
In the price component code, we need to assign the price attribute group to both the header and the line. This is the primary setup that enables the system to recognize which price attribute group applies to the header and which applies to the line. Then, the system will group header and line price attribute groups and will define the price attribute group combination.
5. Create Sales Trade Agreements
6. Configure Pricing Elements
Set up the various pricing components you will be using, such as prices, discounts, price adjustments, charges, etc.
7. Configure the Price Structure (Price Tree)
At its core, a price structure organizes various price components, like base price, margin price adjustments, discounts, into a clear, hierarchical format. This structured approach gives businesses valuable insights into how each pricing element impacts the final customer price.
Scenarios
Scenario 1: Defining a Product Price Using Sales Trade Agreement with Attributes
Condition: Suppose you want to define a specific product price using a sales trade agreement, based on particular product and customer attribute values. In this example, we’ll set a price for a product with the 128GB drive capacity when sold to customers from the Western region.
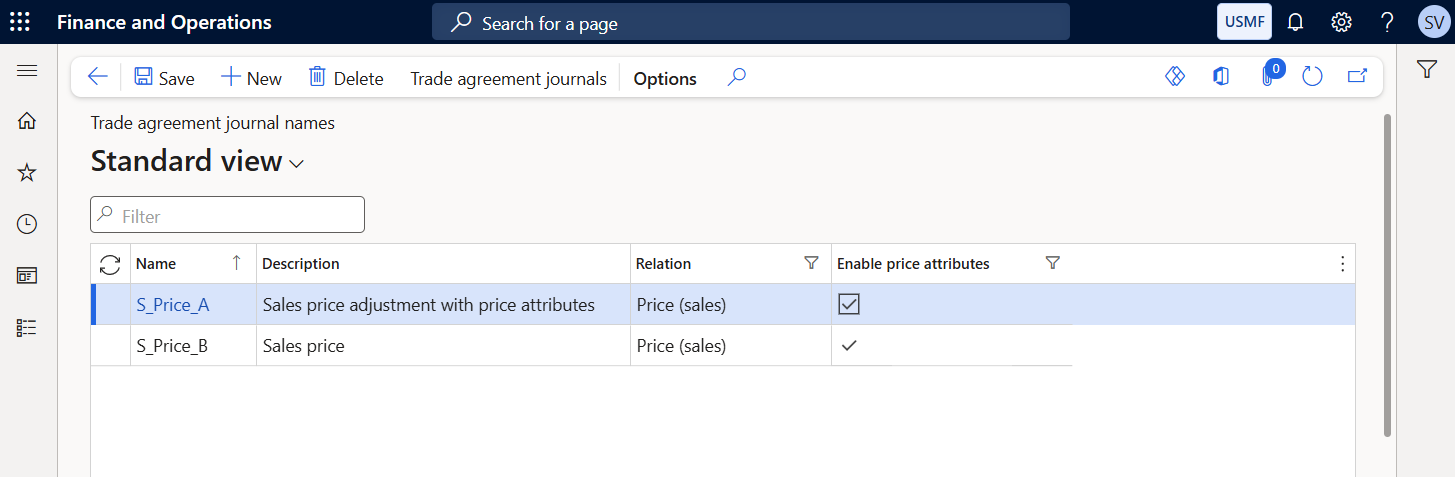
Step 1: First, create a trade agreement journal that supports attribute-based pricing. To do this, navigate to: Pricing management > Setup > Trade agreement prices > Trade agreement journal names. Make sure to select the Enable price attributes checkbox.
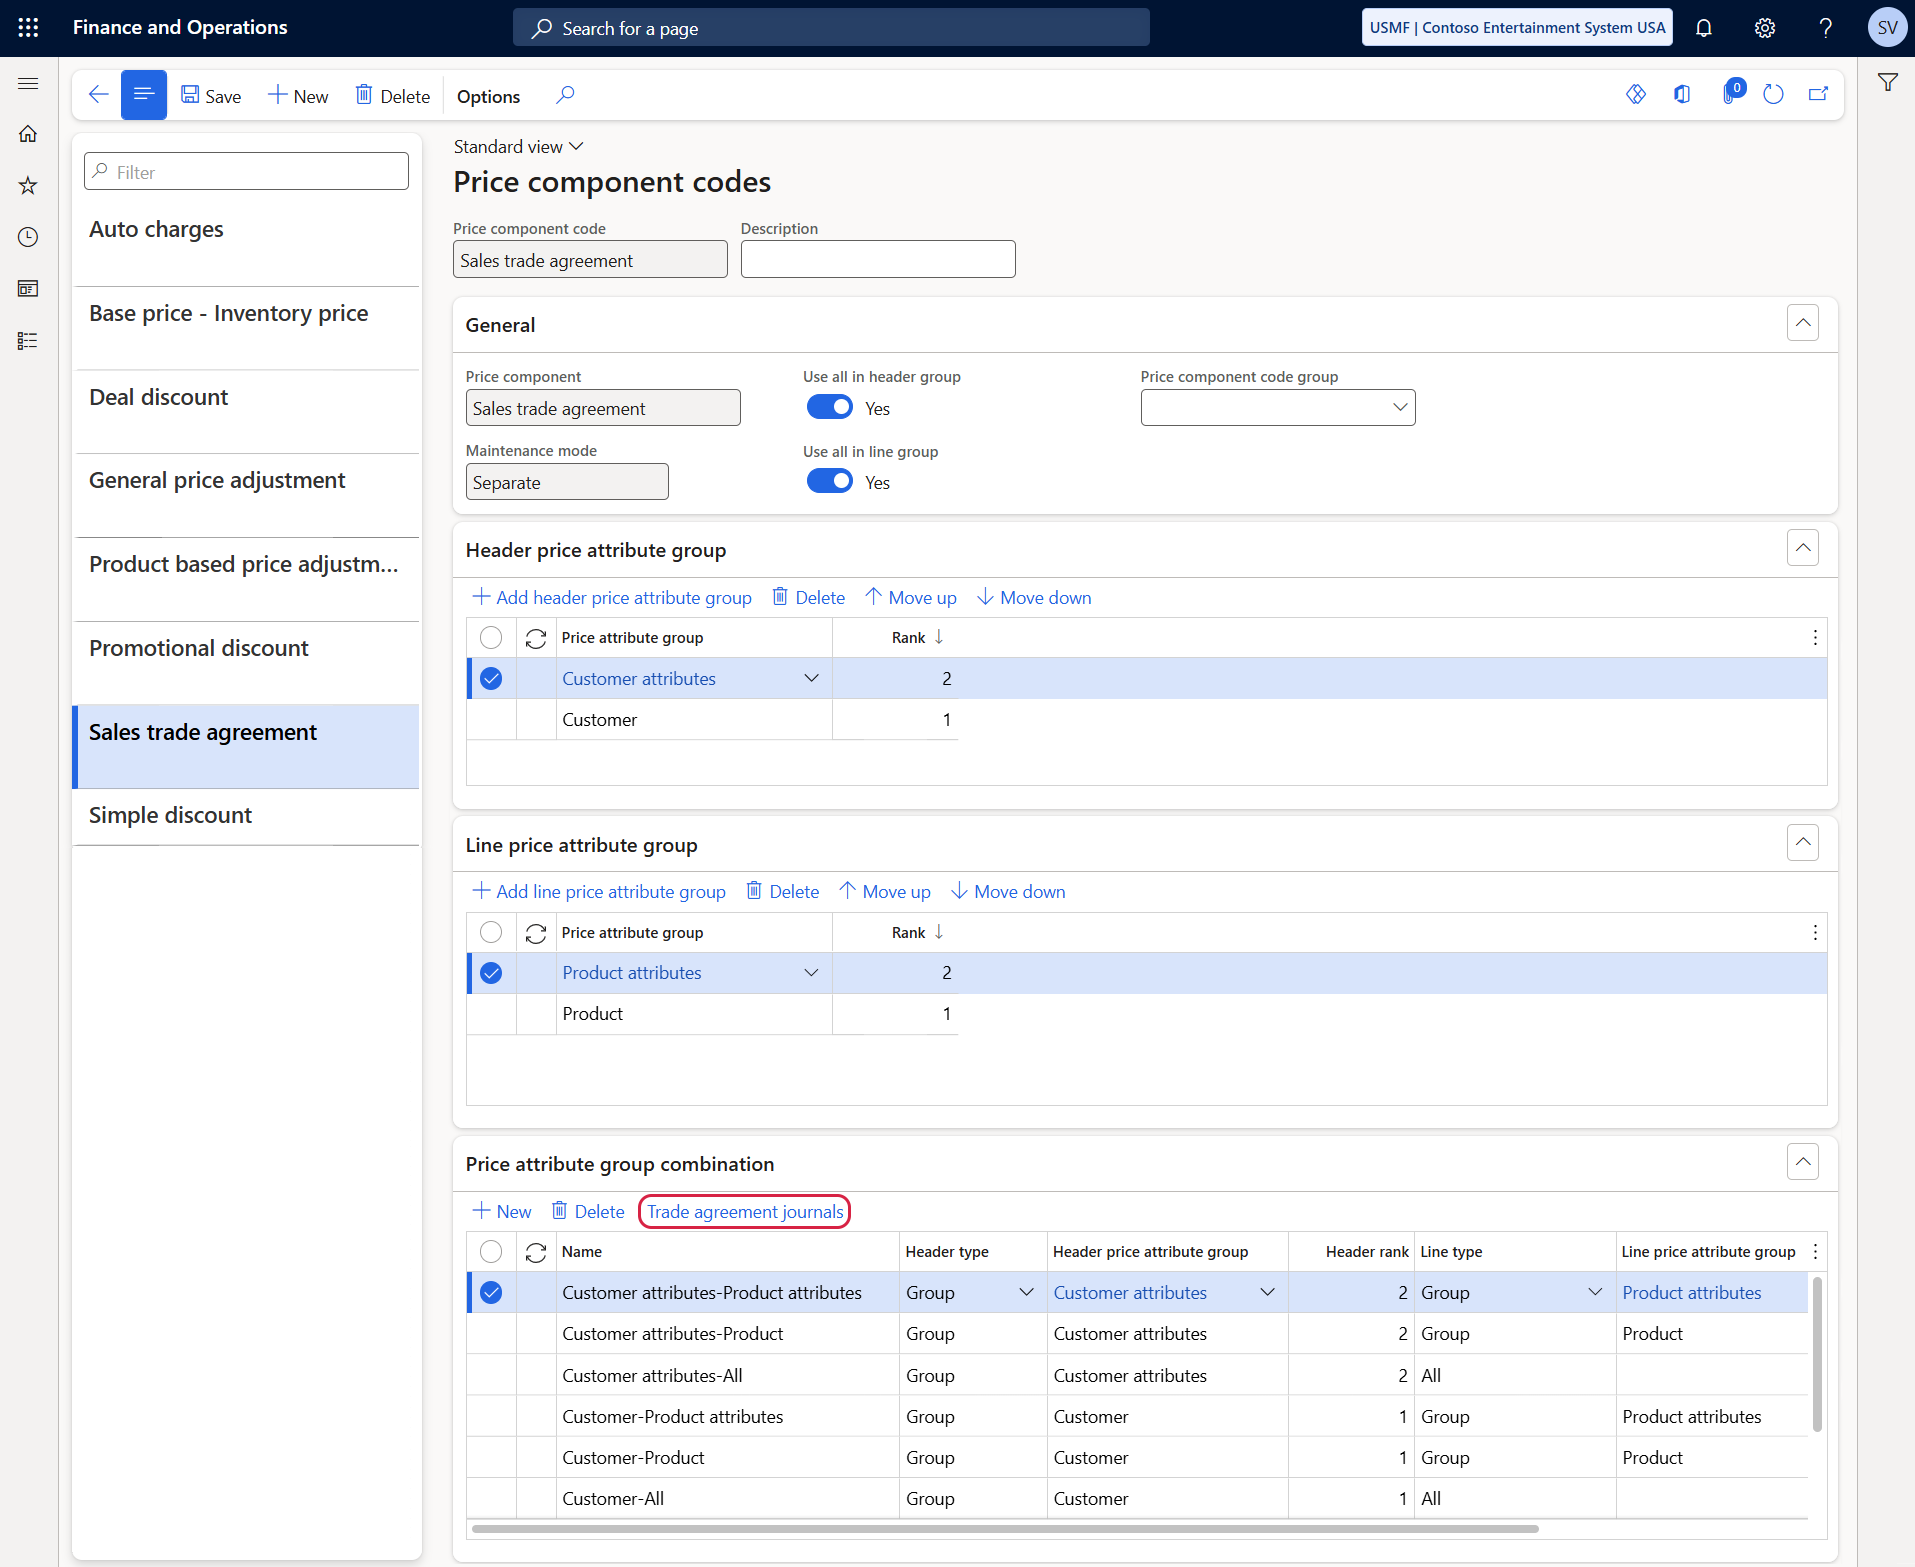
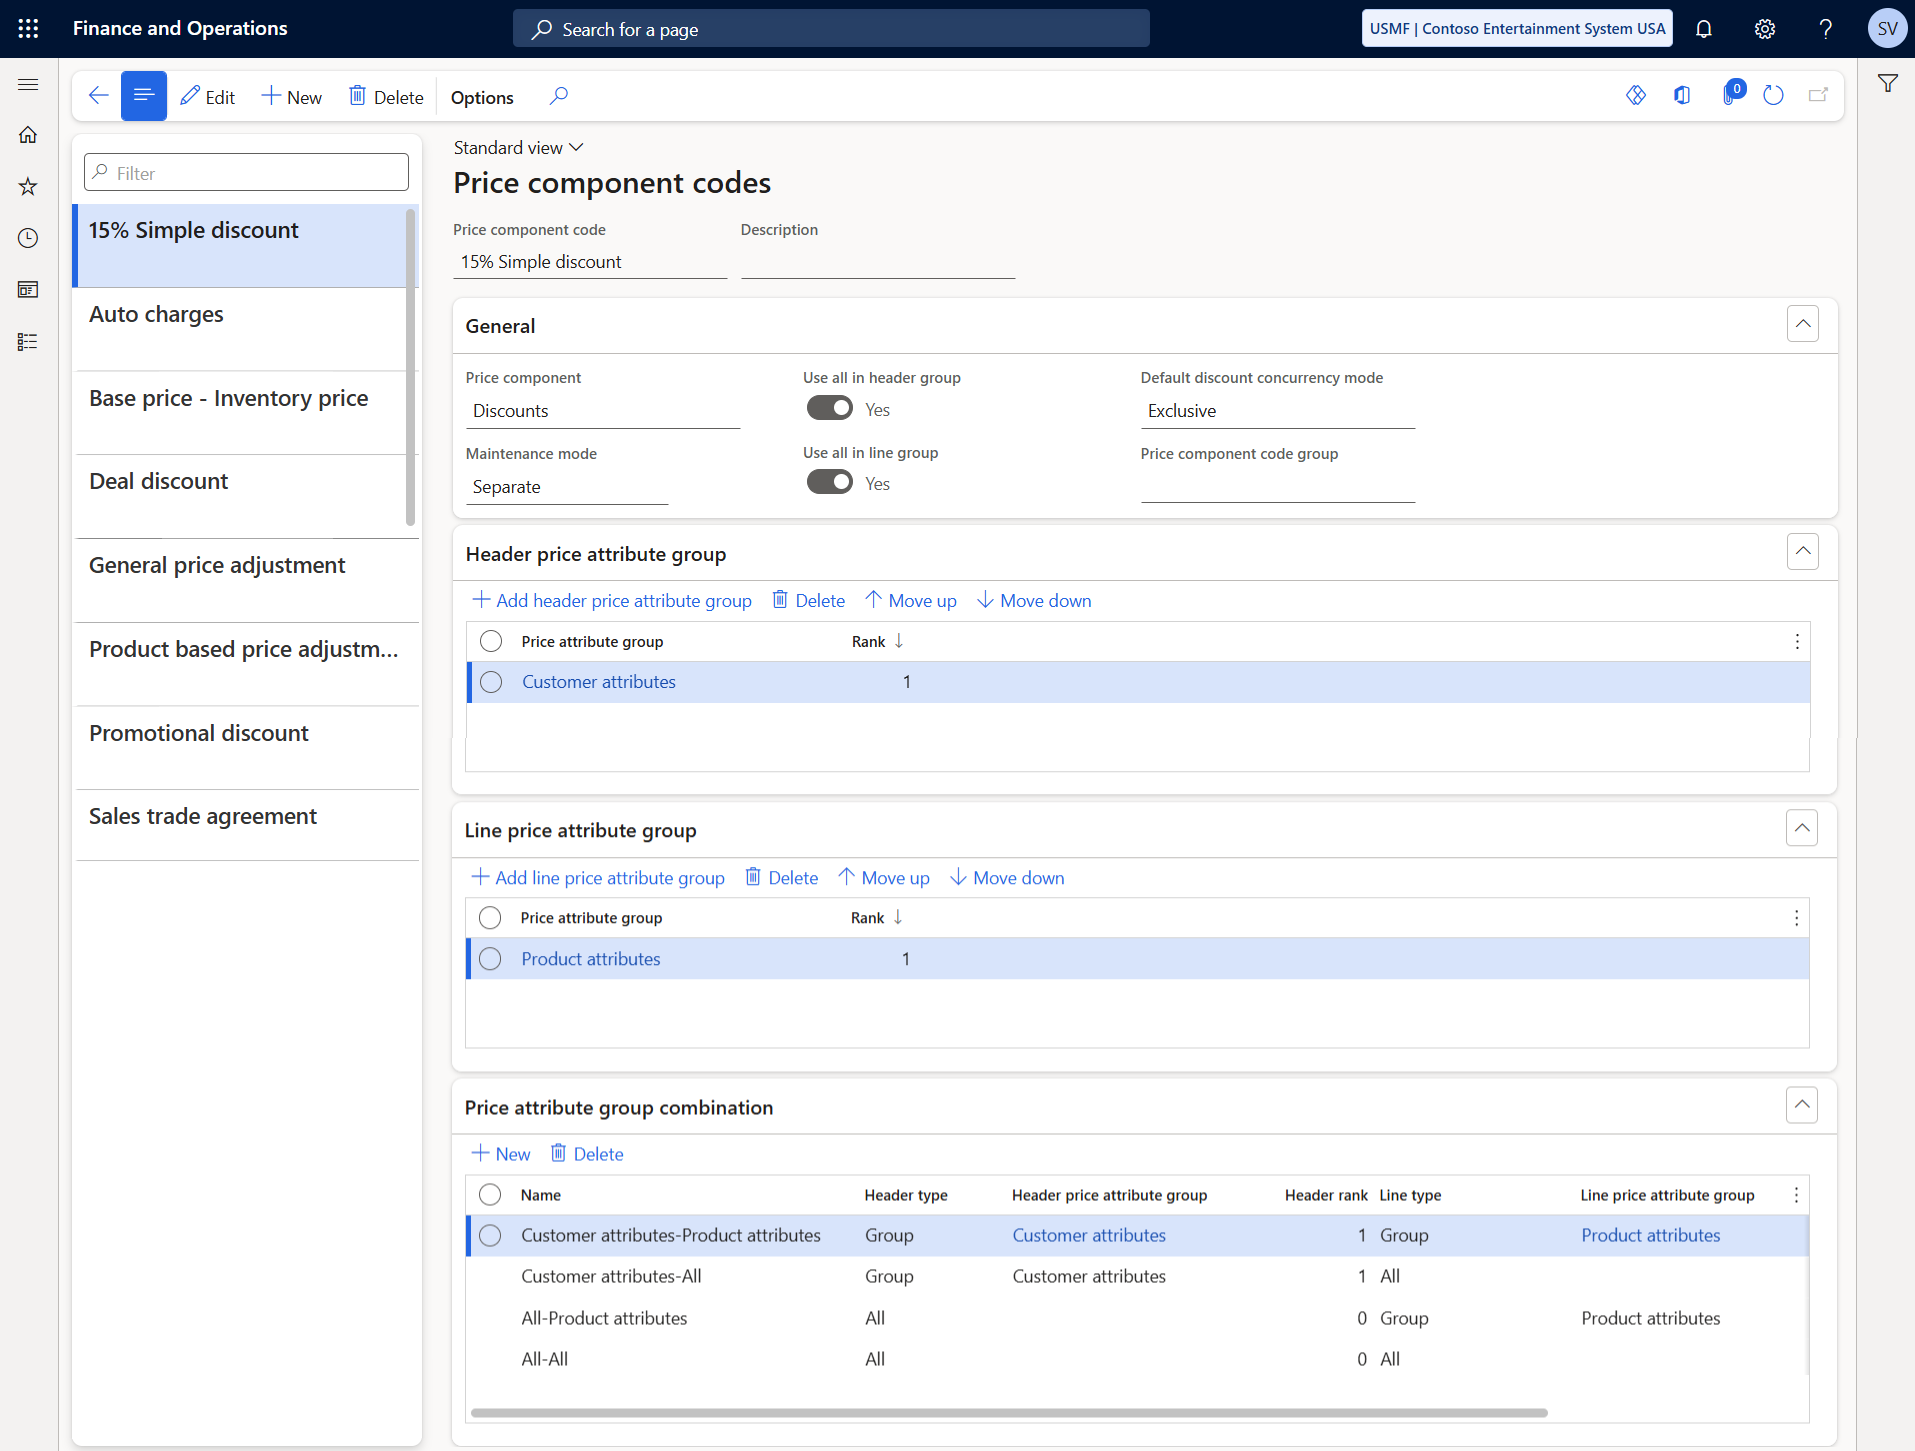
Step 2: Create a trade agreement journal for the price attribute group combination. To do this, open the Price component codes window, select the Sales trade agreement value in the Price component field, and add the necessary header and line attributes. Once the system generates attribute group combinations, select the relevant one and click Trade agreement journals, on the Price attribute group combination FastTab.
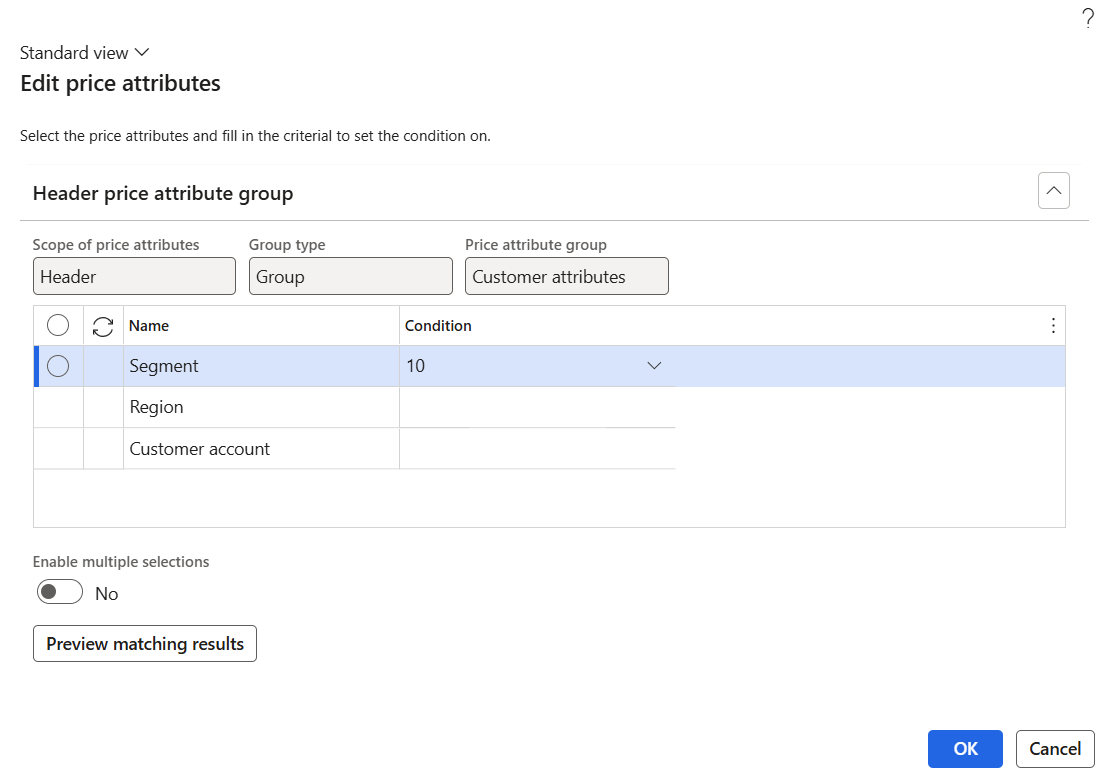
Step 3: Assign a name to the journal. On the journal lines, click New to open the attributes window. In the attributes window, define the attribute values for both the header and lines. In this scenario, we will set a price for tablets with a 128GB drive capacity and customers from the Western region.

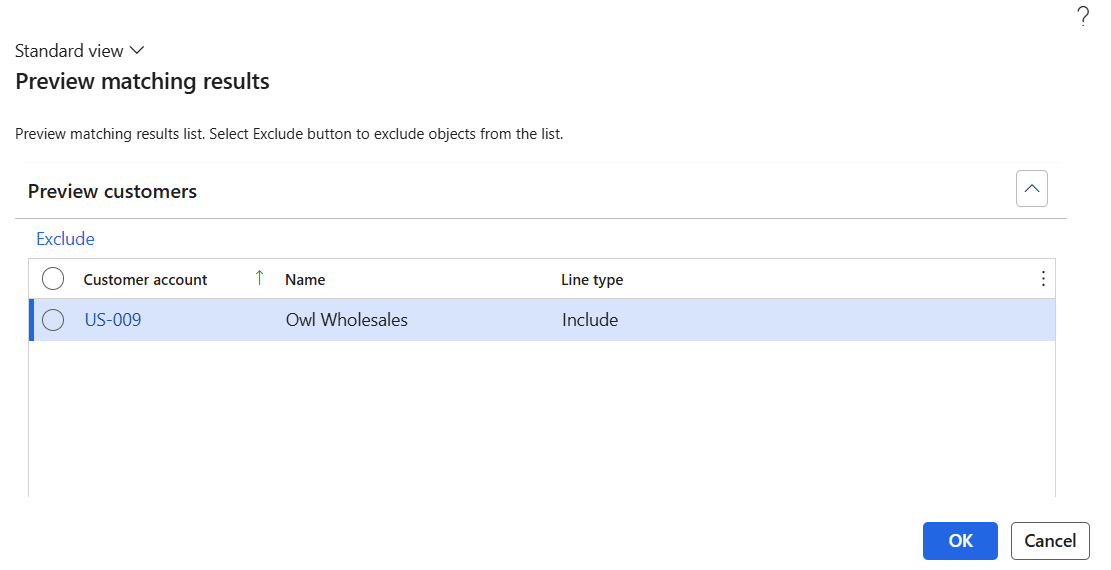
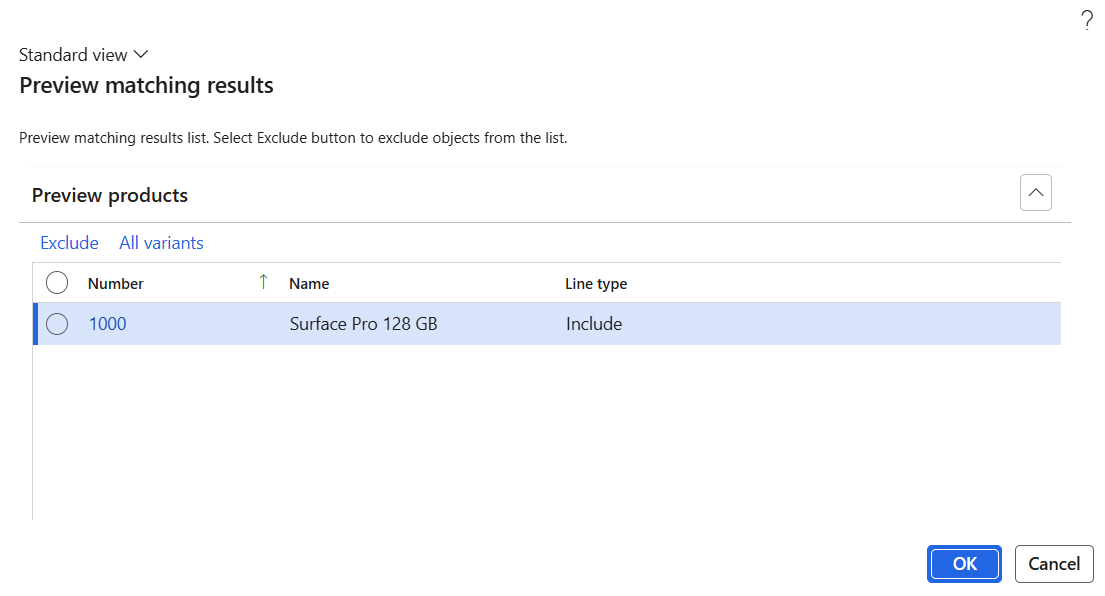
You can preview the matching results to see which customers and products meet the specified criteria.
As shown in the screenshots below, the system identifies one product and one customer that match the selected attribute values.
Step 4: Set and post the trade agreement price. Enter the desired sales price for the selected attribute combination. In our case, we set the price to $899. Once done, post the trade agreement.
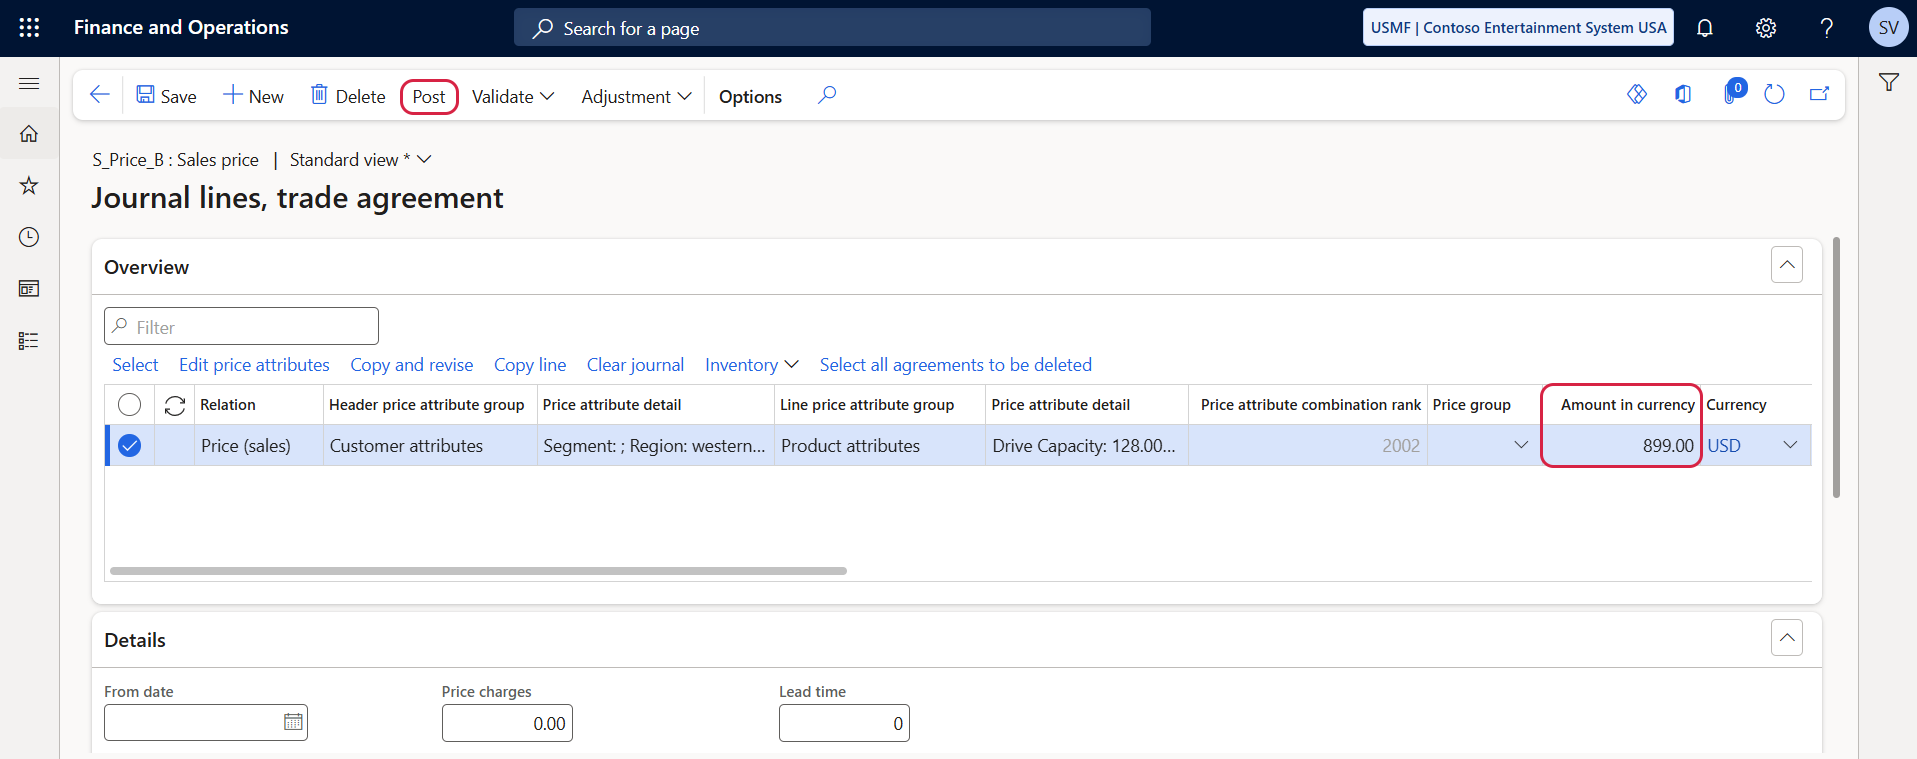
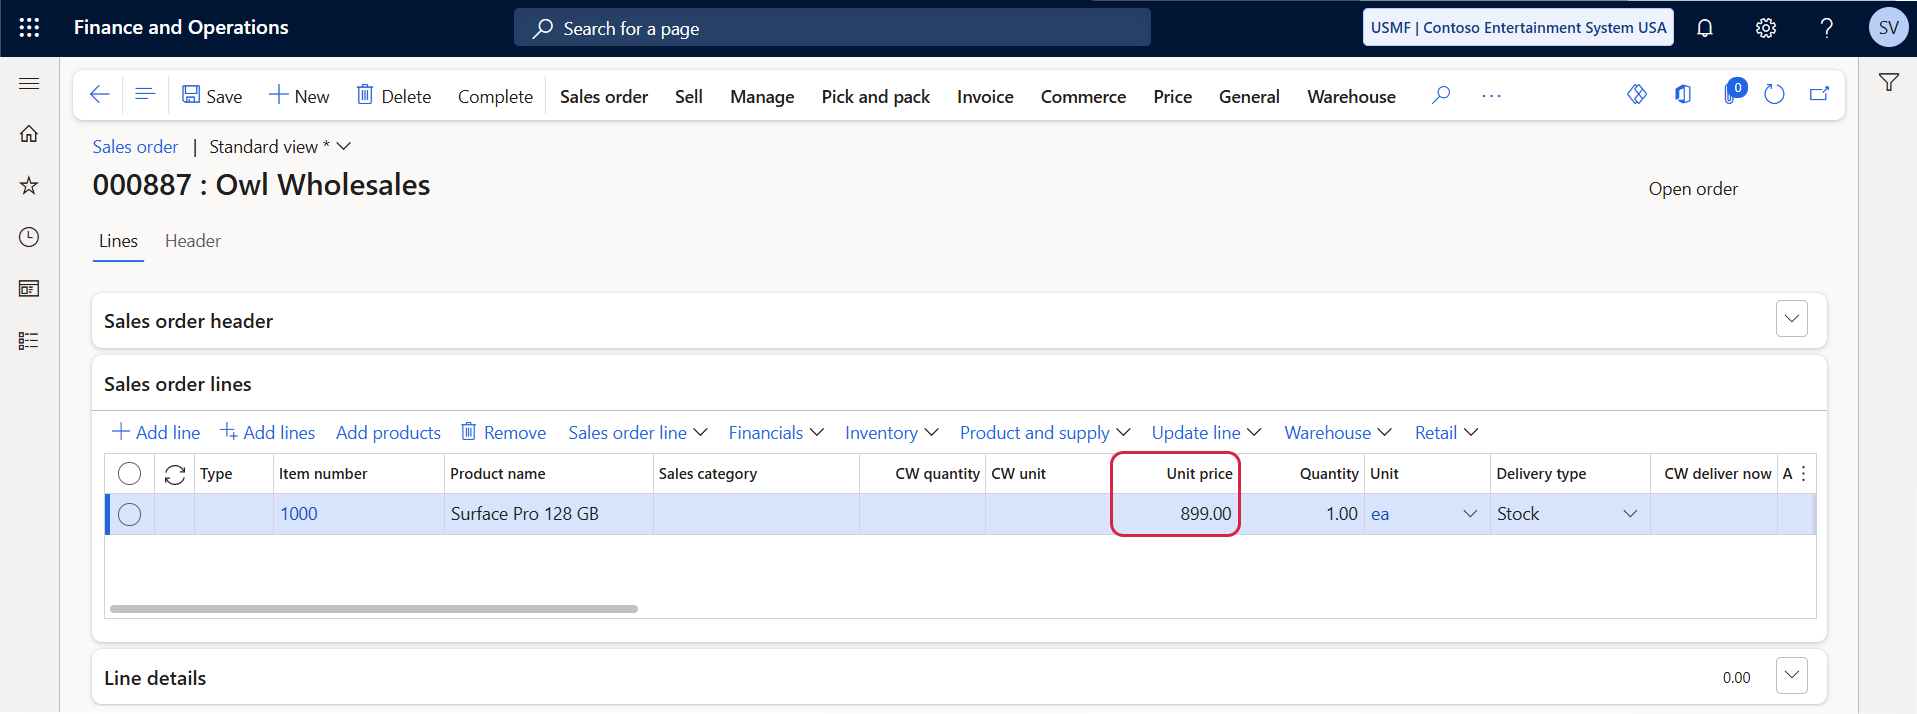
Result: When a customer from the Western region places an order for a Surface Pro tablet with 128GB drive capacity, the system will apply the defined sales price of $899.
Scenario 2: Configuring a Holiday Discount for Online Spare Parts Sales
Discount criteria: The company wants to offer a 15% discount on all spare parts purchased through its online store before a project season. This promotion runs from May 1st to May 25th.
Below are the steps to configure this discount in Unified pricing management.
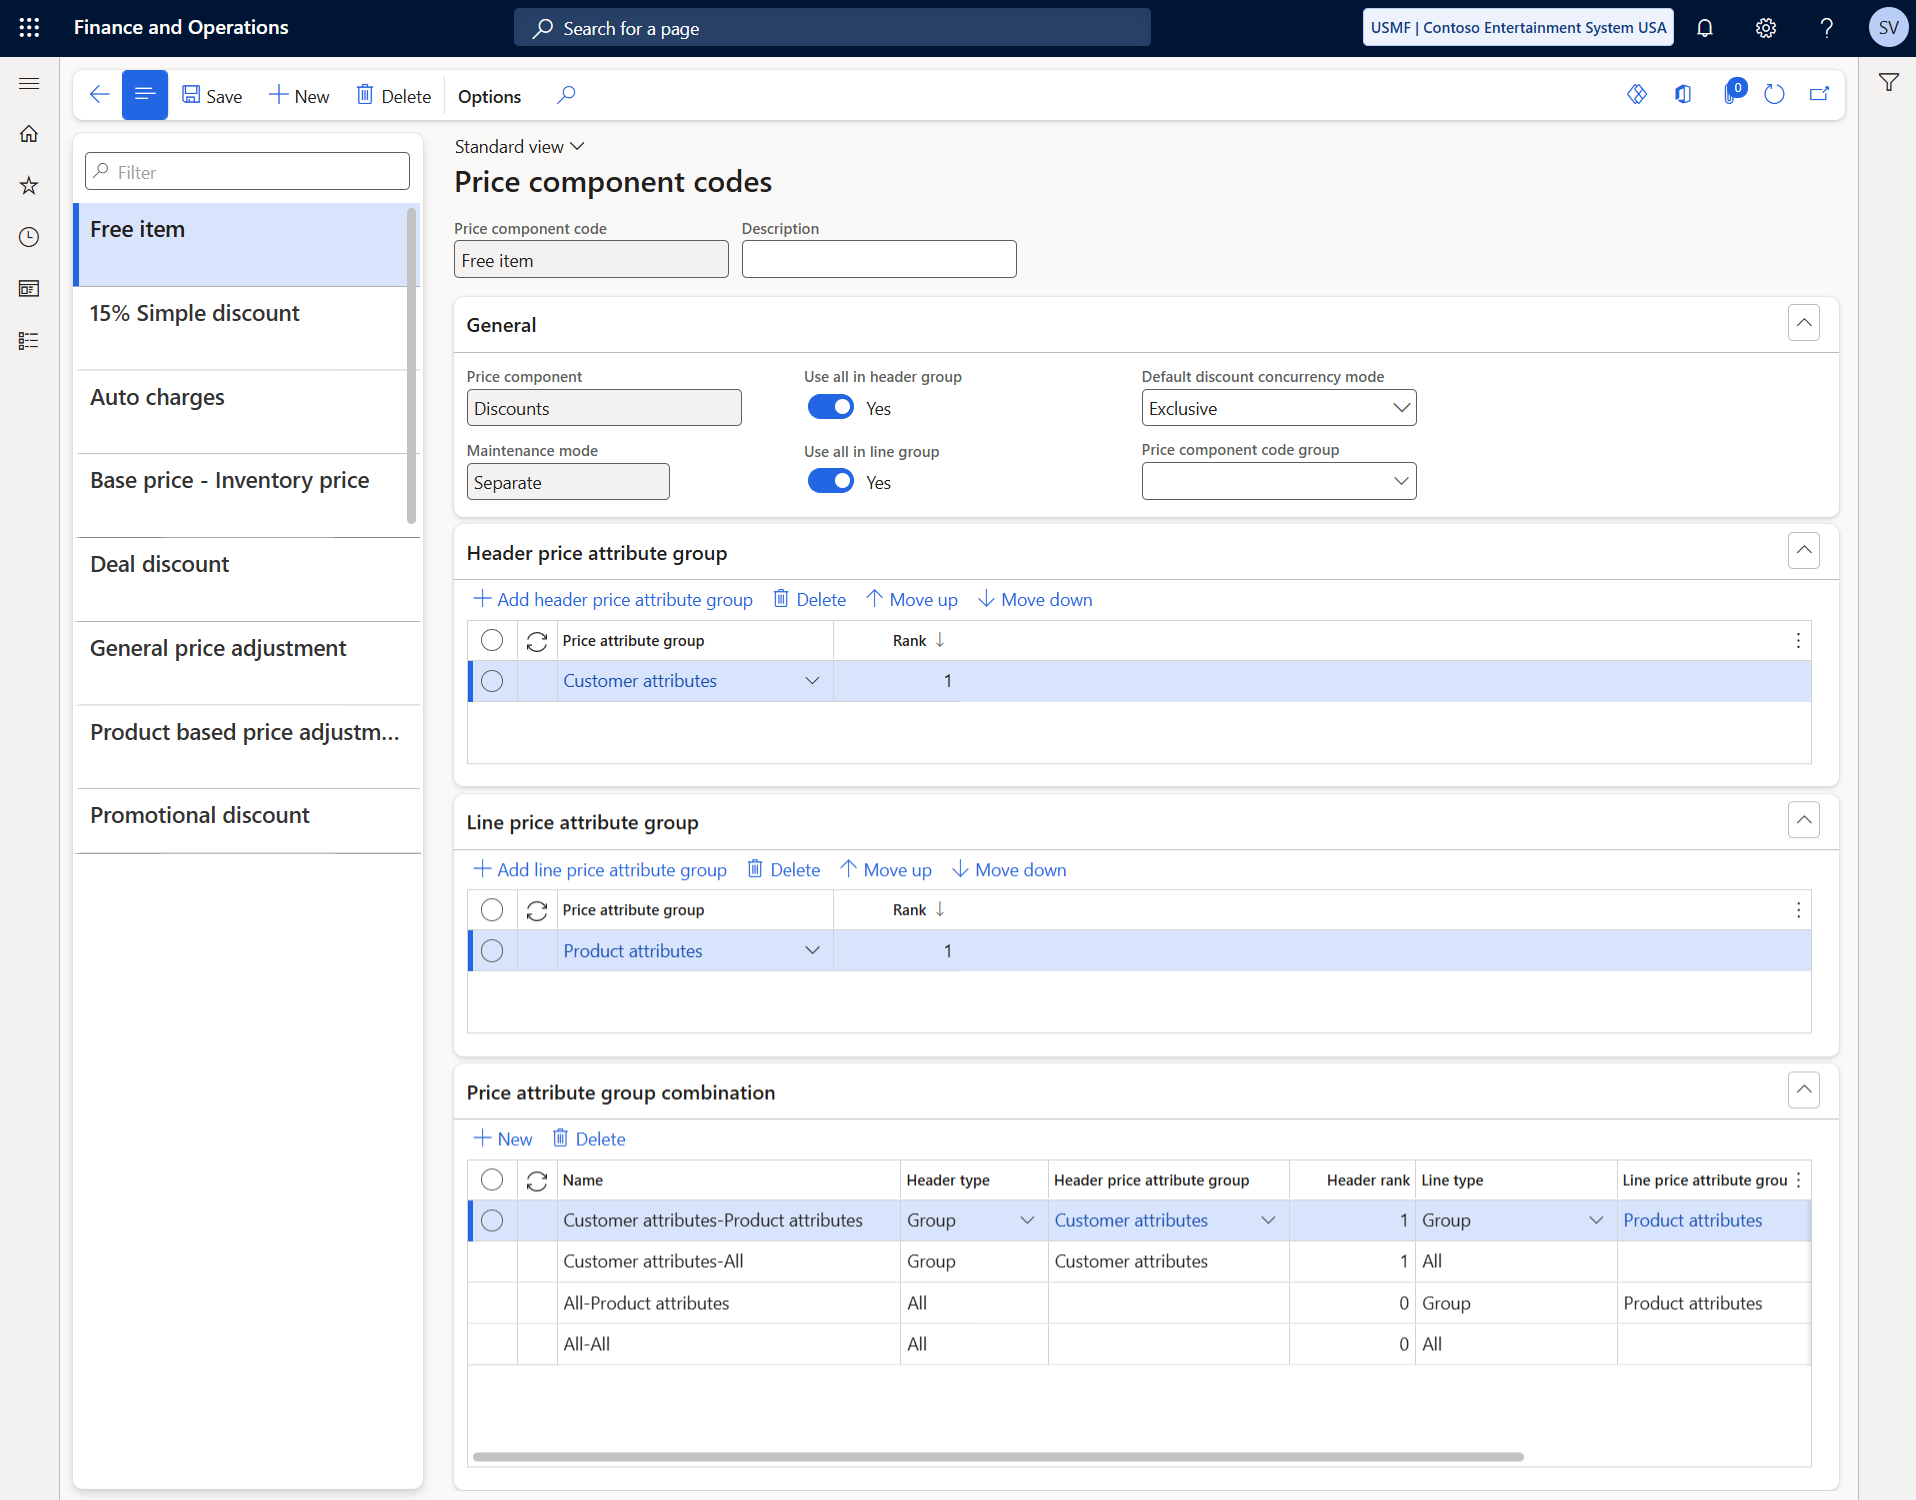
Step 1: Begin by creating a price component code specific to this campaign. The price component code will help the system identify which header and line attribute values apply to the discount.
- At the header level, add the required customer header price attribute group.
- At the line level, add the relevant product attribute price group.
The system will automatically generate the price attribute group combinations, which will be used in the discount configuration.
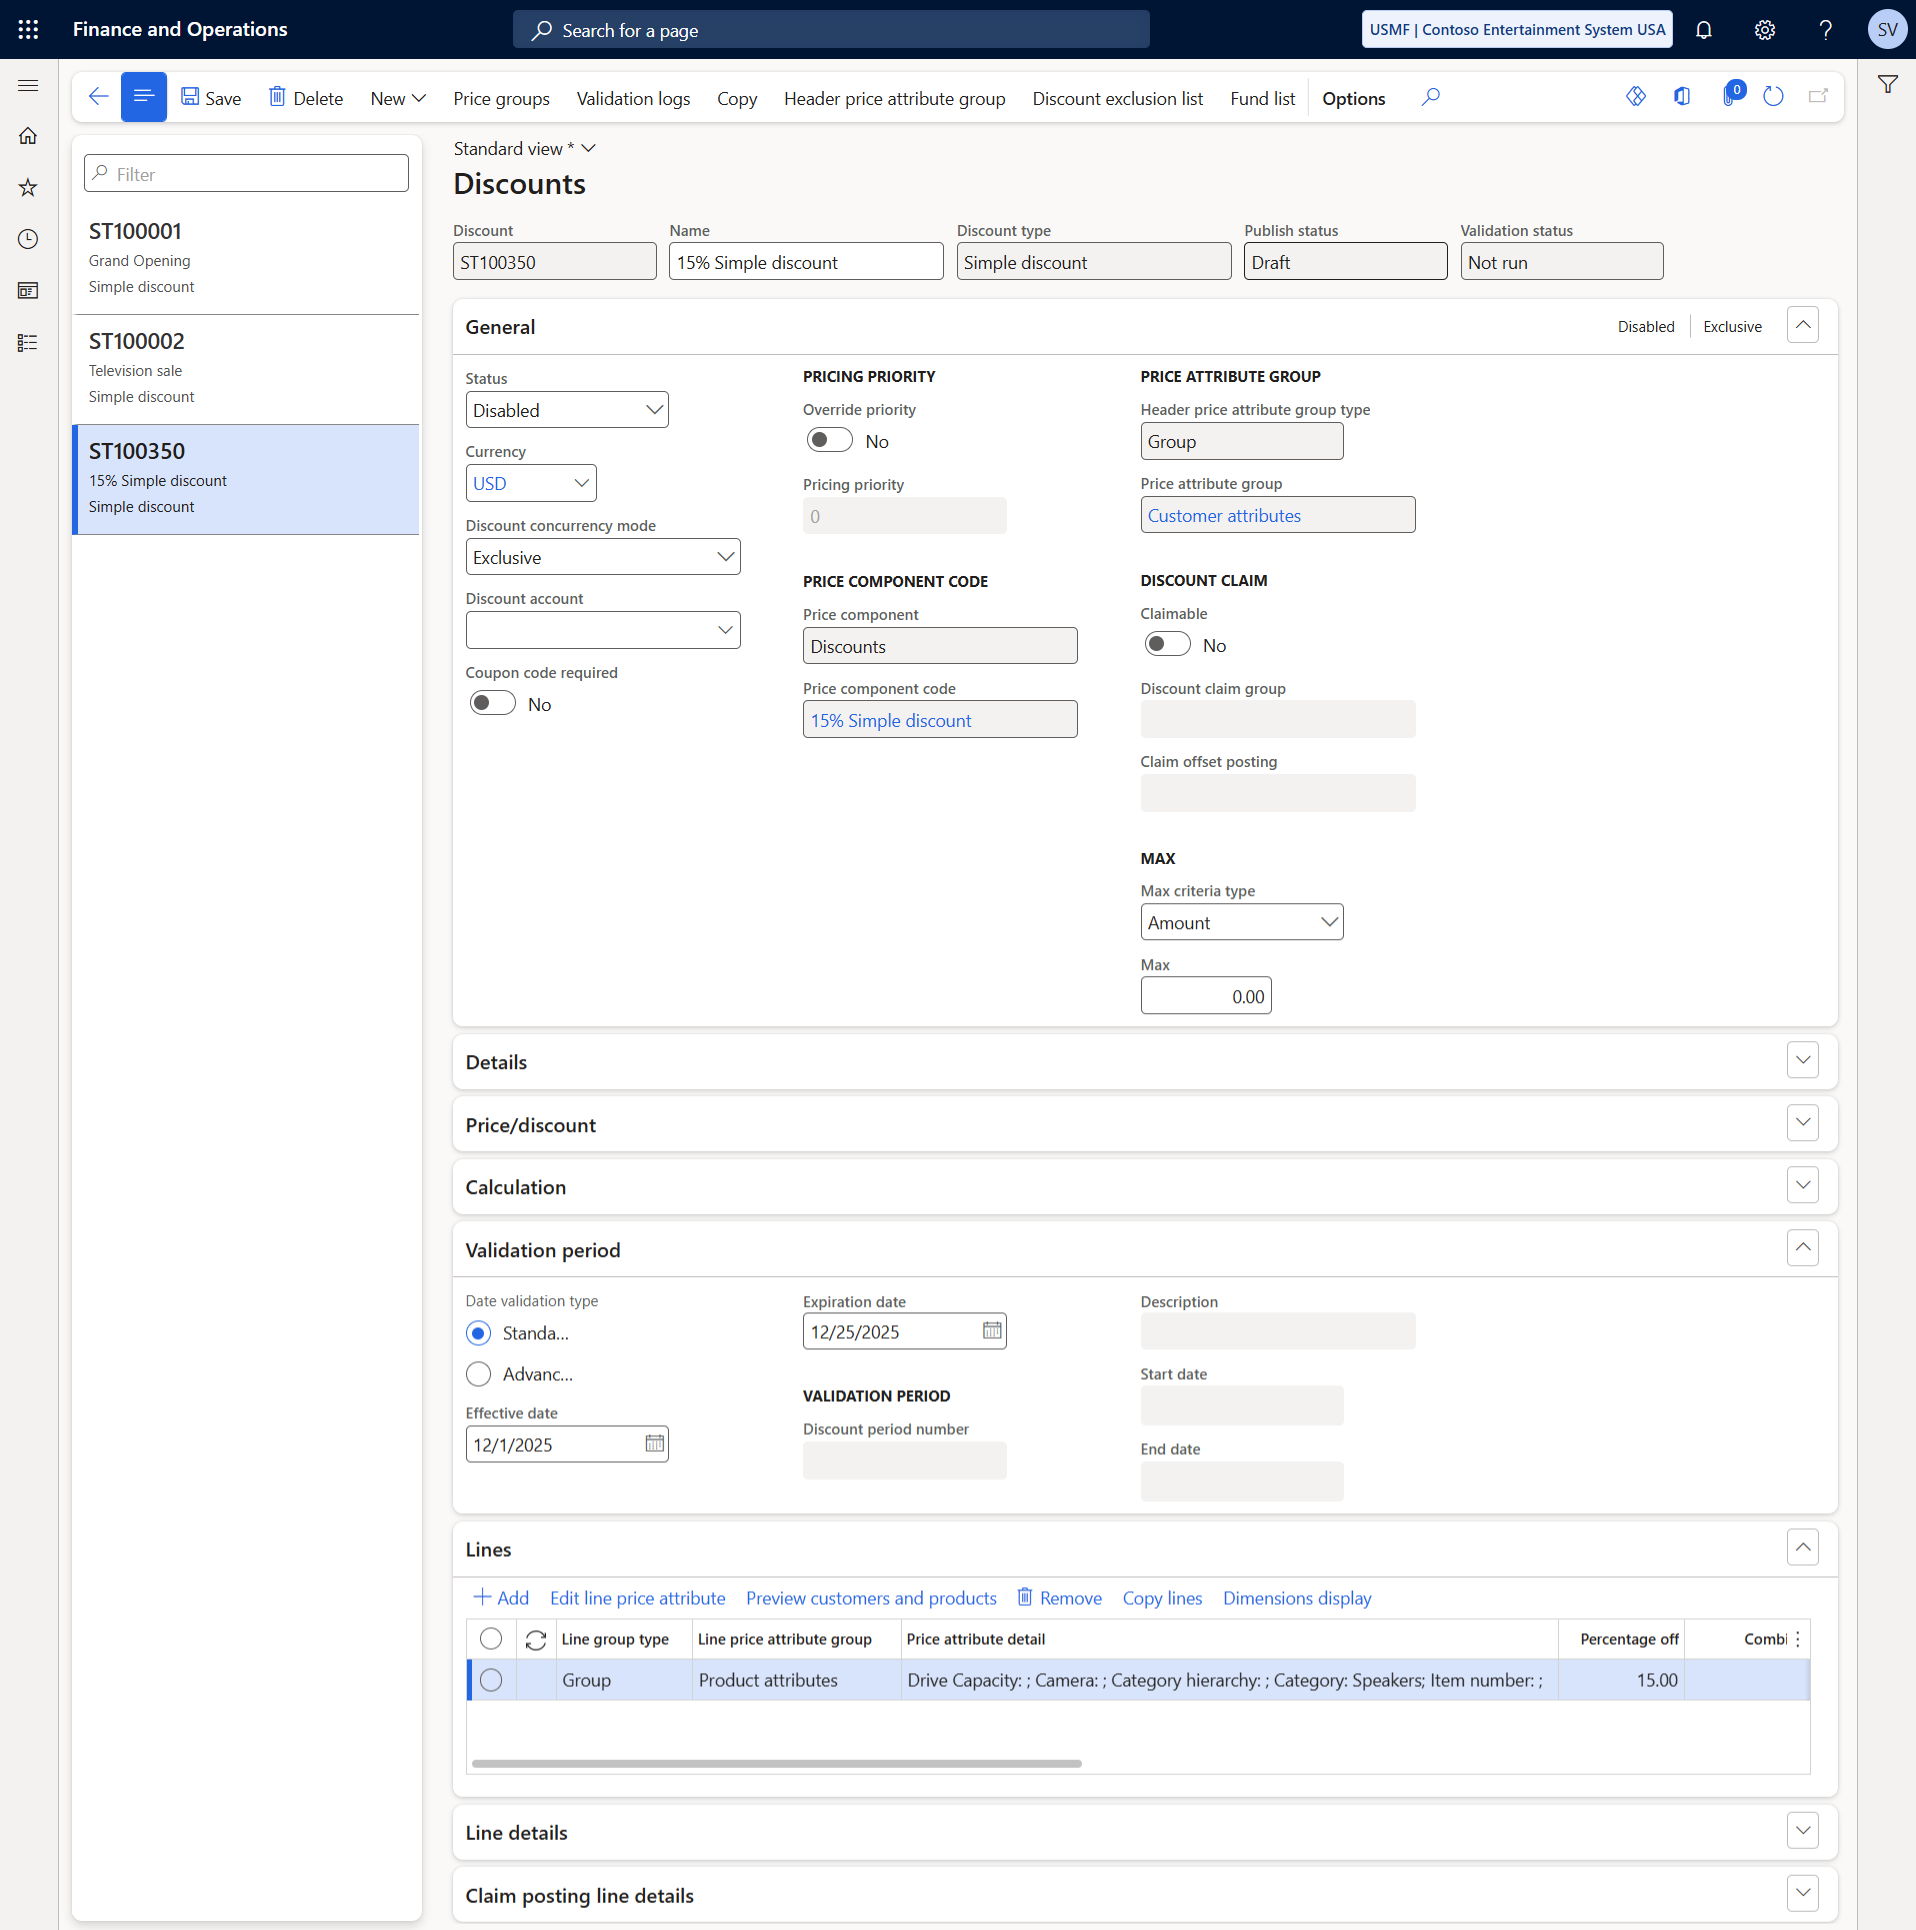
Step 2: Define the discount. In Microsoft Dynamics 365 for Finance and Operations click: Pricing management > During-sales pricing > Discounts > Discounts. Create a new discount record and provide a name for this campaign.
Step 3: Assign the previously created price component code.
Step 4: Then, click Header price attribute group, on the Action Pane to select the necessary header price attributes that will determine when the discount applies. Since this campaign is intended exclusively for e-commerce customers, set the value of the Segment attribute to E-commerce.
Step 5: Since the discount is intended to be available in the weeks leading up to the project season, we will define its active period by setting the start and end dates on the Validation period FastTab.
Step 6: Next, let’s configure the lines. Clicking New on the lines will open the Edit price attributes dialog box, where we can define the line-level attributes the discount will apply to. Since the discount is intended for all spare parts, we will set the value of the Category attribute to Spare parts, ensuring the discount only applies to products in this category.
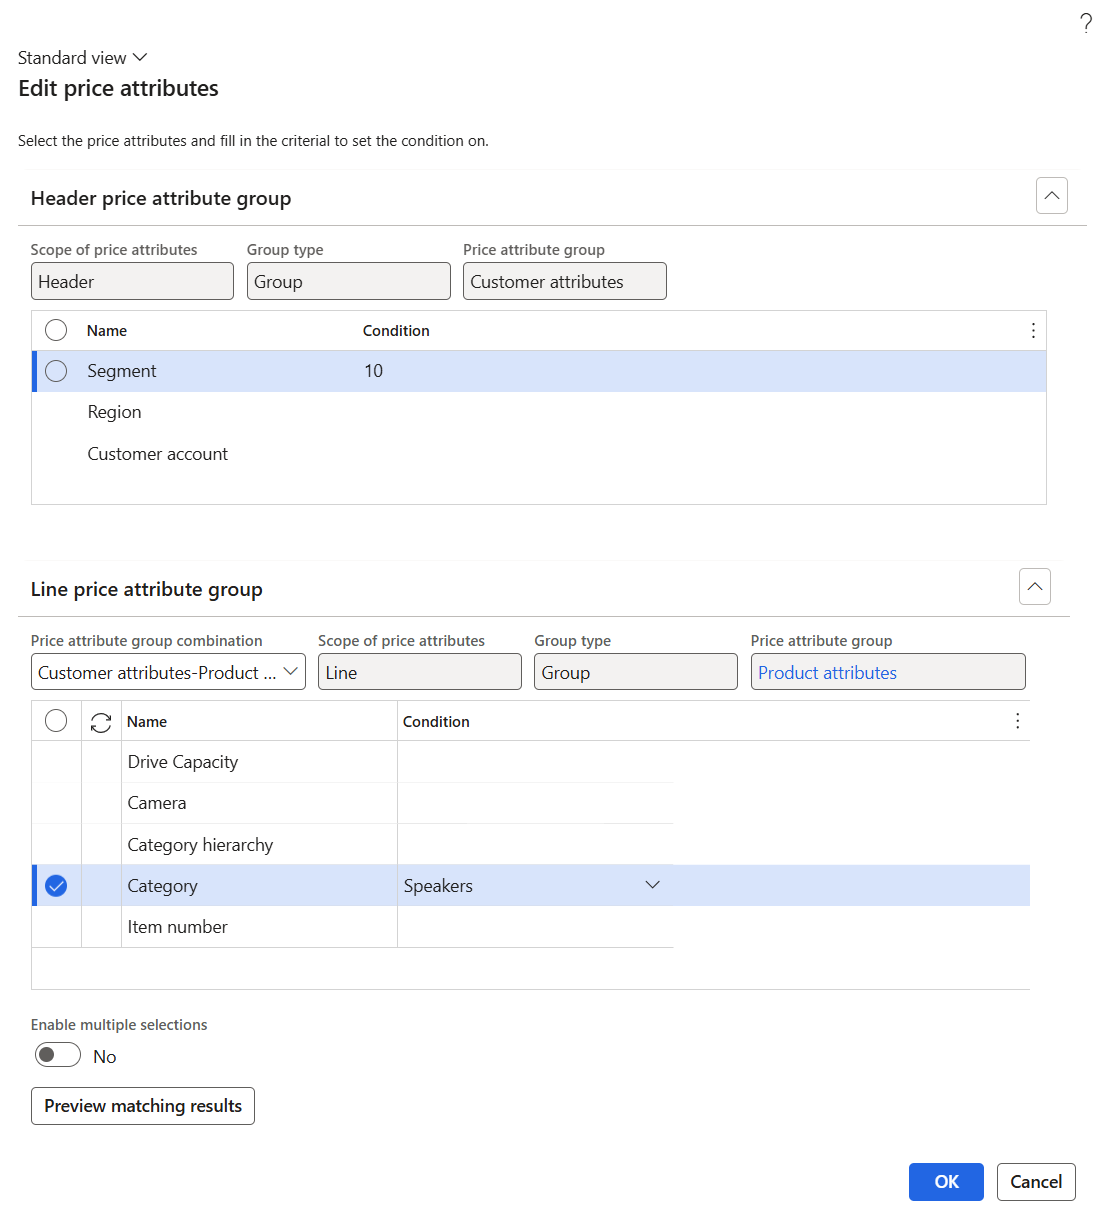
Step 7: After defining all necessary line attributes, we can set the discount percentage, in our case it’s 15%.
Then, we will enable the discount.
Result: With this configuration, any customer purchasing spare parts through the online store between May 1st and May 25th will automatically receive a 15% discount.
Scenario 3: Setting Up a Free Speaker Promotion for Northern Region Customers
Discount criteria: NextWave Tech wants to offer a free item, a speaker, for all customers from the Northern region if they buy a tablet with 12MP camera.
Below are the steps to configure this free item discount in Unified pricing management.
Step 1: Begin by creating a price component code specific to this campaign. The price component code will help the system identify which header and line attribute values apply to the free item discount.
- At the header level, add the required customer header price attribute group.
- At the line level, add the relevant product attribute price group.
The system will automatically generate the price attribute group combinations, which will later be used in the free item discount setup.
Step 2: Define the free item discount. In Microsoft Dynamics 365 for Finance and Operations click: Pricing management > During-sales pricing > Discounts > Free item. Create a new free item discount record and provide a name for this campaign.
Step 3: Assign the previously created price component code.
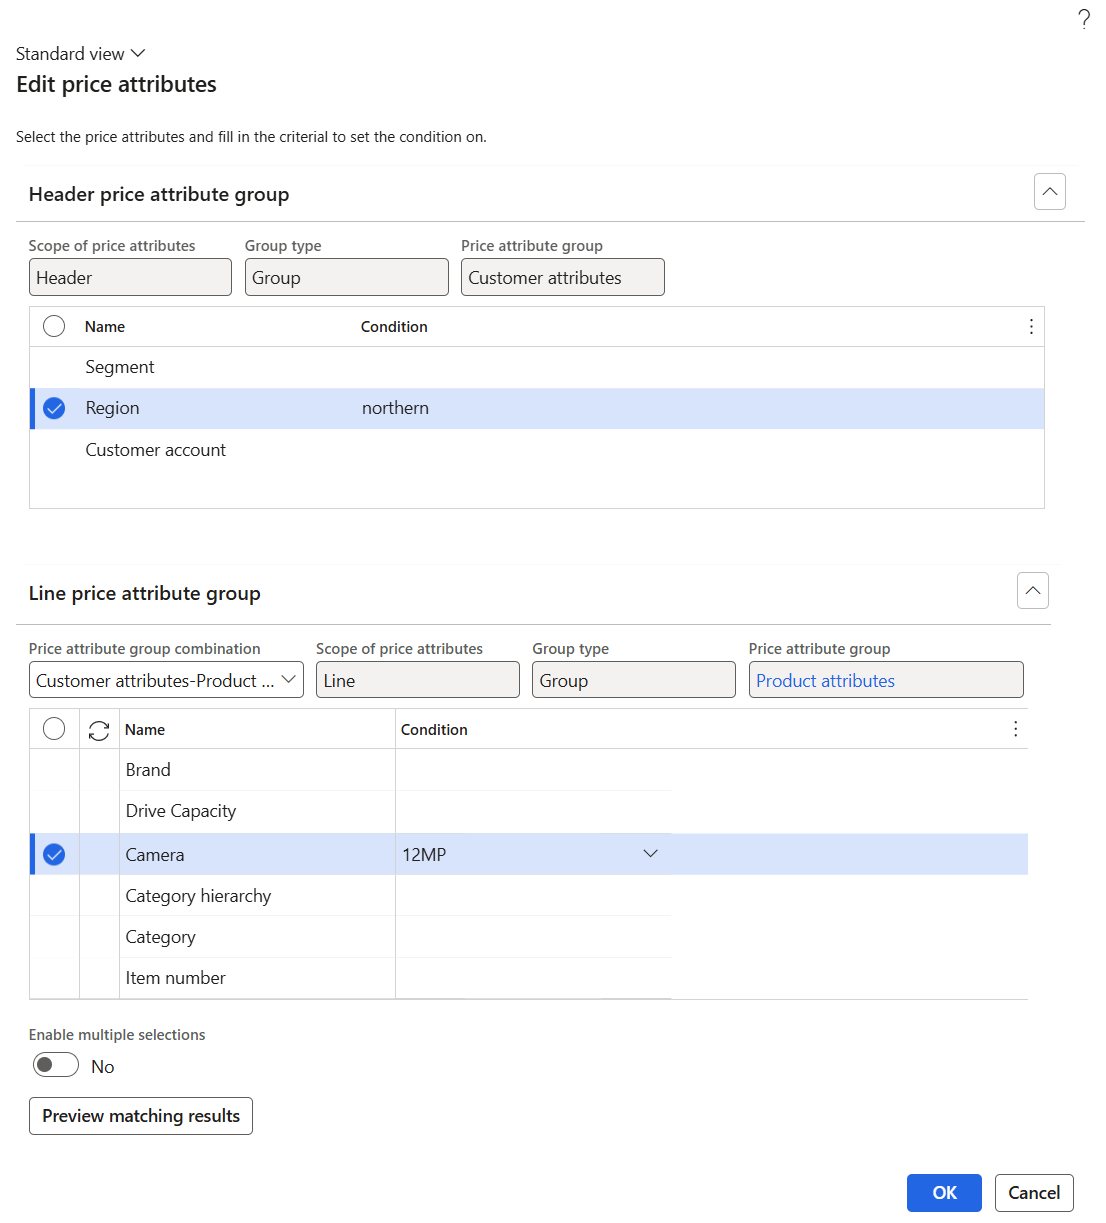
Step 4: Then, click Header price attribute group on the Action Pane to select the necessary header price attributes that will determine when the discount applies. In this case, set the value of the Region attribute to northern, ensuring the discount is only available to customers from the Northern region.

Step 5: Next, let’s configure the lines. Clicking New on the lines will open the Edit price attributes dialog box, where we can define the line-level attributes the free item discount will apply to. Locate the Camera attribute in the list and set its value to 12MP, ensuring the discount is triggered only when a customer purchases a tablet with a 12MP camera.
Step 6: After defining all necessary line attributes, we can select a product on the Free item lines FastTab that will be offered to a customer as a free item if the header and line attributes match on the sales order. In our case a customer will get a mid-range speaker for free.
Then, we will enable the free item discount.
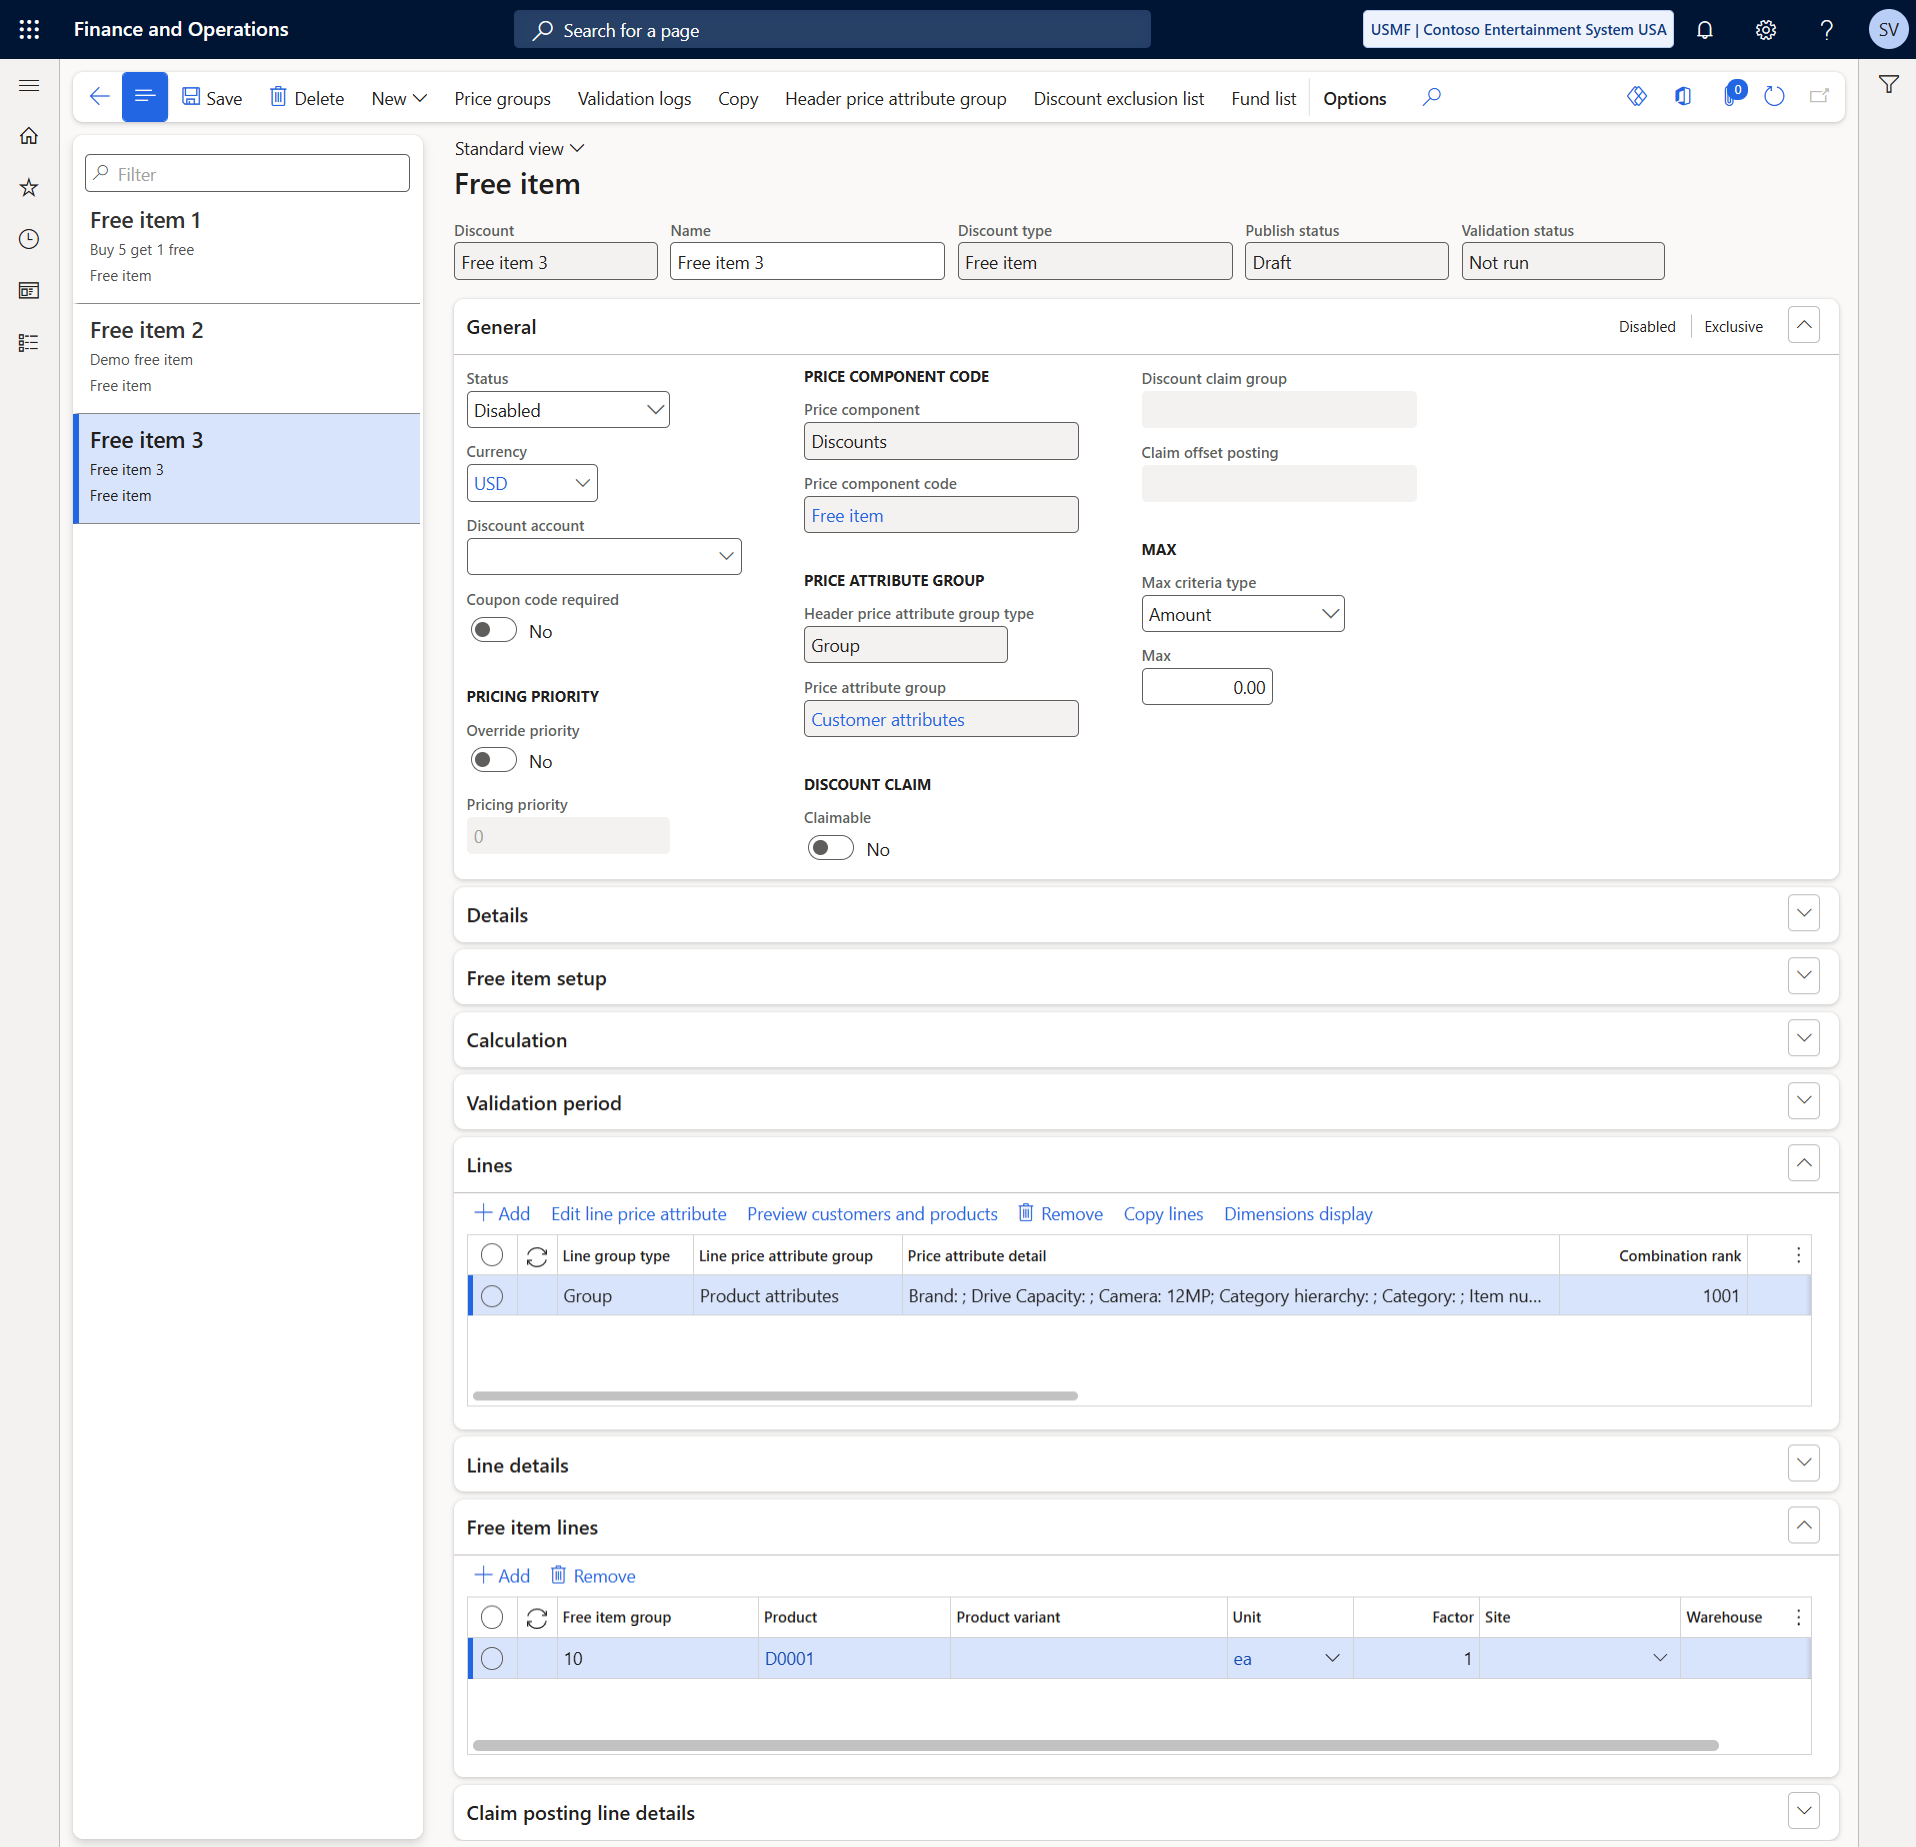
Result: With this configuration in place, customers from the Northern region who purchase a tablet with a 12MP camera will automatically receive a mid-range speaker for free on their sales order.
Scenario 4: Configuring a Regional Price Increase Using Margin Price Adjustment
Adjustment criteria: NextWave Tech plans to increase the price of all products in the catalog by 5% for customers in the Western region starting September 2025.
Below are the steps to configure this price adjustment in Unified pricing management.
Step 1: Begin by creating a price component code specific to this price adjustment. The price component code will help the system identify which header and line attribute values will be evaluated when applying the margin price adjustment.
- At the header level, add the required customer header price attribute group.
- At the line level, add the relevant product attribute price group.
The system will automatically generate the price attribute group combinations, which will later be used in the margin price adjustment setup.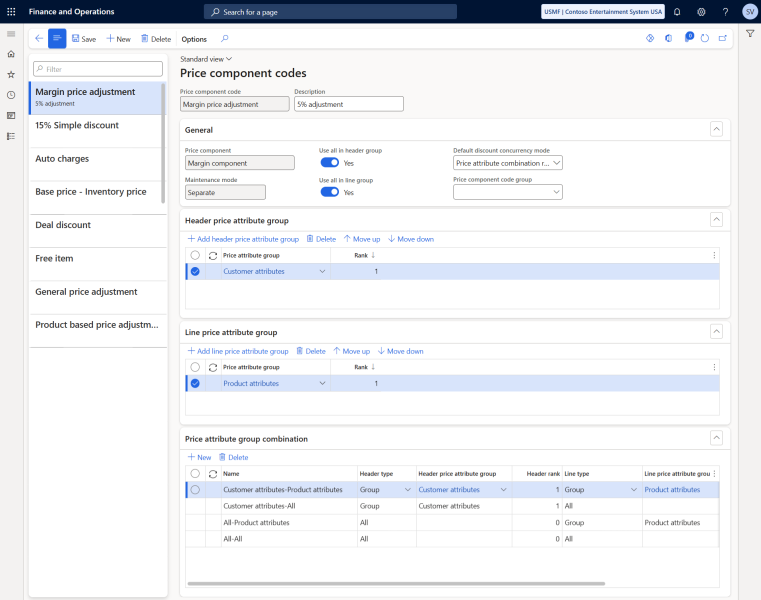

Step 2: Define the margin price adjustment. In Microsoft Dynamics 365 for Finance and Operations click: Pricing management > During-sales pricing > Price adjustments > Margin component price adjustments. Create a new price adjustment record and provide a name for it.
Step 3: Assign the previously created price component code.
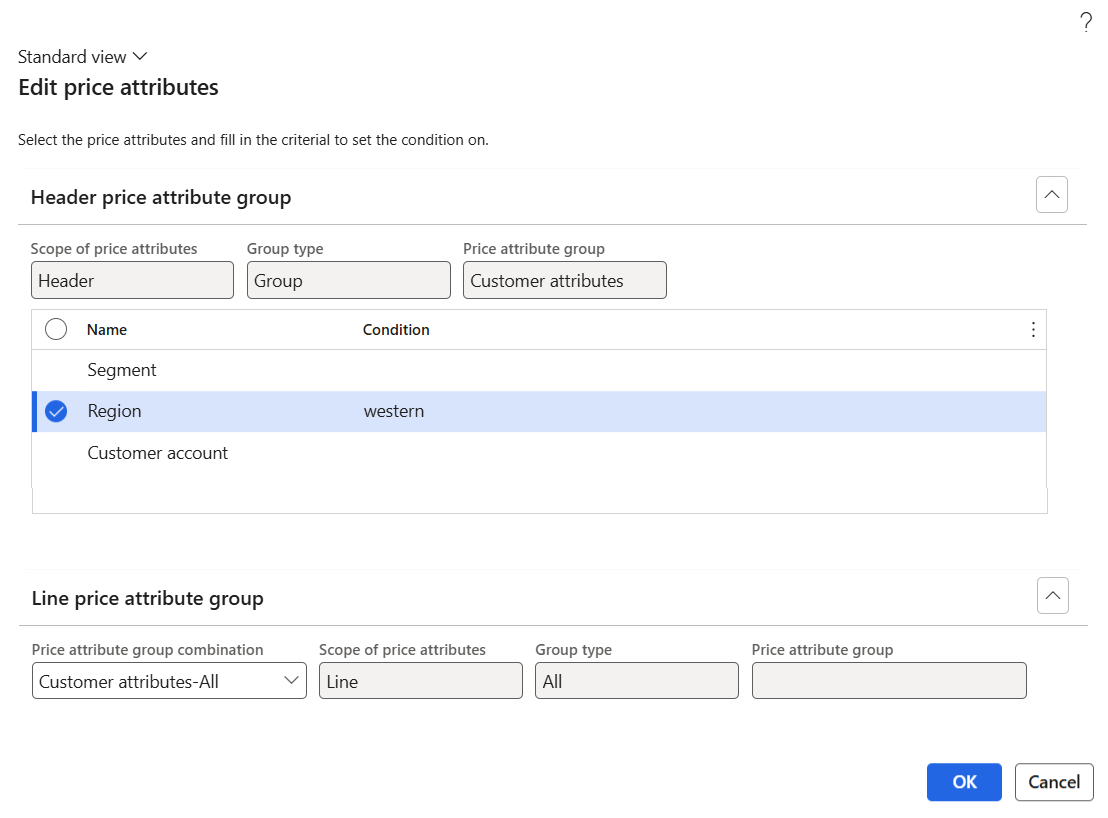
Step 4: Then, click Header price attribute group on the Action Pane to select the necessary header price attributes that will determine when the price adjustment applies. In this case, locate the Region attribute in the list and set its value to western, ensuring the price adjustment only applies to customers in the Western region.

Step 5: To ensure the price increase takes effect from September 2025, define the start date on the Validation period FastTab.
Step 6: Next, let’s configure the lines. Clicking New on the lines will open the Edit price attributes dialog box, where we can define the line-level attributes the price adjustment will apply to. Since the adjustment should apply to all products in the catalog, we are going to set the value to All for the line-level attributes.
Step 7: After defining all necessary line attributes, we can specify the price adjustment, in our case it’s 5%.
Then, we will enable the margin price adjustment to activate it.
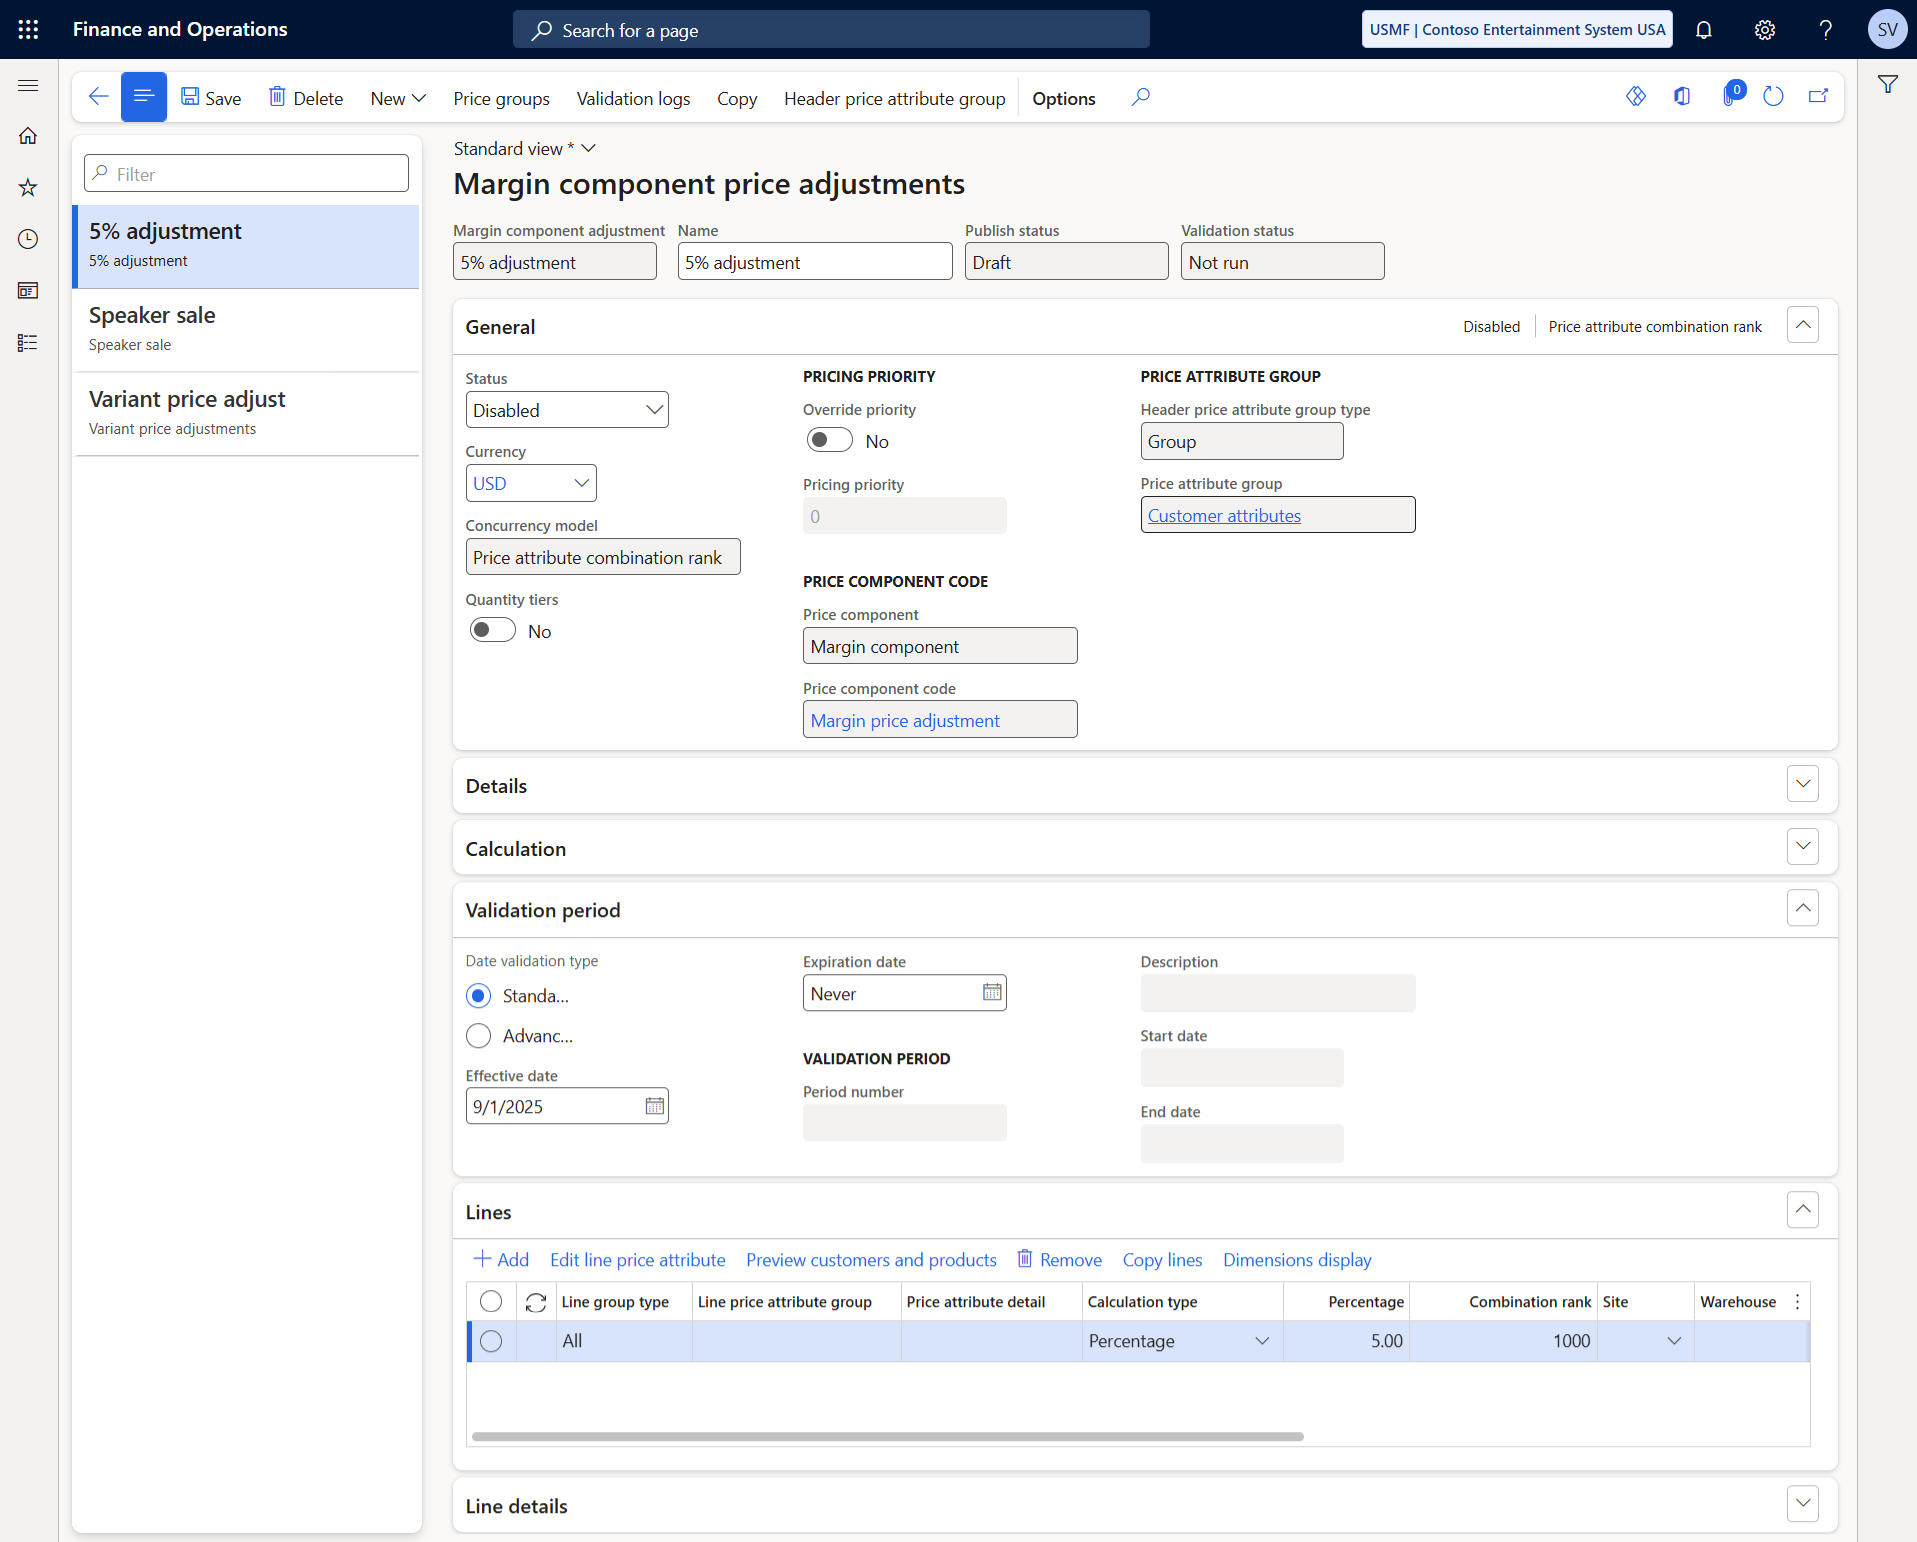
Result: With this configuration in place, a 5% price increase will automatically apply to all products purchased by customers in the Western region, starting from September 2025.