Orders Authorization
In Sana you can create shop accounts for your business customers with different roles - regular customer account, account manager, and sub-account.
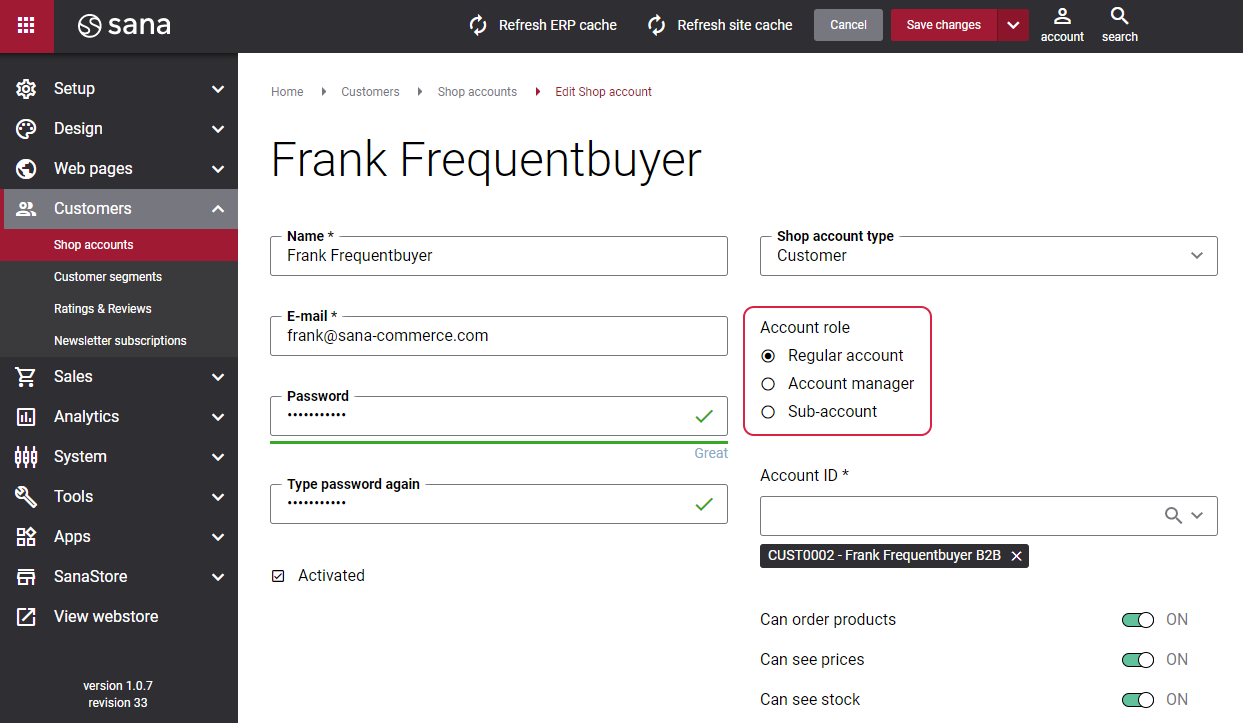
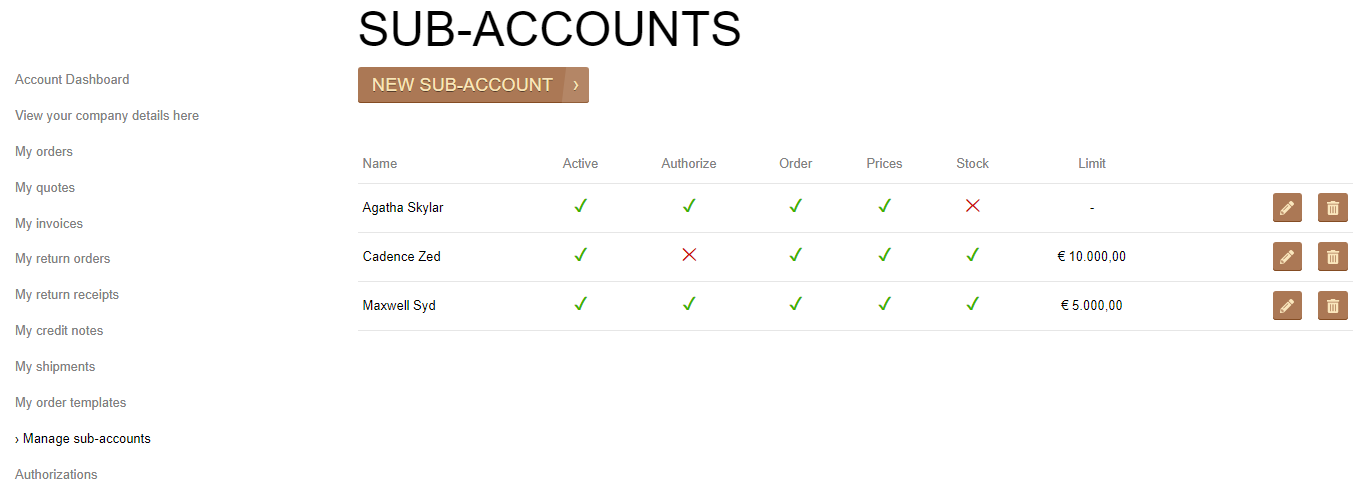
Sub-accounts can have limited budget. If a customer with the sub-account role creates an order which exceeds the limit, it must be checked and then either approved or declined by an authorizer.
For more information about shop account roles and order approval workflow in Sana, see Shop Account Roles.
Orders which are created by sub-accounts and that are waiting for approval (not approved or declined yet) are not shown in the standard Microsoft Dynamics 365 Business Central table Sales Orders. This is because such orders must be first checked by the authorizers and either approved or declined in Sana. Until then, sales managers in Microsoft Dynamics 365 Business Central should not be able to post sales orders which are waiting for approval or declined, but only the approved orders.
To see orders that are waiting for approval and declined orders, in Microsoft Dynamics 365 Business Central click on the search button  and enter Webshop Orders Overview.
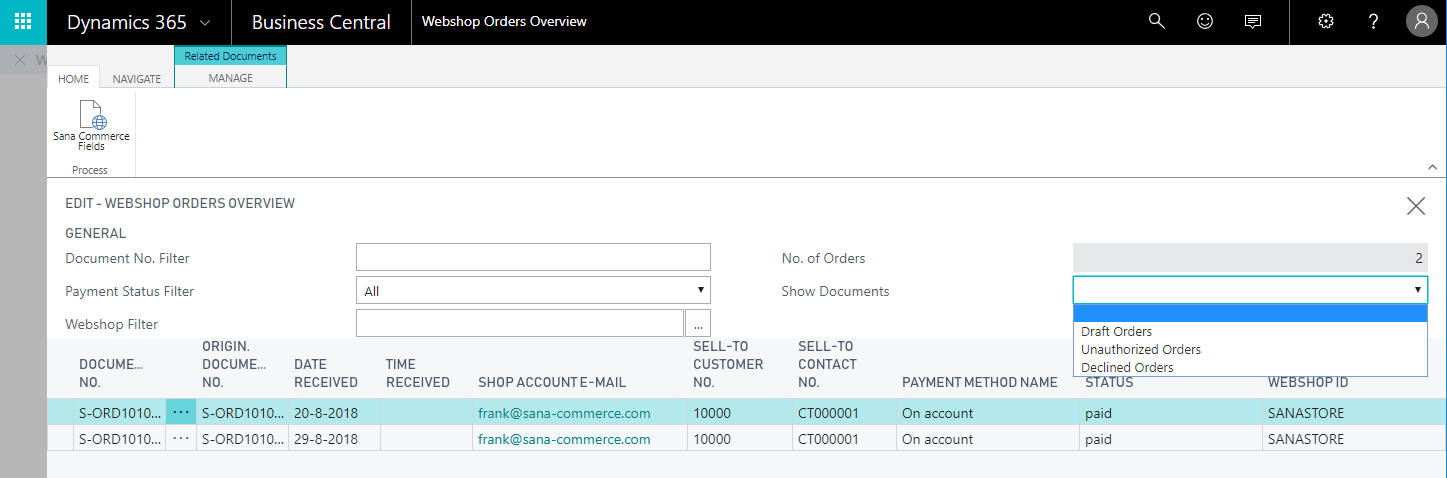
Using the field Show Documents, you can filter sales documents and see only the unauthorized (not approved or declined yet) and declined orders.
For more information, see Webshop Orders Overview.
If sales managers in Microsoft Dynamics 365 Business Central try to post the unauthorized or declined order, they will see the following warning message You are going to process a declined document created by Sana Commerce. Do you want to continue?
You can also see the authorization status of the order in the Sana Commerce Sales Document Fields.
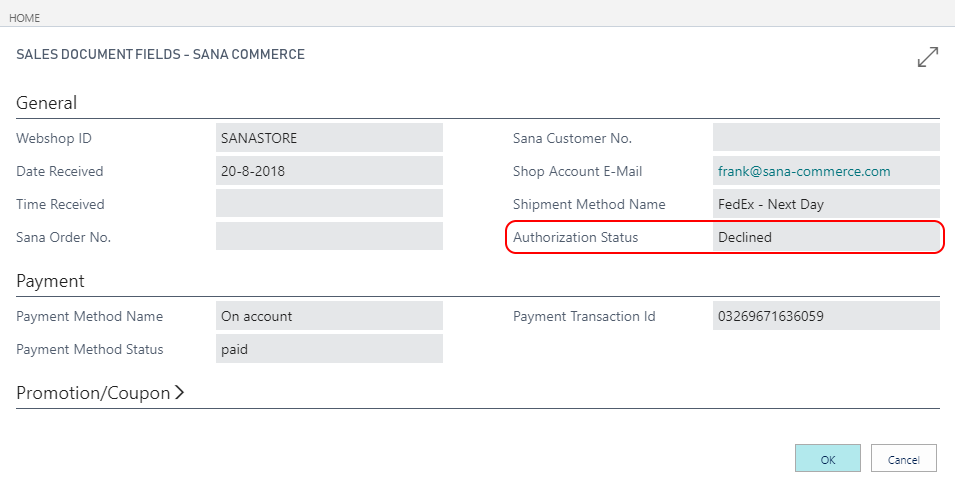
To see Sana Commerce Sales Document Fields, select the sales document in the Webshop Orders Overview window and click Sana Commerce Fields on the action pane.
You can also open the sales order and click Sana Commerce on the action pane to see Sana specific Sales Document Fields.
For more information, see Sales Order Data.
Delete Declined Documents
Keeping declined documents in Microsoft Dynamics 365 Business Central leads to stock reservation and accumulation of unnecessary data. Therefore, you can delete declined documents to release the reserved stock and remove the unnecessary data.
In Microsoft Dynamics 365 Business Central click on the search button and enter Webshops. Select your webshop and on the Navigate tab, click Webshop Documents Cleanup.
Sana uses a job to delete declined documents which is the standard Microsoft Dynamics 365 Business Central approach. You can set jobs to run one time, or on a recurring basis. Microsoft Dynamics 365 Business Central automatically runs the jobs according to the specified schedules for each job queue entry. You can also start, stop, and put a job queue entry on hold manually.
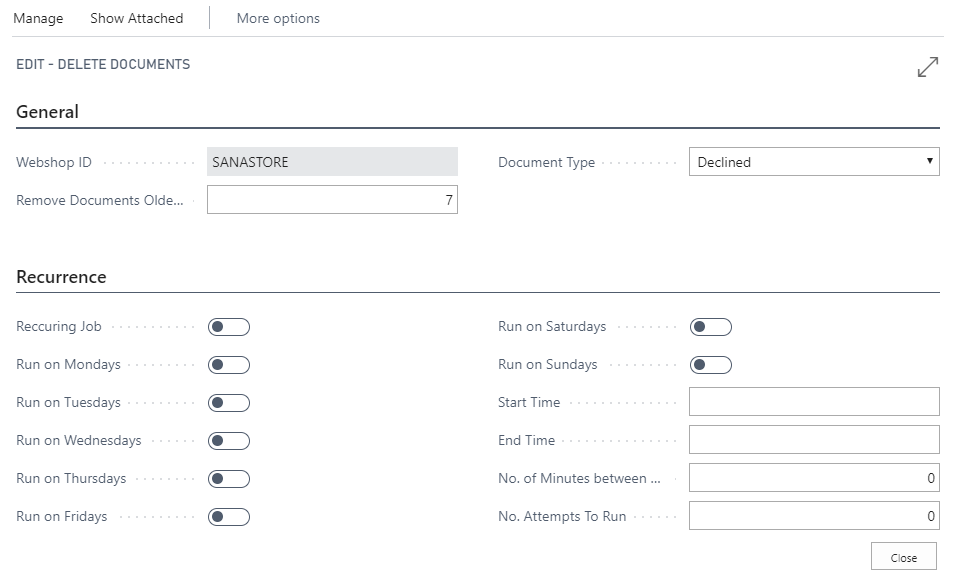
The table below provides the description of the fields on the General and Recurrence FastTabs.
|
Field |
Description |
|---|---|
|
General FastTab |
|
|
Webshop ID |
The name of the webshop. Declined documents created from this webshop will be deleted. |
|
Remove Documents Older Than the Following Number of Days |
Specify the number of days for the system to look back and find the declined documents. All declined documents stored in Dynamics 365 Business Central within the specified period of time will be deleted. |
|
Document Type |
Select the Declined document type to delete declined documents. You can also select Draft and Declined, then all draft and declined documents will be deleted. In case you need to delete all draft, declined and unpaid documents, then select Draft Declined Unpaid. For more information about unpaid orders, see Delete Unpaid Orders. For more information about draft documents, see Draft Orders and Quotes. |
|
Recurrence FastTab |
|
|
On the Recurrence FastTab, you can set up the job to run on a recurring basis. It will automatically delete declined documents based on the specified schedule. |
|
-
If you want to run the job manually to delete all declined documents, you must enter the number of days in the field Remove Documents Older Than the Following Number of Days and select Document Type on the General FastTab. Then, on the Actions tab, click Delete Documents.
-
If you want to run the job on a recurring basis, set up the schedule on the Recurrence FastTab. Then, on the Actions tab, click Create Job Queue.